
In This Chapter
A blog application that enables only one-way communication is no fun. In this final chapter, we add support for comments to our blog application. We implement the set of user stories in Figure 21.1.
We have the following stories related to comments:
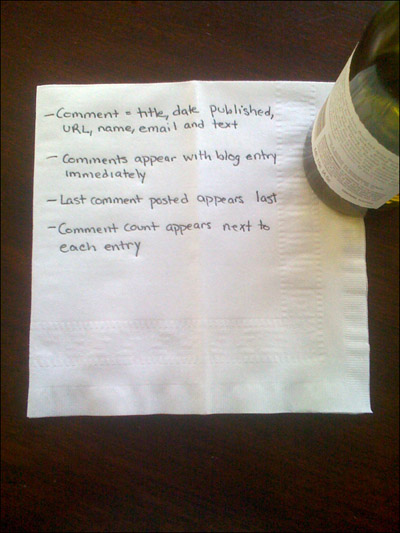
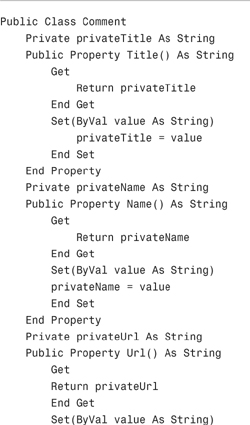
- A user should be able to add a comment to a particular blog entry. A comment consists of a title, date published, URL, name, email, and text.
- After a user adds a comment to a blog entry, the user should see the comment when viewing the blog entry.
- The last comment posted should appear last in the list of comments.
- The number of comments associated with each blog entry should appear next to each blog entry when a set of blog entries are listed.
This gives us enough to start writing tests. We tackle each of these requirements one-by-one.
According to the first user story, a user should be able to create a new comment. Furthermore, according to the story, a comment should consist of title, date published, URL, name, email, and text.
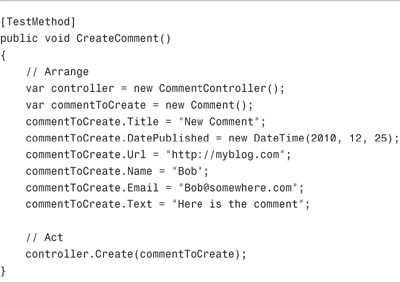
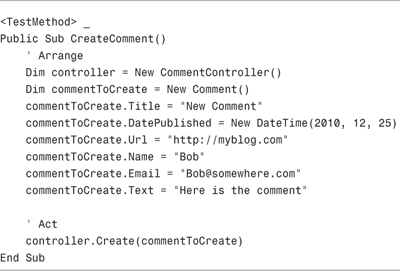
The test in Listing 21.1 captures the intention of the first user story.
Note
The test in Listing 21.1 does not have an Assert section. An Assert section is not needed because the test is verifying that you can create a comment successfully and the comment has particular properties.
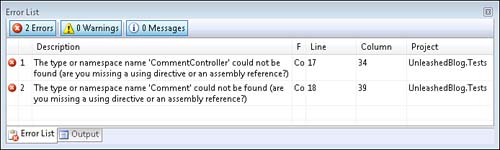
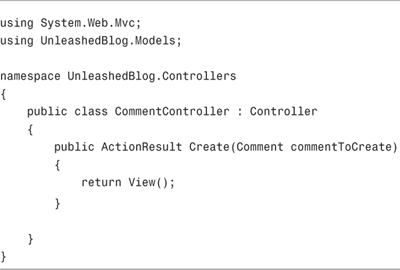
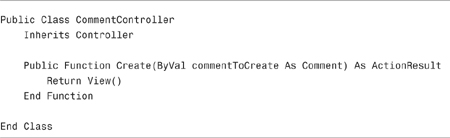
After you create the test, the application won’t compile because we have not yet created a CommentController or a Comment class (see Figure 21.2). Therefore, the first thing that we need to do is to create these classes (see Listing 21.2 and Listing 21.3).

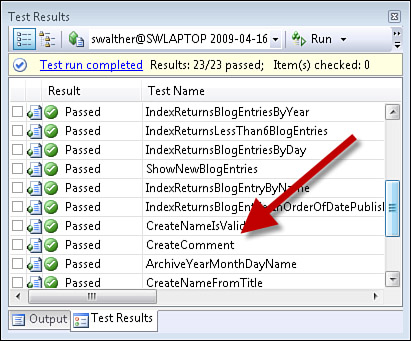
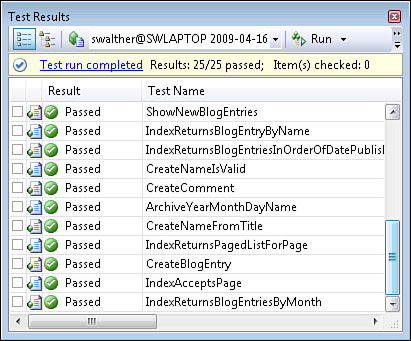
After we add the Comment and CommentController classes, we are back in the green. All of our tests pass (see Figure 21.3).
The Create() action isn’t actually doing anything. However, we want to write the minimum amount of code to get the test to pass and the test does, in fact, pass.
Next, we need to implement the user story related to viewing the comments. According to this user story, after you add a comment, you should see the comment when you retrieve the blog entry. The test in Listing 21.4 is intended to capture the intent of this story.

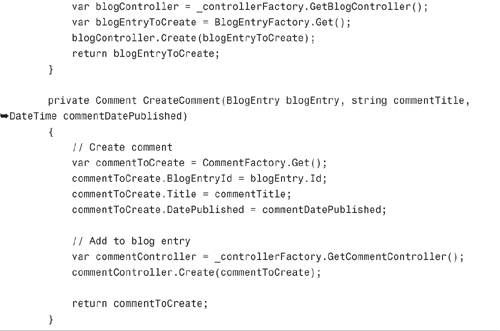
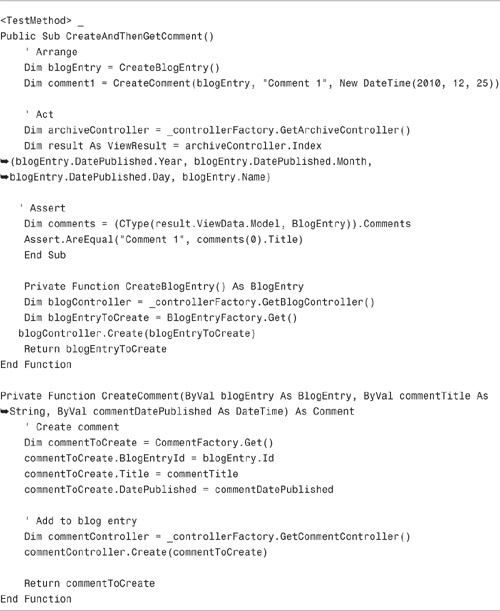
Listing 21.4 contains one test method named CreateAndThenGetComment(). The test creates a blog entry, creates a comment associated with the blog entry, and retrieves the blog entry. If the comment can be retrieved, the test passes.
Notice that the test uses two helper methods named CreateBlogEntry() and CreateComment(). These helper methods make the CreateAndThenGetComment() test method more readable.
Note
In the solution in the code samples on the website (www.informit.com/title/9780672329982), the CreateBlogEntry() and CreateComment() helper methods have been moved into a separate helper class named TestHelpers.
This is not an easy test to pass. To pass this test, we need to modify several classes including the CommentController, the BlogService, and the BlogRepository class.
I won’t include all the code that I had to modify to get the test to pass here. The application logic for retrieving comments is similar to the application logic that we wrote earlier for retrieving blog entries.
Let’s move to the next user story. According to the next user story, the last comment posted to a blog entry should appear last when the comments display. The test in Listing 21.5 represents this user story.
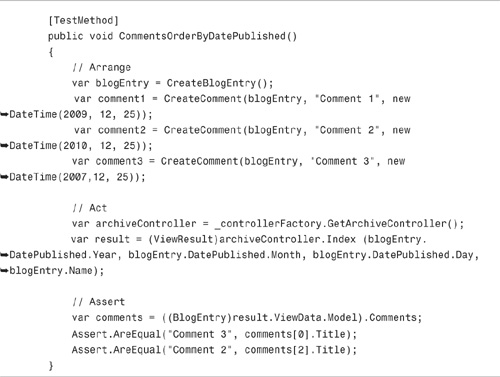

Getting this test to pass is not as difficult as the previous test. We simply need to order the comments returned by the blog repository by DatePublished. After we make this change, all tests pass (see Figure 21.4).
Let’s tackle the final user story concerning blog comments. According to the final user story, a count of the number of comments associated with a blog entry should appear next to each blog entry. The test in Listing 21.6 is intended to capture the intention behind this story.
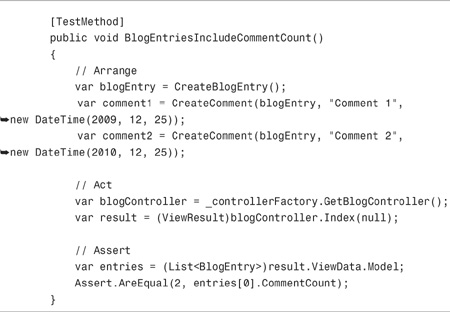
The test in Listing 21.6 creates a blog entry with two comments. Next, the test invokes the Archive controller action method to retrieve all the blog entries. The test verifies that the first blog entry has a CommentCount of 2.
Unfortunately, the only way to get this test to pass is to modify the FakeBlogRepository class (see Listing 21.7). Because the application code in the FakeBlogRepository class is not executed when the application is run during production, testing any code in the FakeBlogRepository class does not test production code.
However, the test in Listing 21.7 is not without value. For example, the test verifies the way the controller, service, and repository classes interact. The test verifies the behavior of all the application code around the repository even if the test does not verify the behavior of the repository itself.
At this point, we have passed all the tests related to comments. We have implemented the application logic for creating comments, retrieving comments, and displaying a comment count.
To support comments, we need to update the database so that it includes a Comments database table. The Comments table contains the following columns (see Table 21.1).
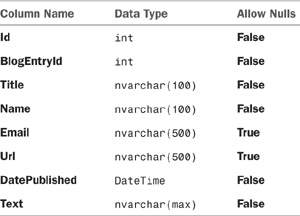
The first column, the Id column, is an Identity and primary key column.
After we create the table, we need to update our data model. Follow these steps:
- Open the Entity Framework Designer by double-clicking the DateModel.edmx file in the Solution Explorer window.
- Right-click the designer surface and select the menu option Update Model from Database.
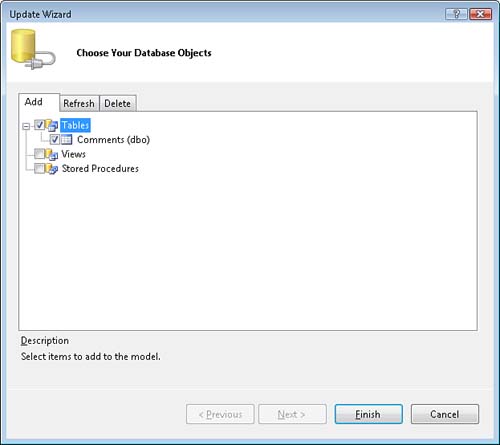
- In the Update Wizard, select the Comments table from beneath the Add tab (see Figure 21.5).
- Click Finish to close the wizard and add the table.
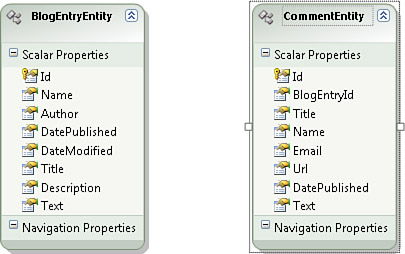
- Rename the entity from Comments to
CommentEntity(see Figure 21.6).
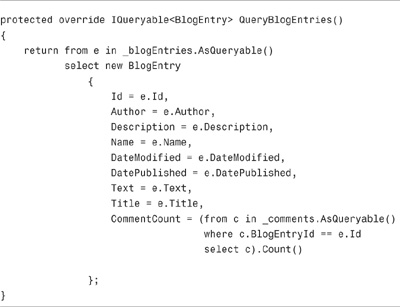
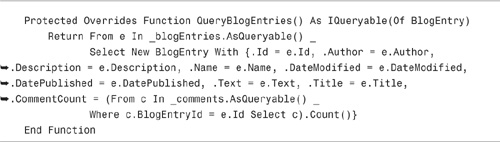
To use the new Comments database table, we need to update the EntityFrameworkBlogRepository. The updated EntityFrameworkBlogRepository in Listing 21.8 contains new or revised QueryBlogEntries(), QueryComments(), and CreateComment() methods.
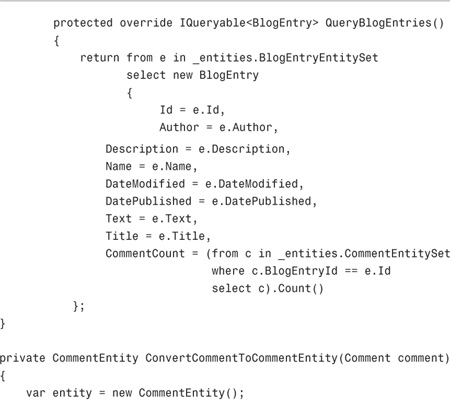
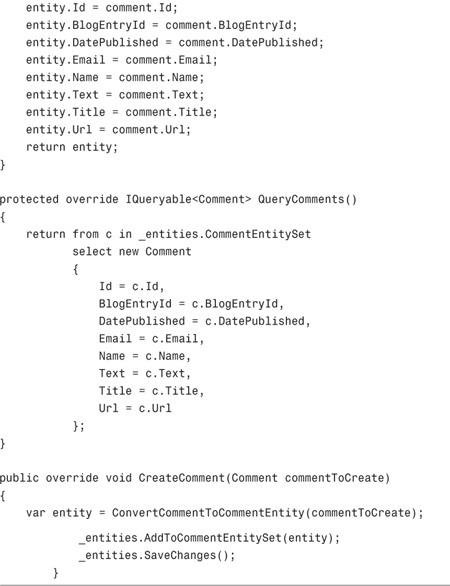
Notice the ConvertCommentToCommentEntity() method. This method converts an instance of a Comment class to an instance of a CommentEntity class. We created the Comment class by hand, and we use the Comment class in our blog application. The CommentEntity class, on the other hand, was generated by the Microsoft Entity Framework. We convert back and forth between these two versions of the Comment class in our blog application.
Note
Why don’t we use the Microsoft Entity Framework CommentEntity class everywhere? In other words, why do we perform the additional work of creating a separate Comment class? We want to use a POCO (Plain Old CLR Object) when writing our application logic. Otherwise, we cannot build our application through incremental design.
We need to update our views to take advantage of comments. We don’t want to display the list of comments associated with a blog entry on every page. We only want to display the list of comments on the page that displays a single blog entry.
I created a new view named Details that displays a single blog entry (see Figure 21.7). The Details view is contained in Listing 21.9.
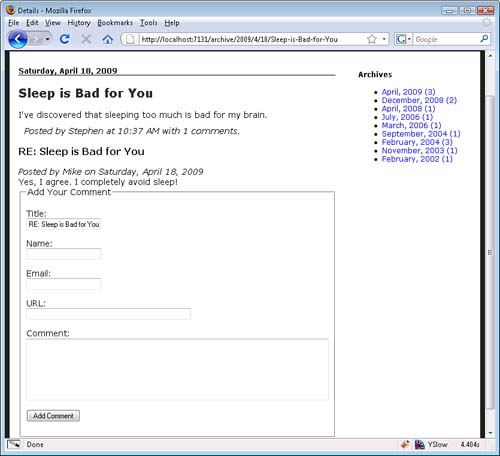
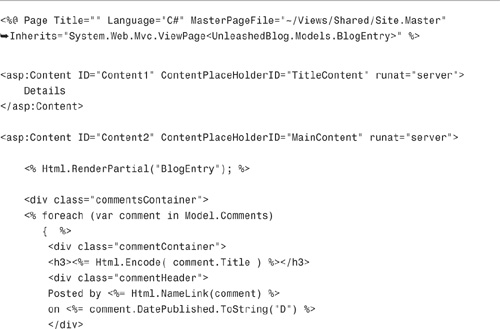
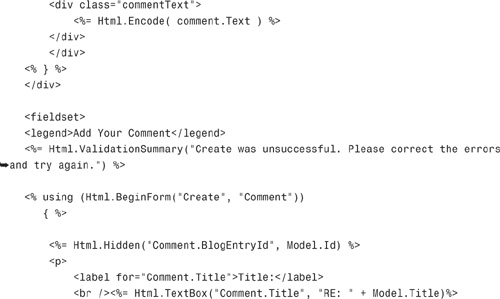
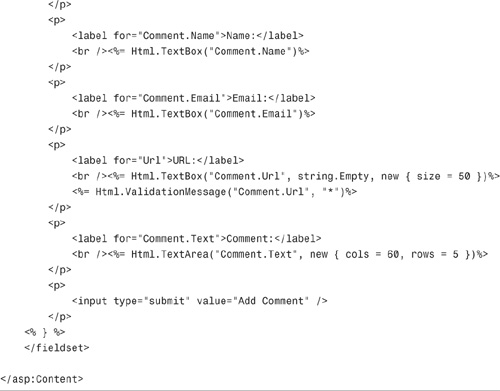
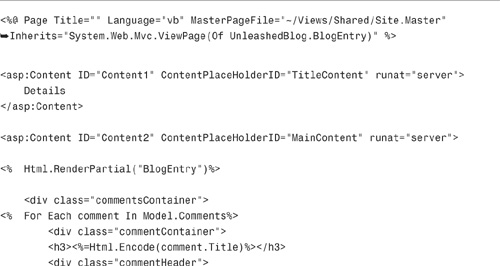
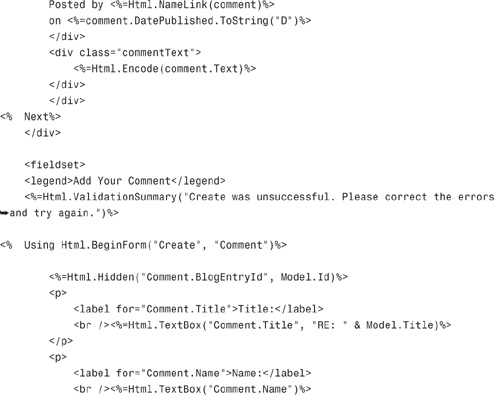

The Details view renders a single blog entry by rendering the BlogEntry partial. Next, the view renders all the comments associated with the view. Finally, the view displays a form for entering a new comment.
Adding a new Details view to our project required a modification to our route tests and route table. Our route tests class includes the new test in Listing 21.10 and the Global.asax file includes the new route in Listing 21.11.
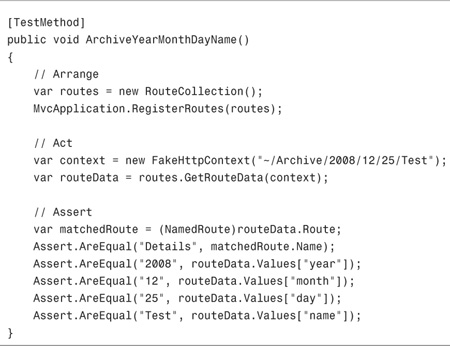
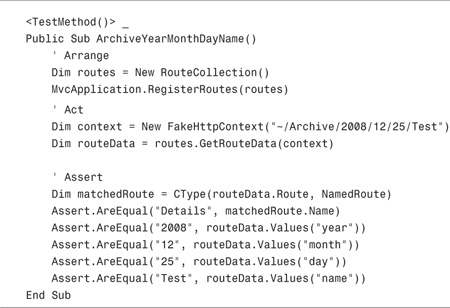

The test in Listing 21.11 verifies that requesting the URL ~/Archive/2008/12/25/Test matches a route named Details. Furthermore, the test verifies that the year, month, day, and name route parameters get correctly populated from the URL.
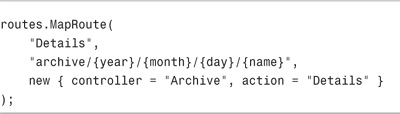
The route defined in Listing 21.11 satisfies the test. Adding this route causes all our tests to go green (see Figure 21.8).
This is the final chapter devoted to the Unleashed Blog and the final chapter of this book. The goal of this final part of this book was to demonstrate the process of building a real-world application using ASP.NET MVC and test-driven development. We implemented each feature of the blog application by starting with a user story and then capturing the intent of the user story with one or more tests. We did not write any application code until after we had a failing test.
Our blog application is not a full blog application. Our blog is missing major features such as support for tags and RSS. In other words, we still have some work to do!
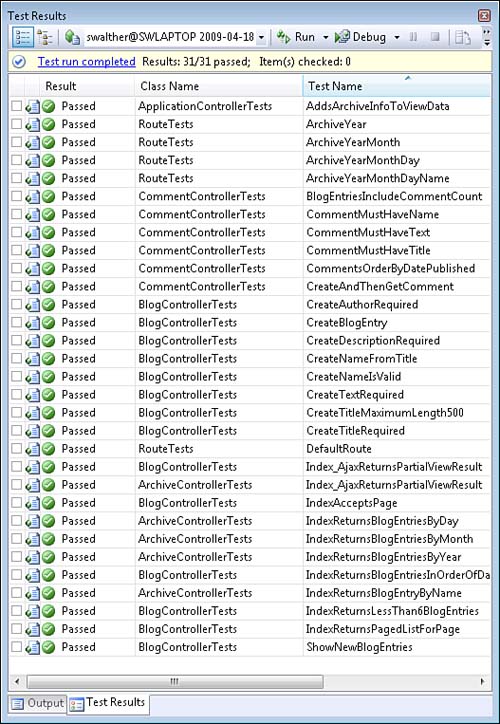
However, you are in an excellent position to extend the blog application. Because we used test-driven development, our blog application code is covered by a set of 31 tests. Because the code is supported by the safety net of tests, you can fearlessly refactor and extend the blog application without worrying about breaking existing functionality.