
The action of opening the mouth is defined by the jaw bone. Although at first it seems like a simple movement, a more careful look shows there's more to it. More than just rotating in one axis, the jaw moves towards the front, back, and to the sides as well, allowing us to make somewhat complex movements.
When creating the jaw controller, we should not only pay attention to its unique movements, but also to the hierarchy of bones, since we'll have controllers such as the lips and tongue that should follow its movements.
- Open the file
004-Jaw.blendfrom this book's support files. This file holds our character's head mesh along with some controllers for its eyes and facial expressions. You'll also see a visible Lattice for controlling the lower lip of our character, as a result of our previous recipe, as seen in the next screenshot: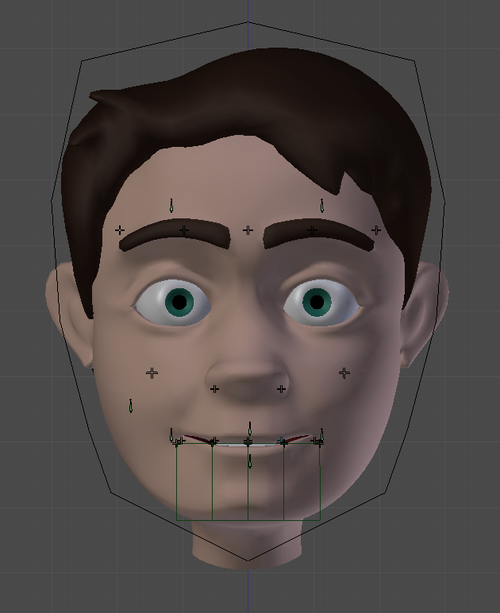
- Select the Armature, enter into Edit Mode, and add a bone to act as the jaw. It should have its root on the jaw's imaginary axis of rotation, near the center of the head. Its tip should be located at the chin, as seen in the next screenshot (the other bones are hidden for clarity's sake). Name it
D_Jaw. Since the mesh already has a vertex group with the same name, when you move this bone the mesh should be deformed accordingly.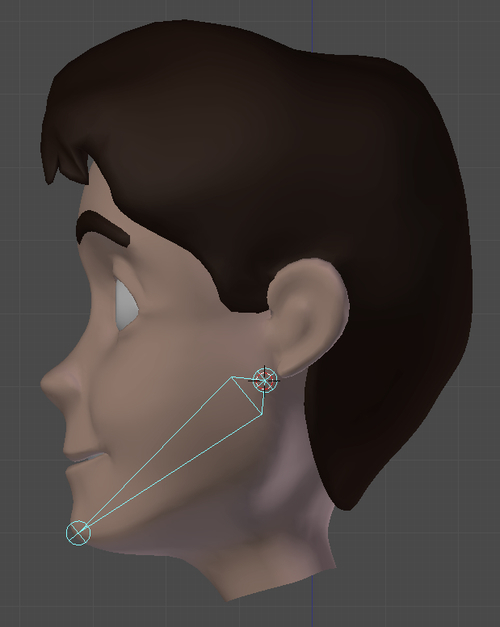
Note
You should pay attention to the bones and objects hierarchy. All the bones that have names starting with
Lip_Bottomand theMouth_lip.Bottomshould be parented (Ctrl+ P) to theD_Jawbone so that they follow its movement. In addition to these bones, you should also parent two more objects to theD_Jawbone:Lattice_JawandOtto_Teeth.Bottom. Finally, theD_Jawbone should be parented to theHeadbone so that it follows the head movement.This jaw bone would only deform the mesh, and won't be touched by the animator. Since it would perform some specific movements, we're going to control it using the Action constraint. The Action constraint is based on a series of preset animations, triggered by a controller.
- With the
D_Jawbone selected in Pose Mode, open a DopeSheet window, select the Action Editor mode on the window header, and add a new Action using the plus button. Call itjaw.Now you will move and rotate the D_Jaw bone, defining keyframes on this newly created action.
- For the first frame, just press I and choose LocRot in the 3D View to define a keyframe to the rest position.
- Go up 10 frames (up arrow), rotate the jaw bone until the mouth is fully open, and set a keyframe (I) (choosing LocRot) there. Remember the keyed frames: 1 and 11. We're going to need these.
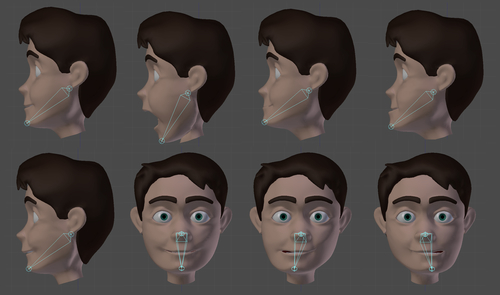
- Repeat step 4 for the remaining key poses, all spaced by 10 frames to make things easier:
- Frame 21 with a rest position
- Frame 31 with a fully closed mouth
- Frame 41 with a rest position
- Frame 51 with the jaw rotated left
- Frame 61, rest again
- Frame 71, rotated right
- Frame 81, rest
- Frame 91 with the jaw moved to the front
- Frame 101, rest
- And finally, 111 with the jaw moved back
Note
You don't need to create new positions for the resting poses. Just duplicate (Shift + D) the first key position, which holds the resting pose, and move the copies to frames 21, 41, 61, 81, and 101.
The next screenshot shows all the different key poses: rest (side), open, closed, front, back, rest (front), rotated right, and left.
Now comes the fun part. We're going to set the controller for the jaw movements.
- Create a new bone just in front of the chin. Make it smaller and call it just
Jaw. With this bone still selected and in Pose Mode, hold Shift, select theD_Jawbone, press Ctrl + Shift + C and select the Action constraint. - Go to the Properties window, under the Bone Constraints tab and change the settings for the constraint you've just created: select
jawfor the Action field;Location Y, for Transform Channel;Start:1, End:11for the Action Length;Min:0, Max:-0.1for Target Range; and finally,Local Spacein the Convert combo. This will make the character's mouth open when you move the controller down. - For the other movements, repeat the previous step and change only the values for Action Length, Target Range, and Transform Channel. You should create five more constraints so that the jaw closes with the controller up movement; go left, right, back, and front with the relevant controller transform channels. The settings for all six constraints are shown in the next screenshot:

Now you can move the Jaw controller freely and the character will move accordingly. The complete example is in the file 004-Jaw-complete.blend, so you can refer to in case of any doubts.
By creating predefined positions for the jaw in a separate action, you can trigger parts of that animation with a controller and an Action constraint. Because the jaw movements are a bit more complex, involving rotation and translation, it's a good idea to use a separate controller and predefined keys.
Chapter 5: Creating IK legs with a three-pivot foot