
Looking inside your computer
Considering memory and monitors
Macs versus PCs
Selecting a print platform and media for your images
Scanning like a pro
Consider an analogy to illustrate moving a photo file from your scanner or digital camera to your printer. Take your average-size image on the Internet — say, one of those beautiful images that AOL flashes on its welcome page. Those pictures, usually small in size and crystal clear, have been moved from one place to another. For example, they were either scanned from film or taken at low resolution with a digital camera and then moved to a personal computer, a server, or Web space.
Now imagine that you could physically carry the image from one platform to another. No cords or wireless wavelengths to travel through, just moved with your bare hands. Imagine that an image off the Internet would be easy to carry, weighing no more than a cup of coffee.
Comparatively, if you take the average size of a digital rendering or photograph taken with a digital camera or scanned from film and put into a computer or server, you'd have to be Hercules (or Wonder Woman) to transport it from platform to platform because its weight might approach that of an elephant. You'd either have to have supernatural powers or a crane.
The point of this analogy: Big, heavy objects require extra might to handle them. The same reasoning follows for small and large images that go from one place to another. Handling a small image that travels a short distance (say, from a camera to a computer or server) takes care but requires much less power and manipulation than moving a huge image from a camera to a computer and then to a printer — a long way.
The point is that although good images are big, they need lots of power from your computer to be processed. If you're considering purchasing a new PC, make sure that it's powerful. Chapter 2 provides an overview of digital cameras and peripherals. In this chapter, I discuss computers, monitors, printers, and scanners — the other equipment necessary for digital art photography.
If you're new to digital cameras and digital imaging, take a moment to explore your computer's relationship with your digital camera and your scanner. In this section, you discover the basics of storage, get an overview of monitors, and read about which platform to use (Mac or Windows — the age-old argument), all tied together with a discussion of when to upgrade. Unfortunately, I can give only a smattering of the information regarding these topics within the confines of this book. For further reading, try Macs For Dummies, Eighth Edition, by David Pogue, and PCs All-in-One Desk Reference For Dummies, Third Edition, by Mark L. Chambers (both by Wiley).
Storage space is of paramount importance to anyone manipulating graphics on a computer. In short, you need a lot of space and a lot of memory to move, edit, and print your photos. Certain components of your computer deal with these issues, and you must be familiar with them. Think of each component of your computer — described in the following bullets — in terms of storage space utilization (and conservation, also).
Disk drive: This can be external or internal.
Internal disk drives are hard drives, which are part of the total package when you buy a desktop or laptop computer. Look for a computer with at least 80 gigabytes (GB) of hard drive space.
A clear, gallery-worthy 8″ × 10″ image uses somewhere around 20 megabytes (MB) of computer storage space. Some pieces of this size, like black-and-white photos, can use as little as 5MB, and others that contain intense color can use more than 100MB.
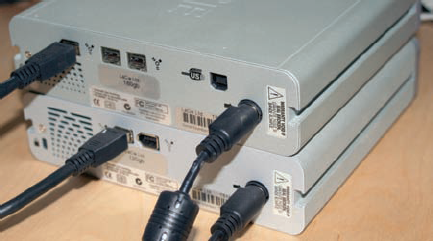
External disk drives are a great way to add more memory to your computer. At 160GB — considered a smaller size — a drive like that shown in Figure 3-1 can do the trick of keeping thousands of high-resolution photos. And if one external drive doesn't do the trick, you can get more than one; at just a little over $100, the price is right for these workhorses. If you're a professional digital photographer, you need one of these eventually no matter how large a hard drive came with your machine. You can get external hard drives online (I recommend
www.seagate.comorwww.lacie.com) in a variety of sizes from 80GB to over 400GB.Tip
Connect your external hard drive to your computer with a FireWire or USB 2.0 cable (not a USB cable) because these ports transfer data much faster. FireWire and USB are two types of connections that both Macs and PCs use to connect devices. The FireWire and USB 2.0 devices transfer data at over 400 Mbps (megabytes per second, a unit of measurement used for describing the speed at which data transfers), almost 30 times faster than a USB cable.
CD and/or DVD drives enable you to store extra images on CDs or DVDs. The different types of CDs and DVDs are mostly distinguished by whether you can reuse them. The capacity of the discs ranges from a CR-R or CD-RW (approximately 650MB) to a dual-sided DVD-RAM (a read/write DVD that holds close to 10GB). The discs are ideal for making hard copies to carry around with you or to send back and forth via snail (ground) mail.
Random access memory (RAM): This is the computer's memory that is available for programs to use — to move, edit, save, and print files. Digital photography is a memory-eater: Pictures downloaded onto your computer use up a lot of memory on your machine while being edited or adjusted.
Tip
No amount of RAM is too much if you have a choice of models of computers that you're shopping for — go with the higher number. RAM gets used up with each program you open and each time you have your computer process an image with the tools in an image processing program like Photoshop.
Note
Computers sold even a couple years ago didn't come furnished with as much hard drive space as those sold today. The older your computer, the faster you'll run out of space without upgrading the storage space that came with it when you bought it.
Look out for messages that your computer gives you while you're dumping images onto it, such as Cannot copy X to Y because there is not enough free space; this message tells you that the disk you're transferring files to is full. While dealing with large images, Scratch disk is full or Not enough memory appears onscreen, telling you that you've run out of RAM. You also don't want to hear a grinding hard drive or endure that certain sluggishness that leaves you staring out a window, wondering whether you made your image so big that your computer has the hiccups.
You can help tell the status of your computer by listening to it and watching your monitor:
Listen to the fan and the spinning of the hard drive. A quiet humming sound is best.
See how quickly files open. When you have sufficient RAM and your computer is well maintained, files don't lag when opening.
Tip
If you have a new computer that you haven't overloaded with software and files from the Internet, you're off to a great start for image processing. If your system is a bit cluttered, you'll find that moving and manipulating images is a slow process. Clean your system to free some space:
Throw stuff away that you've created and don't use. You can get rid of files that you don't use by right-clicking (Control+clicking on a Mac) and depositing them into the Recycle Bin (Windows)/Trash (Mac). Be careful, though, because you don't want to dump files that your computer needs to run. Stick with dumping old documents and images that you've created or duplicated and that you don't need or use anymore. Or, if you're a packrat, copy them onto your external hard drive or burn them onto a CD/DVD.
Empty your trash. Sounds obvious, but dumping files you don't need is a two-step process. First you put them in the trash; then you empty it. (Files in the trash are still recognized by your hard drive; you have to empty your trash for those files to be really gone.) On the Mac, you click the Trash icon and choose Empty. In Windows, right-click the desktop icon and choose Empty Recycle Bin.
Empty temporary Internet files. Open your browser and navigate to the location where it stores temporary files or to the cache and delete them. In Internet Explorer, choose Tools

Maintain your system by using its maintenance utilities. In Windows, run the Disk Cleanup and/or Disk Defragmenter, which are both part of System Tools, and just follow the prompts. In Mac OS X, navigate to Applications
Read more about Mac system maintenance in Mac OS X Tiger All-in-One Desk Reference For Dummies, Third Edition, by Mark L. Chambers. To give your PC a thorough and deep cleaning, take a look at Cleaning Windows XP For Dummies, by Allen Wyatt (both books by Wiley).
The monitor shut off. It wouldn't blink and couldn't link. Then it gleamed like the Big Dipper. Its light flickered as it started to get chipper. | ||
| -- "Shut Down the Computer, Roxanne" by Matt Bamberg | ||
Your monitor is your window to what you see, in close detail. In order for an image to be successfully rendered (that is, for the pixels to be arranged to create a picture), you need to see the details. The only way that you can see the details clearly is with a good, high-resolution LCD flat-panel monitor from a well-known company:
Tip
Prices change quickly, so visit Web sites when you decide to buy.
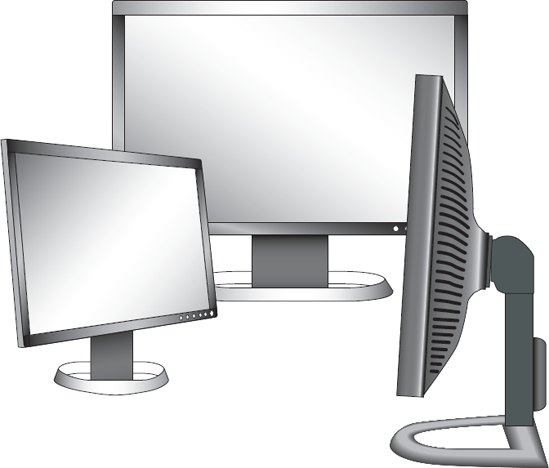
Flat-panel monitors (as shown in Figure 3-2) are best. And the bigger, the better. Compared with traditional CRT (cathode ray tube) screens (the ones that look like a TV from the '80s), they don't blink much or flicker. LCD flat-panel monitors also possess a native resolution. Unlike CRT screens, whose resolution stays the same no matter what size you set it to (size being the number of pixels you see onscreen), LCD resolution has a value in which the screen you're gazing at is clearest. Each monitor size contains a pixel configuration for the native resolution. The configuration for a 15″ screen is 1024 × 768 pixels; and 1280 × 1024 or 1400 × 1050 for a 17″, 18″, or 19″ model.
The advantages of a big, flat-panel monitor are
A big, flat-panel monitor is essential for graphics work, but you also need to decide what specifications are best for the type of graphics work you're going to do. What you see isn't necessarily what you get. Brightness is distributed across the intensity spectrum (how much contrast you have) of your monitor or the gamma value (the value of color perception output from the voltage of the input to the monitor). The differences in gamma between a PC and a Mac can have an effect on the colors you see in your photograph.
Note
The platform that you use — Mac or PC — affects the image you see on your monitor, making it even more important that what you see on your monitor is as clear as you can get. That way, you know what to tweak to make your picture prints the best that they can be. Monitors do act differently on different platforms. You might notice that an image shown on a monitor connected to a PC is darker than one connected to a Mac. You can read more about platform differences in the upcoming section, "Choosing a platform."
Thank goodness that the days of blinking monitors are just about over with the advent of the new flat-panel monitors. However, you still might have to calibrate your monitor, which involves first assessing your computer's color management system and then making some tweaks so that the colors you see onscreen are as close as possible to what you see in print. Because your monitor is what you see — the king (or queen) of communication in the technology world — you need to make sure that it jibes with where your photo has come from and where it's going. The images shown in Figure 3-3 simulate what I mean.

Think output — that is, what comes out of your printer — from the very beginning of the digitizing process, when you put your image into a computer. Whether you're calibrating your monitor on a Mac or a PC, this upfront work gives you superior quality prints.
Calibrating your monitor requires that you tweak it to work with your image processing program. The process is color management, or matching the color in the image as it's displayed with the color you see in your scanner, on your monitor, and in print.
Note
If you have trouble setting up a color management system for your platform — or if you simply can't determine whether you need to calibrate your monitor — type "color management" and the name of your platform into a search engine and look for the latest tutorial. (As with anything on the Internet, however, sometimes information presented there is not accurate or current, so use caution.) The best Web sites for this type of information are the companies that make your product. I recommend the following site for some general information:
www.adobe.com/support/techdocs/329486.html
Tip
The Mac's Apple Display Calibrator Assistant can be used to calibrate your monitor in a few easy steps. Note that Mac OS X screens will look a bit different from version to version (10.2, 10.3, and 10.4), but they basically function the same. Note: Right out of the box, however, most Apple LCDs work just fine and require no calibration. Open your Mac's System Preferences, click Displays, and choose Adobe RGB as the color space from the Color panel. If you see unusual color reproduction onscreen, you might want to calibrate the monitor.
Other items to consider when you're souping up your computer for graphics work include the following:
Card readers: These handy little devices can be connected to your computer with a USB or FireWire cable to directly read the memory cards that you extract from your digital camera. Usually, you have to have your digital camera's software read what's in your camera after it's connected. (For more about these devices, see Chapter 2.)
Graphics card: All modern computers include a card that processes the video data and sends it to your monitor. A more powerful card can help your computer speed the redraw of the monitor screen, which helps you work faster and more efficiently.
External hard drive: No amount of hard drive space could be enough when working with a lot of high-resolution photographs. I discuss this in the earlier section, "Storage space."
Mouse: To make your Mac behave more like a PC, you can replace your one-button mouse with a multibutton mouse. When you do, right-clicking is the same as Control+clicking with a one-button mouse. Scroll wheels also help you navigate the screen.
Graphics tablet: A graphics tablet is like a drawing pad for your computer (see Figure 3-4). No more crimping up your wrist trying to get a smooth hand-drawn line into your Photoshop document. The tablet comes with a stylus that you draw with. (The tablet is connected to your computer.) In Bonus Chapter 2 (at
www.dummies.com), I create text out of a VW Bug image, an activity where using a graphics tablet would be especially helpful.

When you go shopping for a new computer, look for the best platform in terms of ease of use for yourself. If you've been working in a Windows environment for most of your life and know it well — meaning you know how to troubleshoot, combat viruses, and maintain your Windows system — then stick with it. Just because you're going deeper into digital photography doesn't mean that you have to switch platforms, even if most people say that Macs are better suited for graphics work.
If you've never used a computer before, you probably can go with either platform. You'll hear the Mac-is-better-for-graphics argument, but PCs and Windows have come a long way in upgrading their graphics capabilities.
Tip
Older computers (Mac systems with OS 9 and Windows 98) and earlier versions of Photoshop that work on less-powerful computers can produce almost the same results as the most recent version of Photoshop and an upgraded computer. However, newer versions and machines are faster and offer more advanced features. You might also find that older computers are incapable of working with the larger file sizes produced by more advanced digital cameras.
Your computer needs some get-up-and-go to run any graphics intensive program — and high-resolution photographs are the most demanding form of 2-D graphics (the most intensive graphics that exist, except for digital video and 3-D graphics). That is, at high resolutions, photographs need a lot of space within your computer and a lot of random access memory (RAM) to manipulate them.
After you do your housekeeping chores, adding more RAM (see the "Storage space" section, earlier in this chapter) to your computer can help it run more smoothly. You can order additional memory, which looks like long wafers, from your favorite neighborhood computer store (or online).
First determine how much memory you have, how much more you can add, and what type of RAM it is.
In Mac OS X:
Click the

Click More Info to see how many empty slots you have (in the Memory Overview area on the System Profile tab).
Write down the memory type that you find.
In Windows, consult the type of memory for the machine you have by looking at the manual or go to your computer manufacturer's Web site.
Tip
Adding more memory is just a matter of opening up your box and snapping memory chips into the empty RAM slots. (Think of pushing an ink cartridge into a printer.) If you have an older machine, it's probably not a bad idea to fill up all the empty memory slots.
Warning
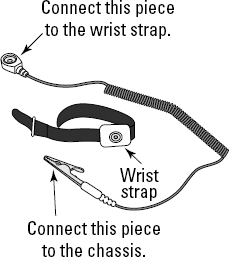
Always first unplug the machine and ground yourself before touching the chassis of your computer so you don't send an electric shock through the computer and yourself. Ground yourself by touching something metal before handling the memory or the computer, or by wearing an antistatic wrist strap (see Figure 3-5) while snapping the RAM into place.
Because the computer-connection world (for the most part) works via USB and/or FireWire ports (connections that work on both platforms), you can use the same external hard drives described in the Mac section for your PC.
Note
The two types of USB products are 1.1 and 2.0. The newer, 2.0, is a much faster connection, as fast or faster than a FireWire (both have tested to transmit data at speeds at or over 400 Mbps). When you plug a USB 2.0 device into a USB port, you can expect USB speeds of up to 12 Mbps. Likewise, plugging a USB device into a USB 2.0 port won't speed up the data transfer rate.
Here are other things that make your graphics programs and image processing work go faster and smoother on a PC:
Get more RAM. Get lots — as much as you can afford. On a PC, Photoshop runs slowly when you're working with high-resolution photos if you don't have enough RAM.
Consider getting a workstation. Workstations — computers designed to handle high-resolution graphics — have come down in price (some down to around $1,000) and offer all the high-end graphics card and memory capabilities of a souped-up PC. Dell and Hewlett-Packard (HP) offer these systems, once used only by graphic designers and engineers.
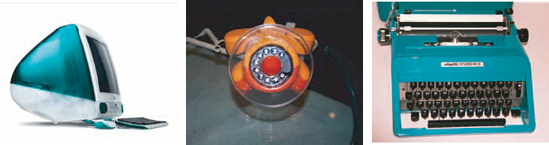
Tech styles of today are tomorrow's art photography ops
Think about it: Those stylish iMacs (as shown here) will be collectibles in 30 years! Take an art photo of it today, just as you would of a 1940s Olivetti Chevy typewriter or a psychedelic '60s telephone. Hint: Anything made of clear plastic or colored plastic, with style, is great material for an art photo.
PCs are definitely catching up with Macs in terms of exceptional graphics. New systems come with great graphic cards that make their displays comparable with a Mac. If you have an older PC, certainly upgrade your graphics card for better performance and speed from image processing programs. (If you're a video game addict, you know exactly what I mean.) Here are some key points to keep in mind:
AGP: Your computer has to have an Accelerated Graphics Port (AGP) connector. (To look for accelerated graphics devices on a PC, choose Start
RAM: Get at least 128MB of memory on the video card for the best shadows, highlights, tones, and colors in your display.
Graphics card: nVIDIA (
www.nvidia.com), ATI (www.ati.com), or Matrox (www.matrox.com) graphics cards are the most efficient — that is, they give you speed and stability when you work in Photoshop.An 8X graphics card (the data transfer speed) is good. Because Photoshop isn't a 3-D game, though, 4X will do just fine. A 4X card will save you over $100.
Ahh, printers. When you finally get to the step where you actually print something out, that's an achievement. Pat yourself on the back.
In order to understand printers, you have to understand the files from which a print originates. You can print out straight from your digital camera, but the prints you get probably won't be gallery-worthy because you haven't had the opportunity to adjust the image's color, composition, and content. Transforming a high-resolution photograph to a gallery-worthy print means that you print from an image processing program, like Photoshop.
If you're wondering what Photoshop (or another image processing program) has to do with buying a printer, try to fill a swimming pool with a hose that's the width of a straw. That's right — you don't want to spare pixels and resolution by buying a printer that sputters out pixels here and there. Just as you would want to use a normal-sized garden hose to fill your swimming pool, you want a printer that uses as much of the data coming from your computer as possible and covers your paper with breathtaking color or well-contrasted shades of gray (for a black-and-white photo).
Software such as Photoshop and Photoshop Elements allows you to make your images any size from tiny, high-resolution prints to huge grainy blow-ups that look like they came from Marilyn Monroe's old family photos. (See Parts III and IV for more about image editing and printing.)
Gathering information about the different types of printers available is a big help in understanding your choices in the world of printers. Educate yourself by talking with others in your situation and by doing a little research:
Talk with other artists. Go to art shows and street fairs, look at folks' digital art, and ask what type of printer they use. If you like the look they present, you might have found the perfect printer. Conversely, if you don't like their quality, you can eliminate that printer from your list.
Research. Read printer reviews at sites like PC World, Macworld, and Infoworld online magazines.
The following list highlights those issues you should be most concerned with when printer shopping:
Printer resolution: A measurement of the detail of the printed photograph, this resolution is different from computer screen resolution and is measured in dots per inch (dpi). The lower the dpi your printer prints at, the less clear your prints will be. However, any printer rated at 1440 dpi or higher is sufficient.
Paper types: You have literally dozens of papers to choose from — from glossy to matte and fine art. See Table 3-2 (later in this chapter) for a quick comparison of paper types.
Print speed: Any art photo that's of gallery quality — that is, has a high resolution — will take at least a few minutes to print out. If you want high quality, you have to be patient.
Print quality: Epson products hold up pretty well in terms of the ink that's sprayed on the paper. Mid-level HP glossy prints don't do as well. (I've had some of mine for a few years, and much fading has occurred on those that were printed on HP glossy paper on a Photosmart 1215 printer.) Look for the term archival when shopping for a printer so that you know your prints will last for decades.
Tip
Most high-end Epson printer models require that you switch between two different shaded black ink cartridges when you print on different papers. You have to change your ink cartridge depending on the paper you use. Matte black ink is used for matte paper, and photo black ink is used for glossy papers.
Different printers use different colors to closely match the colors of your computer screen. Printer software converts whatever colors you use in your photo editing program to CMYK (cyan, magenta, yellow, black) format. CMYK is one of a few color systems used by printers for creating color in your print. An Epson 2200 printer, for example, takes seven cartridges of the following colors that fit within the CMYK mold: matte or photo black, light black, cyan, light cyan, magenta, light magenta, and yellow. Remember, however, that your digital image remains in the RGB (red, green, blue) color mode — let the printer's software convert to CMYK (or CcMmYKk in the case of a seven-ink printer).
Tip
Generally speaking, the more ink cartridges your printer has, the better variegation in tone and color your print will have.
Note
For the purposes of printing art photography on a variety of papers, you'll be working mostly in RGB mode. Another common mode in Photoshop is the CMYK mode, which is what printing presses use. In this mode, many colors in Photoshop become out of gamut, which means you can't see them in print if you don't change them to colors readable in that mode. You don't use CMYK color mode with inkjet printers.
Several types of printers currently on the market are suitable for art photography:
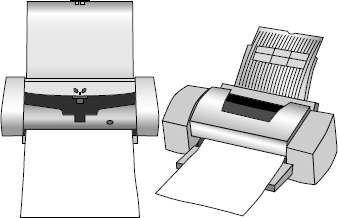
Inkjet: Inkjet printers (see Figure 3-6) spray ink onto paper using replaceable cartridges. They are great for economical prints. An 8″ × 10″ print costs a dollar or two (depending on the type of paper used). Despite their slowness (perhaps several minutes to print a 5″ × 7″ at a high resolution), inkjet printers have become the number-one choice for the art photographer (like yourself). Produced by a number of different computer and printer companies, they vary in price ($100–$8,000). You can spend a pittance for one that uses a single combo ink cartridge or a lot for one that uses many individual ink cartridges. (The printers with 44″-wide printing capabilities with special inks are the pricey ones.)
Tip
Everything you want to know about inkjet printers is at the
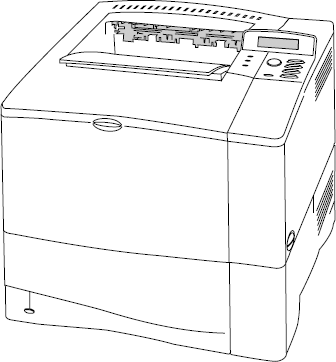
http://inkjetart.commoderated forum page. You can also find some very good prices/deals on ink cartridges here, too.Color laser: A laser printer (shown in Figure 3-7) uses static electricity to make an image on a drum covered with toner (a solid black/different colored powder), which then prints the image onto paper using heated rollers that melt the toner onto the paper. Color laser printers are good for creating charts and other graphics but not for printing art photography. Perhaps the technology will develop some day to make these printers produce photography that's comparable with that produced in a darkroom. Prices for the printers range from $400 to $2,000, varying mostly with print speed. The cost per-page of less than a quarter makes a color laser printer great for printing out fliers, but the inferior quality compared with an inkjet makes it a no-go for art photos.
Snapshot: Snapshot printers are mini models that print fast (prints made in about a minute) at home or on the road. However, you can't make images larger than 4″ × 6″ with them. Too, your prints end up being more expensive than those you can get at the drug store from the photo guy. Prices range from $100 to $300. These printers, capable of producing high-quality photographs, can be used to make art photos by setting up a kiosk to take and print photos of people, say, sticking their heads on top of the bodies of hula-dancers, and then selling them at a fair. Models (all printing at 4″ × 6″) include Kodak's EasyShare Printer Dock dye-sublimation (about 62 cents per print), and Epson's PictureMate (about 29 cents per photo). Figure 3-8 shows examples of three models of snapshot printers.
Dye-sublimation: Also called thermal dye transfer printers, dye-sub printers (see Figure 3-9) use heated ribbons to imprint an image onto specially coated paper with the resulting print looking just a like a darkroom-produced photograph.

What's the verdict in terms of choosing a printer? Probably some kind of inkjet would be your best bet. Check out Table 3-1 for a handy comparison of some pros and cons of various printers.
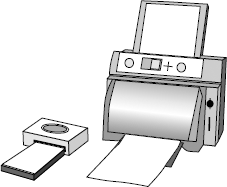
Table 3-1. Printer Comparison
Pro | Con | Cost | Maximum Size Print | |
|---|---|---|---|---|
Inkjets | Low cost; many to choose from; some models print larger than 8″ × 10″ | Slow | $100–$8,000 | Unlimited length with paper rolls: Epson 7800 prints up to 24″ wide; Epson 9800 can print 44″ wide |
Color laser | Faster than inkjet; good for charts and graphics | Cost; not photo-quality | $400–$8,000 | HP LaserJet 5500 laser can print 11″ × 17″ |
Snapshot printers | Convenience | Can't print larger than 4″ × 6″ | $100–$300 | 4″ × 6″ |
Tip
Many entry-level professional digital photographers print with the Epson Stylus Photo 2200 inkjet printer, which can produce gallery-quality prints. Available online from Epson (www.epson.com), this one will set you back about $700. That's not a bad price for a printer that uses seven ink cartridges and prints at resolutions of 2880 dpi, leaving you with knock-your-socks-off art photos. This model produces prints as big as 13″ × 19″. If you attach the printer to its roll feed (it comes with the printer) and roll paper (you have to buy that extra), you can print out a maximum print of 13″ × 44″ inches. The Epson Stylus Photo R1800 model uses eight inks, can print 13″ wide, and produces archival prints with a lifespan over 100 years — all for $549!
Note
Good-quality prints will have your printer drinking ink like a runner drinks water after he's just finished a marathon. Make sure to keep extra ink cartridges on hand!
Kodak, Fuji, HP, Epson, and even Office Depot make and sell their own photographic print paper. Some printers can handle any kind of paper, producing good-quality prints that you can sell. Others produce superior quality prints that your friends and customers will be in awe of, exclaiming, "How'd you do that?!"
You can choose from a variety of media on which to print your art: all kinds of paper, acetate, and even canvas. (Epson offers its PremierArt Water Resistant Canvas to print your photos with certain printers.)
For printing your art on paper, you have a wealth of options (see Table 3-2 for a quick-and-dirty comparison). Paper comes in a number of varieties: ultra-premium glossy, enhanced matte, velvet fine art, and so on. What you use depends upon the type of art you want to create:
Any paper is fine as long as it's inexpensive. Cost is important, especially if you're on a budget and/or want to keep your expenses down. If you want to sell a lot of prints and you plan to do your own framing, you don't need the artsy velvet stuff. Enhanced matte or premium glossy works just fine. Many papers are arranged by thickness. For example, HP glossy papers are categorized by Ultra Premium (the thickest), Premium (next thickness), and so on. 8½″ × 11″ HP paper runs about a dollar a sheet for the Ultra Premium Glossy, the paper that looks most like a photograph. Epson enhanced matte paper produces a stellar print that among some circles has been considered archival. (At any rate, the print will last at least a couple of decades behind glass.) The paper under glass looks mediocre and much less thrilling than HP glossy paper. Set an Epson matte print inside a glass frame and it looks super, while the HP glossy looks great outside the frame but picks up glare behind glass.
Your paper choice is your first shot at getting into a gallery. Epson's enhanced matte is still a fine choice for a show or for a presentation in a gallery. Although the fine glossies look good, they still don't have the ability to take to the ink as a matte paper does when it's applied with an inkjet printer.
Table 3-2. Paper Comparison
Type | Use | Pro | Con | Cost (per 8½″ × 11″ inch sheet) |
|---|---|---|---|---|
Matte | Test copies at low resolution, printer calibration | Cheap | Not much different than regular printing paper | A couple of cents per sheet |
Enhanced matte | Art photography prints at low cost, for selling mass quantities at moderate prices | Lasts a long time; looks great behind glass | Looks like a piece of white cardboard | A little more than 50 cents per sheet |
Glossy | Art photography prints to emulate darkroom photography prints | Looks great outside frame | Susceptible to glare under glass | About $1 per sheet |
Velvet | Fine art prints for high-end galleries | Looks like it belongs in a high-end gallery/museum | Expensive for mass production/multiple copies | About $1.25 per sheet |
Consider these points regarding your choice between glossy and matte paper prints printed on an inkjet printer:
Glossy paper looks great but is inferior to matte paper in print quality. The highest-quality glossy papers that HP, Kodak, and other companies offer are thick. And some brands do have a tendency to roll. HP machines do well with many brands of paper. Higher-quality glossy paper is about a dollar per sheet.
Glossy paper looks better than matte paper — or does it? That great glossy print is what photography is all about, right? Well, yes, no, and maybe. An inkjet print on glossy paper behind glass can display bother-some glare on an image in direct light.
Matte paper fed into wide-format, high-end printers has superior print quality. I recommend using the paper produced by your printer's manufacturer (rather than paper from other paper makers). Other paper might be cheaper, but you probably won't get as good a print, and you could be spelling disaster in the form of clogged ink cartridges and wasted paper. Enhanced matte runs about 50 cents per sheet for 8½″ × 11″ to a dollar and more for 13″ × 19″.
The newer inks don't fade on some matte paper. In fact, the paper degrades over time faster than the ink fades. Note: I'm talking decades here, especially with paper and ink behind UV-coated glass.
You want to set product pricing to be profitable. A print on velvet fine art paper commands more money than one on enhanced matte paper. However, both print types will last a very long time and give outstanding digital prints, which is why both papers would be accepted as saleable items at galleries and consignment stores.
The size of your image that you should make all depends on how powerful your equipment is. If you want to dabble in producing your own framed prints, start small — say, produce 5″ × 7″ prints. This is a good starting size because it's a little bigger than the prints produced by a drug store's film processing machine.
The most common size prints are 4″ × 6″, 5″ × 7″, 8″ × 10″, 11″ × 14″, 11″ × 17″, and 13″ × 19″ inches. Of course, you could opt for smaller or larger, the latter dependent on your printer's maximum printout size. These standard sizes work well because
People are accustomed to these standard print sizes used in film photography.
You can easily find premade frames for these standard sizes.
Smaller size images (4″ × 6″, 5″ × 7″, and 8″ × 10″) can be printed on 8½″ × 11″ paper, which is the size of paper most printer companies make for printing on their printers.
Flatbed scanners — the type that you use to scan prints, negatives, or slides (positives) — are the devices that bring a nondigital image into the digital realm. You're probably familiar with the concept of scanning a hard copy photo print: Just like using your everyday copy machine, you lay the image face-down on a glass plate, close the lid, and press a Copy button. However, instead of getting another hard copy duplicate, that image is stored digitally on your computer. You're not limited to scanning only prints, though. Many scanners can also scan transparencies — negatives and slides (positives) — as well.
Why would you want to use film instead of buying a digital camera? One, scanned images' are still technically digital art because your final product has been digitized. Two, some galleries don't accept digital art: They consider any image printed from a computer to be digital art, even if you started from film.
The main advantage of digitizing film images is that you have a hard copy of your work. This is important because
A hard copy can't be corrupted, like a file on a computer. Hey, life happens. Hard drives hiccup and crash. Sure, you can make CD backups of your images' files, but those won't last forever, either (ten years, maybe — depending on how much the CD is used and handled). No one knows how digital media will perform over long periods of time as a storage system.
Warning
Practice safe print and transparency storage to keep your originals pristine. Dust and scratches are the enemy!
You can scan these images again and again, each into a new file. Your creative possibilities are endless, all starting from the same hard copy original.
Note
Film-processing cost isn't that big of a back-breaker: Developing 35mm film can be really cheap if you order develop-only (no prints). (The price to develop 24 images versus also getting prints drops by more than half: And you still get to know the local photo guy/girl.)
Fortunately, within the realm of digital photography, film still has a role via the scanner. You can scan prints. Better yet, you can scan negatives. And best yet, you can scan slides at really high resolution, making the film-digital divide not a divide at all.
When you go shopping for a scanner, many numbers are thrown at you, with a variety of prices that are associated with them. In their product specifications, computer companies refer to scanner power in dots per inch (dpi). Earlier in this book, you can read about pixels per inch. The difference between ppi and dpi has to do with image resolution and print resolution.
You can set the resolution of the image that you are importing. The number of pixels per inch (ppi) is determined by the number of sensors inside the scanner.
For the sharpest color prints that have been scanned, you need a scanner that creates a a print image with more dpi.
The least expensive scanners have a print resolution of 300 × 300 dpi to about 2400 × 2400 dpi. The Visioneer One Touch 9220 USB FlatBed scanner is priced at under $100 and includes a negative reader. Not bad for a machine that scans at 4800 × 2400 dpi. Also, for about $100, you can get an HP Scanjet 3970 with a negative reader, which scans at 2400 × 2400 dpi.
The most expensive scanners have print resolutions around 4800 × 9600 dpi. Coming in at the low end of expensive — at near $300 — is Microtek's ScanMaker 6100 Pro with a negative reader into which you can slip negatives up to 4″ × 5″. (Don't laugh; I've found more than a couple of these in my old family photos.) Resolution for this workhorse is 6400 × 3200 dpi. A little over $400 will buy the Epson 4990, which scans film and/or transparencies up to 8″ × 10″ at 4800 × 9600 dpi.
Note
Sharpness depends mainly on the quality of the optics used to make the scanner and the brightness of the light source.
The few pages I have to explore using scanners can't really do the topic justice. For more information, I recommend a book dedicated to the subject, such as Scanners For Dummies, Second Edition, by Mark L. Chambers (Wiley).
After you buy your scanner, you need to do two things:
Connect your scanner to your computer using a USB or FireWire device. (See the earlier section, "Storage space," where I discuss external hard drives because scanners use the same connection ports as do other peripherals.) If your scanner and computer have USB 2.0 or FireWire ports, use them — they're much faster than the regular USB.
Download the software to run the scanner. Scanner software comes with a companion CD to download into your computer. You can also (and should) access the scanner manufacturer's Web site to download the software (because it will be more current than the CD in hand), just in case you misplace your CD or its files become corrupted or outdated.
Tip
Read more about scanning in Chapter 12.