Using Photoshop filters to enhance your art photos
Advanced Photoshop special effects
Creating backgrounds in Photoshop
Photoshop has literally hundreds of effects that you can use to manipulate an image. The choices available range from subtle to dramatic to (in my opinion) downright bizarre and surreal. How far you want to take your art photography from its original state is a matter of your taste and the outcome you desire.
For making saleable images that are superior prints, keep in mind the printing process as you move through your editing process. And with the special effects you can achieve with the special effect filters Photoshop offers, you can take a great photograph and tweak or twist it into something spectacular.

Experimenting with an image in Photoshop is a trial-and-error process; you won't really know the potential of the final result until you print the image (discussed in Chapter 17). However, you can twist and turn and tweak an image in Photoshop with a minimum amount of processing. In this chapter, I discuss using filters, creating a new background, and applying color enhancement.
Note
Pick your finest images to tweak in Photoshop. Otherwise, you run the risk that your image won't have clear lines, shapes, and forms. Too, you're likely to get more image degradation when you run it through the various filters and options. Alternatively, if you have an image that you think is beyond salvage, you might just turn it into a gem with Photoshop's more powerful filters.
Filters in Photoshop work differently than those that you attach to your camera's lens (see Chapter 11). With so many choices, menu bars, values, colors, and patterns to choose from, you might wonder why you even need a camera at all! As a photographer, though, I'm sure you want to work with your own images, because in Photoshop, starting with your own exposures can let you create many effects from the same shot.
For example, Figure 15-1 shows before and after pictures of the Photoshop Watercolor filter applied to an architectural landscape in my attempt to bring the golden age of British watercolors back to life. Joseph Mallord William Turner, a British watercolorist, used the same hues as this tweaked landscape during his lifetime evolution from realism to abstraction. To see how to tweak an image like this, see the upcoming section, "Watercolor filter."

Warning
Most of Photoshop's filters are destructive; that is, they make permanent changes to the image. (Adjustment layers, on the other hand, are considered nondestructive because deleting the adjustment layer returns you to the original unchanged image.) Always make a copy of your image file before you start making permanent changes to it. You can make the copy in the Mac Finder or Windows Explorer, or you can use Photoshop's Image
Photoshop has too many filters for me to cite and show the effects of each here. The ones I concentrate on in this chapter are Gaussian Blur, Unsharp Mask, Plastic Wrap, Glowing Edges, Watercolor, Charcoal, Chalk & Charcoal, Graphic Pen, and Emboss. For more detail on these filters, see Photoshop CS Timesaving Techniques For Dummies (Phyllis Davis) and Photoshop CS2 All-in-One Desk Reference For Dummies (Barbara Obermeier), both published by Wiley.
Note
When you apply some of the special effects of image processing programs, sometimes your image appears to have lost detail. Truth be told, some effects look no better than unwanted noise in your digital image. But then again, you might just craft an artistic view that is creative and compelling. Be very selective when using any filter in any image processing program because some filters work better than others. Some are meant to give your picture only a slight edge over the original.
Mies van der Rohe is a famous architectural designer who penned, "Less is more." This truism applies to when you process your images. Using one or two objects/subjects is best as well as using a uniform background. For more on creating flattering backgrounds, see the section, "Making a Background for Your Images."
William Klein's famous photograph of a child, Candy Store, Amsterdam Avenue, New York (1954), was shot with effective blur. This blur effect left some critics referring to his work as photography that didn't meet standards of quality. Check out Klein's photo at
www.masters-of-photography.com/K/klein/klein_candy_store_full.html
You can create a similar kind of blur via Photoshop's Gaussian Blur filter (Filter
To create the effect in Figure 15-2, see in Figure 15-3 the settings that I used. The Radius setting of 4.5 pixels is a good blur value whereby the image has enough contrast to be clear and enough blur to make it soft.

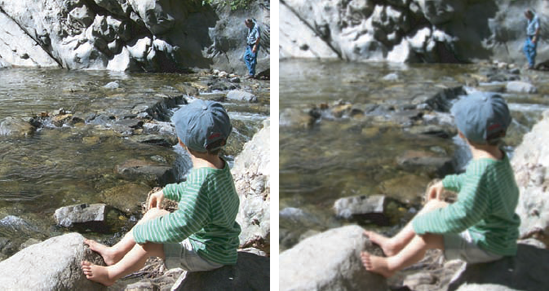
You can also use the Gaussian Blur filter to create intentional softening or blur in the background of your image. The Gaussian Blur filter is an absolute must if you want to produce a killer sky. Use this filter to take a mediocre sky and make it surreal.
Note
The Gaussian Blur filter can also produce a special other-planetlike special effect:
Take an image in which you have a good bit of background sky and clouds.
Select the sky with the Magic Wand tool, using a tolerance setting (located in the top menu bar) of about 20 or 30.
To make continuous multiple selections, hold down the Shift key while selecting. For more about selection techniques, see Chapter 13.
Tip
After your initial tap on your background with the Magic Wand tool, you can choose Select

Choose Filter
The blur becomes more pronounced as you click and drag the slider (in the Gaussian Blur dialog box) to the right. My before and after images are shown in Figure 15-4.
The Unsharp Mask filter (Filter
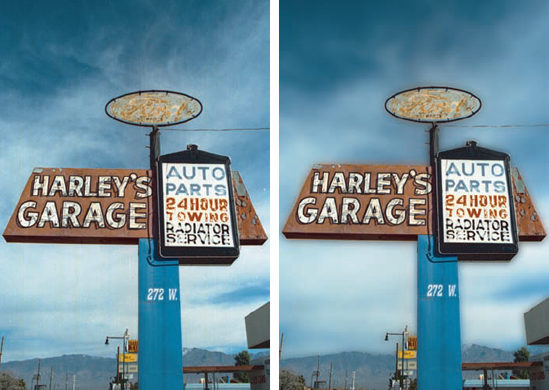
Figure 15-5 shows how I took a shot of a box of dice and tweaked the image using Unsharp Mask to the max for a special effect that looks almost hand-drawn. The animated look of the picture using this drastic tweak can come in handy when you're building a layered cartoon image.

For a special effect such as this, you can move the Amount and Radius sliders to their max values of 500% at 250 pixels at a Threshold of 0. The Unsharp Mask dialog box shows your image as you tweak the values.
Sure, using Unsharp Mask is cool, but take it further. Building on the image in the preceding section, read on to see how you can continue to manipulate this same image in even more dramatic ways. Here I move on to the Plastic Wrap filter. Using this filter makes an image look as if you've wrapped your subjects tightly with, um, plastic wrap. Go figure. You can imagine what that looks like. But here, tweaking this image with the Plastic Wrap filter (an image that has been altered using maximum settings of the Unsharp Mask filter), you get a Surrealist effect. After using the maximum Unsharp Mask settings, you can use the settings shown for the Plastic Wrap filter in Figure 15-6.

Applying the Glowing Edges filter (Stylize

The Watercolor filter application is easy and requires only that you choose Filter
Tip
Sometimes lightening your image by using the sliders in Shadow/Highlight (Image

If watercolors aren't your thing, take an image and convert it to a sketchlike image in Photoshop by using one of the sketch filters. I find this technique effective when starting with an image with lots of shadows, silhouettes from natural sunlight, and lines within architecture. Here are but a few of the Sketch filters that Photoshop offers.
Use the Charcoal filter (Filter
I chose the maximum Detail setting (as well as Charcoal Thickness: 5 and Light/Dark Balance: 37) because I had many dark tones in my original image that, when highlighted, still showed some detail through sketched lines in between the edges.

Use the Chalk & Charcoal filter (Filter
In the picture I chose, one with a darker foreground and lighter background, the lighter tones in back appeared hand-brushed with short diagonal strokes. As a result, in the foreground, the dark tones are medium to dark shades of gray, and the light that breaks through has a soft chalky appearance, as shown in Figure 15-10. Setting Charcoal Area and Chalk Area to 6 and Stroke Pressure to 1 produced this effect.

Use the Graphic Pen filter (Filter

I set the Stroke Direction to Horizontal, emphasizing the foreground and separating it from the fairly mundane background. I stuck to the middle ground (a setting of 10) on the Stroke Length and Light/Dark Balance (59).
Use the Emboss filter (Filter
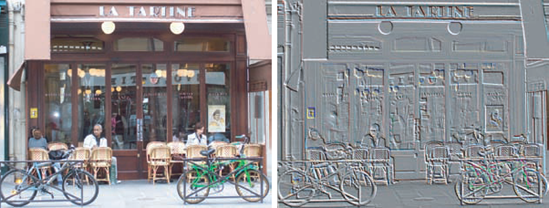
In this case I went for the conservative look of this filter with height values of 9 pixels — any more, and the shadows drift off onto entities by themselves. I tweaked the Angle to 49° because that gave me the most detail in the bikes and people. It also added a little dimension, which is the real deal with this filter. The Amount slider was set to 129% for this image.
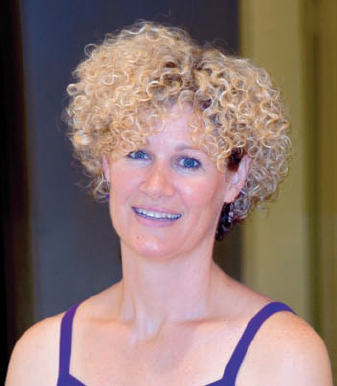
Time to turn up the flame a few notches. Take a very simple image — like an uncluttered basic portrait — and multiply it into a frenzy of color variations and repetition to emulate the work of Andy Warhol, an icon of pop art, who created startling and revolutionary block prints of repeating images. Here's how you can emulate his work via Photoshop from one simple image of your own.
Open a color shoulders-up portrait (a head shot) and then use the Crop tool from the Tools palette to crop the image so it's a tight fit in the frame.
Note
Start with a copy of your original so you still have your source image.
I used Figure 15-13 to begin the process.
(Optional) Choose Image
Desaturating an image is a simple way to change it to look as if it is black-and-white (B&W), clearing the way of all color so that the gray tones can be replaced with the bright, offbeat colors from the Gradient Map.
Choose Image
I clicked the sample gradient in the Gradient Map dialog box and chose the Rainbow gradient, as shown in Figure 15-14. I also selected the Reverse option because I liked the sharpness of the models features with this option.
Figure 15-15 shows what the Gradient Map tool does to your desaturated image.
Save your base image.
You can use this alone (um, stop here) or with other portraits produced in the same way to make a composite of like images (keep reading).
Tip
To make it easier to find when you repeat the image in different color tones, save it in its own specially named folder on your desktop. And if you make a mistake, you can start over again with this image.
Choose Image
Choose Image
Enter 20 for the hue for a picture that appears active on your screen (any picture).
Click OK and save to your project folder.
Repeat Steps 6, 7, and 8, adding 20 to the hue value each time.
My composite contained nine images, so I did this eight times. (I renamed my original and tweaked that one last.) At the end of this, you have nine images open on your desktop. Each time you change the hue by 20, your image takes on a different gradient color. Continue to add 20 to the hue for each picture to reach the max hue (which is 180) after the ninth picture.
See Figure 15-16 to see the Hue/Saturation feature and the files duplicated.
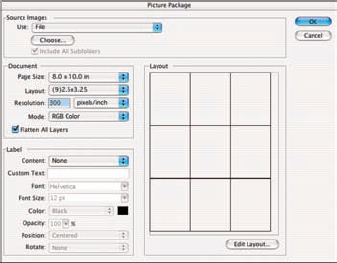
Choose File
Select the page size from the Layout drop-down list (Document section), choose the nine-picture option — (9)2.55×3.25 — as shown in Figure 15-17.
Click the first box (in the upper-right corner of the layout) and then navigate to your first picture.
Repeat Step 12 for the rest of the pictures, selecting a new picture for each box.
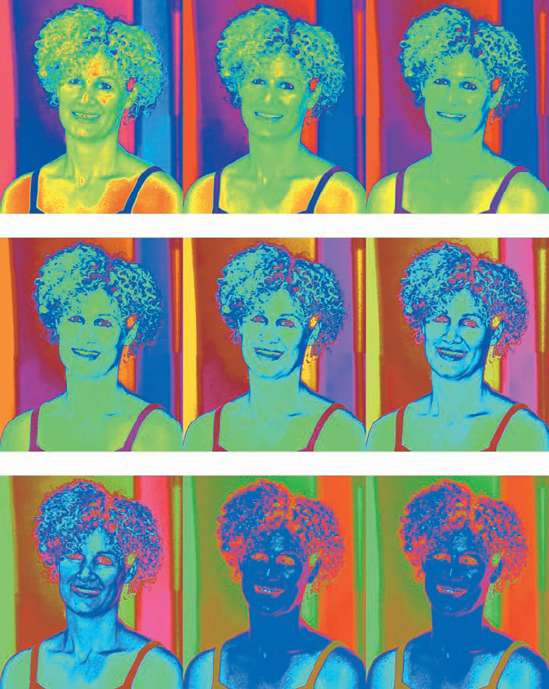
Click OK and wait a few seconds for Photoshop to make your block print.
After the block print is compiled, choose Layer
See Chapter 14 for more information about layers.
Figure 15-18 shows the final result.


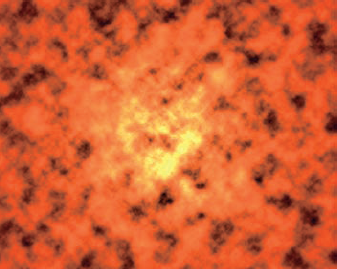
Adding a different or dramatic background to an image can provide you with a whole new look and feel for an image. For example, using a fiery background could add spice to a shot of a supermodel or conjure up feelings of a native ritual when placed behind shots of South Seas' island Tikis. Let Photoshop do the work of cleaning up a less-than-optimal background and insert something artsy.
Note
Here's how to make a fiery background:
Open up a new Photoshop document.
Make the image 10 × 8 and the Resolution 300 pixels/inch.
Press the D key on your keyboard to set the default colors of black (foreground) and white (background).
Choose Filter
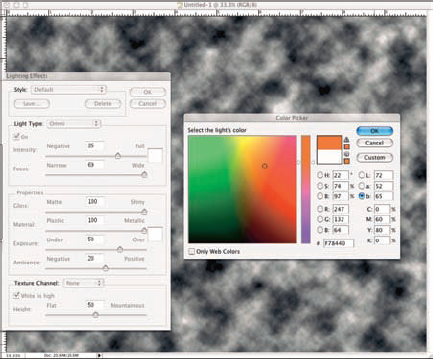
Choose Filter
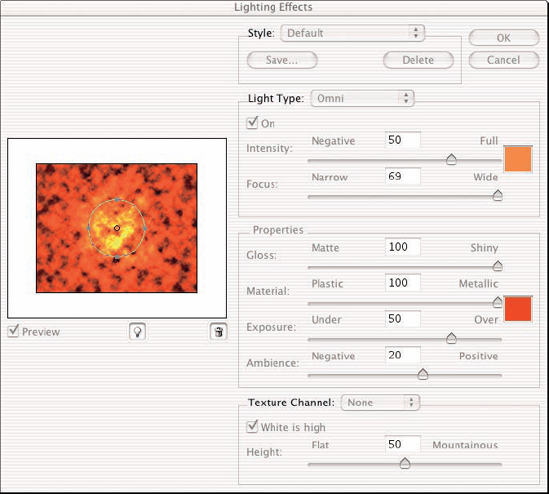
Use this option to spread light among the clouds with a half-dozen slider bars, as shown in Figure 15-19.
Tip
At the top of the Lighting Effects dialog box is a drop-down menu that offers preset slider values for the sliders for the rest of the dialog box along with varying cloud type patterns. In addition, in the Preview window, you can click and drag shapes that Photoshop automatically inserts to redistribute the preselected light values.
In the Lighting Effects dialog box, do the following:
Choose Omni for the type of light (Light Type) to change the light distribution from the default ellipse to a circular pattern.
Click the white color swatch to the right of the Intensity slider to open the Color Picker.
From the Color Picker, choose a red-orange color for your fiery background.
The cloud renders orange with black.
Drag the Intensity slider to 50.
Don't worry about the focus here.
Under Properties, click the white color swatch next to the Material slider and navigate to red in the Color Picker dialog box that opens. (Click around until you get the shade you want.)
Drag the Gloss slider to 100, the Material slider to 100, and the Ambience slider to 20, as shown in Figure 15-20.
The final background image is shown in Figure 15-21. You could place an object — such as a Tiki — in the foreground. (To do so, use layers, as I discuss in Chapter 14.)