
10. Editing Basics
Using a visual interface to edit audio is perhaps the most powerful feature of hard-disk recording: You can use your eyes and ears to manipulate visual representations of audio with remarkable speed and precision. Pro Tools provides many tools for working in this visual environment. With a little practice, you’ll be able to transform raw audio material into streamlined final mixes.
This chapter introduces you to the basics of editing audio in Pro Tools. We’ll start off with some concepts such as non-destructive editing and playback editing. Next, we’ll talk about regions, and we’ll show you several tools for viewing and handling them.
We’ll also get into playlist editing, a feature that lets you create multiple arrangements of audio regions on a single track. And we’ll look at how Edit modes influence the movement of regions in a session. Lastly, we’ll discuss the Edit window’s rulers and the useful memory location feature.
Editing Audio in Pro Tools
Audio editing tasks in Pro Tools are performed in the Edit window. The Edit window provides versatile tools for viewing, auditioning, selecting, and assembling audio. For a detailed description of the Edit window, see Chapter 3: The Mix and Edit Windows.
What is non-destructive editing?
Editing in Pro Tools is non-destructive. This means that when you edit audio, the original audio file saved on disk is not altered. Instead, you perform edits on audio regions, which are visual representations of audio files. Audio regions can be whole audio files or segments of audio files, and are usually displayed during editing as audio waveforms.
Certain Pro Tools commands—such as those that delete or compact audio files—are destructive: They permanently alter the parent audio file on disk. Pro Tools generally warns you before completing a destructive command.
What is playback editing?
You can perform many editing tasks while Pro Tools is in playback mode. This makes the editing process highly interactive and can help increase your editing speed and productivity. You can perform the following tasks during playback:
• Capture, separate, or trim regions
• Place, spot, or rearrange regions
• Add fades or crossfades to audio regions
• Nudge audio regions
• Audition playlists
• Adjust automation data
• Process audio with AudioSuite plug-ins
Some editing commands (such as those for setting audio inputs, outputs, and sends) cannot be performed during playback.
Understanding Regions
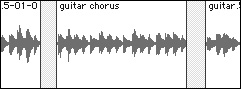
An audio region is a visual representation of a parent audio file stored on disk. A region can represent a whole audio file (Figure 10.1) or a segment of an audio file (Figure 10.2). When track view is set to Waveform, regions are displayed as audio waveforms. There is no limit to the number of regions you can have in a track playlist.
Figure 10.1. A whole-file audio region.

Figure 10.2. A region representing a segment of an audio file.
When you edit audio, you’re editing the regions that represent the audio, not the actual audio file. The original audio file is protected and remains unchanged on your hard disk. Regions can be edited, copied, looped, grouped, and arranged in any number of ways to create new parts, sections, or song structures.
Region types
Pro Tools has various types of regions, including:
Whole-File Audio Regions: These are created when you record or import audio, consolidate existing regions, or process audio non-destructively with an AudioSuite plug-in. Whole-file audio regions represent the entire audio file on hard disk, and are displayed in bold letters in the Regions list (Figure 10.3).
Figure 10.3. Whole-file audio regions are represented in bold in the Regions list.
![]()
When you record audio into Pro Tools, it appears initially as a whole-file audio region. When you select segments of a whole-file audio region, you create new regions that reference only the selected portion of the parent audio file.
User-Defined Regions: These regions are created when you perform certain tasks, such as recording, capturing, separating, or consolidating audio regions. They are also created when you trim a whole-file audio region or rename an existing region.
Auto-Created Regions: These are automatically created when you edit regions or punch-record over existing regions. You can turn auto-created regions into user-defined regions by renaming them.
Offline Regions: These are regions whose parent audio file cannot be located when you open a session. Offline regions appear italicized and dimmed in the Regions list (Figure 10.4) and as light-blue regions with italicized names in a track’s playlist. You can edit offline regions, but you cannot process them with AudioSuite plug-ins.
Figure 10.4. Offline regions are italicized and dimmed in the Regions list.
![]()
Stereo Regions: These are displayed as single regions in the Regions list. Click the triangle next to the multichannel file name to see its individual mono channels (Figure 10.5).
Figure 10.5. A stereo region displaying its associated mono regions.
![]()
Region Groups: New in Pro Tools 7, a region group is a collection of audio regions and/or MIDI regions referenced by a single region group file (.rgrp file format). Region groups let you handle and perform some edits on multiple regions in one move. Region group files are displayed as single regions in the Regions list. Click the triangle next to the region group file icon in the Regions list to see the individual regions contained in the region group file (Figure 10.6). You can place region group files on audio, MIDI, and instrument tracks.
Figure 10.6. Click the triangle next to a region group file to view the individual regions contained in the region group.

Viewing Regions
The Edit window provides several features for viewing regions and their attributes.
Setting the track view
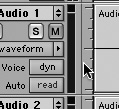
The track view determines which type of data is displayed in a track’s playlist. You can select from Waveform, Volume, Pan, Mute, and Blocks. You can also view automated plug-in parameters. In most cases, you’ll perform edits using Waveform view (Figure 10.7).
Figure 10.7. A Waveform track view.

When track view is set to Volume, Pan, or Mute, a line graph representing the data appears against a dimmed waveform view. These line graphs include breakpoints, which you can edit by dragging with the Grabber tool. You can also draw new breakpoints with the Pencil tool (Figure 10.8).
Figure 10.8. Volume track view. Use the Grabber tool to drag the breakpoints on the line graph.

When track view is set to Blocks, audio regions are displayed as empty blocks bearing the region’s name. Blocks view is less CPU-intensive and can help accelerate screen redraws during playback scrolling.
To set the track view
1. Click the Track View selector.
The Track View pop-up menu appears (Figure 10.9).
Figure 10.9. The Track View pop-up menu.

2. Choose a track view from the pop-up menu.
• To toggle between Waveform and Volume track views, click in the track you want to toggle. (If you want to toggle multiple tracks, Shift-click the additional tracks.) Then press Control-minus (Macintosh) or Start-minus (Windows) on the keyboard.
Setting the track height
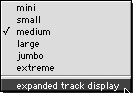
You can display tracks in the Edit window at six different heights: Mini, Small, Medium, Large, Jumbo, and Extreme. Large track heights are useful for precise editing; smaller track heights help conserve screen space.
To set the track height
1. Click the arrow next to the Track View selector (Figure 10.10).
Figure 10.10. Click the arrow button to open the Track Height pop-up menu.
![]()
or
Click in the area to the right of the track controls (Figure 10.11).
Figure 10.11. Click to the right of the track controls to open the Track Height pop-up menu.
The Track Height pop-up menu appears.
2. Select a track height from the pop-up menu (Figure 10.12).
Figure 10.12. The Track Height pop-up menu.

• Pro Tools provides an expanded track display, which lets you view volume, mute, and pan data separately for each channel of a stereo pair (Figure 10.13). To turn on expanded track display for a stereo track, select Expanded Track Display in the Track Height pop-up menu (Figure 10.14).
Figure 10.13. The expanded track display lets you view data separately on both tracks of a stereo pair.
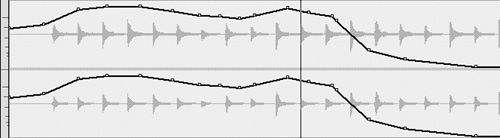
Figure 10.14. Choose Expanded Track Display from the Track Height pop-up menu on a stereo track.
Displaying region names and time locations
Region names and time locations are displayed in the upper-left corner of each region. Pro Tools lets you turn these displays on and off to prevent interference with waveform editing.
To display region names
• Choose View > Region > Name (Figure 10.15).
Figure 10.15. To display the region name, choose View > Region > Name.
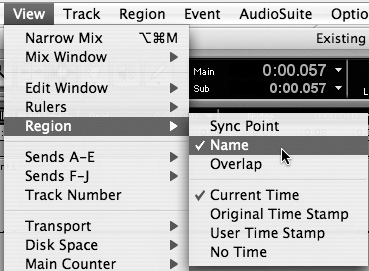
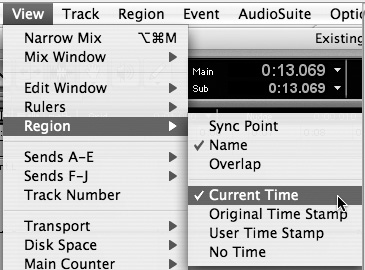
To display region time locations
1. Choose View > Region.
2. Select one of the following time location display options (Figure 10.16):
Current Time: This option displays the start and end times of regions.
Original Time Stamp: This option displays each region’s original time stamp (the time location of the region when it was first created).
User Time Stamp: This option displays each region’s user time stamp. The user time stamp is identical to the original time stamp by default, but you can redefine it using the Time Stamp Selected command.
No Time: This option disables the display of region times.
Figure 10.16. To display region time locations, choose View > Region and then select from the time location display options.
Zooming
The Edit window gives you several tools for quickly zooming in and out on audio regions. These tools include Horizontal and Vertical Zoom buttons, the Zoomer tool, Zoom Preset buttons and Zoom Toggle. Learning these zooming features will help make editing fast and painless.
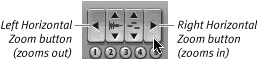
Using the Horizontal Zoom Buttons
The Horizontal Zoom buttons let you zoom in and out in the horizontal direction on audio tracks.
To zoom in and out horizontally on all tracks
• To zoom in, click the right Horizontal Zoom button (Figure 10.17). To zoom out, click the left Horizontal Zoom button.
Figure 10.17. Horizontal Zoom buttons.
or
• To zoom in, press Command-] (Macintosh) or Control-] (Windows). To zoom out, press Command-[ (Macintosh) or Control-[ (Windows).
Using the Vertical Zoom Buttons
The Vertical Zoom buttons let you zoom in and out in the vertical direction on audio and MIDI tracks.
To zoom in and out vertically on all tracks
• To zoom in, click the top Vertical Zoom button. To zoom out, click the bottom Vertical Zoom button (Figure 10.18).
Figure 10.18. Vertical Zoom buttons.

or
• To zoom in, press Command-Option-] (Macintosh) or Control-Alt-] (Windows). To zoom out, press Command-Option-[ (Macintosh) or Control-Alt-[ (Windows).
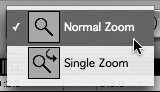
Using the Zoomer Tool
The Zoomer tool lets you zoom in and out of a selected track point or a selected track area. The Zoomer tool offers two modes:
• Normal Zoom mode: In this mode the Zoomer tool remains selected after zooming.
• Single Zoom mode: In this mode the currently selected Edit tool automatically returns after zooming.
To set the Zoomer tool mode
1. Click the Zoomer tool (Figure 10.19).
Figure 10.19. The Zoomer tool.
![]()
2. From the Zoomer tool pop-up menu, select Normal Zoom mode or Single Zoom mode (Figure 10.20).
Figure 10.20. Click and hold on the Zoomer tool to select a Zoomer tool mode.
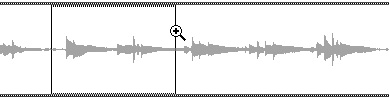
To zoom around a selected track point
1. Select the Zoomer tool.
2. Click once on the desired point within the track.
All tracks are zoomed in one level and centered around the point.
3. To zoom out one level, Option-click (Macintosh) or Alt-click (Windows) with the Zoomer tool.
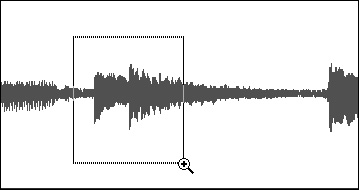
To zoom into a selected track area
1. Select the Zoomer tool.
2. To zoom horizontally, drag with the Zoomer tool in the track’s playlist (Figure 10.21).
Figure 10.21. To zoom in horizontally, drag the Zoomer in any track.
or
To zoom horizontally and vertically, press Command (Macintosh) or Control (Windows) while dragging in the track’s playlist (Figure 10.22).
Figure 10.22. To zoom in vertically and horizontally, press Command (Macintosh) or Control (Windows) while dragging the Zoomer in any track.
Using Continuous Zoom
Pro Tools 7 lets you zoom in and out on tracks continuously in both horizontal and vertical directions. When using continuous zoom, zoom levels expand and contract smoothly. Continuous zoom is helpful for maintaining your orientation when making precise edits.
To zoom continuously on an individual track
1. Select the Zoomer tool.
2. Press Control (Macintosh) or Start (Windows) while dragging vertically in the track’s playlist.
To zoom continuously on all tracks simultaneously
1. Select the Zoomer tool.
2. Press Control-Shift (Macintosh) or Start-Shift (Windows) while dragging vertically across multiple tracks.
or
Press Control (Macintosh) or Start (Windows) while dragging horizontally in the track’s playlist.
All visible tracks zoom to the same zoom level.
Using Zoom Presets
The Edit window gives you five user-definable zoom preset buttons.
To store a zoom preset
1. Navigate to a zoom level that you want to store.
2. Command-click (Macintosh) or Control-click (Windows) one of the five zoom preset buttons (Figure 10.23).
Figure 10.23. To store a zoom preset, Command-click (Macintosh) or Control-click (Windows) on a zoom preset button.

The preset button flashes to indicate the zoom is being stored, and then remains highlighted.
• Click a zoom preset button.
or
• While pressing Control (Macintosh) or Start (Windows), press the zoom preset number on the keyboard.
• To zoom in on a selection, press Option-F (Macintosh) or Alt-F (Windows).
• To zoom so that all regions are visible in the Edit window, do one of the following:
• Double-click the Zoomer tool in the toolbar.
• Press Option-A (Macintosh) or Alt-A (Windows).
• Press the F5 key twice.
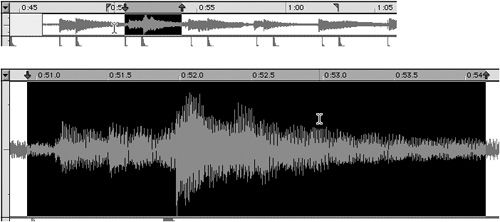
• To toggle between zoomed-in and zoomed-out views of a track selection, press Control-E (Macintosh) or Start-E (Windows). The selection is zoomed in to fill the Edit window, and tracks containing the selection are set to Large view (Figure 10.24).
Figure 10.24. To toggle between zoomed-in and zoomed-out views of a track selection, press Control-E (Macintosh) or Start-E (Windows).
Using Zoom toggle
The Zoom Toggle button lets you switch back and forth between the current zoom view and a different user-defined zoom view. This is useful for making edit selections, examining glitches, or for any other task that requires quickly zooming in and out.
To define a Zoom Toggle view
1. Make an edit selection.
2. Click the Zoom Toggle button. The Zoom Toggle button is highlighted, indicating it is enabled.
3. Adjust the following Zoom Toggle parameters as desired: Track Height, Vertical Zoom, Track View, and Grid.
4. Click the enabled (lit) Zoom Toggle button to store the new Zoom Toggle view and return to the previous zoom view.
5. Click the Zoom Toggle button to recall your new Zoom Toggle view.
To use Zoom Toggle
1. Make a selection on one or more tracks.
2. Click the Zoom Toggle button (Figure 10.25).
Figure 10.25. The Zoom Toggle button.
![]()
or
Press Control-E (Macintosh) or Start-E (Windows).
or
With Commands Focus enabled, press E.
The selection is zoomed to the stored Zoom Toggle view.
Working with Playlists
An edit playlist is a snapshot of a track’s current arrangement of regions. Pro Tools lets you create multiple edit playlists on each track, and switch quickly between them using the Playlist selector. This gives you the flexibility to experiment with different region-editing ideas. An edit playlist can contain a single region or multiple regions.
When you create a new track, its playlist is empty until you record or import audio onto it, or drag a region to it from the Regions list. It’s a good practice to work from a duplicate of a track’s original playlist: This preserves the track’s region arrangement and frees you to try new edits.
To duplicate a track’s current playlist
1. Click the track’s Playlist selector.
2. Choose Duplicate from the pop-up menu (Figure 10.26).
Figure 10.26. Choose Duplicate from the Playlist selector pop-up menu.

3. Enter a name for the duplicated playlist (Figure 10.27).
Figure 10.27. Enter a name for the duplicated playlist.
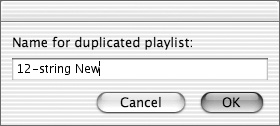
4. Click OK.
The duplicated playlist appears and the track’s name is changed to the name of the new playlist.
You can also create a new playlist, and then record or drag regions to it.
To create a new playlist
1. Click the track’s Playlist selector.
2. Choose New from the pop-up menu (Figure 10.28).
Figure 10.28. To create a new playlist, choose New from the Playlist selector pop-up menu.

3. Enter a name for the new playlist menu.
4. Click OK.
An empty playlist appears in the track.
1. Click the track’s Playlist selector.
2. Choose an existing playlist from the pop-up menu (Figure 10.29).
Figure 10.29. Choose a playlist from the pop-up menu.
The selected playlist appears in the track and the track’s name is updated to that of the selected playlist.
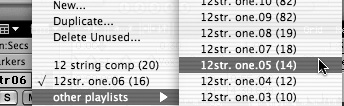
To delete a playlist
1. Click the track’s Playlist selector.
2. Choose Delete Unused from the pop-up menu.
3. Select the playlist you want to delete (Figure 10.30).
Figure 10.30. The Delete Unused Playlists dialog box.
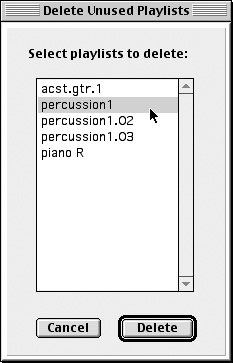
4. Click OK.
The selected playlist is deleted. Caution: You cannot undo this action.
• You can rename a playlist by renaming the track to which it is assigned: Double-click the track’s name, enter a new name, and click OK.
• Each track also has a single automation playlist for each automated track control (such as volume, mute, and pan). For more information on automation playlists, see Chapter 16: Automating a Mix.
Using the Regions List
When you record, import, or create a new audio region during editing, it appears in the Regions list (Figure 10.31). This list lets you manage the flow of audio regions in and out of a session. Whole-file audio regions are displayed in bold, and stereo and multichannel regions can be expanded to view individual channels. You can drag regions from the list directly onto any audio track.
Figure 10.31. The Regions List.
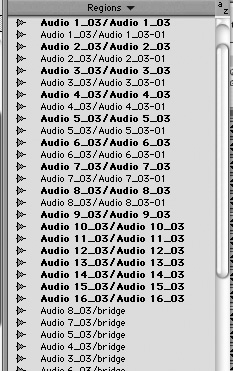
In Pro Tools 7, the Regions list also displays MIDI regions and region group files.
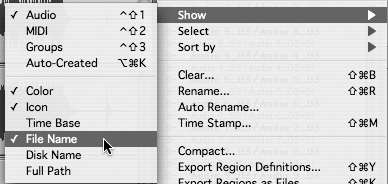
The Regions list pop-up menu provides options for displaying, sorting, finding, and selecting audio regions. You can also use the list to import, export, compact, and delete audio files on disk. For information on managing audio files, see Part III: Audio File Management.
Displaying audio file info
The Regions list lets you display information about audio regions, including region names, color coding, timebase, and information about a region’s parent audio file, including the parent audio file’s name, the disk name on which it resides, and the file’s full pathname.
To display audio file info
1. Click the Regions list pop-up menu (Figure 10.32).
Figure 10.32. The Regions list pop-up menu.

2. Choose Show.
3. Select from the following (Figure 10.33):
• Color
• Icon
• Time Base
• File Name
• Disk Name
• Full Path
Figure 10.33. Choose an option from the Regions list pop-up menu to display information about a region’s parent audio file.
• DigiBase’s Project browser (and other DigiBase browsers) displays detailed audio file data, including sample rate, bit depth, file format, date created, date modified, and time stamp. You can also audition audio files and import them using drag and drop directly into the Regions list of the current session. Choose Window > Project. For more information on DigiBase browsers, see Chapter 9: Managing Audio Files with DigiBase.
Sorting regions
The Regions list provides options for sorting audio regions. These options can help you manage regions, which can become quite numerous during a session. You can sort audio regions by name, length, time stamp, start time, and end time.
You can also sort regions by their parent audio file attributes, including creation date, disk name, and track format (stereo or mono).
To sort regions
1. Click the Regions list pop-up menu.
2. Choose Sort by.
3. Select a sorting parameter (Figure 10.34).
Figure 10.34. The Regions list lets you select options for sorting audio regions.
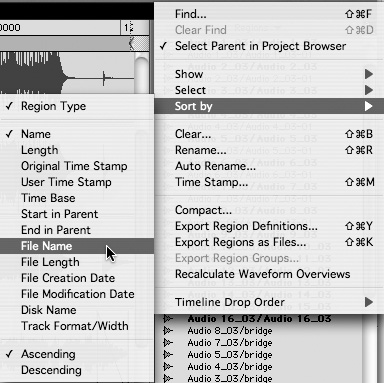
Audio regions are displayed in order according to the sorting parameter.
• To reverse the order of the displayed regions repeat steps 1 and 2 above, and then select Ascending or Descending from the pop-up menu.
Finding regions
The Regions list provides a Find command, which displays regions that match a word or phrase.
To find regions
1. Click the Regions list pop-up menu and choose Find (Figure 10.35).
Figure 10.35. Choose Find from the Regions list pop-up menu.

or
Press Command-Shift-F (Macintosh) or Control-Shift –F (Windows).
The Find Regions dialog box appears.
2. Type the region name or portion of the region name you want to find (Figure 10.36).
Figure 10.36. Type the name of the region you want to find in the Find Regions dialog box.
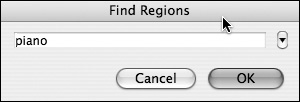
3. Click OK.
All regions matching the specified name appear in the Regions list. The name of the search also appears at the top of the list, indicating the found regions (Figure 10.37).
Figure 10.37. When displaying regions with the Find command, the name of the search appears at the top of the Regions list.

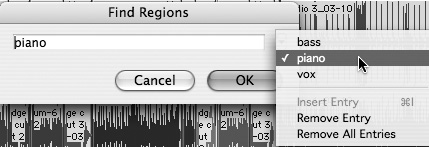
• The Find Regions dialog box retains a history of your previous searches. Click the small arrow next to the search field to view your Find History, remove entries, or insert entries (Figure 10.38). Use this feature to minimize retyping your searches.
Figure 10.38. To view your search history in the Find Regions dialog box, click the small arrow next to the search field.
Selecting in the Regions list
You can select single or multiple regions in the Regions list and drag them to tracks.
To select a single region
• Click the region name that you want to select in the Regions list.
The selected region is highlighted and can be dragged to a track.
To select multiple regions
• Command-click (Macintosh) or Control-click (Windows) each region that you want to select (Figure 10.39).
Figure 10.39. To select multiple regions, Command-click (Macintosh) or Control-click (Windows) their names in the Regions list.

or
1. Move the cursor to the left of the region names until the Marquee cursor appears
2. Command-click (Macintosh) or Control-click (Windows) to the left of each region that you want to select.
The selected regions are highlighted and can be dragged to tracks.
To select a range of regions
1. Move the cursor to the left of the region names until the Marquee appears.
2. Drag the Marquee over the regions you want to select (Figure 10.40).
Figure 10.40. Drag the Marquee in the Regions list to select multiple regions.

or
Shift-click to the left of the first and last regions that you want to select.
All regions in the selected range are highlighted and can be dragged to tracks.
1. Click the Regions list pop-up menu.
2. Choose Select > Unused (Figure 10.41).
Figure 10.41. To select unused regions in a session, choose Select > Unused in the Regions list pop-up menu.
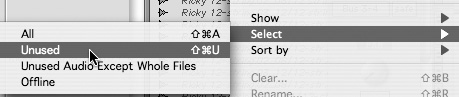
All unused audio regions are highlighted and can be dragged to tracks or cleared from the Regions list.
• You can also select audio regions using the keyboard. To do this, click and hold on the a-z button in the upper right of the Audio Regions list pop-up menu (Figure 10.42), and then type the first few letters of the region name. The region name is highlighted and can be dragged to a track.
Figure 10.42. You can select regions by clicking the a-z button, and then typing the first few letters of the region’s name.
![]()
Clearing audio regions
You can remove unwanted audio regions from the Regions list using the pop-up menu. Periodically clearing unused regions will help you keep the Regions list manageable.
To clear unused audio regions
1. Click the Regions list pop-up menu.
2. Choose Select > Unused.
All unused regions are highlighted.
3. Choose Clear from the Regions list pop-up menu (Figure 10.43).
Figure 10.43. To remove regions from the Regions list, choose Clear from the Regions list pop-up menu.

The Clear Regions dialog box appears.
4. Click Remove (Figure 10.44).
Figure 10.44. The Clear Regions dialog box.
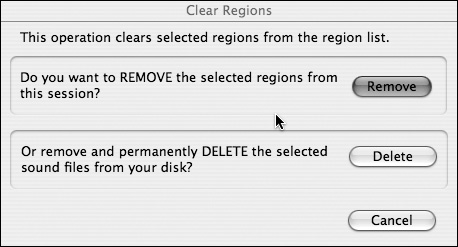
All unused regions are removed from the Regions list.
• The parent audio files of a removed audio region remain untouched on disk.
• Caution: You cannot undo the Remove command.
Using Multiple Undo
The Edit menu’s Undo command lets you undo up to 32 previous sequential operations. Undo lets you quickly return to earlier editing configurations. After an operation is undone, you can use the Redo command to return to a later editing configuration.
Certain Pro Tools commands will clear the undo queue, such as those for deleting a track or playlist, or for clearing a region from the Regions list. Pro Tools will warn you before it clears the undo queue.
To undo the last operation
• Choose Edit > Undo (Figure 10.45).
Figure 10.45. To undo the last operation, choose Edit > Undo.

or
• Press Command-Z (Macintosh) or Control-Z (Windows).
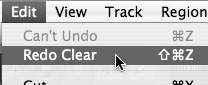
To redo the last undone operation
• Choose Edit > Redo (Figure 10.46).
Figure 10.46. Choose Edit > Redo to recall the last undone operation.
or
• Press Shift-Command-Z (Macintosh) or Shift-Control-Z (Windows).
• If you’re low on RAM, reducing the levels of undo can help save memory. Choose Setup > Preferences, and click the Editing tab. In the Levels of Undo field, enter a value between 1 and 32 (Figure 10.47). Click Done.
Figure 10.47. Choose Setup > Preferences > Editing and then input up to 32 levels of undo.
![]()
Using the Undo History Window
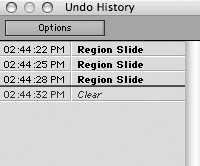
The Undo History window displays the current queue of undoable and redoable operations. You can use the Undo History window to return your editing session to a previous state.
To show the Undo History window
• Choose Window > Undo History (Figure 10.48).
Figure 10.48. To show the Undo History window, choose Window > Undo History.
The Undo History window appears (Figure 10.49). Undoable operations appear in bold. Redoable operation appear in italics.
Figure 10.49. The Undo History window.
To undo an operation in the Undo History window
• Click the operation you want to undo in the Undo History window.
The selected operation is undone, as well as all operations in the queue performed after the selected operation.
To redo an operation in the Undo History window
• Click the operation you want to redo in the Undo History window.
The selected operation is redone, as well as all operations in the queue performed before the selected operation.
Setting Edit Modes
Pro Tools has four Edit modes: Shuffle, Spot, Slip, and Grid. These modes control how regions are moved and placed in the Edit window. Using the appropriate Edit mode for a task can help make editing faster and more efficient.
To set the Edit mode
• Select one of the four Edit mode buttons in the upper-left corner of the Edit window (Figure 10.50).
Figure 10.50. The Edit mode buttons in the upper-left corner of the Edit window.
![]()
Edit modes affect the movement and placement of regions as follows:
Shuffle: In Shuffle mode, adjacent audio regions automatically snap together. This is useful for removing a segment from a continuous piece of audio—such as removing a section from a song. When a new region is created or placed on a track, it automatically snaps to the region to its left.
In Shuffle mode, you can rearrange the order of regions on a track, but regions can’t overlap. When you change a region’s start or end time, the other regions on the track are moved accordingly.
Spot: Spot mode lets you move a selected region to an exact time location. When you select a region in Spot mode, the Spot dialog box appears (Figure 10.51). You can then enter a precise start time for the selected region.
Figure 10.51. The Spot dialog box.
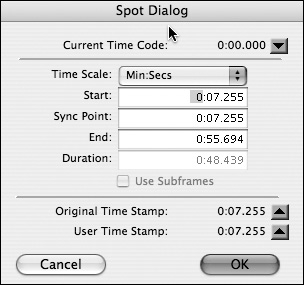
Spot mode is useful for precision tasks such as synchronization: You can enter SMPTE frame locations (HD only) or another time format, capture an incoming timecode address, or use a region’s time stamp as a reference point.
Slip: Slip mode lets you move regions freely in a track with few constraints. Unlike Shuffle mode, Slip mode lets you overlap regions or separate regions with space (silence).
In Slip mode, you can use edit tools—the Trimmer, Selector, Grabber, and Pencil—without time restrictions. This freedom makes Slip mode ideal for use in most editing situations.
Grid: Grid mode lets you snap selected regions to a user-defined time grid. This mode is useful for placing regions cleanly on the beat. It’s also good for making precise Edit and Timeline selections.
There are two types of Grid mode:
• Absolute Grid mode: Absolute Grid mode snaps a selection cleanly to the grid.
• Relative Grid mode: Relative Grid mode moves selections by the current grid unit. Relative mode is useful when working with regions that fall between boundaries.
To select Grid mode
• Click the Grid mode button and select Absolute or Relative Grid mode (Figure 10.52)
Figure 10.52. Click the Grid mode button to select Absolute or Relative Grid mode.
![]()
To set the grid size, choose a time in the Grid Value pop-up menu (Figure 10.53).
Figure 10.53. The Grid Value pop-up menu.

To display grid lines in the Edit window, choose Setup > Preferences. Click the Display tab. Select “Draw Grids in Edit Window.” You can also toggle the display of grid lines on and off by clicking the current Timebase ruler (Figure 10.54).
Figure 10.54. Toggle the display of grid lines on and off by clicking any Timebase ruler.
For more information on using Edit modes, see Chapter 12: Working with Regions.
• To switch between Grid mode and Slip mode while dragging a region, press the Command key (Macintosh) or the Control key (Windows).
• The Grid Value pop-up menu contains an option for Regions/Markers. This lets you snap a region to other region locations (start, end, and sync points), markers, and track selections.
• To switch between Edit modes, use the following function keys: F1 (Shuffle), F2 (Slip), F3 (Spot), F4 (Grid).
Using Rulers
Pro Tools provides two types of track rulers: Timebase and Conductor. These rulers appear directly above the track playlists, along the top of the Edit window (Figure 10.55).
Figure 10.55. The Edit window’s Timebase and Conductor rulers.

Timebase rulers provide a timing reference for track material. You can also use them to make Edit selections of track material or Timeline selections of record and play ranges. When you make a selection in a Timebase ruler, all tracks in the Edit window are selected.
Pro Tools LE displays the following Timebase rulers:
• Bars:Beats
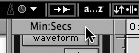
• Minutes:Seconds
• Samples
Conductor rulers indicate important track locations within a session. Pro Tools provides the following Conductor rulers:
• Tempo
• Meter
• Markers
The Tempo and Meter rulers indicate locations where tempo or meter (time signature) changes occur (Figure 10.56). You can use these rulers to map out a session’s tempo and meter fluctuations. This is useful for aligning track material with a fixed time reference such as bars and beats.
Figure 10.56. The Tempo and Meter rulers.
![]()
The Markers ruler displays user-defined memory locations.
• Choose View > Rulers > All.
or
1. Click the Ruler View selector (Figure 10.57).
Figure 10.57. The Ruler View selector.
![]()
2. Choose All.
All Timebase and Conductor rulers appear along the top of the Edit window.
To display the Minutes:Seconds ruler (or any other specific ruler)
• Choose View > Rulers > Minutes:Seconds (Figure 10.58) (or any other ruler you want to display).
Figure 10.58. Choose View > Rulers > Minutes:Seconds (or another ruler) to display the selected Timebase rulers.

To remove a ruler from the display
• Option-click the ruler’s name to the left of the ruler display (Figure 10.59).
Figure 10.59. Option-click a ruler’s name to remove it from the ruler display.

or
1. Click the Ruler View selector.
2. Deselect the ruler you want to hide.
To display only the Main Time Scale in the ruler
• Choose View > Rulers > None.
or
1. Click the Ruler View selector.
2. Choose None.
• You can change the order of the ruler display by clicking and dragging on the name of any ruler.
Setting the Main Time Scale
The Main Time Scale (or Main Timebase Ruler) is the primary time format of a session. The Main Time Scale determines the time format used for the following:
• The Main Time Counter in the Transport and Edit windows
• Start, end, and length values
• Pre- and post-roll values
• Grid and Nudge values
You can set the Main Time Scale to the following time formats:
• Bars:Beats: Displays Main Time Scale in bars and beats as in musical notation.
• Minutes:Seconds: Displays the Main Time Scale in minutes, seconds, tenths, hundredths, and thousandths of a second.
• Samples: Displays the Main Time Scale in samples for precise sample-level editing.
• Time Code: Displays the Main Time Scale in SMPTE frames. Pro Tools supports frame rates of 23.976, 24, 255, 29.97 Drop, 30 Non-Drop, and 30 Drop frames per second (HD and LE with DV Toolkit 2 systems only).
• Feet+Frames: Displays the Main Time Scale in feet and frames for audio sync to 35 millimeter film format (HD and LE with DV Toolkit 2 systems only).
To set the Main Time Scale
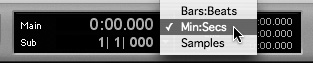
• In the Location Indicators window click the arrow next to the Main Time Scale counter (Figure 10.60).
Figure 10.60. To set the Main Time Scale, click the arrow next to the counter in the Location Indicators window and choose a time format.
The Main Time Scale changes to the selected time format.
For information on the Main Time Scale, see the Location Indicators section in Chapter 3: The Mix and Edit Windows or The Pro Tools Reference Guide.
Using Memory Locations
Pro Tools lets you set memory locations, which store information about specific edit points and selected track ranges. Memory locations are useful for recalling important locations in a session and quickly navigating to them.
You can recall memory locations by clicking them in the Memory Locations window (see Recalling memory locations, later in this chapter).
Setting memory locations
When you set a memory location, the New Memory Location dialog box appears (Figure 10.61). The New Memory Location dialog box lets you set time properties, place location markers, and store selections and other general properties for each memory location.
Figure 10.61. The New Memory Location dialog box.

Time properties determine whether a memory location represents a specific edit point or a selected range. You can choose the following time properties in the New Memory Location dialog box:
Marker: This property recalls a specific time location in a session. When you create a Marker memory location, a yellow marker appears in the Markers ruler (Figure 10.62).
Figure 10.62. A Marker memory location in the Markers ruler.
![]()
You can choose a timeline reference for each memory location using the Reference selector in the New Memory Location dialog box. Memory locations referenced to Bars:Beats appear as yellow chevrons in the Markers ruler, whereas those referenced to Absolute appear as yellow diamonds (Figure 10.63).
Figure 10.63. Memory locations referenced to Bars:Beats appear as yellow chevrons in the Markers ruler. Those that are referenced to Absolute appear as yellow diamonds.
![]()
Selection: This property recalls a selected track range. Create a Selection memory location if you want to return to a selected record or play range.
None: This property recalls no time information. Memory locations created without a time property are called General Properties memory locations.
The New Memory Location dialog box also lets you save the following general properties with each memory location:
Zoom Settings: This recalls horizontal and vertical zoom values for audio and MIDI tracks. Zoom settings are useful for quickly moving between zoomed-in and zoomed-out track views.
Pre/Post-Roll Times: This recalls pre- and post-roll times. You can use this in conjunction with a Selection memory location to recall the pre- or post-roll values of a selected track range.
Track Show/Hide: This recalls which tracks are hidden in a session. You can use this to recall different groups of tracks during editing or mixing.
Track Heights: This recalls all of the session’s current track heights. This is useful in conjunction with zoom settings for quickly switching between different track views.
Group Enables: This recalls which Edit and Mix groups are enabled. Use this option if you want to recall a particular group for editing or mixing.
To create a Marker memory location
1. Configure any settings you want to save along with the Marker memory location (such as zoom settings, pre/post-roll times, Show/Hide tracks, track heights, or Edit and Mix Group enables).
2. Select Options > Link Edit and Timeline Selection. (This makes all selections apply to both Timebase rulers and track playlists.)
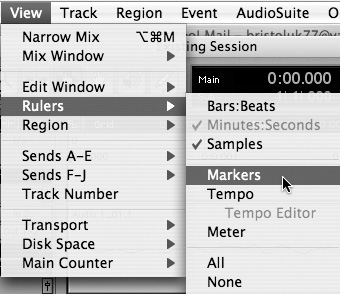
3. Select View > Rulers > Markers (Figure 10.64).
Figure 10.64. To display the Markers ruler, select View > Rulers > Markers.
4. Click with the Selector tool at the desired location in any track or ruler.
5. Click the Marker/Memory Location button (Figure 10.65).
Figure 10.65. Click the Marker/Memory Location button to the left of the Markers ruler to create a Marker memory location at the current track location.
![]()
or
Press Enter on the numeric keypad.
or
Control-click (Macintosh) or Start-click (Windows) in the Markers ruler at the desired location.
The New Memory Location dialog box appears.
6. Select the Marker option.
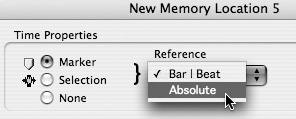
7. Click the Reference selector and select Bar | Beat or Absolute (Figure 10.66).
Figure 10.66. Click the Reference pop-up menu to choose a time reference (Bar | Beat or Absolute) for a new memory location.
8. Enter a name for the new marker and select any general properties you want to save with the marker.
9. Click OK.
A marker appears at the designated location in the Markers ruler and in the Memory Locations window.
• To move a marker to a new location, drag it to the new location in the Markers ruler (Figure 10.67).
Figure 10.67. Drag a marker to move its location in the Markers ruler.
![]()
or
Click with the Selector in the Markers ruler (or any Timebase ruler or track). In the Memory Locations window or in the Markers ruler, Control-click (Macintosh) or right-click (Windows) the Marker memory location you want to redefine. Enter a new name for the marker. Click OK.
To create a Selection memory location
1. Configure any settings you want to save with the Marker memory location (such as zoom settings, pre/post-roll times, Show/Hide tracks, track heights, or Edit and Mix Group enables).
2. Select Options > Link Edit and Timeline Selection. (This makes all selections apply to both Timebase rulers and track playlists.)
3. Select a range of material in one or more tracks.
4. Press Enter on the numeric keypad.
or
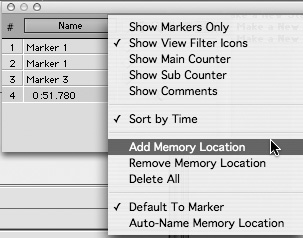
Choose Add Memory Location from the Memory Location pop-up menu at the top of the Memory Locations window (Figure 10.68). (Click Name to open the pop-up menu.)
Figure 10.68. Click Name to open the Memory Locations window’s pop-up menu.
The New Memory Location dialog box appears.
5. Choose the Selection option.
6. Click the Reference selector and select Bar | Beat or Absolute.
7. Enter a name for the new memory location and select any general properties you want to save with it.
8. Click OK.
The Selection memory location is created and appears in the Memory Locations window.
• To change a selection stored with a memory location, select a range of material in one or more tracks. In the Memory Locations window, Control-click (Macintosh) or right-click (Window) the memory location you want to redefine. Enter a name for the memory location and click OK.
To create a General Properties location
1. Configure any settings you want to save with the Marker memory location (such as zoom settings, pre/post-roll times, Show/Hide tracks, track heights, or Edit and Mix Group enables).
2. Press Enter on the numeric keypad.
The New Memory Location dialog box appears.
3. Select None.
4. Enter a name and select any general properties you want to save with it.
5. Click OK.
The General Properties memory location is created and appears in the Memory Locations window.
• To redefine general properties stored with a memory location, make the changes you want to the session’s configuration. In the Memory Locations window, Control-click (Macintosh) or right-click (Windows) the memory location that you want to redefine; or Control-click (Macintosh) or right-click (Windows) the marker in the Markers ruler. Select the general properties you want to save in the New Memory Location dialog box and click OK.
To create a memory location on the fly
1. Select Default to Marker in the Memory Locations window pop-up menu (Figure 10.69).
Figure 10.69. Select Default to Marker in the Memory Locations window pop-up menu to create a memory location on the fly.
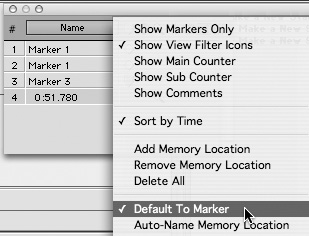
2. Select Auto-Name Memory Location in the Memory Locations window pop-up menu.
3. Click Play in the Transport window.
4. Press Enter at the desired location.
A marker is automatically created and appears in the Markers ruler.
Note that the New Memory Location dialog box does not appear when creating memory locations on the fly.
• To rename a memory location, double-click it in the Memory Locations window or double-click the marker in the Markers ruler. Enter a new name in the New Memory Location dialog box and click OK.
• To change a memory location’s time properties, double-click it in the Memory Locations window or double-click the marker in the Markers ruler. Select Marker, Selection, or None, and then click OK.
Recalling Memory Locations
You can recall memory locations by clicking them in the Memory Locations window (Figure 10.70). You can also recall them from the numeric keypad.
Figure 10.70. To recall a memory location, click its name in the Memory Locations window.
The Memory Locations window pop-up menu provides options for viewing, sorting, creating, and deleting memory locations. The menu has the following options:
Show Markers Only: This displays only Marker memory locations in the Memory Locations window.
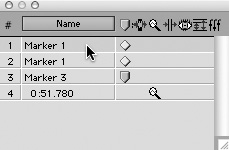
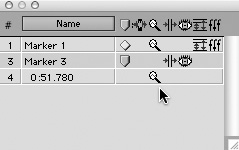
Show View Filter Icons: This extends the Memory Locations window to include an icon-based view filter, which lets you show or hide memory locations based on their properties (Figure 10.71). To show or hide memory locations containing a specific property, click the appropriate icon.
Figure 10.71. View filter icons in the Memory Locations window.
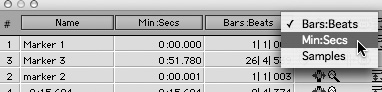
Show Main and Show Sub Counter: These options extend the Memory Locations window to include columns displaying the location of Marker memory locations and the start times for Selection memory locations (Figure 10.72). Click at the top of each column for a pop-up menu that lets you change the Main and Sub Time Scale (Figure 10.73).
Figure 10.72. The Main and Sub Counters display the location of Marker memory locations and the start time of Selection memory locations.
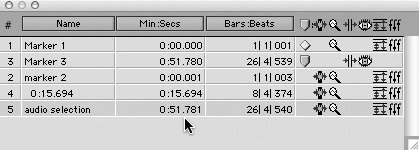
Figure 10.73. Click the top of each Main and Sub Counter column to select a Main and Sub Time Scale.
Sort by Time: This option sorts markers by their order in the timeline, followed by Selection memory locations and General Properties memory locations, which are listed in the order in which they were created.
Add Memory Location: This command creates a new memory location.
Remove Memory Location: This command removes the currently selected memory location in the Memory Locations window.
Delete All: This command deletes all memory locations from the session.
Default to Marker: This option causes all new memory locations to default to Marker memory locations.
Auto-Name Memory Location: This option lets you create a memory location without opening the Memory Locations dialog box. When the Default to Marker option is selected, a Marker memory location is automatically created.
1. Choose Window > Memory Locations.
The Memory Locations window appears.
2. Click the memory location you want to recall.
or
With the Numeric Keypad mode set to Classic, press the memory location number on the keypad followed by the period key.
or
With the Numeric Keypad mode set to Transport, press the period key, the memory location number, and the period key again.
or
Click a Marker memory location in the Markers ruler.
In all the preceding cases, the playback cursor locates to the chosen memory location and any general properties stored with it are recalled.
• To delete a marker from the Markers ruler, Option-click (Macintosh) or Alt-click (Windows) the marker you want to delete.
• To delete a memory location, in the Memory Locations window, Option-click (Macintosh) or Alt-click (Windows) the memory location.
or
In the Memory Locations window, select the memory location and choose Delete Memory from the pop-up menu.