
Chapter 21. Introducing ADO.NET and DataSets
Working with data is one of the primary tasks that an application must accomplish. Over the years, the .NET Framework has evolved, offering various kinds of data access platforms, but at a higher level the way you work with data is based only on two ways: connected or disconnected modes. For the disconnected mode, DataSets still play an important role today because many developers build or maintain applications based on DataSets—you are one of them! But times change and technology advances. New data platforms, such as the ADO.NET Entity Framework and LINQ to SQL, have been introduced to the .NET world, and the classic approach is becoming obsolete. If you think of Silverlight applications, you cannot use DataSets. You instead use LINQ. Of course, in some situations you can still take advantage of the old approach (such as the connected mode), and this is left to your strategy. Because of these considerations, the purpose of this chapter is to provide a quick recap on connected mode and disconnected mode with DataSets. We focus on what is new in data access with LINQ in the following chapters. Basically, you get information that can put you on the right track for comparing and appreciating the power of LINQ.
System Requirements
This chapter and the next ones are all about data. For this reason, you need to set up a development environment for testing code that works with data. Microsoft Visual Studio 2012 ships with a new edition of SQL Server 2012, called Local DB. This is a reduced edition of SQL Server Express, which is dedicated to developers who need to test data on their development machines. However, some compatibility issues exist with Local DB when using the old Data Readers. Even though it is appropriate on a development machine, it does not completely allow simulating a real-world database engine. For this reason, the current chapter and the next ones require you to install Microsoft SQL Server 2012 Express Edition, which is still available for free. You can download it from the following address: http://www.microsoft.com/sqlserver/en/us/editions/2012-editions/express.aspx. After you have downloaded, installed, and configured SQL Server 2012 Express, you are required to install the famous Northwind sample database, which is also available for free at http://archive.msdn.com/Northwind. You will need to open the InstNwnd.sql file in Visual Studio 2012 and execute the script against the specified SQL Server instance.
Introducing ADO.NET
ADO.NET is the .NET Framework area that provides the capability to access data from databases, and can be thought of as the .NET version of ActiveX Data Objects (ADO), which was the data access technology prior to .NET, based on the COM architecture. ADO.NET can be observed from two perspectives, known as connected and disconnected modes. It can access data from different data sources thanks to data providers. In the next sections, you learn about providers and connection modes and how you can access data in a connected environment.
After completing these procedures, a recap on DataSets is offered before discussing LINQ in the next chapter.
Data Providers
Data providers are .NET objects that allow the .NET Framework to speak with data sources. Data sources are generally databases, such as SQL Server, Oracle, and Access, but also include Microsoft Excel spreadsheets. The .NET Framework includes several built-in data providers exposed by the System.Data namespace. Table 21.1 summarizes built-in data providers.
Table 21.1. .NET Data Providers
These are the most common providers, but several companies provided their own, such as MySQL or PostgreSQL. Notice how the OleDb provider is available to provide support for data sources such as Microsoft Access databases or Excel spreadsheets. In this book, for this chapter and the ones dedicated to LINQ, Visual Basic topics using the SQL Server provider are covered. There are obviously some differences when writing code for each provider; however, you also find several similarities in connecting to data sources and manipulating data. Such operations are discussed in the next sections.
Connection Modes
ADO.NET provides support for both connected and disconnected modes. The big difference between the two modes is that in a connected mode, you explicitly open and close connections against a data source so that you can work with data. This is something you accomplish with the Connection, DataReader, and Command objects. In a disconnected environment, you work against in-memory data that is later persisted to the underlying data source. This is achieved with DataSets, although you see starting from Chapter 24, “LINQ to SQL,” how such an approach is the same in LINQ to ADO.NET. I’m sure that you already worked with both modes in your developer experience, so here’s just a quick recap so that you appreciate the difference between what you learn in this chapter and what you learn studying LINQ.
Understanding Connections and Data Readers
To establish a connection to a database, you need to create an instance of the SqlConnection class by passing the connection string as an argument. Then you invoke the Open method to open the connection so you can perform your data operations. Finally, you invoke Close to close the connection. The following code, which requires an Imports System.Data.SqlClient directive, demonstrates how you establish a connection to the Northwind database:
Using myConnection As New _
SqlConnection("Data Source=SERVERNAMESQLEXPRESS;Initial Catalog=Northwind;" &
"Integrated Security=True;MultipleActiveResultSets=True")
myConnection.Open()
End Using
Utilizing a Using..End Using block ensures that the connection will be correctly released without the need of invoking Close. You have to replace SERVERNAME with the name of the SQL Server to which you are connecting.
Inserting Data
To perform an insert operation, you create an instance of the SqlCommand class by passing the SQL instructions that perform the actual insertion. The constructor also requires the connection to be specified. The following code demonstrates this:
Using myConnection As New _
SqlConnection("Data Source=SERVERNAMESQLEXPRESS;Initial Catalog=Northwind;" &
"Integrated Security=True;MultipleActiveResultSets=True")
myConnection.Open()
Using addCustomer As New SqlCommand("INSERT INTO CUSTOMERS(CompanyName, "&
"CustomerID) VALUES (@COMPANYNAME,
@CUSTOMERID)",
myConnection)
addCustomer.Parameters.AddWithValue("@COMPANYNAME", "Del Sole")
addCustomer.Parameters.AddWithValue("@CUSTOMERID", "DELSO")
addCustomer.ExecuteNonQuery()
End Using
End Using
Notice how you can provide parameterized query strings specifying values with the SqlCommand.Parameters.AddWithValue method. The code adds a new customer to the Customers table in the database, specifying two fields, CompanyName, and CustomerID. The ExecuteNonQuery method enables the execution of a Transact-SQL operation instead of a simple query.
Updating Data
Updating data works similarly to inserting, in that you write the same code, changing the SQL instructions in the query string. The following code provides an example affecting the previously added customer:
Using updateCustomer As New SqlCommand("UPDATE CUSTOMERS SET " &
"COMPANYNAME=@NAME WHERE
CUSTOMERID=@ID",
myConnection)
updateCustomer.Parameters.AddWithValue("@NAME", "Alessandro Del Sole")
updateCustomer.Parameters.AddWithValue("@ID", "DELSO")
updateCustomer.ExecuteNonQuery()
End Using
So, you simply use an Update SQL instruction.
Deleting Data
Deletion works the same as other operations, differing only when it comes to the SQL code that uses a Delete statement. The following code demonstrates this:
Using deleteCustomer As New SqlCommand("DELETE FROM WHERE CUSTOMERID=@ID",
myConnection)
deleteCustomer.Parameters.AddWithValue("@ID", "DELSO")
deleteCustomer.ExecuteNonQuery()
End Using
Querying Data
Querying data is the last operation; it is important because it demonstrates a fundamental object: the SqlDataReader. The object enables the retrieval of a series of rows from the specified database object. The following code demonstrates how you can retrieve a series of customers:
Using myConnection As New _
SqlConnection("Data Source=SERVERNAMESQLEXPRESS;Initial Catalog=Northwind;" &
"Integrated Security=True;MultipleActiveResultSets=True")
myConnection.Open()
Using queryCustomers As New SqlCommand("SELECT * FROM CUSTOMERS",
myConnection)
Dim reader As SqlDataReader = queryCustomers.ExecuteReader()
While reader.Read
Console.WriteLine("Customer: {0}", reader("CompanyName"))
End While
End Using
End Using
The query string contains a projection statement that enables the querying of data. The ExecuteReader method sends the reading query string to the data source and retrieves the desired information. Now that you have recalled the ways for working with data in a connected mode, it is time to recall the disconnected mode and DataSets.
Introducing DataSets
A DataSet is basically an in-memory database that lets you work in a disconnected mode. Being disconnected means that first a connection is open, data is read from the data source and pushed to the DataSet, and finally the connection is closed and you work against in-memory data stored by the DataSet. DataSets introduced a first attempt of typed programming against in-memory data, a concept that has been unleashed in the modern data access layers such as LINQ to SQL and ADO.NET Entity Framework. Now you get a quick recap on DataSets with Visual Basic before facing LINQ.
Creating DataSets
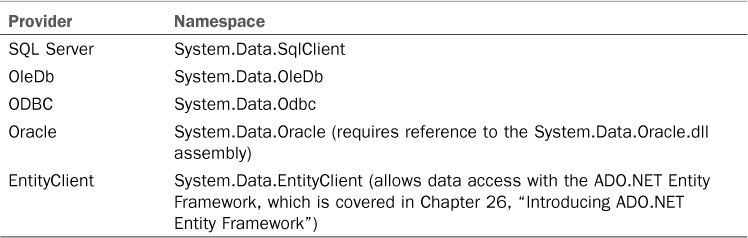
You create DataSets starting from a database and adding a new data source to your project. This is accomplished by clicking the Add New Data Source command from the Data menu in Visual Studio 2012. This launches the Data Source Configuration Wizard where you choose the Database source, as shown in Figure 21.1.

Figure 21.1. The first step of the Data Source Configuration Wizard.
When you proceed, you are prompted to specify whether you want to create a DataSet or an Entity Data Model. Select DataSet and click Next. At this point, you are prompted to specify the database connection. For example, with the Northwind database available on SQL Server, your connection looks similar to the one shown in Figure 21.2, which represents what I have on my machine.
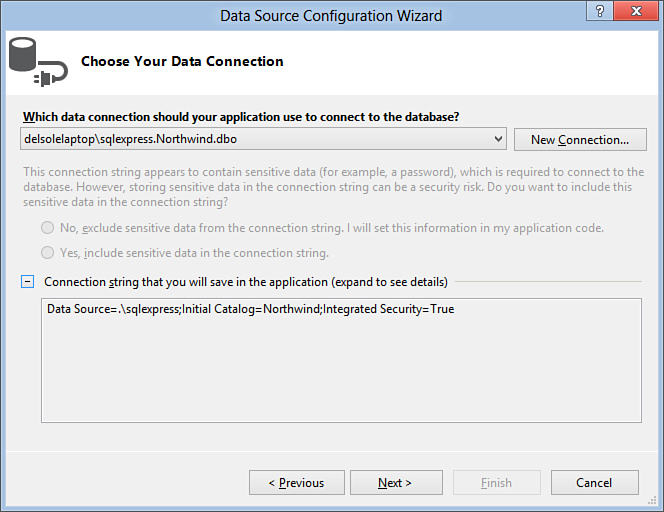
Figure 21.2. Specifying the database connection.
Next, you are prompted to specify the database objects you want to be represented by the new DataSet. Choose the number of tables you like, but be sure that the Products table is also selected, to complete the next code examples. When the wizard completes, Visual Studio generates a DataSet that you can manage via the designer, represented in Figure 21.3.
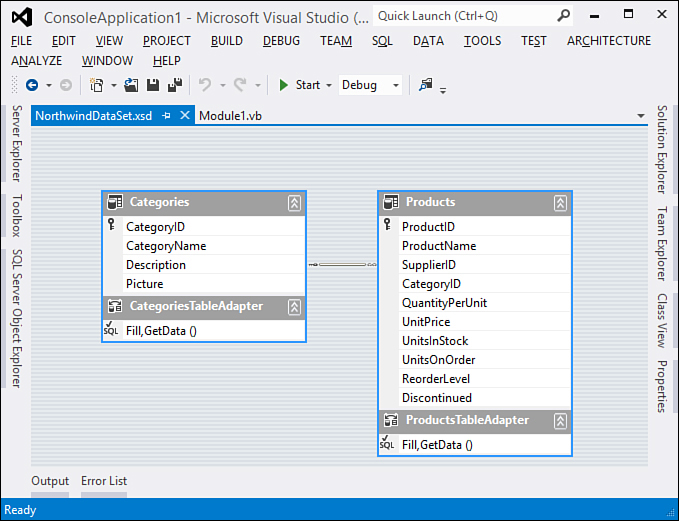
Figure 21.3. The DataSet designer.
The designer shows how database objects have been mapped into the DataSet. Each table is represented by a DataTable object. Each record in a table is represented by a DataRow object, and each field is a property having its own data type. DataSets use Data Adapters to read and write data. A Data Adapter is actually a bridge between the data source and the DataSet. Each DataTable works with a specific adapter; with more than one adapter, an object must take care of all of them, which is the job of the TableAdapterManager. If you work with Windows Forms and WPF applications, Visual Studio generates all adapters for you. For Console applications, as in the following example, you must perform a few steps manually. When you have your DataSet, you need an instance of the DataSet and of table adapters:
'DataSet here is also the project name
Imports DataSet.NorthwindDataSetTableAdapters
...
Dim WithEvents NWindDataSet As New NorthwindDataSet
Dim WithEvents ProductsTblAdapter As New ProductsTableAdapter
Dim WithEvents TblAdapterManager As New TableAdapterManager
Then you populate the DataSet’s object by invoking the adapter Fill method. In the meantime, you also assign a TableAdapterManager if you have more than one adapter:
ProductsTblAdapter.Fill(NWindDataSet.Products)
TblAdapterManager.ProductsTableAdapter = ProductsTblAdapter
The next paragraphs recap the insert/update/delete operations. For the moment, remember that you can save back changes to your data source by invoking the adapter’s Update method as follows:
ProductsTblAdapter.Update(NWindDataSet.Products)
Inserting Data
Each DataTable exposes a NewTableRow method, where Table is the name of the DataTable. In the example of the Products table, the method is named NewProductsRow. This method returns a new instance of the ProductRow object that you can fill with your information. Finally, you invoke the AddProductsRow method to send your data to the DataSet. Of course, each table has a corresponding Add method. The following code demonstrates how you can insert a new product:
'Insert
Dim row As NorthwindDataSet.ProductsRow = NWindDataSet.
Products.NewProductsRow
row.ProductName = "Italian spaghetti"
row.Discontinued = False
NWindDataSet.Products.AddProductsRow(row)
ProductsTblAdapter.Update(NWindDataSet.Products)
Generally, when performing create/read/update/delete (CRUD) operations, you work against rows.
Updating Data
To update a row, you first retrieve the instance of the corresponding DataRow so that you can perform manipulations. Then you can update your data. The following snippet demonstrates this:
'Update
Dim getRow As NorthwindDataSet.ProductsRow
getRow = NWindDataSet.Products.FindByProductID(1)
getRow.Discontinued = True
ProductsTblAdapter.Update(NWindDataSet.Products)
Notice how the instance has been retrieved via the FindByProductID method. When you create a DataSet, Visual Studio generates a FindByXXX method that allows you to retrieve the instance of the specified row.
Deleting Data
Deleting a row is simple. You get the instance of the row and then invoke the DataRow.Delete method. The following code demonstrates this:
'Delete
Dim delRow As NorthwindDataSet.ProductsRow
delRow = NWindDataSet.Products.FindByProductID(1)
delRow.Delete()
ProductsTblAdapter.Update(NWindDataSet.Products)
To delete an object, you could also invoke the TableAdapter.Delete method. However, this would require the complete specification of the row’s properties.
Querying Data
You query data from DataSets by writing query strings. This is the old approach, though; in Visual Basic 2012 a more convenient way is to use LINQ to DataSets, which is covered in Chapter 25, “LINQ to DataSets.”
Summary
ADO.NET is the .NET Framework area providing the data access infrastructure for data access. With ADO.NET, you access data in two modes: connected and disconnected. For the connected mode, you create Connection objects to establish a connection, Command objects to send SQL query strings to the data source, and DataReader for fetching data; finally, you close the Connection object. In a disconnected environment, you take advantage of DataSets that are in-memory representations of databases and where each table is a DataTable object, each record is a DataRow object, and TableAdapter objects act like a bridge between the database and the DataSet. You perform CRUD operations invoking the Add, Delete, Update, and New methods of DataTable objects, although a better technique for querying data is offered by LINQ to DataSets in Chapter 25. After this brief recap on the old-fashioned data access techniques, you are ready to start a new journey through the LINQ technology.