
Chapter 27. Manipulating XML Documents with LINQ and XML Literals
With the growing diffusion of the Internet during the years, one of the most common needs has been establishing standards for information exchange across computers in different parts of the world. For such an exchange, the XML file format was introduced to provide a unified standard that was specific to structured data. Because of its flexibility, the XML file format became popular among developers, and the .NET Framework has always offered a built-in way for manipulating XML documents: the System.Xml namespace. With the advent of LINQ in Visual Basic 2008, things have been improved. Although the System.Xml namespace still exists for several reasons, a more efficient way of manipulating XML documents is now available in Visual Basic due to important features such as LINQ to XML and XML literals that are also integrated into the language syntax. In this chapter you learn about manipulating XML documents using LINQ to XML and XML literals, and you discover how much more powerful this opportunity is when compared to the System.Xml namespace.
Knowledge of XML
The goal of this chapter is not explaining XML syntax and document structure, so you are required to be familiar with XML syntax and implementation.
Introducing LINQ to XML
LINQ to XML is the standard LINQ provider for reading, creating, and manipulating XML documents with the .NET languages starting from Visual Basic 2008 and Visual C# 3.0. Such a provider is implemented in the System.Xml.Linq.dll assembly and supports all operators available in LINQ to Objects with a few differences due to the XML document structure and other specific language features. The good news is that you can take advantage of the unified programming model offered by LINQ to perform XML manipulations via the classical LINQ syntax that you already know. Visual Basic 2012, like its predecessors, offers particular syntax paradigms for LINQ to XML that is also described in this chapter. You first learn how to create and manipulate XML documents using managed objects; in the second part of this chapter, you become skillful with XML literals that can allow you to write code more quickly and cleanly.
The System.Xml.Linq Namespace
The System.Xml.Linq namespace exposes objects for creating, reading, and manipulating XML documents. All objects inherit from System.Xml.Linq.XObject. Table 27.1 summarizes and describes available objects.
Table 27.1. Objects Available in the System.Xml.Linq Namespace
You create an XML document declaring an instance of the XDocument class:
Dim myDocument As New XDocument
When you have the instance, you can add all acceptable objects mentioned in Table 27.1. The first required element is the XML declaration that can be added as follows and that is mandatory:
myDocument.Declaration = New XDeclaration("1.0", "utf-8", "no")
If you want to add comments to your XML documents, you can create as many instances of the XComment class for as many comments as you need to add:
myDocument.Add(New XComment("My first Xml document with LINQ"))
The next step is creating a first-level XElement that stores nested XElement objects:
Dim mainElement As New XElement("Contacts")
Now you can create nested elements and specify some attributes, as demonstrated in the following code:
'An Xml element with attributes
Dim firstNestedElement As New XElement("Contact")
Dim attribute1 As New XAttribute("LastName", "Del Sole")
Dim attribute2 As New XAttribute("FirstName", "Alessandro")
Dim attribute3 As New XAttribute("Age", "35")
firstNestedElement.Add(attribute1)
firstNestedElement.Add(attribute2)
firstNestedElement.Add(attribute3)
Dim secondNestedElement As New XElement("Contact")
Dim attribute4 As New XAttribute("LastName", "White")
Dim attribute5 As New XAttribute("FirstName", "Robert")
Dim attribute6 As New XAttribute("Age", "40")
secondNestedElement.Add(attribute4)
secondNestedElement.Add(attribute5)
secondNestedElement.Add(attribute6)
'In-line initialization with an array of XAttribute
Dim thirdNestedElement As New XElement("Contact", New XAttribute() {
New XAttribute("LastName", "Red"),
New XAttribute("FirstName", "Stephen"),
New XAttribute("Age", "41")})
When you create an XAttribute you need to invoke the XElement.Add instance method to assign the new attribute. Creating elements and assigning attributes is a simple task because classes are self-explanatory, and IntelliSense helps you understand which arguments the constructors need. But if you take a look at the last instance, you can see that things can become difficult, especially if you think that you could create an array of XElement with nested XElement definitions, with nested XAttribute definitions. You see later in this chapter how XML literals make things easier; for now let’s focus on fundamentals. The next step is to add all nested XElement objects to the main XElement as follows:
With mainElement
.Add(firstNestedElement)
.Add(secondNestedElement)
.Add(thirdNestedElement)
End With
mainElement now stores a sequence of XML elements that must be added to the document as follows:
myDocument.Add(mainElement)
In the end, you can save your XML document to disk by invoking the Save method:
myDocument.Save("C:Contacts.xml")
This method has several overloads that also enable the specifying of a stream instead of a string of file options for controlling formatting. If you just want to check your result, invoke XDocument.ToString as follows:
Console.WriteLine(myDocument.ToString)
This line of code allows you to see how your document is formed. The output follows:
<!—My first Xml document with LINQ—>
<Contacts>
<Contact LastName="Del Sole" FirstName="Alessandro" Age="32" />
<Contact LastName="White" FirstName="Robert" Age="40" />
<Contact LastName="Red" FirstName="Stephen" Age="41" />
</Contacts>
Creating an XML document with the System.Xml.Linq namespace is more intuitive than the older System.Xml namespace, but things can go better as you see later. At the moment you need to know how to load and parse existing documents.
Loading and Parsing Existing XML Documents
To load an existing XML document, you invoke the shared XDocument.Load method as follows:
Dim myDocument = XDocument.Load("C:Contacts.xml")
You can get a new instance of XDocument and get access to its members via numerous methods and properties that the class offers. Table 27.2 summarizes the most important members.
Table 27.2. Most Important Members of the XDocument Class
Notice that both XDocument and XElement classes expose methods in Table 27.2, and XElement can also load and save XML content as much as XDocument. Both XDocument and XElement classes also allow parsing strings containing XML representation to get an appropriate object. This is accomplished invoking the Parse method as in the following example:
Dim document As String = "<?xml version=""1.0""?>" & Environment.NewLine & _
" <Contacts>" & Environment.NewLine & _
" <Contact FirstName=""Alessandro"" Last
Name=""Del Sole"" Age=""35""/>" & _
Environment.NewLine & _
" <Contact FirstName=""Robert"" Last
Name=""White"" Age=""40""/>" & _
Environment.NewLine & _
" </Contacts>"
Dim resultingDocument As XDocument = XDocument.Parse(document)
resultingDocument.Save("C:Contacts.xml")
This can be useful if you need to get a real XML document from a simple string.
Querying XML Documents with LINQ
You can take advantage of the LINQ syntax for querying XML documents. Consider the following XML file:
<Contacts>
<Contact LastName="Del Sole" FirstName="Alessandro" Age="35" />
<Contact LastName="White" FirstName="Robert" Age="40" />
<Contact LastName="Red" FirstName="Stephen" Age="41" />
</Contacts>
Now imagine you want to get a list of last names for people with an age greater than or equal to 40. This can be accomplished by the following query:
Dim query = From element In myDocument.Descendants("Contact")
Where Integer.Parse(element.Attribute("Age").Value) >= 40
Select element.Attribute("LastName").Value
The Descendants method returns an IEnumerable(Of XElement) and stores all XElement objects whose XName is the one specified as the argument. To get the value of an attribute about comparisons as in our situation, you invoke the XElement.Attribute().Value property that contains the actual value of the XAttribute instance whose name is specified within Attribute(""). Notice how an explicit conversion is required from String to Integer to perform an evaluation on numbers. The preceding query returns an IEnumerable(Of String). If you need to generate custom results, you can take advantage of anonymous types as in the following query that get only the LastName and Age values:
Dim query = From element In myDocument.Descendants("Contact")
Let age = Integer.Parse(element.Attribute("Age").Value)
Where age >= 40
Select New With {.LastName = element.
Attribute("LastName").Value,
.Age = age}
The preceding query returns IEnumerable(Of anonymous type). Notice how the Let keyword is used to provide a temporary identifier that can be used both for performing a comparison and for assignment to the anonymous type’s Age property. With the exception of anonymous types, as you remember from the LINQ to Objects discussion, you can bind results of LINQ to XML queries directly to user interface controls, such as the BindingSource in Windows Forms or the CollectionViewSource in WPF. By the way, remember that, if you do not select just one attribute per element (which would return an IEnumerable(Of String)), this would work as collections of XElement; therefore, it is not the best approach because you need to work against your business objects and not against XElement instances. Just to provide a simple example, if you need an iteration over your query, iterating an IEnumerable(Of XElement) would not probably make much sense; though it instead would with a List(Of Contact). The appropriate approach is creating a class that maps each element within the XML document. For example, consider the following simplified implementation of the Contact class:
Class Contact
Property FirstName As String
Property LastName As String
Property Age As Integer
End Class
At this point, you can write a LINQ query that generates a collection of Contact and that can be both mapped to a user interface control and that can be edited:
'Returns a List(Of Contact)
Dim contactCollection = (From element In myDocument.Descendants("Contact")
Let age = Integer.Parse(element.
Attribute("Age").Value)
Select New Contact With {.FirstName = element.
Attribute("FirstName").Value,
.LastName = element.
Attribute("LastName").Value,
.Age = age}).ToList
Now you have a List(Of Contact) that can be both used for presenting data or for editing. On the contrary, you could create an XML document starting from a collection of objects, but this is something you see in a more efficient way in the discussion of XML literals in the next section.
Writing XML Markup in VB with XML Literals
The System.Xml.Linq namespace is powerful. Manipulating complex XML documents that store a lot of data can lead to writing less elegant and more complex code. Luckily the Visual Basic language provides a powerful feature for manipulating XML documents, known as XML literals. You can write XML markup together with the Visual Basic code. The following code provides an example:
'The compiler infers XDocument
Dim Contacts = <?xml version="1.0"?>
<Contacts>
<Contact LastName="Del Sole"
FirstName="Alessandro"
Age="35"
email="[email protected]"/>
<!— Fantasy name—>
<Contact LastName="White"
FirstName="Robert"
Age="45"
email="[email protected]"/>
</Contacts>
This means that you can write entire XML documents integrating XML markup and Visual Basic code. Here IntelliSense features are less powerful than in the classic Visual Studio XML editor, but they are good enough to provide syntax colorization and code indentation. Figure 27.1 shows what the preceding code looks like in the Visual Basic code editor.

Figure 27.1. XML literals in the Visual Basic code editor.
Just think that you can paste from the clipboard the content of long and complex XML documents, such as Microsoft Excel workbooks or Open XML documents, and take advantage of XML literals. The Visual Basic compiler can then map XML nodes to the appropriate .NET type. In the previous example, Contacts and Contact are mapped to XElement objects, whereas properties of each Contact element are mapped to XAttribute objects. The previous example also takes advantage of local type inference. In such a scenario, the Visual Basic compiler infers the XDocument type for the Contacts variable. This is because the XML markup contains the XML declaration. If you do not specify such a declaration, the XML markup is mapped to an XElement, as in the following code:
'The compiler infers XElement
Dim Contacts = <Contacts>
<Contact LastName="Del Sole"
FirstName="Alessandro"
Age="32"
email="[email protected]"/>
</Contacts>
If you do not want to use local type inference, you need to pay attention to which type the XML markup is mapped. For example, both the following code snippets throw an InvalidCastException:
'Throws an InvalidCastException
'Cannot assign to XElement markup that
'ships with the Xml declaration
Dim Contacts As XElement = <?xml version="1.0"?>
<Contacts>
<Contact LastName="Del Sole"
FirstName="Alessandro"
Age="35"
email="[email protected]"/>
<!-- Fantasy name-->
<Contact LastName="White"
FirstName="Robert"
Age="45"
email="[email protected]"/>
</Contacts>
'Throws an InvalidCastException
'Cannot assign to XDocument markup that
'does not have the Xml declaration
Dim Contacts As XDocument = <Contacts>
<Contact LastName="Del Sole"
FirstName="Alessandro"
Age="35"
email="[email protected]"/>
<!-- Fantasy name-->
<Contact LastName="White"
FirstName="Robert"
Age="45"
email="[email protected]"/>
</Contacts>
XML literals are powerful because they allow you to write more elegant code and provide a view of your XML documents as you would within an XML editor that is better than generating nodes, elements, and attributes the old-fashioned way. The preceding code has one limitation: It is hard-coded, meaning that values have been added manually. This would be a big limitation because you often need to dynamically generate XML documents (for example, generating elements for each member within a data source). Luckily, XML literals make this easier, providing the ability to embed local variables’ values and LINQ queries within the XML markup, as shown in the next section.
The Visual Basic compiler parses XML documents, elements, and attributes written with XML literals into the appropriate .NET types, such as XDocument, XElement, and XAttribute. Comments are included in such a mapping and converted into XComment objects and so on. Please refer to Table 27.1 for available objects.
LINQ Queries with XML Literals
XML literals provide an alternative syntax for LINQ to XML queries in Visual Basic code. Let’s look at the first XML document used in the “System.Xml.Linq Namespace” section again, which looks like the following but with a slight modification:
<?xml version="1.0" encoding="utf-8"?>
<Contacts>
<Contact FirstName="Alessandro"
LastName="Del Sole"
Age="35"
Email="[email protected]">
</Contact>
<!--The following are fantasy names-->
<Contact FirstName="Stephen"
LastName="Red"
Age="40"
Email="[email protected]">
</Contact>
<Contact FirstName="Robert"
LastName="White"
Age="41"
Email="[email protected]">
</Contact>
<Contact FirstName="Luke"
LastName="Green"
Age="42"
Email="[email protected]">
</Contact>
<Person FirstName="Alessandro"
LastName="Del Sole">
</Person>
</Contacts>
There is a Person element that we want to be excluded. The goal is querying all Contact elements whose age is greater than or equal to 40. Instead of recurring to the classical syntax, you can write the following code:
Dim doc = XDocument.Load("Contacts.xml")
Dim query = From cont In doc.<Contacts>.<Contact>
Where Integer.Parse(cont.@Age) >= 40
Select cont
The preceding code uses new symbols for querying documents known as XML Axis Properties. Table 27.3 summarizes XML axis.
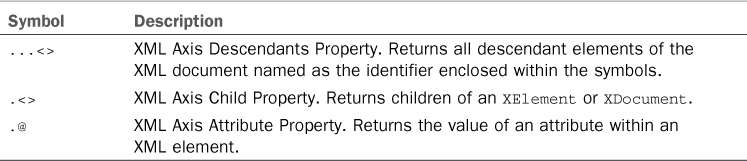
The preceding query can be described by this sentence: “Process all Contacts’ children Contact elements.” The difference with the XML Axis Descendants Properties can be explained with another example. Consider the following document that is just a revalidation of the previous one:
<?xml version="1.0" encoding="utf-8"?>
<Contacts>
<Contact>
<FirstName>Alessandro</FirstName>
<LastName>Del Sole</LastName>
<Age>35</Age>
<Email>[email protected]</Email>
</Contact>
<Contact>
<FirstName>Stephen</FirstName>
<LastName>Red</LastName>
<Age>40</Age>
<Email>[email protected]</Email>
</Contact>
<Person>
<FirstName>Robert</FirstName>
<LastName>White</LastName>
</Person>
</Contacts>
Now each Contact element has sub-elements. If you wanted to get a collection of all LastName elements for all elements, you could use the XML Axis Descendants property as follows:
'Returns a collection of all <LastName></LastName>
'elements within the document
Dim onlyLastNames = From cont In doc...<LastName>
It’s worth mentioning that such a query also includes results from the Person element because it exposes a LastName attribute. So if you need to filter results depending on the root element, you should invoke the Axis Descendants property. Notice also how in both the previous code examples an explicit conversion is required when you need a comparison against non-String data. In this particular case the comparison is done against an integer number (40); therefore, you can invoke the Integer.Parse method—because you expect that the Age attribute contains the string representation of a number. XML Axis properties provide a simplified and cleaner way for querying XML documents. Just remember that, as discussed in the previous section, you will need helper classes for mapping each XElement content into a .NET type to provide data-binding features to your code.
Why Option Strict On is Important
One of the last code snippets had an explicit conversion using Integer.Parse. If you set Option Strict On and forget to perform such a conversion, the compiler throws an exception requiring you to perform an appropriate conversion, which is always good. If you instead set Option Strict Off, no conversion is required at compile time, but in all cases you encounter errors at runtime except if you assign the value of an attribute to a String variable. You should always keep Option Strict On.
Understanding Embedded Expressions
With embedded expressions, you can include local variables or perform dynamic queries within XML literals. Let’s look again at the first example about XML literals, where an XML document contains a couple of contacts. Imagine you want to generate a contact starting from some variables (that you could populate at runtime with different values) instead of hard-coding the last name, first name, and age. This can be accomplished as follows:
'All with type inference
Dim FirstName = "Alessandro"
Dim LastName = "Del Sole"
Dim Age = 35
Dim Contacts = <?xml version="1.0"?>
<Contacts>
<Contact LastName=<%= LastName %>
FirstName=<%= FirstName %>
Age=<%= Age %>
email="[email protected]"/>
<!-- Fantasy name-->
<Contact LastName="White"
FirstName="Robert"
Age="45"
email="[email protected]"/>
</Contacts>
Although the second contact in the list is equal to the first example, the first contact is generated with embedded expressions. You create an embedded expression including an expression within <%= and => symbols. While you write the expression after the opening tag, IntelliSense works to improve your coding experience. In this way, you can create elements dynamically. But this code works just for one element. What if you need to dynamically generate as many elements for as many items stored within a collection or within a database table? Imagine you have a Contact class that is implemented as follows:
Class Contact
Property FirstName As String
Property LastName As String
Property Age As Integer
Property EmailAddress As String
End Class
Now imagine that within a method body you create a collection of Contact. For demo purposes, four instances of the Contact class are created and then pushed into a new collection:
Dim firstContact As New Contact With {.FirstName = "Alessandro",
.LastName = "Del Sole",
.EmailAddress = "[email protected]",
.Age = 35}
'Now fantasy names
Dim secondContact As New Contact With {.FirstName = "Stephen",
.LastName = "Red",
.EmailAddress = "[email protected]",
.Age = 40}
Dim thirdContact As New Contact With {.FirstName = "Robert",
.LastName = "White",
.EmailAddress = "[email protected]",
.Age = 41}
Dim fourthContact As New Contact With {.FirstName = "Luke",
.LastName = "Green",
.EmailAddress = "[email protected]",
.Age = 42}
Dim people As New List(Of Contact) From {
firstContact,
secondContact,
thirdContact,
fourthContact}
Our goal is to generate an XML document that contains all the preceding created contacts as XML nodes. This is accomplished by the following code:
Dim newDocument = <?xml version="1.0"?>
<Contacts>
<%= From cont In people
Where cont.Age > 35
Select <Contact
FirstName=<%= cont.FirstName %>
LastName=<%= cont.LastName %>
Age=<%= cont.Age %>
Email=<%= cont.EmailAddress %>>
</Contact>
%>
</Contacts>
newDocument.Save("C:Contacts.xml")
Embedding an expression means that you can also embed a LINQ query. Notice how the query is part of the first embedded expression and how the Select clause allows the creation of a new XElement object using XML literals where nested embedded expressions can provide advantage of local variables. The previous code can produce the following result (remember that only people with an age greater than 35 have been included):
<Contacts>
<Contact FirstName="Stephen" LastName="Red" Age="40"
Email="[email protected]"></Contact>
<Contact FirstName="Robert" LastName="White" Age="41"
Email="[email protected]"></Contact>
<Contact FirstName="Luke" LastName="Green" Age="42"
Email="[email protected]"></Contact>
</Contacts>
Using XML literals and embedded expressions, you dynamically created an XML document that can contain an infinite number of elements. This example was related to a simple generic collection, but you can easily understand what kinds of results you can reach if you need to generate XML documents from database tables. If you work with LINQ to SQL or with ADO.NET Entity Framework, the code remains the same; the only exception is that the data source in the From clause is the DataContext instance for LINQ to SQL or the ObjectContext or DbContext classes in the ADO.NET Entity Framework.
XML literals can map any kind of XML markup. For example, you can dynamically generate WPF controls writing XAML code that Visual Basic recognizes as XML and that can be assigned to XElement objects. Another useful example is a Microsoft Excel workbook saved as XML format that can be entirely pasted into the Visual Basic editor. Other than writing cleaner code, the ability to wrap any XML content is probably the best feature of XML literals.
Iterators and XML Literals
The new Visual Basic feature of iterators can be used inside XML literals code blocks. Specifically, you can use the anonymous iterators (or iterator lambdas). The following code shows how to use an anonymous iterator to retrieve only the LastName property for each item in the People collection created previously and creates an XML document where each contact has only the LastName attribute:
Dim doc = <?xml version="1.0"?>
<Contacts>
<%= (Iterator Function()
For Each person In people
Yield person
Next
End Function)().
Select(Function(c) <Contact LastName=<%= c.LastName %>>
</Contact>) %>
</Contacts>
By using the iterator lambda you can write more responsive code, whose result can be elaborated while the rest of processing is still in progress.
XML Schema Inference
LINQ to XML and XML literals are both powerful features, but they have a limitation: Within embedded expressions or when using the literals symbols in queries, IntelliSense support is not as good as usual, especially when you need to invoke XML attributes. This means that in most situations you need to remember and manually write code that maps attributes with no IntelliSense support. This can lead to errors because elements and attributes within XML documents are case-sensitive, so typing age instead of Age results in a runtime error. To solve this issue, Visual Basic offers the XML Schema Inference Wizard, which is a tool integrated in the IDE and that is specific for Visual Basic. The tool enables the generating of an XML schema from the XML document you query and allows enabling IntelliSense support. First, you need an XML document. The following is a simplified list of customers that is the base document:
<?xml version="1.0" encoding="utf-8" ?>
<Customers xmlns="DelSole.Customers">
<Customer CustomerID="DELSO" CompanyName="Del Sole Ltd."
Country="Italy" Address="Unspecified"
Email="[email protected]"/>
<!— Not real names —>
<Customer CustomerID="GREEN" CompanyName="Green Corp."
Country="Italy" Address="Unspecified"
Email="[email protected]"/>
<Customer CustomerID="WHITE" CompanyName="White Corp."
Country="Italy" Address="Unspecified"
Email="[email protected]"/>
</Customers>
Notice how an XML namespace declaration has been added to the Customers node. This is important and is explained later. Save the file as Customers.xml. When you get the document, right-click the project name in Solution Explorer and select Add New Item. When the Add New Item dialog box appears, select the XML to Schema template and name it CustomersSchema.xsd, as shown in Figure 27.2.
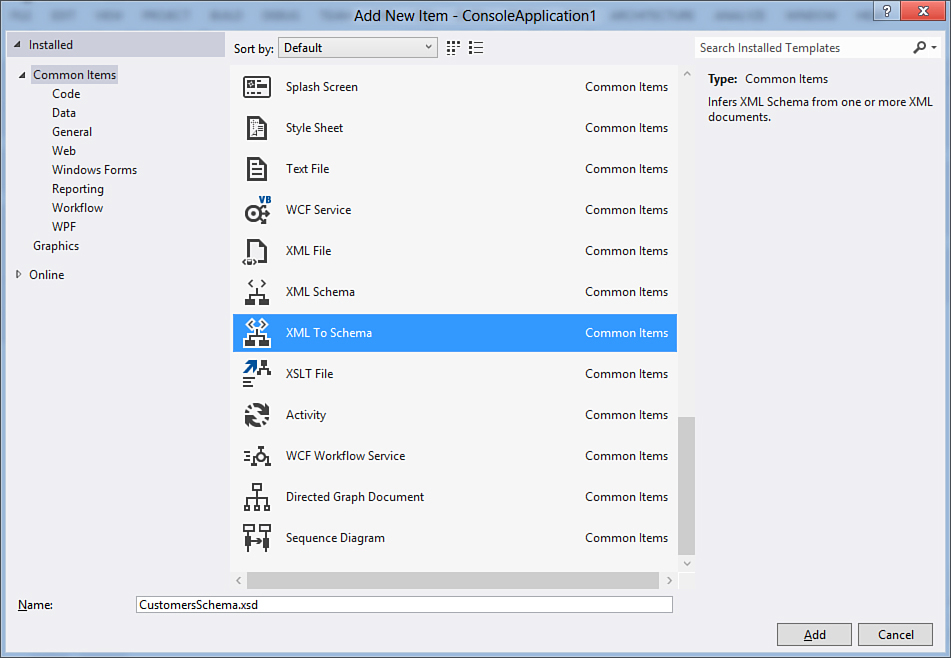
Figure 27.2. The XML to Schema item template.
After you click Add, a dialog box named Infer XML Schema Set from XML Documents appears, requiring you to specify the XML document as the base. You are not limited to specifying existing XML documents; you can manually write the document (or paste it from the clipboard) or specify an XML document that is available on a network. This can be useful if you want to generate schemas for RSS feeds. Click the Add from File button and select the Customers.xml document. (You can notice that Visual Studio automatically points to the project folder making the selection easier.) Figure 27.3 shows the dialog box.
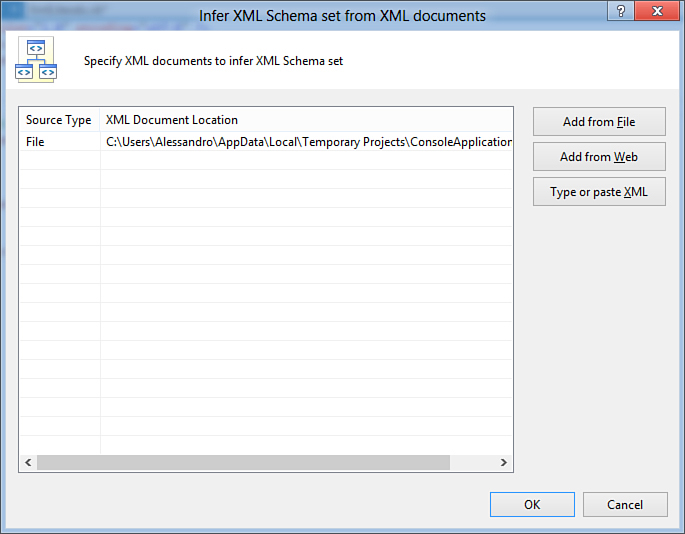
Figure 27.3. Selecting the XML document for generating XML schemas from.
The good news is that you are not limited to just one document; you can add multiple documents to generate multiple schemas at one time. When you finish and click OK, Visual Studio generates an .Xsd document whose content is the following:
<?xml version="1.0" encoding="utf-8"?>
<xs:schema attributeFormDefault="unqualified"
elementFormDefault="qualified"
targetNamespace="DelSole.Customers"
xmlns:xs="http://www.w3.org/2001/XMLSchema">
<xs:element name="Customers">
<xs:complexType>
<xs:sequence>
<xs:element maxOccurs="unbounded" name="Customer">
<xs:complexType>
<xs:attribute name="CustomerID" type="xs:string"
use="required" />
<xs:attribute name="CompanyName" type="xs:string"
use="required" />
<xs:attribute name="Country" type="xs:string"
use="required" />
<xs:attribute name="Address" type="xs:string"
use="required" />
<xs:attribute name="Email" type="xs:string"
use="required" />
</xs:complexType>
</xs:element>
</xs:sequence>
</xs:complexType>
</xs:element>
</xs:schema>
The schema is simple because the structure of our starting document is simple. Notice how the schema declaration contains a targetNamespace attribute that maps the XML namespace we provided within the original document. You can also get a visual representation of the new schema via the XML Schema Explorer tool window that is available by clicking View, XML Schema Explorer. The tool window is shown in Figure 27.4.
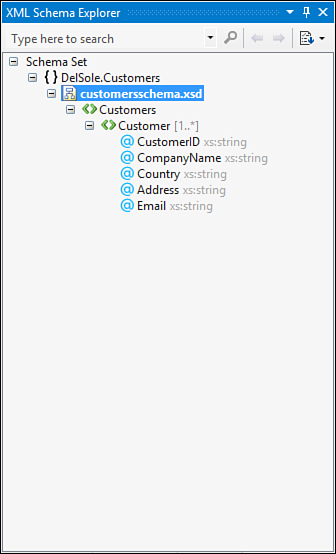
Figure 27.4. The XML Schema Explorer tool window.
This window is helpful to understand the hierarchical structure of an XML schema. For the newly created schema, notice the custom namespace at the root level and then the root document node, named Customers. Within the child node, Customer, you can see nested attributes and mappings to data types. Also notice how Visual Studio tells us that Customer is part of a one-to-many relationship (1..*).
XML Schema Designer
Visual Studio 2012 offers a specific designer for XML schemas that is also enabled each time you work with such documents. The editor is now based on WPF and allows generating or editing schemas with a powerful designer. This tool is not described here, but you can easily understand how to take advantage of its instrumentation to edit schemas the first time you see it.
At this point, you are ready to write Visual Basic code. The first thing to do is to add an Imports directive pointing to the XML namespace. This is possible because the Imports keyword can import XML namespaces, too, as follows:
Imports <xmlns:ds="DelSole.Customers">
Importing XML Namespaces
Each time you need to work with XML documents or schemas that define an XML namespace, you need to import that namespace. This is because, otherwise, you should rewrite the XML namespace declaration every time you write an XML element within your document. By importing the namespace, you do not need to worry anymore about XML namespaces. Microsoft Excel’s workbooks or XAML markup code are good examples of this.
This is the point where IntelliSense can provide support for your schemas. Now you can understand why the addition of an XML namespace within the original document was necessary. At this point you could write whatever query you need. The following query is simple, but its purpose is not to show how you can query data; instead its purpose is to demonstrate IntelliSense capabilities in XML literals after the addition of an XML schema:
Dim custDoc = XDocument.Load("Customers.xml")
Dim customers = From cust In custDoc...<ds:Customer>
Select cust.@CompanyName
At the point at which you type the ...< symbols, IntelliSense shows all the available options for the schema allowing the selection of available nodes. Figure 27.5 shows IntelliSense in action.
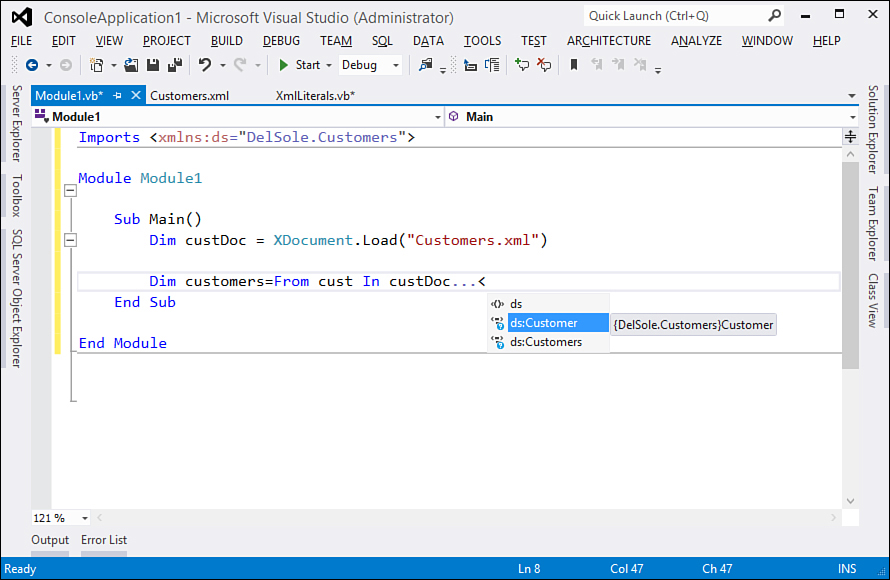
Figure 27.5. XML Schema Inference enables IntelliSense in LINQ queries with XML literals.
As you can imagine, this is helpful because now you are not required to remember every element in the XML document and to type it manually. And this works not only with XML elements, but also with XML attributes, which is what you get when beginning to write the .@ symbols. Figure 27.6 represents such a situation.
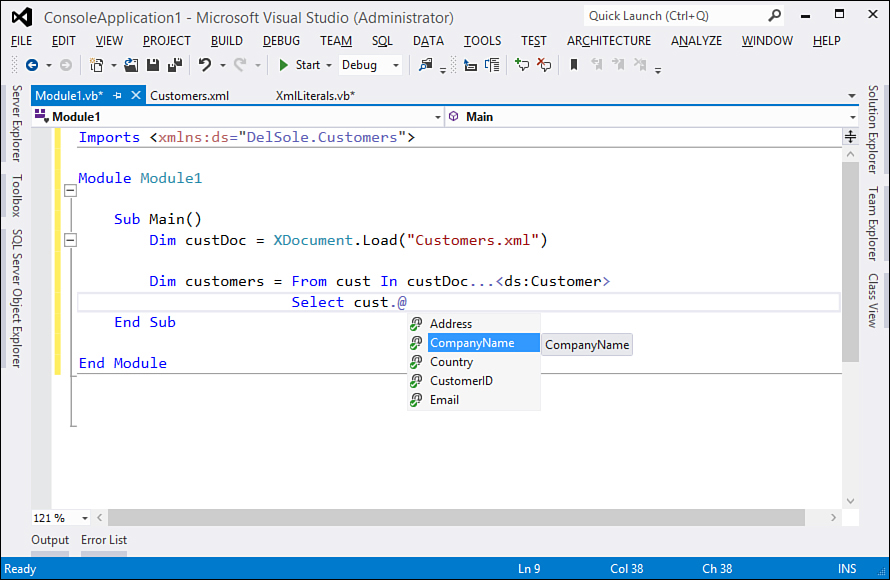
Figure 27.6. IntelliSense also allows you to select attributes.
If you have multiple schemas or multiple namespaces, IntelliSense can provide support for all of them making your coding experience straightforward.
Summary
The .NET Framework offers a special LINQ provider named LINQ to XML that enables working with XML documents. Via the System.Xml.Linq namespace, this provider allows creating and manipulating XML documents in an efficient way. Classes such as XDocument, XElement, XAttribute, XComment, and XDeclaration are self-explanatory and allow easy generation of XML documents. To query XML documents, you just write LINQ queries using the unified syntax that you already know, with a few additions such as the Descendants or Attribute property. Although efficient, System.Xml.Linq can be confusing when XML documents become larger. Luckily, Visual Basic provides the XML literals feature that enables the writing of XML markup code directly into the VB code editor. To make things real, with embedded expressions you can generate documents putting local variables, expressions, and LINQ queries within XML literals so that you can generate XML documents dynamically. Visual Basic also takes care of your coding experience and provides the XML Schema Inference Wizard that generates an XML schema starting from the XML document you want to query with LINQ to XML and allows enabling IntelliSense for that particular document, avoiding the risk of typos.