
Chapter 52. Deploying Applications with ClickOnce
Sometimes customers want simple installations for applications they purchase. They do not want to step through complex guided procedures with several dialog boxes and lots of options. They want to make just two or three mouse clicks and nothing more. To accomplish this particular scenario, Microsoft created ClickOnce—the one-click deployment technology for .NET Framework applications. ClickOnce is useful for installations that are just a few steps, but it is the easiest way for bringing automatic updating capabilities to your applications. In this chapter, you will learn about deploying client applications with ClickOnce and discover some new features.
Introducing ClickOnce
ClickOnce is the deployment technology offered by all Visual Studio editions, including the Express versions, which enables you to create distribution procedures for Windows client applications in a simple way, according to one-click deployment logic. The idea behind ClickOnce is that the final user will have the ability to install an application with a minimum number of mouse clicks and interactions, even if the user does not have administrative rights on the machine. This technology was first introduced with .NET Framework 2.0 and Visual Studio 2005 and has been improved over the years. Further improvements were introduced in .NET 4.0 and Visual Studio 2010, and Visual Studio 2012 retakes them all. ClickOnce enables you to publish the deployment package to file system folders, FTP servers, and HTTP servers and can make applications available online, offline, or both. Before illustrating how you publish deployment packages with ClickOnce, it is important to understand how it works and when you should use it.
How ClickOnce Handles Applications
Different from the Windows Installer engine, which is integrated in the operating system, ClickOnce is integrated with the .NET Framework. Applications deployed via ClickOnce run in a security sandbox that is fully managed by the .NET Framework. This provides great flexibility because the .NET Framework can apply managed trust rules to ClickOnce-deployed applications and provide the infrastructure for automating application updates. For example, thanks to the .NET integration, developers can write code to programmatically check for updates or to access the deployment system. However, ClickOnce does have some limitations for Windows Installer. The next section explains these limitations and provides information on when you should use ClickOnce for your deployments.
When to Use ClickOnce
ClickOnce is a powerful technology and is useful when you need to deploy applications that require a minimum amount of interaction from the user. ClickOnce is appropriate in the following scenarios:
• You want to provide your application with the capability of being frequently updated without writing a single line of code.
• Your application makes use of third-party components that are not required to be installed into the Global Assembly Cache.
• You want your application to be installed by nonadministrative users.
• You want to deploy add-ins for Microsoft Office.
• Your installation process does not require you to customize the target system other than creating shortcuts.
ClickOnce does have limitations you must consider when choosing the most appropriate development system:
• You cannot install assemblies to the Global Assembly Cache.
• ClickOnce does not enable writing values to the Windows Registry.
• It does not enable deep installation customization.
• It does not let you choose the target folder for the application on the target machine. This is because, as ClickOnce is integrated with the .NET Framework, applications run inside a security sandbox managed by .NET which has its own folders.
If you need to perform just one of these customizations, ClickOnce is not appropriate, and you need to recur to Windows Installer by creating InstallShield projects for Visual Studio 2012 (as explained in the previous chapter). At this point, we can learn to deploy ClickOnce.
With the growth of WPF applications, ClickOnce has been erroneously considered as a technology for deploying these kinds of applications. This is true in part, meaning that ClickOnce is not limited to WPF applications, whereas it can deploy all kinds of Windows client applications, including Windows Forms and Console applications.
Deploying Applications with ClickOnce
To deploy an application with ClickOnce, you have three options: the Publish command in the Build menu, right-clicking the project in Solution Explorer, and selecting Publish or the Publish Now button in the ClickOnce configuration page within My Project. For now, we will focus on the first option. (The second option is covered in the next section.)
Create a new WPF project with Visual Basic and name it ClickOnceDemo. There is no need to write code for the application because we need only a base for our example. To deploy an application with ClickOnce, follow these steps:
1. Click Build, Publish, Visual Studio launches the Publish Wizard. Figure 52.1 shows the first dialog box of the wizard, in which you need to specify the location where the application will be published. Notice how the dialog box explains available possibilities, such as disk path, network shared path, ftp server, or website. You can change the target type and location by clicking Browse. In this case, publish the application to the local Internet Information Services website, which requires Visual Studio to be running with administrator privileges.
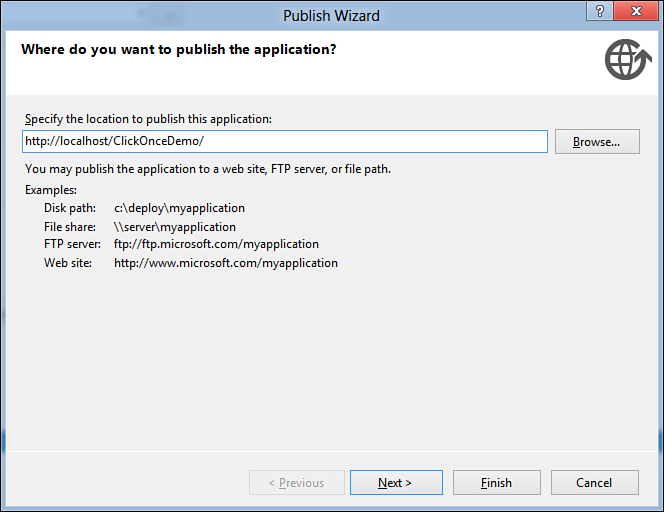
Figure 52.1. Choosing the target location for the ClickOnce deployment.
Publish the application to a local folder on the file system if you want to deploy the application on supported media such as CD-ROM or zipped archives. This option can make the application available only offline.
2. Click Next. The second dialog box of the wizard lets you specify if the application will be available offline. In this case, the .NET Framework creates a shortcut in the Start menu for launching the application and another one in the Add/Remove Programs tool for enabling uninstalling the application. Figure 52.2 shows how you set this option. This is all the information Visual Studio needs to create a ClickOnce deployment.
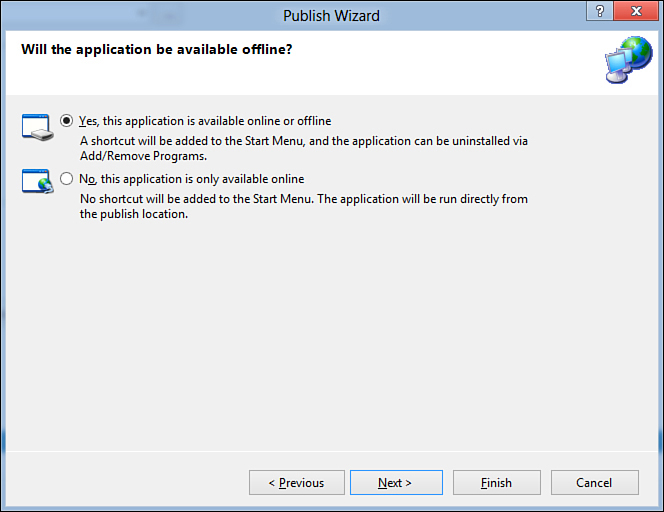
Figure 52.2. Specifying how the application will be available.
3. Click Next. You will see the last dialog box of the wizard showing the deployment information summary (see Figure 52.3).
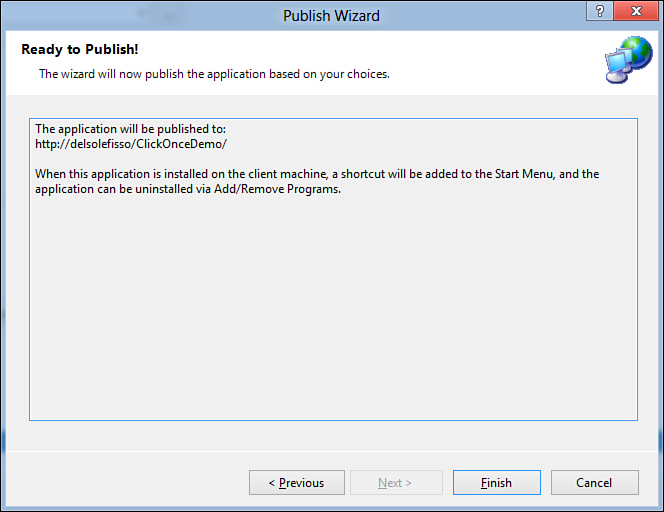
Figure 52.3. Collecting summary information for the ClickOnce deployment.
4. Click Finish. Visual Studio generates all the required files and folders. Because the deployment is currently done for a web server, Visual Studio generates a Publish.htm web page that is the place users can install the application. Figure 52.4 shows the page created for this sample application.

Figure 52.4. The web page from which the application will be downloaded.
Tips on the Publish.htm Web Page
Being a simple HTML page, the default Publish.htm can be edited to accomplish your particular needs or just to provide a different appearance. In this case, the web page address points to the local IIS, but if you publish the application onto a real server, you probably publish the application files via an FTP account; users will be able later to install the application from a web address similar to the following: www.something.com/ClickOnceDemo/publish.htm.
Now click Install. At this point, a security warning informs you the application is downloading from a website with other information about the publisher, as shown in Figure 52.5.
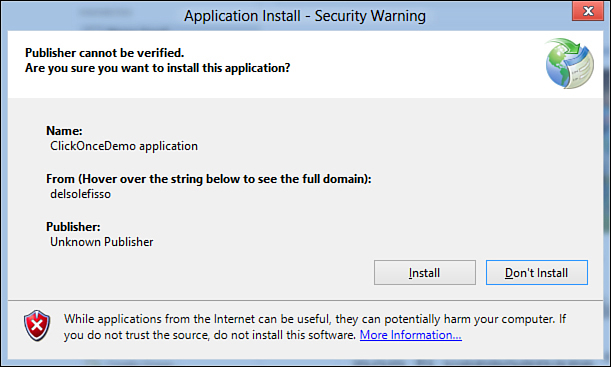
Figure 52.5. ClickOnce shows a security warning asking confirmation before installing the application and providing information on the application’s publisher and source.
Because you are the publisher and you trust yourself, click Install. This installs the application on your system, and a shortcut will be added to the Start menu. To remove the application open the Control Panel, Programs and Features tool, and then select the application from the list.
Understanding the Structure of a ClickOnce Deployment
The publish process, whatever target you select, generates a subfolder containing the following elements:
• A bootstrapper file named Setup.exe, which launches the installation.
• The application manifest, which contains information on how the application has to be run in the ClickOnce context.
• The Publish.htm file (only if the application has been published to a Web or FTP space).
• A subfolder containing the actual application and related files. This subfolder has a version number that is recognized by the .NET Framework when the application finds updates.
If you publish the application to the file system for deploying to supported media such as a CD-ROM, you just need to copy to the media the content of the publish folder.
Unless you specify a publish folder, the deployment package is published to BinDebugPublish or BinReleasePublish depending on the selected configuration.
Configuring ClickOnce
You can customize your ClickOnce deployment by setting its property page in My Project. Click the Publish tab to activate the ClickOnce options designer represented in Figure 52.6.
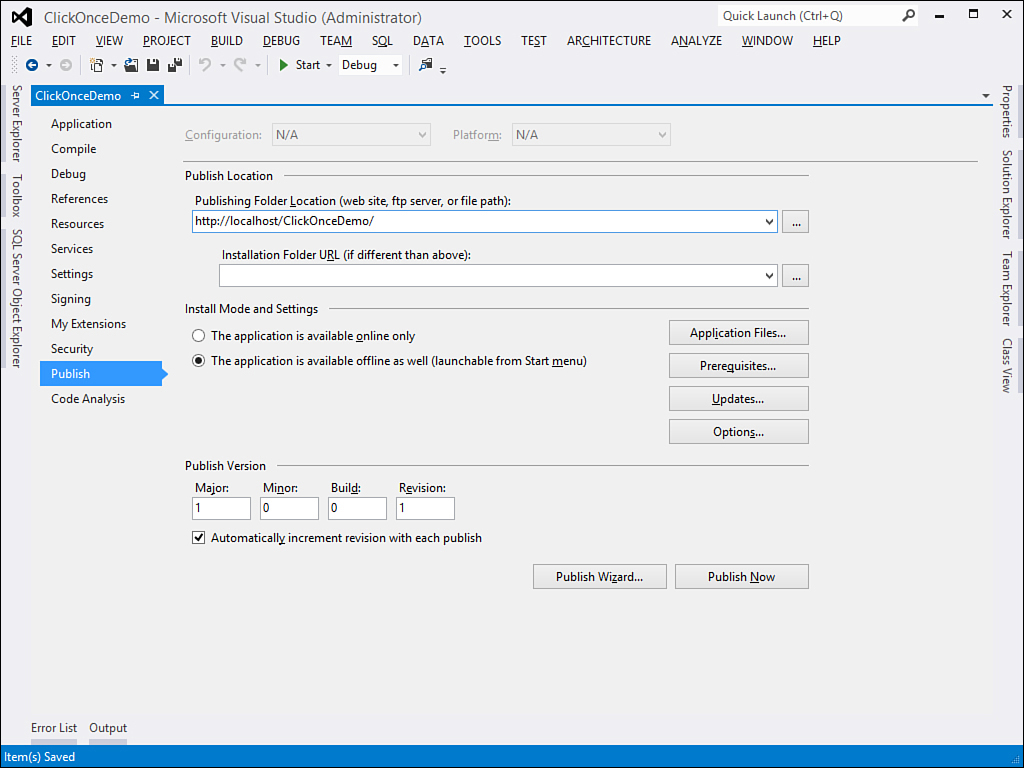
Figure 52.6. The ClickOnce properties designer enables customizing the deployment.
The upper part of the designer shows properties you already set with the Publish Wizard. The Publish Version group enables you to specify the deployment version that is important for allowing automatic updates. Automatically incrementing the revision number is a convenient way for allowing installed applications to check for updates. Just remember that the publish version is just a ClickOnce-related version and does not affect the application version. Now let’s take a look at the other available options.
Application Files
By clicking the Application Files button, you can view or specify files that need to be included in the deployment package. If you want some required files included in the deployment package (such as documents or databases), you need to set their Build Action property as Content. Visual Studio can automatically classify files according to their role in the project, so this is something you rarely need to perform manually.
Prerequisites
Prerequisites are those files the application needs to work correctly. An example of this is runtime components such as the .NET Framework or third-party controls, which the installer installs on the target machine before the application is installed. Visual Studio can detect the appropriate prerequisites and select them for you, but there are situations in which you need to perform this manually. An example of this is when you need to install third-party components. Figure 52.7 shows the Prerequisites dialog box.
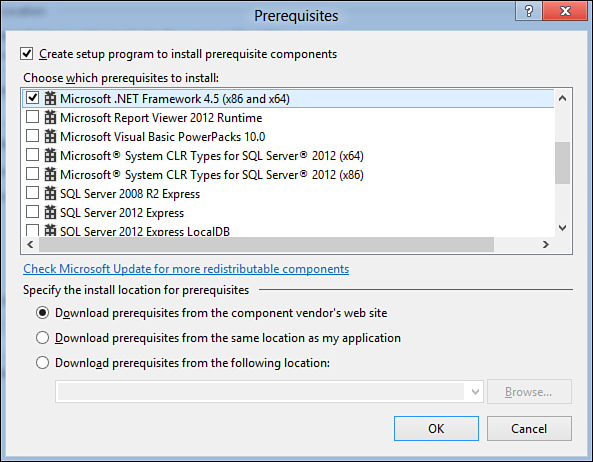
Figure 52.7. Selecting prerequisites for your applications.
If you use third-party components, ensure the producer made available a redistributable package you can include in the deployment prerequisites. The .NET Framework will always be included as a prerequisite because ClickOnce cannot predict if on the target machine the .NET Framework is already available.
Custom Prerequisites
Visual Studio 2012 does not provide a built-in functionality for packaging custom prerequisites. To accomplish this particular need, follow the instructions described in this page of the MSDN Library: http://msdn.microsoft.com/en-us/library/ms165429(v=vs.110).aspx.
Publishing Application Updates
One of the most important features in ClickOnce (and one of the reasons why you should use it) is the capability of updating applications without writing code to accomplish this. The idea is that you publish a new version of the application and when you run the old version, it checks for updates and automatically upgrades to the new version. Automatic updates are not available for applications published to the file system. To enable automatic updates, click the Updates button and then in the Application Updates dialog box, check The Application Should Check for Updates check box, as shown in Figure 52.8.
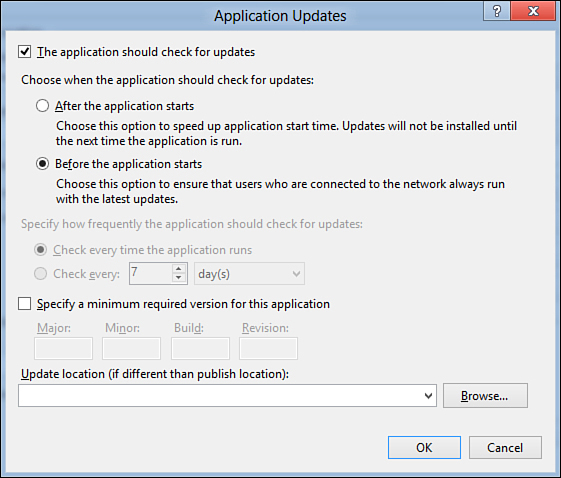
Figure 52.8. Enabling automatic updates.
You can decide whether the application will be updated before it starts (default option) so users always run the latest updates or if it will be updated after it starts, but in this case changes will be applied only at the next start. You can specify how frequently the application has to check for updates. The default setting is that the application checks for updates each time it runs. Otherwise, you can specify a time interval expressed in days, hours, or minutes. (This option is available only if you decide to update the application after it starts.)
Testing Updates
When you enable updates and you want to ensure this feature works correctly, perform any kind of modification to the application (such as adding a button). Then publish it again. Finally, run the application and check that the new version downloaded and installed.
Options
When you click the Options button, you have access to additional features. For instance, you can edit the Description part in the deployment manifest so you can set a full description for your installation. Figure 52.9 shows an example of how you can specify information.
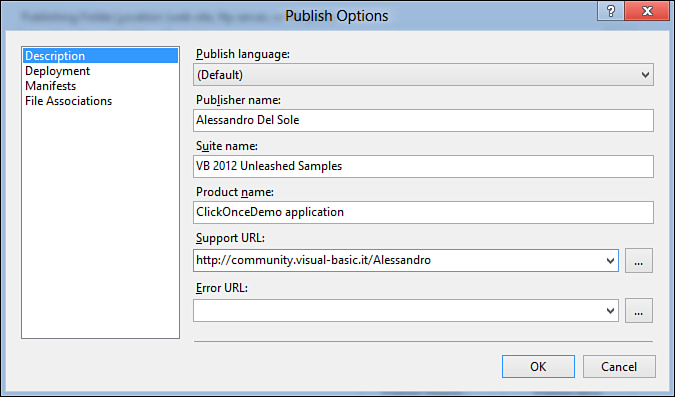
Figure 52.9. Setting description options for the deployment package.
Consider that the Publisher name will be used to create a root shortcuts folder in the Start menu, whereas the Suite name value will be used to create a shortcuts subfolder for the current application. The Deployment option enables you to set some aspects of the publish process. Figure 52.10 shows an example for setting these options. You can decide if the Publish.htm web page has to be created and shown, if the wizard generates an Autorun.inf file for automatic CD start, or if the deployment will use the .deploy extension. Pay attention to this particular option. Unless you uncheck this check box, the application files will be deployed with the addition of the .deploy extension, which might cause errors if your application attempts to access external files. If this is your case, disable the extension and deploy the application again. The Manifest option lets you establish how application URLs must be treated, but more particularly, it enables you to set if a desktop shortcut needs to be created for your application (see Figure 52.11).
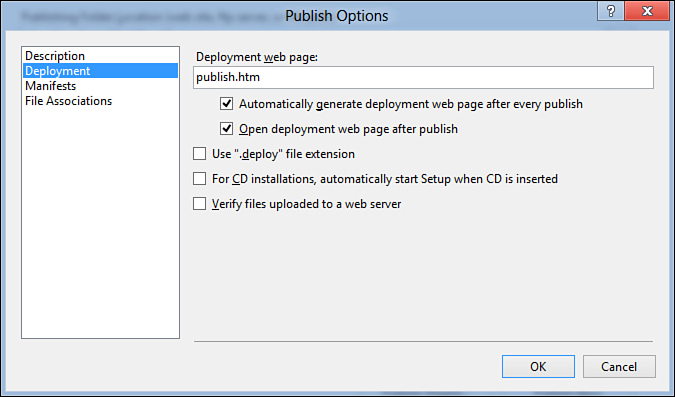
Figure 52.10. Setting deployment options.
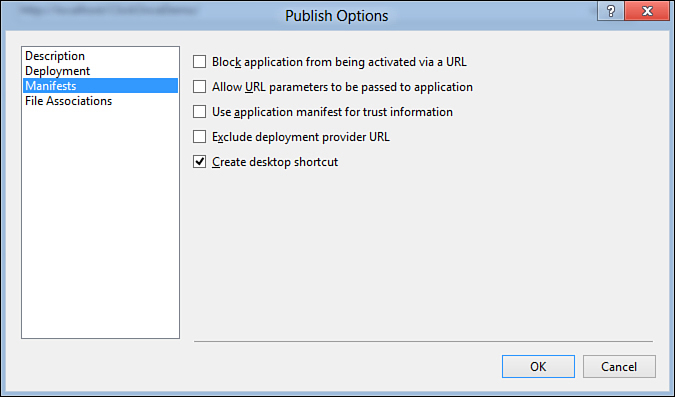
Figure 52.11. Setting manifest options.
Another useful option is the File Associations that is the only Registry customization allowed to ClickOnce. This enables you to assign a file extension to your executable.
Security Considerations
Depending on how an application is deployed or what system resources it needs to have access to, it will be considered under the Full Trust or the Partial Trust rules of .NET Framework Code Access Security. For example, an application that needs to access the Registry or other system resources needs to be full-trusted, but this is not a good idea if your application will be deployed via the Internet, which should instead be partial-trusted. You set the trust level for your ClickOnce deployments in the My Project, Security tab (see Figure 52.12).

Figure 52.12. Specifying security settings for the ClickOnce deployment.
The ClickOnce manifest can be signed with Full Trust or Partial Trust. This second option is divided into the Internet and intranet zones. You can choose the most appropriate for you or even create a custom configuration by editing the application manifest file (Edit Permissions XML button).
Providing Certificates
To make ClickOnce deployments the most trustable possible, you should use a certificate. If you look at Solution Explorer after you publish the application, you notice that Visual Studio has signed the assembly with a .pfx strong name. This is good in local test scenarios, but the most convenient way (although not mandatory) for providing security information to customers is adding an Authenticode certificate, especially if your application is deployed via the Internet. Visual Studio adds a test certificate, as demonstrated in Figure 52.13, which shows the Signing tab in My Project. The test certificate is intended for local testing purposes only and should never be used in real-life deployment, in which you will prefer an Authenticode certificate you can purchase from the specific authorities. After you add a valid certificate, to sign the ClickOnce manifest, full and trusted information will be shown to your customers when they download and install the application.
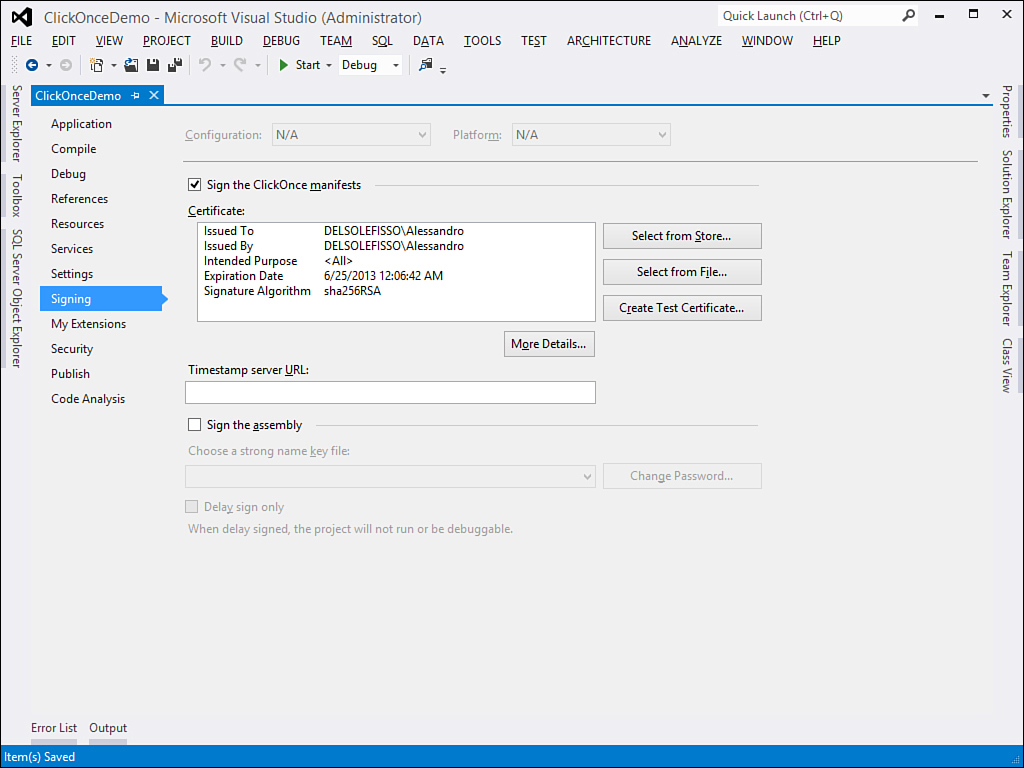
Figure 52.13. Signing the ClickOnce manifest.
Programmatically Accessing ClickOnce
As pointed out at the beginning of this chapter, ClickOnce is handled by the .NET Framework, but more precisely it is part of the .NET Framework. This means it can be accessed via managed code. The .NET Framework exposes the System.Deployment namespace that offers a managed way for interacting with ClickOnce. The subname-space System.Deployment.Application and the System.Deployment.Application.ApplicationDeployment class are the most useful items because they offer objects that enable developers to programmatically access ClickOnce information from an application. The ApplicationDeployment class exposes a shared CurrentDeployment property that enables access to interesting information on the current application deployment. The following code demonstrates how you can use the property to retrieve information on the current deployment:
Private Sub GetClickOnceInformation()
'Checks if the application has been deployed with ClickOnce
If ApplicationDeployment.IsNetworkDeployed = True Then
'Retrieves the data folder for this application
Dim dataFolder As String = ApplicationDeployment.
CurrentDeployment.DataDirectory
'Retrieves the path where updates will be
'downloaded from
Dim updatesPath As Uri = ApplicationDeployment.
CurrentDeployment.UpdateLocation
'Gets the version number for updates
Dim updateVersion = ApplicationDeployment.
CurrentDeployment.UpdatedVersion
'Determines the last time that updates were checked for
Dim lastUpdate As Date = ApplicationDeployment.
CurrentDeployment.TimeOfLastUpdateCheck
End If
End Sub
You can programmatically check and download updates. This can be useful if you do not want the application to be automatically updated but you still want to provide the user the ability of updating the application manually. The following code demonstrates this:
Private Sub ApplicationUpdate()
Dim isUpdateAvailable As Boolean = _
ApplicationDeployment.CurrentDeployment.CheckForUpdate
If isUpdateAvailable = True Then
ApplicationDeployment.CurrentDeployment.Update()
End If
End Sub
Both methods offer an asynchronous counterpart (CheckForUpdateAsync and UpdateAsync) that can be used as well.
Registration-Free COM
One of the biggest benefits from ClickOnce is users do not have administrator permissions that can install applications. Note that there are situations in which an application is deployed together with some COM libraries, but this can be a problem because these libraries need to be registered and a non-administrator user does not have the appropriate permissions for this. Fortunately, with ClickOnce you can take advantage of a technique known as Registration-Free COM, which refers to a COM library visible to the application only without the need of registration. You need to right-click the library name in Solution Explorer, References and select Properties. Finally, set the Isolated property as True (see Figure 52.14). When you build the project, Visual Studio generates a manifest file that provides the actual state of isolation of the library. Listing 52.1 shows a sample manifest file.
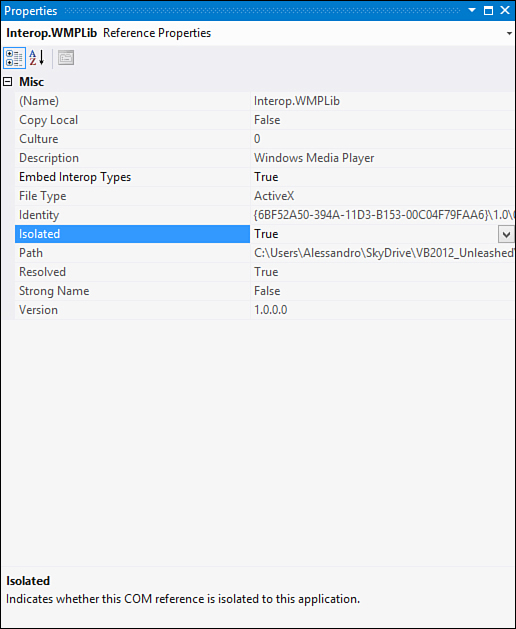
Figure 52.14. Isolating the library for Registration-Free COM.
Listing 52.1. Sample Manifest for Registration-Free COM
<?xml version="1.0" encoding="utf-8"?>
<assembly xsi:schemaLocation="urn:schemas-microsoft-com:asm.v1 assembly.adaptive.xsd"
manifestVersion="1.0" xmlns:asmv1="urn:schemas-microsoft-com:asm.v1"
xmlns:asmv2="urn:schemas-microsoft-com:asm.v2"
xmlns:asmv3="urn:schemas-microsoft-com:asm.v3"
xmlns:dsig="http://www.w3.org/2000/09/xmldsig#"
xmlns:co.v1="urn:schemas-microsoft-com:clickonce.v1"
xmlns:co.v2="urn:schemas-microsoft-com:clickonce.v2"
xmlns="urn:schemas-microsoft-com:asm.v1"
xmlns:xsi="http://www.w3.org/2001/XMLSchema-instance">
<assemblyIdentity name="Native.MyCOMLibrary" version="1.0.0.0" type="win32" />
<file name="wmp.dll" asmv2:size="11406336">
<hash xmlns="urn:schemas-microsoft-com:asm.v2">
<dsig:Transforms>
<dsig:Transform
Algorithm="urn:schemas-microsoft-com:HashTransforms.Identity" />
</dsig:Transforms>
<dsig:DigestMethod Algorithm="http://www.w3.org/2000/09/xmldsig#sha256" />
<dsig:DigestValue> kaMt4lcikbZvNzRrAtbzkM6mAlQQ5fm56Jj8Ed6xm0k=</dsig:DigestValue>
</hash>
<typelib tlbid="{6bf52a50-394a-11d3-b153-00c04f79faa6}"
version="1.0" helpdir="" resourceid="0" flags="HASDISKIMAGE" />
<comClass clsid="{6bf52a52-394a-11d3-b153-00c04f79faa6}"
threadingModel="Apartment"
tlbid="{6bf52a50-394a-11d3-b153-00c04f79faa6}"
progid="WMPlayer.OCX.7"
description="Windows Media Player ActiveX Control" />
</file>
</assembly>
The manifest file is part of the setup process, so you need to include it in your ClickOnce deployment (Visual Studio takes care of this for you). If you are interested in understanding how the Registration-Free COM technique works, you can read a specific article in the MSDN Magazine available at http://msdn.microsoft.com/en-us/magazine/cc188708.aspx.
Summary
This chapter described how to build deployment packages with ClickOnce, the one-click deployment technology included in the .NET Framework. You saw how to use the Publish Wizard to create a setup procedure in a few steps. Then you learned how you can configure the deployment options with the Visual Studio designer, including allowing automatic updates and adding publisher information. You then stepped through security considerations required so that you can understand what happens on the target machines. Finally, the discussion focused on how to programmatically interact with ClickOnce by writing Visual Basic code taking advantage of the System.Deployment.Application.ApplicationDeployment class.