
Chapter 33. Localizing Applications
Limiting applications’ user interfaces (UIs) to just one language means limiting your business. If you want to increase the possibilities of your applications being sold worldwide, you need to consider creating user interfaces that support multiple languages and the culture specifications of your users. Of course, you can give users the option to select the desired language or provide localized interfaces for a particular country, but the main concept is that localization is a common requirement in modern applications. The .NET Framework helps developers in localizing applications with several kinds of resources. In this chapter, you learn how to localize desktop applications and explore Windows Forms and WPF applications to understand the fundamentals of localization in both technologies. Specific techniques are available for web, Windows Phone, and Windows 8 Store applications, but these are beyond the scope of this book.
Available Techniques
Localizing applications is something that you can accomplish in several ways in both Windows Forms and WPF. This chapter discusses the most commonly used techniques—just remember that they are not the only ones.
Introducing .NET Localization
The .NET Framework provides the infrastructure for application localization via the System.Globalization namespace. The most important class in this namespace is the CultureInfo class that allows getting or setting information on the current application culture or on new custom settings. This class works with the System.Threading.Thread.CurrentThread class that provides access to the thread representing your executable and that exposes the CurrentCulture and CurrentUICulture properties you can assign with a CultureInfo object. The following code demonstrates how to get information on the current thread culture and how to set a new CultureInfo:
'Requires an Imports System.Globalization directive
'Gets the current culture and shows information
Dim culture As CultureInfo = System.Threading.Thread.
CurrentThread.CurrentCulture
Console.WriteLine(culture.DisplayName)
'Creates an instance of the CUltureInfo class
'based on the Italian culture and sets it as
'the current culture
Dim customCulture As New CultureInfo("it-IT")
System.Threading.Thread.CurrentThread.
CurrentCulture = customCulture
The CultureInfo class provides lots of properties that enable applications to adhere to the required culture specifications. For example, DisplayName shows the name of the culture as it appears on the system, DateTimeFormat specifies the appropriate format for date and time in the specified culture, and NumberFormat provides specifications on how numbers and percentage need to be formatted in the specified culture. In this chapter you learn how to localize smart client applications, thus Windows Forms and WPF.
Windows Forms Localization
Why Windows Forms?
As for other code examples provided throughout the book, even if Windows Forms is no longer explained, localization is discussed because such a platform is still popular and common to have to maintain in the industry.
If you are an experienced Windows Forms developer, maybe you already faced the localization problem with this technology. There are different ways for localizing a Windows Forms application, but basically all of them rely on managed resources. The easiest way for localizing a Windows Forms application is to use the Visual Studio Designer so that the IDE generates the appropriate resources files for you. An example is the best way for providing explanations; the goal of this example is to localize a Windows Forms application in both English and Italian. Run Visual Studio 2012, create a new Windows Forms project with Visual Basic 2012, and name it WindowsFormsLocalization. Follow these steps:
1. Drag a Button from the toolbox onto the new form surface, and set its Text property as Localized button.
2. Drag a Label from the toolbox onto the new form surface, and set its Text property as Localized label.
3. Select the form, and in the Properties window, set its Localizable property as True; then set its Language property as Italian.
4. Select the Button and set its Text property as Pulsante localizzato (in Italian).
5. Select the Label and set its Text property as Etichetta localizzata.
6. Build the project and enable the Show All Files view in Solution Explorer.
Visual Studio has now generated a new it-IT subfolder under BinDebug (or BinRelease) containing a satellite assembly where localized resources are stored. Moreover, Visual Studio generated a new localized resources file for the current form named Form1.it-IT.resx, storing the localized information for design time. If you try to run the application, you notice that it is still localized in English. This is because you need to explicitly assign the new localized culture in code. You can do this by adding the following code (which requires an Imports System.Globalization directive) at the beginning of the application startup, which is typically the constructor, before the InitializeMethod is invoked:
Public Sub New()
With Threading.Thread.CurrentThread
.CurrentUICulture = New CultureInfo("it-IT")
.CurrentCulture = New CultureInfo("it-IT")
End With
' This call is required by the designer.
InitializeComponent()
' Add any initialization after the InitializeComponent() call.
End Sub
The code assigns to the current thread the new culture information that will be retrieved from the related subfolder and satellite assembly. Figure 33.1 shows how the application looks with localized controls.
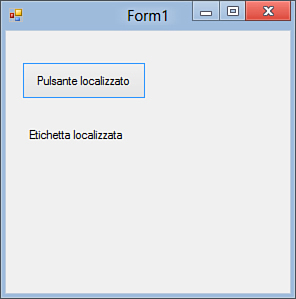
Figure 33.1. The localized Windows Forms application in action.
Localizing Windows Forms applications is an easy task because you can use the Visual Studio Designer. Unfortunately, this is not the same in WPF applications, where a number of manual steps are required, as explained in the next section.
WPF Localization
In WPF, the localization process is also based on resources but with different steps. Also, there are some alternative techniques for accomplishing localization, but we cover only the most common.
Note on Installed Culture
The code examples shown in this section assume that your system’s regional settings are based on the en-US (English-United States) culture. If your system is based on different regional settings, replace en-US with the culture information that suits your system.
When you compile a WPF project, the XAML code is parsed into a more efficient file format known as Binary Application Markup Language (BAML). Each BAML file represents a resource that is then linked into the executable storing all resources. To localize a WPF application, you need to localize BAML objects and put the result in a satellite assembly. This is accomplished using a command-line tool named LocBaml.exe, which is available for free from the MSDN. It is distributed as C# source code, so you need to open it inside Visual Studio and compile it. At the time this chapter is being written, LocBaml source code is available for .NET Framework versions prior to 4.5. Thus, in order to make it work with the next examples, you need to perform some steps that are described in the next subsection.
Locbaml for .NET 4.5
You can check for the availability of a new version of LocBaml targeting .NET 4.5 at the following address: http://msdn.microsoft.com/en-us/library/ms771568(VS.110).aspx. When Microsoft makes it available, you can skip the next section and go to the “Localizing a WPF Application” section.
Preparing the LocBaml Tool
Until a new version of LocBaml is available for .NET 4.5, you can download version 4.0 and upgrade it manually. To accomplish this, follow these steps:
1. If not installed, install Visual C# on your machine (the Express Edition is also supported).
2. Download the LocBaml source code from this address: http://go.microsoft.com/fwlink/?LinkID=160016
3. Uncompress the downloaded archive into any folder you like.
4. Start Visual Studio 2012 and create a new Console Application with Visual C#, naming the project as LocBaml.
5. Save the new project into a different folder than the downloaded source code.
6. Remove the Program.cs and AssemblyInfo.cs code file from the project. Notice that the second file is just a duplicate of the one generated by the IDE and so can be safely removed.
7. Using the Project, Add Existing Item command, add all the code files (with .cs extension) from the downloaded source code folder to the current project folder.
8. Add a reference to the following assemblies: WindowsBase.dll, PresentationCore.dll, and PresentationFramework.dll
9. In the new project, add a folder named Resources and add to this new folder the StringTable.resText file, which you can pick from the same-named folder of the original LocBaml code.
10. After you’ve added the file, open the Properties window and set the Build Action property as Embedded Resource.
11. Open the LocBaml.csproj project file with the Windows Notepad and add the following lines (if not already available) within an ItemGroup node:
<EmbeddedResource Include="ResourcesStringTable.resText">
<LogicalName>Resources.StringTable.resources</LogicalName>
</EmbeddedResource>
12. In Solution Explorer, click Properties and ensure that the BamlLocalization.LocBaml is set as the startup object in the Application tab.
Now build the project. At this point you have a new version of LocBaml.exe that targets the .NET Framework 4.5.
Localizing a WPF Application
When you have completed the steps required to prepare LocBaml, imagine you want to create a localized version for the Italian culture of a WPF application based on English as the primary culture. Create a new WPF project with Visual Basic and name it as WpfLocalization, and add the code shown in Listing 33.1 on the XAML side. The goal is to provide a WPF counterpart of the Windows Forms example shown in the previous section.
Listing 33.1. Preparing the User Interface Before Localization
<Window x:Class="MainWindow"
xmlns="http://schemas.microsoft.com/winfx/2006/xaml/presentation"
xmlns:x="http://schemas.microsoft.com/winfx/2006/xaml"
Title="MainWindow" Height="350" Width="525">
<StackPanel>
<Button Name="Button1" Width="100" Margin="5"
Height="40" Content="Localized button"/>
<TextBlock Text="Localized text"
Margin="5"
Name="TextBlock1"/>
</StackPanel>
</Window>
The first step required to localize a WPF application is to specify the neutral-language specification at assembly level. Click the Show All Files button in Solution Explorer, expand My Project, and double-click AssemblyInfo.vb; finally uncomment the following line of code:
<Assembly: NeutralResourcesLanguage("en-US",
UltimateResourceFallbackLocation.Satellite)>
This is required because the application looks for localization resources inside external satellite assemblies, and at least one culture must be provided as neutral. This is the culture you are writing code with. The next step is to open the project file, thus click the File, Open, File command and browse the project folder; then open the WpfLocalization.vbproj file. At this point you need to add the following line of XML markup inside one of the PropertyGroup items:
<UICulture>en-US</UICulture>
This works with the neutral language specification and ensures that a satellite assembly for current culture resources will be generated. The successive step is marking UI elements in XAML as localizable. This is accomplished by adding an x:Uid attribute to each localizable member, assigning an identifier equal or similar to the element name. This task can be accomplished manually but can be difficult if you have a lot of elements to mark as localizable, so the most common option is running the MSBuild compiler that automates this for you. Save the project, and then open a command prompt pointing to the project folder. Next, write the following command lines after the exact sequence shown:
msbuild /t:updateuid WpfLocalization.vbproj
msbuild /t:checkuid WpfLocalization.vbproj
The first command line adds an x:Uid attribute to each UI element possible (updateuid), whereas the second one performs a check to verify that all localizable members have an x:Uid. When MSBuild completes, you notice how visual elements have been marked as localizable, as shown in Listing 33.2.
Listing 33.2. The XAML Code Marked as Localizable by MsBuild
<Window x:Uid="Window_1" x:Class="MainWindow"
xmlns="http://schemas.microsoft.com/winfx/2006/xaml/presentation"
xmlns:x="http://schemas.microsoft.com/winfx/2006/xaml"
Title="MainWindow" Height="350" Width="525">
<StackPanel x:Uid="StackPanel_1">
<Button x:Uid="LocalizedButton" Name="LocalizedButton" Margin="5"
Width="140" Height="40"
Content="Localized button"/>
<TextBlock x:Uid="LocalizedTextBlock" Name="LocalizedTextBlock" Margin="5"
Text="Localized text"/>
</StackPanel>
</Window>
Now build the project again in Visual Studio. You now notice that the project output folder (BinDebug or BinRelease) contains a new subfolder named en-US, which contains a WpfLocalization.Resources.dll satellite assembly with localized resources for the en-US culture. The goal now is to create a similar folder/assembly structure per culture. In this case, you see how to create a localized satellite assembly for the Italian culture, but you can replace it with a different one. A subsequent step requires invoking LocBaml. The need is to extract resources information and edit the information with localized ones. The following command line parses the neutral-language resources and creates an editable .CSV file in which you can place custom information:
LocBaml.exe /parse en-USWpfLocalization.resources.dll /out:WpfLocalization.csv
When ready, open the generated WpfLocalization.csv file with an appropriate editor, such as Microsoft Excel or Visual Studio. Figure 33.2 shows how the contents of the file appear in Microsoft Excel.
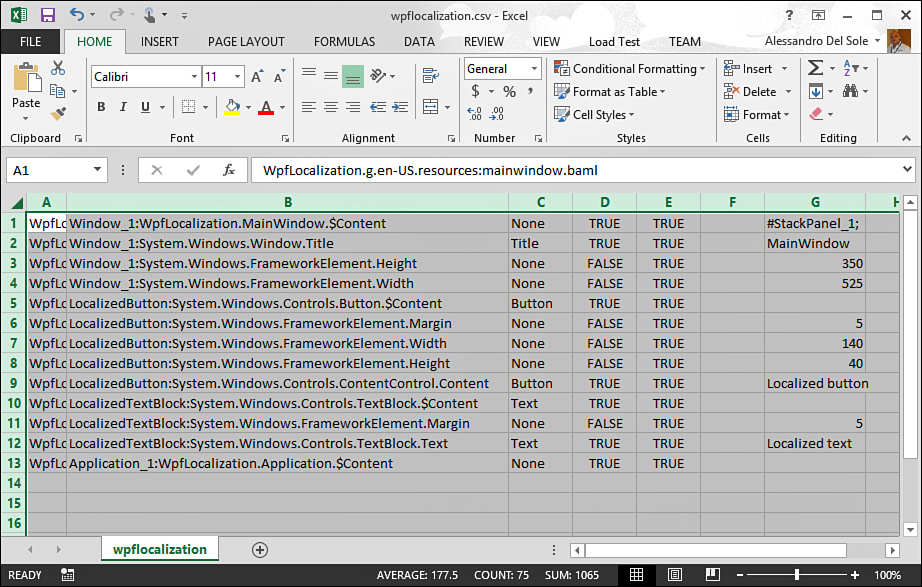
Figure 33.2. The extracted resources information opened in Excel.
If you inspect the contents of the file, you’ll notice the content of UI elements. For example, row 2 contains the Window title, row 9 contains the Button text as the last word, and row 12 contains the TextBlock text. Now you need to replace the original values with new ones. Continuing the example of the Italian localization, perform the following replacements:
• In row 2, replace MainWindow with Finestra principale.
• In row 9, replace Localized button with Pulsante localizzato.
• In row 12, replace Localized text with Testo localizzato.
Figure 33.3 shows the file after edits.
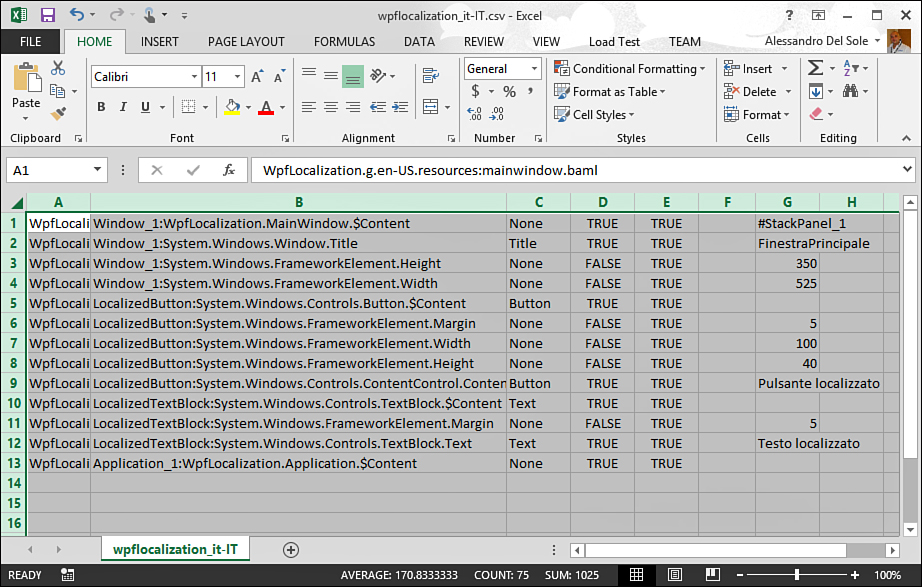
Figure 33.3. Resources information is edited for localization.
Now save the file with a different name—for example, WpfLocalization_it-IT.csv. When done, manually create a new directory where the new localized resources will be published; then create a folder named it-IT inside the same folder of en-US. You still need to invoke LocBaml to build the localized satellite assembly, so write the following command line:
LocBaml.exe /generate en-USWpfLocalization.resources.dll /trans: WpfLocalization
_it-IT.csv /out:c: /cul:it-IT
The /generate option tells LocBaml to generate a new satellite assembly, translating (/trans) the specified .csv file into the desired culture (/cul). The /out option enables you to specify the target directory that in this example is the hard drive root folder. When ready, move the newly generated WpfLocalization.resources.dll assembly from C: into the it-IT subfolder you created before. The last step is to initialize the desired culture information at the application startup. In Application.xaml.vb provide a constructor as follows:
Imports System.Globalization
Imports System.Threading
Class Application
Public Sub New()
Thread.CurrentThread.CurrentUICulture = _
New CultureInfo("it-IT")
Thread.CurrentThread.CurrentCulture = _
New CultureInfo("it-IT")
End Sub
End Class
This is different from Windows Forms because in WPF the Application class is the actual application entry point. If you now run the application, you get the result shown in Figure 33.4, where you can see how UI elements have been localized.
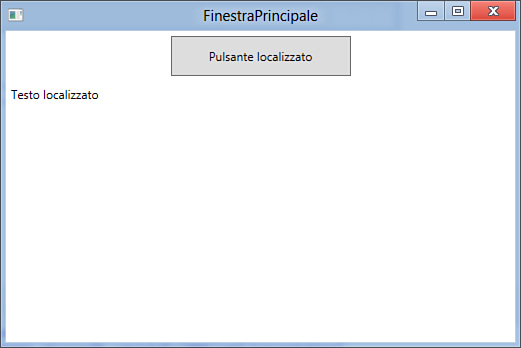
Figure 33.4. Localized UI elements in the WPF sample application.
Summary
In this chapter we covered localization; first we discussed information on how the .NET Framework provides objects for application localization at a general level. Next, the discussion focused on Windows Forms applications localization, using the Visual Studio Designer and managed resources files. Finally, you learned how localization works in WPF applications and how a number of manual steps are required, such as adding the neutral-language resource and culture information to the project file, running MSBuild to mark visual elements as localizable, and running LocBaml to generate satellite resources assemblies.