Topics and tasks in this chapter
Deciding how to transfer
Collecting the Files from Your Old Windows XP Computer
Placing the Files and Settings on Your New Windows 7 Computer
When you bring home an exciting new Windows 7 computer, it lacks the most important thing of all: your old computer's files. How do you copy your files from that drab old computer to that exciting new Windows 7 computer? How can you even find everything you want to move?
To solve the problem, Microsoft created a virtual moving van named Windows Easy Transfer. The Windows Easy Transfer program sweeps up your old computer's data and program settings: your Web browser's list of favorite Web sites, for example. After packaging them up, the transfer program copies them to your new computer.
There's one big catch: Windows Easy Transfer won't move your programs. You need to install those onto your Windows 7 computer by hand. (Start searching for your old discs. . ..)
Windows Vista owners don't need the transfer program, as Windows 7 keeps their files, most programs, and their settings in place during an upgrade. But Windows XP owners should all walk down this chapter's path.
Note
Windows Easy Transfer doesn't work with older Windows versions such as Windows Me or Windows 98.
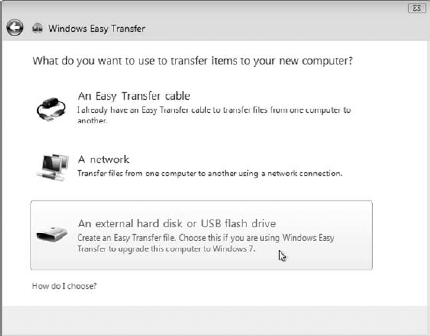
Windows Easy Transfer packages all your files and program settings into one huge file, leaving you with one huge decision. What's the best way to move that huge file over to your new Windows 7 computer? The envelope, please:
Easy Transfer cable: A natural choice for the budget conscious, this cable resembles a normal USB cable. Plug one end into each computer's USB port, and you're ready to transfer the file. (No, a normal USB cable won't work.) Easy Transfer cables cost less than $30 online and at computer stores.
Portable hard drive: Costing around $100, a portable hard drive can plug into your computer's USB port to grab or deliver the file. Some portable drives plug into a wall outlet for power; others draw their power right from the USB port. (I describe how to create your own portable hard drive in Chapter 13.)
Flash drive: These little memory sticks plug into any computer's USB port. They're handy for transferring small batches of files or settings, but they lack enough storage space to hold much else.
Network: If you've linked your two computers through a network (a chore I cover in Chapter 15), the Easy Transfer program can place the magic transfer file in any folder that's accessible to both computers.
I recommend the portable hard drive. Even if you have to buy one, you can leave the drive plugged into your Windows 7 computer and use it for backups.
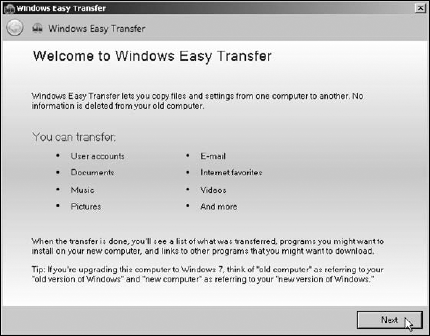
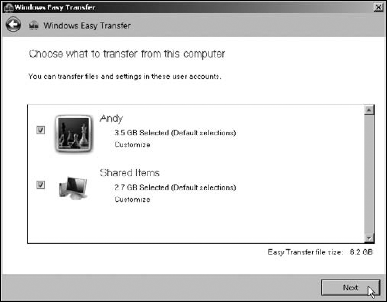
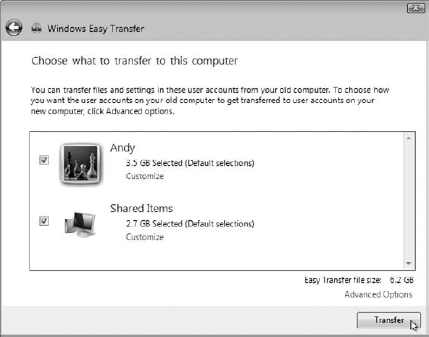
When running Windows Easy Transfer, you'll eventually face the window shown in Figure 20-1, along with the program's stern demand: Choose What to Transfer.
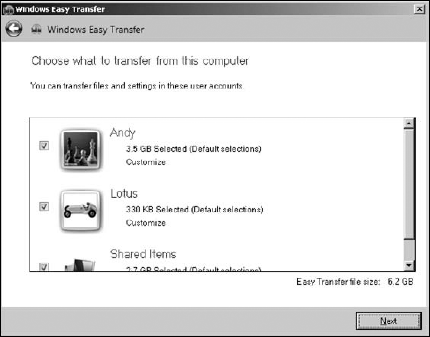
Figure 20.1. Windows Easy Transfer transfers files and program settings from your old computer to your new one.
Tip
To transfer everything from all your old computer's user accounts to accounts on your new computer, simply click the Next button. If your new computer has enough space, the program copies everything for later transfer to your new computer. You can always delete unwanted items later from your new computer, if you want.
But if your new computer doesn't have enough storage space or you don't want everything copied, here's how to choose which items to transfer:
User Accounts: Want to transfer your own account to your new computer, but leave the other accounts behind on the family's computer? Here's your chance: Windows Easy Transfer puts a check mark next to each user account it will transfer, as shown in Figure 20-1. Click to remove the check mark from the user accounts you don't want transferred.
Customize: Sometimes you don't need it all. To pick and choose what categories of items should be transferred from each account, click the Customize button under each account's name. A window pops up, shown in Figure 20-2, letting you exclude certain categories. Remove the check mark from Desktop, for example, to grab everything but your Desktop's items from your old computer.
Advanced: The Advanced button, shown at the bottom of the pop-up list in Figure 20-2, works for techies who enjoy micromanaging. By weeding through the tree of folder and filenames, this area lets you pick and choose individual files and folders to copy. It's overkill for most people, but it's an option, nevertheless.

If you've customized your transfer, click the Save button to return to the Choose What to Transfer window. Then, click Next to continue the transfer process.
Windows Easy Transfer only copies files and program settings, not the programs themselves. So, before copying your files and settings to Windows 7, dig out your old program discs. Hopefully, you've kept them in the box on the shelf. Install those programs on your Windows 7 computer so they're ready to receive their incoming settings.
Then follow these steps on your old computer to run Windows Easy Transfer:
Windows Easy Transfer is built into Windows 7, but not Windows XP. To download the program onto your old computer, head to Microsoft's Web site (
http://windows.microsoft.com/en-us/windows7/products/features/windows-easy-transfer). (Every Web site mentioned in this book is mentioned on my Web site atwww.andyrathbone.comfor your point-and-click convenience.) Nearly every Windows XP owner should download the program's 32-bit version.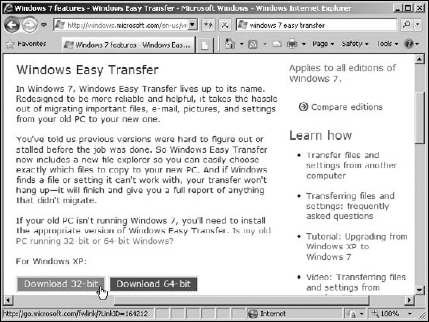
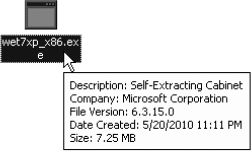
Install the program by double-clicking the downloaded file's name. The file's name should resemble
wet7xp__86.exeor something very similar. (At this point, close any other open programs so that their settings can be copied successfully.) Click Next, agree to the 12 pages of licensing terms, and then click Next again to finish installing the program. You'll need to restart your computer.
Click the Start button, click All Programs, and click Windows Easy Transfer for Windows 7 to launch the program.
Click Next at the opening screen.
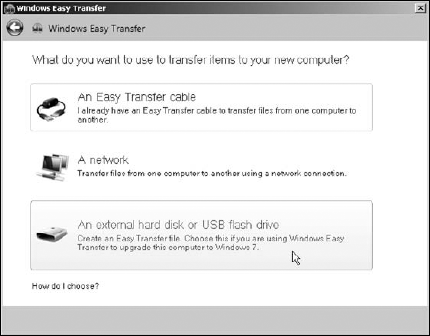
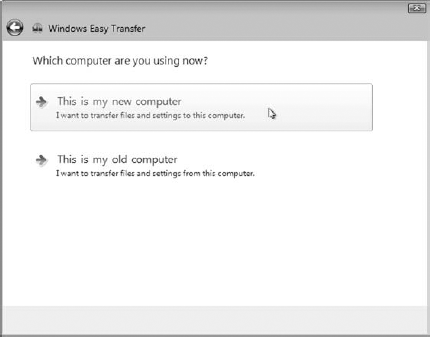
Click the method you'd like to use for transferring your files and settings to your Windows 7 computer, as I described at the beginning of this chapter. You can use an Easy Transfer cable, a network storage area, or my favorite option, a portable hard drive.
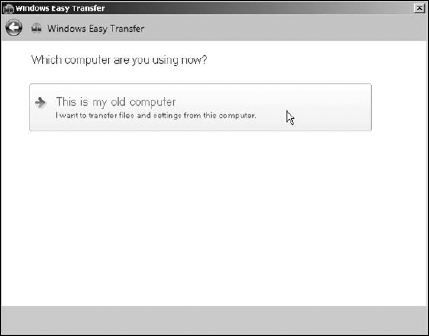
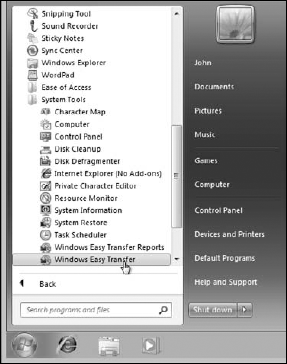
Choose This is my Old Computer. If you're transferring through a network, write down the secret code that appears. If you're using an Easy Transfer cable or a network, shuffle over to your new Windows 7 computer and run Windows Easy Transfer. (To find Windows Easy Transfer in Windows 7, click the Start menu, click All Programs, click Accessories, and click System Tools.) Using a portable hard drive to transfer files? Jump to Step 7.
To transfer everything possible, just click Next. To fine-tune your selection, perhaps leaving out some folders or user accounts, read this chapter's earlier section, "Picking and Choosing the Files, Folders, and Accounts to Transfer." When you're done choosing, click Next.
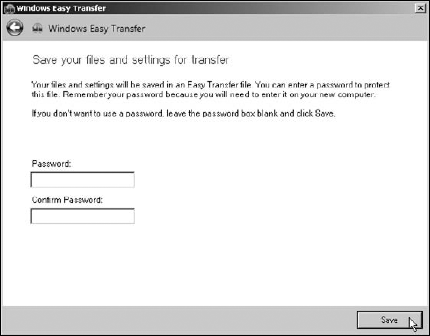
Enter a password if you're concerned that others might have access to your transfer file, and with it, your private files. Then click Save.
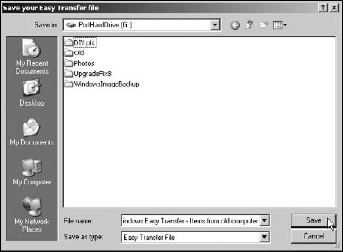
Choose the location to save the file, be it a portable hard drive or network location, and then click Save. Then relax — don't work on your old computer — until the program has packaged all the information and stashed it in your chosen spot. When the program's finished, click Next, and then head to the next task, where you retrieve all those files on your Windows 7 computer.
After you've collected the files and settings from your old computer, here's how to unpack them on your new Windows 7 computer. The Windows Easy Transfer program may ask a lot of questions, but most require simple Yes or No answers, followed by a click of the Next button.
Here are the steps:
Open Windows Easy Transfer on your new Windows 7 computer by choosing Start and clicking All Programs. Under Accessories, click System Tools, and then click Windows Easy Transfer. When Windows Easy Transfer jumps to the screen, click Next. Groggy from being woken up, Windows Easy Transfer leaves you at a screen saying, What Do You Want to Use to Transfer Items to Your New Computer?
Choose the transfer method you chose while in the preceding task — a portable hard drive, an Easy Transfer Cable, or a network.
Choose This Is My New Computer.
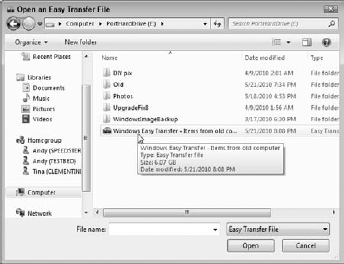
If you chose to transfer by portable hard drive, flash drive, or network, the program asks whether you've already gathered your files. Click Yes, plug in your drive, and browse to the location where you've saved your Windows transfer file. When the Open an Easy Transfer window appears, double-click your portable hard drive's name, and then double-click the file called "Windows Easy Transfer – Items from Old Computer." Enter the password you gave it earlier, if necessary, and click Next.
If you chose to transfer by Easy Transfer cable, the program asks if you need to install Windows Easy Transfer onto your old computer. Choose I Already Installed It on My Old Computer, and click Next. The two computers find each other through the cable and begin talking.
Network swappers are asked to enter their secret code from Step 6 of the preceding task before being allowed to grab the transfer file.
Click the Transfer button on your new computer to begin copying the information. After clicking, let the computers work undisturbed. If you've grabbed more information than your new computer can hold, you'll encounter the Choose What to Transfer window from Step 7 in the preceding task. There, you must whittle down the information you want to transfer. (I cover that window and its whittling process in this chapter's earlier section.)
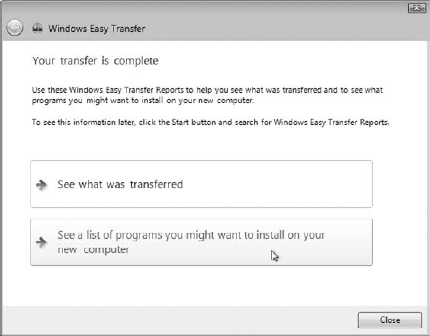
The program leaves you with these two options. See What Was Transferred fetches a dry, technical report listing exactly what was transferred. The more useful option, See a List of Programs You Might Want to Install on Your New Computer, tells you the programs you'll need to install before you can open some of your transferred files.