In This Chapter
This chapter is devoted to the topic of performing validation in an ASP.NET MVC application. For example, you learn how to validate whether a user has entered a required value into an HTML form field.
Over the course of this chapter, we examine alternative approaches to validation. You learn how to perform validation in a service layer and how to perform validation using the IDateErrorInfo interface.
Finally, at the end of this chapter, you learn how to test code that performs validation. You learn how to verify that the expected error message is generated from a controller.
You represent validation errors in an ASP.NET MVC application with something called the model state dictionary. The model state dictionary contains a collection of model state objects that represent the state of particular properties.
You pass validation errors from a controller action to a view by passing the model state dictionary from the controller to a view. Both the controller class and the view class have a property named ModelState that exposes the model state dictionary.
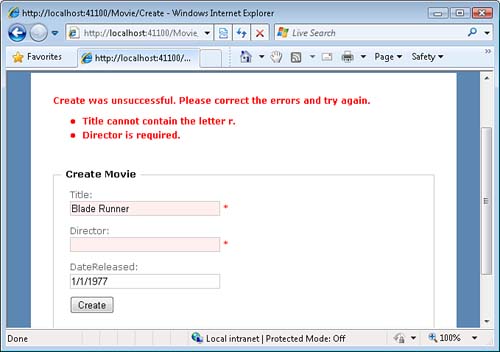
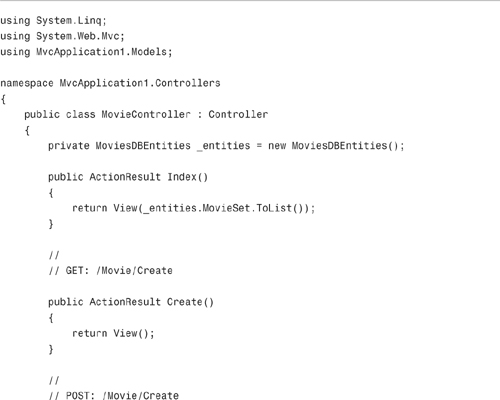
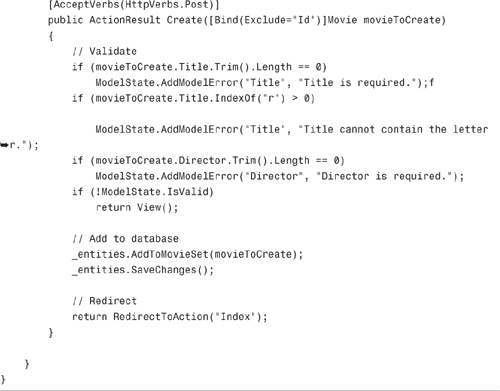
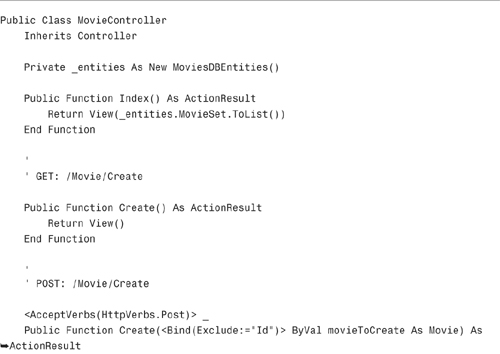
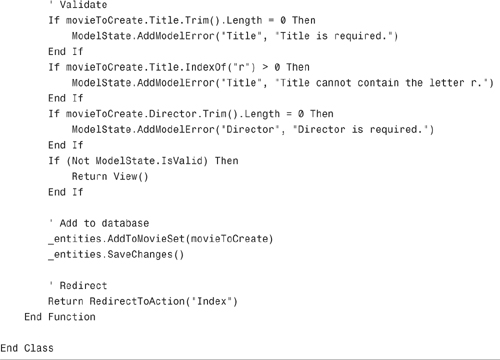
The controller in Listing 8.1 illustrates how you use model state. The Create() action validates the Title and Director properties of the movie passed to the action. If the movie fails validation, the ModelState.IsValid property returns the value false and the action redisplays the form for creating a movie (see Figure 8.1).
Validation errors are added to model state with the help of the AddModelError() method. This method accepts two values: a key and an error message. The key (typically) corresponds to the property being validated.
If any errors have been added to model state, the ModelState.IsValid property returns false. In Listing 8.1, when ModelState.IsValid returns false, the original HTML form for creating a movie is redisplayed. Otherwise, if ModelState.IsValid returns true, the new movie is added to the database, and the user is redirected to the Index action.
Note
Notice the Bind attribute that is applied to the Movie parameter in Listing 8.1. This Bind attribute tells the model binder to ignore the Id property when binding. If you do not exclude the Id property and you do not include a form field for Id, you get a mysterious validation error in model state.
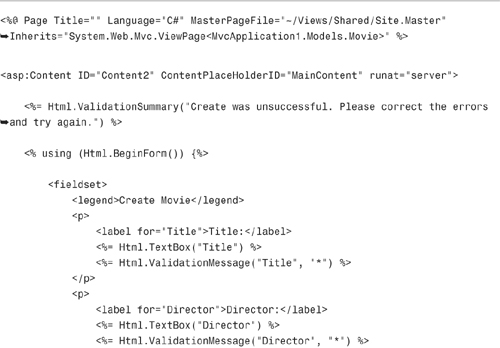
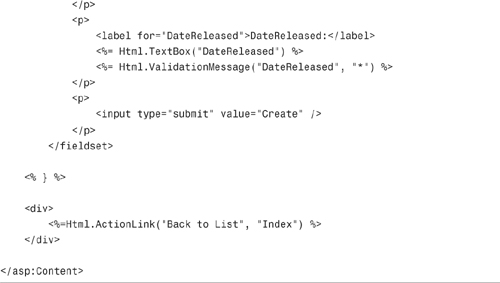
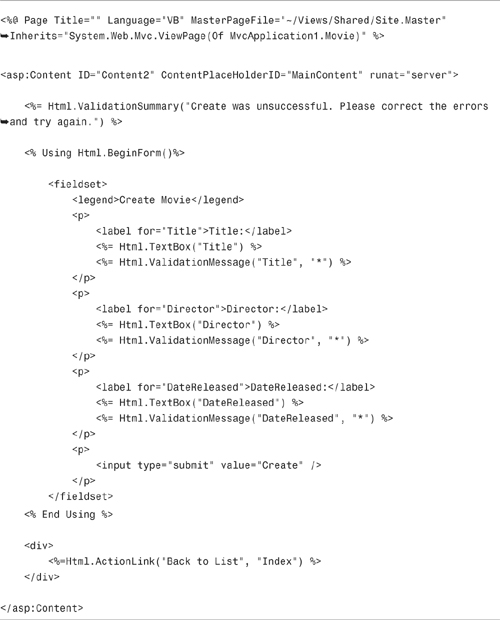
The ASP.NET MVC framework includes two validation helpers: Html.ValidationSummary() and Html.ValidationMessage(). The Html.ValidationSummary() helper displays a bulleted list of all the validation error messages in model state. The Html.ValidationMessage helper displays a validation error message associated with a particular key (property).
When you generate a view by using the Visual Studio Add View command, the generated view contains both of these validation helpers automatically (see Listing 8.2). The Html.ValidationSummary() helper appears at the top of the form. The Html.ValidationMessage() helper appears next to each form field.
The Html.ValidationSummary() helper accepts the following optional parameters:
• message (optional)—The message appears before the bulleted list of validation error messages.
• htmlAttributes (optional)—The HTML attributes are added to the <span> tag that surrounds the message and the <ul> tag that surrounds the list of validation error messages.
The Html.ValidationMessage() helper accepts the following parameters:
• modelName—The name of the key in model state that corresponds to the validation message.
• validationMessage (optional)—The error message displayed. If not supplied, the message from model state is displayed.
• htmlAttributes—The HTML attributes are added to the <span> tag that surrounds the error message.
There are several Cascading Style Sheets classes that you can modify to alter the appearance of the validation error messages. These classes are given default values in the Site.css file included in a new ASP.NET MVC project (located in the Content folder):
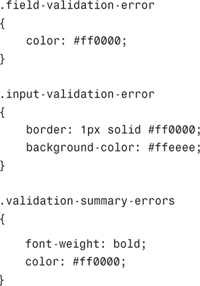
The field-validation-error class is applied to the error message rendered by the Html.ValidationMessage() helper.
The input-validation-error class is applied to form fields rendered by helpers such as the Html.TextBox() or Html.TextArea() helpers.
Finally, the validation-summary-errors class is applied to both the <span> and <ul> tags that are rendered by the Html.ValidationSummary() helper.
Note
The HtmlHelper class includes three static (shared) methods named HtmlHelper.ValidationInputCssClassName(), HtmlHelper.ValidationMessageCssClassName(), and HtmlHelper.ValidationSummaryCssClassName() that you can use to generate the CSS class names described in this section. These methods simply return CSS class names and nothing else.
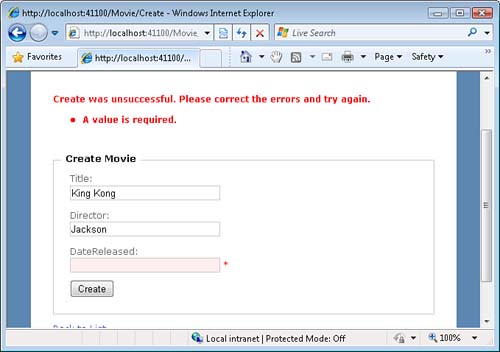
If you submit the form for creating a new movie, and you don’t provide a value for the DateReleased property, you get the validation error message in Figure 8.2. Where does this error message come from?
There are actually two types of validation error messages: prebinding and postbinding validation errors. Prebinding validation error messages are added to model state before a model binder creates an object and postbinding validation error messages are added to model state after an object is created.
In Chapter 7, “Understanding Model Binders and Action Filters,” we discussed the default model binder. The default model binder is responsible for taking a browser request and converting it into a parameter passed to an action. For example, it takes a set of untyped form fields and converts them into an object.
However, the default model binder cannot always complete its task successfully. Imagine that a user types the string "apple" into the DateReleased form field. Because the default model binder cannot assign a string to a DateTime property, the default model binder adds an error message to model state.
There are two situations in which the default model binder generates a validation error message:
• Property value required—When you attempt to assign null to a property that does not accept null (for example, submitting a blank form field for a DateTime property)
• Invalid property value—When you attempt to assign the wrong type of value to a property (for example, submitting a form field with the value "apple" for an Integer property).
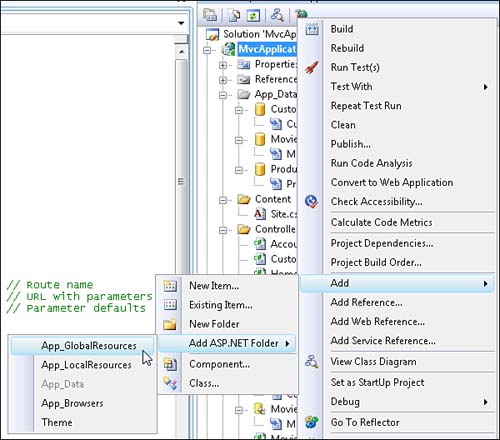
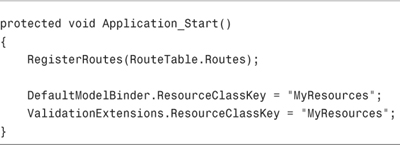
The only way to customize prebinding validation error messages is to create a custom resource string. Follow these steps:
- Modify the
Application_Startevent handler in the Global.asax file so that it looks like Listing 8.3. - Create an
App_GlobalResourcesfolder by selecting the menu option Add, Add ASP.NET Folder, App_GlobalResources (see Figure 8.3). - Right-click the
App_GlobalResourcesfolder and select the menu option Add, Add New Item. - In the Add New Item dialog, select the Resource File template. Name the file
MyResources.resx and click the Add button. - Add two resource strings named
InvalidPropertyValueandPropertyValueRequired(see Figure 8.4).
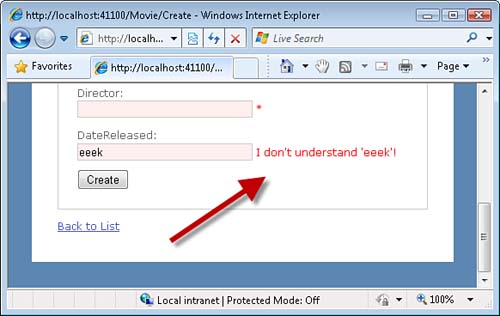
After you make these changes, the text defined in the MyResources.resx file will be used for the prebinding validation error messages. For example, Figure 8.5 illustrates what happens when you submit the value "eeek" for a DateTime field.
There are some limitations to customizing the prebinding error message. First, you cannot include the name of the property in the error message. Second, the Html.ValidationSummary() helper does not display the InvalidPropertyValue error message. If you need to completely customize a prebinding error message, you should consider creating a custom model binder or not using a model binder at all.
From the perspective of good software design, the Movie controller is horrible. The Movie controller mixes controller logic, validation logic, and data access logic. It enthusiastically violates the Single Responsibility Principle (SRP).
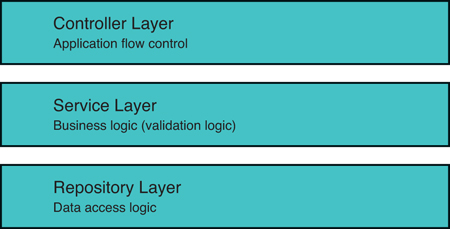
In this section, we redeem ourselves by separating the controller, validation, and data access logic into separate layers. We create separate controller, service, and repository layers. That way, making changes in one layer does not jeopardize working code in another layer (see Figure 8.6).
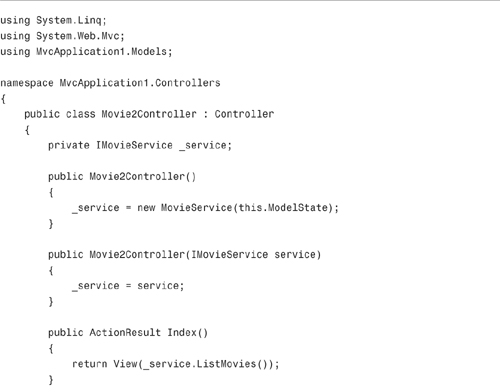
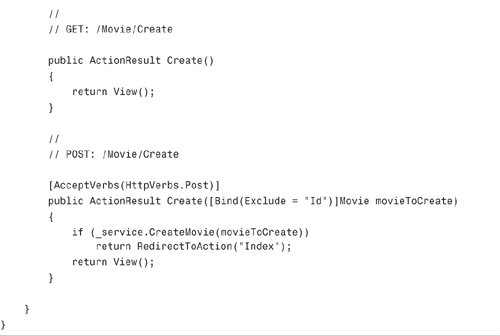
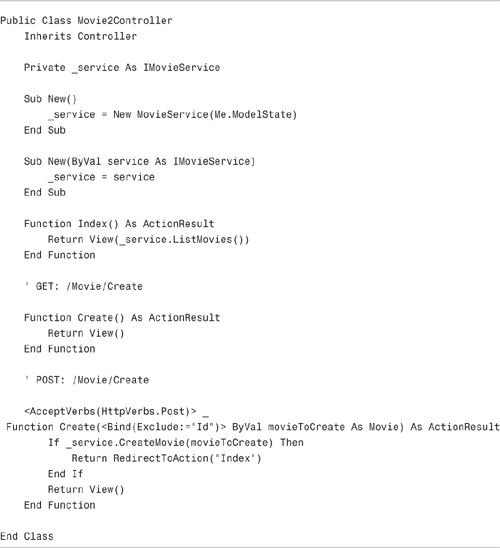
The Movie2 controller in Listing 8.4 contains only controller logic and nothing else. Compare the Create() action in Listing 8.4 with the Create() action in Listing 8.1. The Create() action in Listing 8.4 has only a few lines of code.
Note
The Movie2 controller uses a software pattern named Dependency Injection. Notice that the controller class uses the abstract IMovieService interface instead of the concrete MovieService class everywhere except the constructor.
One benefit of the Dependency Injection pattern is that it makes the controller more testable. In the last section of this chapter, you learn how to test whether this controller class returns the right validation error messages.
The controller in Listing 8.4 uses a class named the MovieService in both its Index() and Create() action. The MovieService class is used in the Index() action to return the list of movies. The Movie service is used in the Create() action to create a new movie.
The MovieService class is created in the controller’s constructor. Notice that the controller model state dictionary is passed to the Movie service when the service is created. The Movie service communicates validation error messages back to the controller through this model state dictionary.
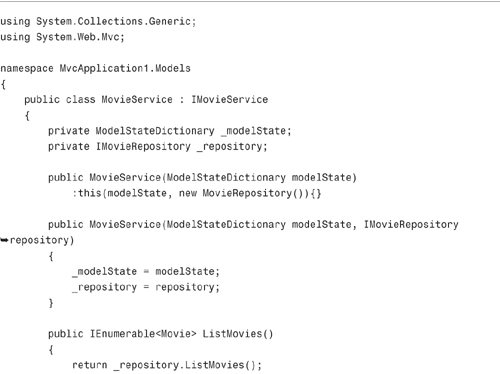
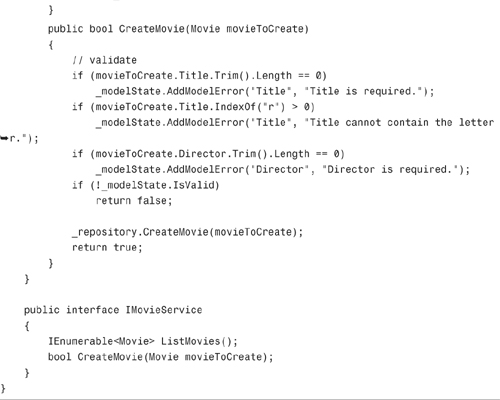
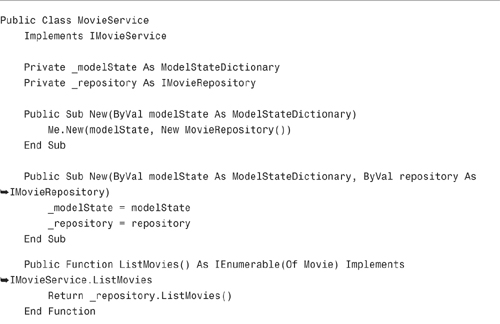
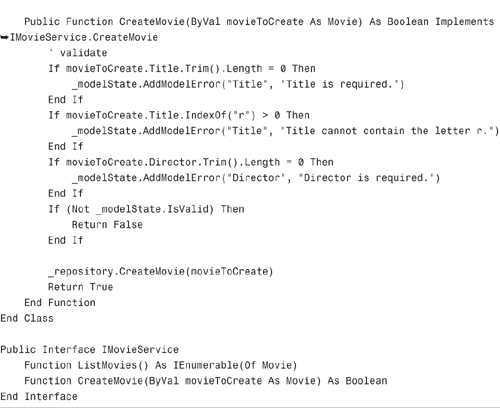
The code for the MovieService class is included in Listing 8.5.
The Movie service contains both a ListMovies() method and a CreateMovie() method. The CreateMovie() method contains the validation logic that was previously located in the controller class. The CreateMovie() method validates a new movie and, if the movie passes validation, uses the MovieRepository class to insert the new movie into the database.
If there is a validation error, the error is added to the controller’s model state. Because the error message is added to model state, the error message is displayed by the Create() view when the view is rendered to the browser.
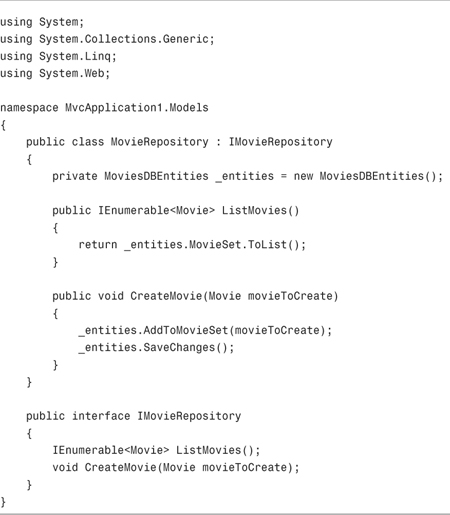
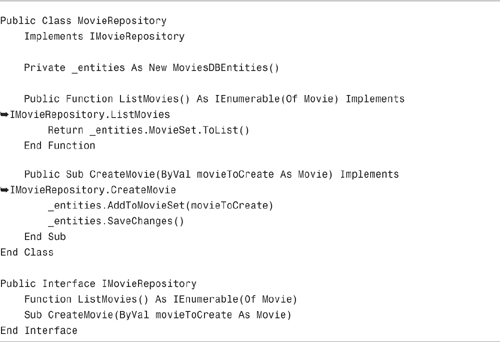
The Movie service does not contain any data access logic. All the data access logic is contained in a separate MovieRepository class. The code for the MovieRepository class is contained in Listing 8.6.
Listing 8.6 uses the Microsoft Entity Framework to interact with the database. You could, of course, use a different data access technology. For example, you could implement the MovieRepository class using LINQ to SQL or NHibernate.
In this section, we fixed up our Movie controller so that the controller, validation, and data access logic is contained in separate classes. Creating this clear separation of concerns results in an application that is easier to maintain and modify over time.
In this section, we explore an alternative method of implementing validation logic. Instead of creating a separate service layer, we add the validation logic directly to the class being validated.
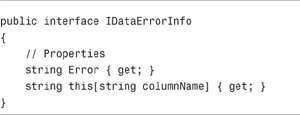
The default model binder respects an interface named the IDataErrorInfo interface. This interface is contained in Listing 8.7.
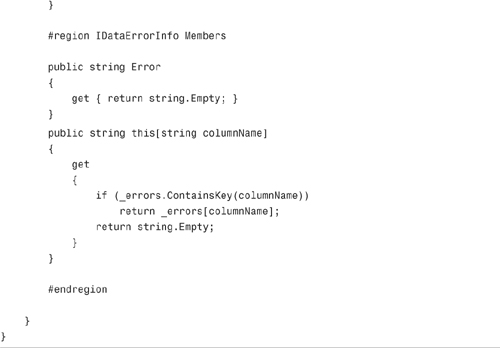
The IDataErrorInfo interface provides you with a way of reporting validation error messages. The default model binder checks the indexer for each property. If the indexer returns a string, the model binder adds the validation error message string to model state.
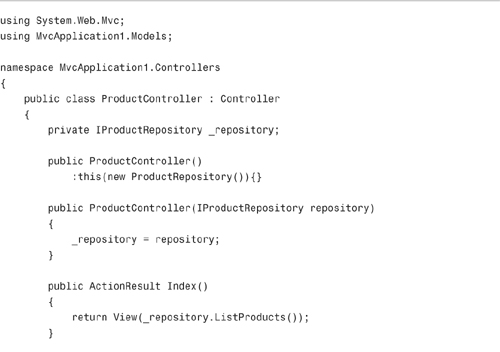
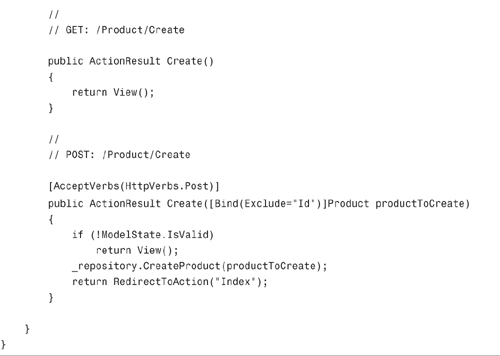
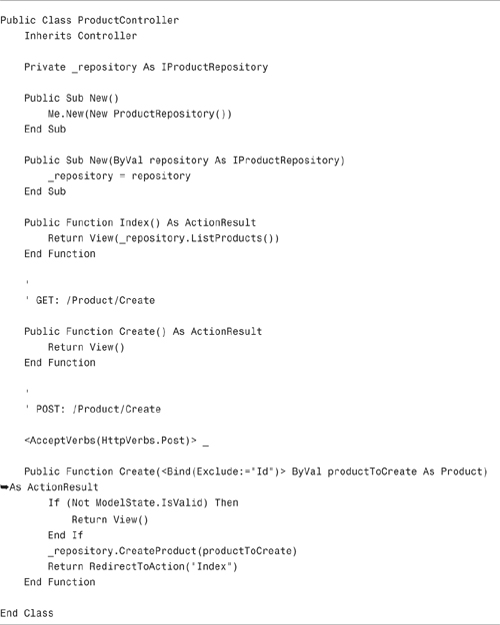
For example, the controller in Listing 8.8 enables you to list and create products. Notice that the controller does not contain any validation logic. All the validation logic has been moved to the Product class.
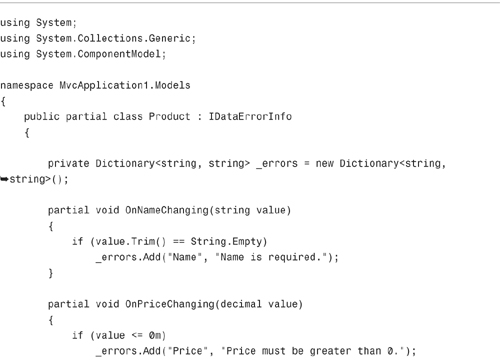
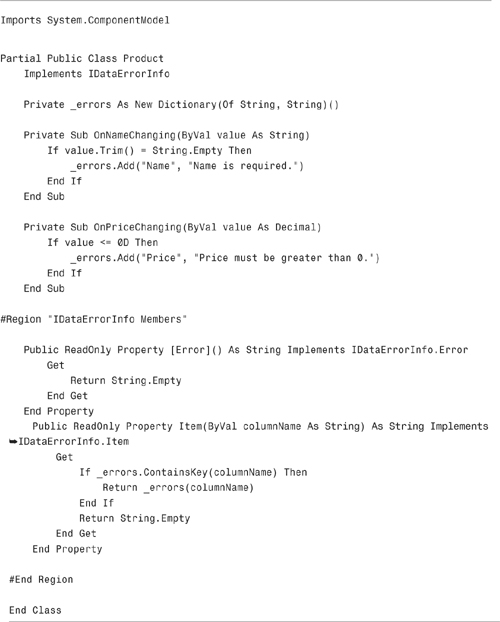
Because we use the Microsoft Entity Framework, the Product class is generated by the Entity Framework Designer. To implement the IDataErrorInfo interface, we must create a partial class. Our Product partial class is contained in Listing 8.9.
The partial Product class in Listing 8.9 includes two event handlers named OnNameChanging() and OnPriceChanging(). These event handlers are called when the Product Name property or Product Price property is about to be changed. The OnNameChanging() handler validates that the Name property has a value and the OnPriceChanging() handler validates that the Price has a value greater than zero.
When there is a validation error, the OnNameChanging() or OnPriceChanging() handler adds an error message to a dictionary named _errors. The _errors dictionary represents all the validation errors associated with the Product class.
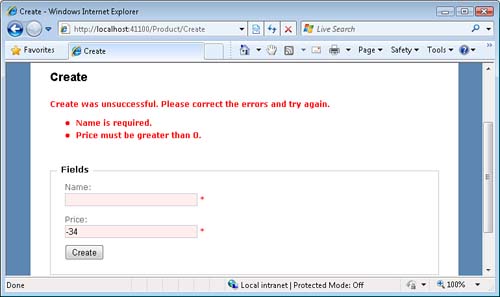
The class in Listing 8.9 implements the IDataErrorInfo interface. The default model binder checks the IDataErrorInfo indexer for each property. If the indexer returns a value, the model binder adds the error into model state. Because the error is added to model state, the validation helpers display the error in a view automatically (see Figure 8.7).
Note
We don’t use the Error property included in the IDataErrorInfo interface in Listing 8.9. You can use the Error property to represent a class wide error message. In other words, you use the Error property to represent an error that is not associated with any particular class property.
Creating unit tests for validation is easy. Because validation error messages are represented in a standard location—model state—you can verify that the expected validation error messages get added to model state.
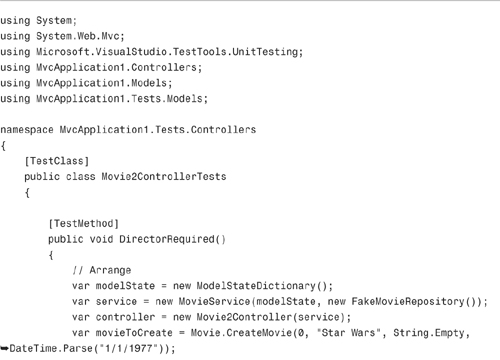
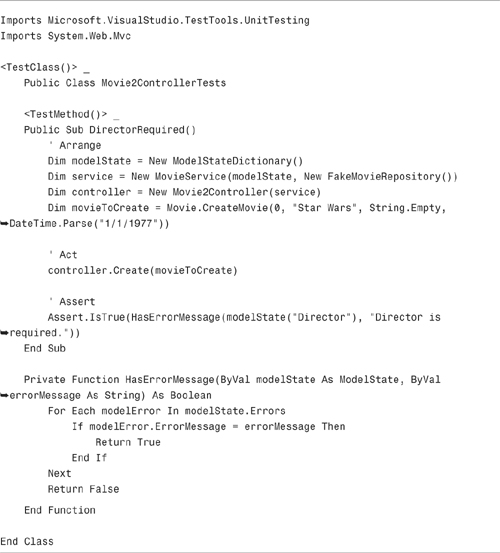
Imagine, for example, that you want to create a test that verifies that attempting to create a movie without a value for the Director property results in a validation error message. The test in Listing 8.10 verifies that the validation error message Director is required. gets added to model state when the Director property is missing a value.
Listing 8.10 contains a test for the Movie2 controller that we created earlier in this chapter (see Listing 8.4). The test has three sections named Arrange, Act, and Assert.
In the Arrange section, four objects are created: a model state dictionary, a Movie service, a Movie controller, and a movie to create. Notice that the movie has an empty string for its Director property.
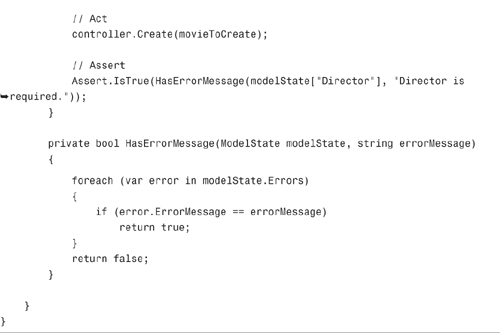
In the Act section, the controller Create() action is invoked with the movie to create.
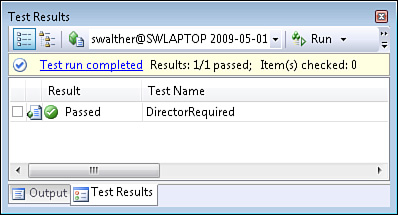
Finally, in the Assert section, an assertion is made that the model state dictionary contains the validation error message Director is required. If the model state dictionary contains this message, the test passes (see Figure 8.8).
The test takes advantage of a helper method named HasErrorMessage() that is also included in Listing 8.10. This helper method searches all the errors associated in model state for a particular error message string (a property might have multiple errors).
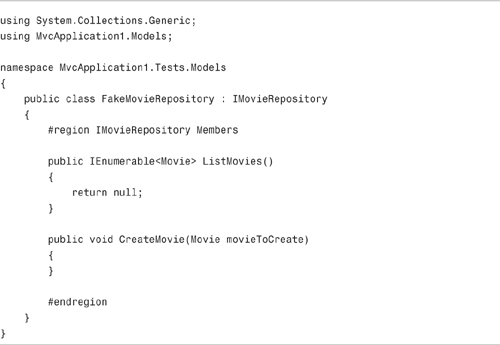
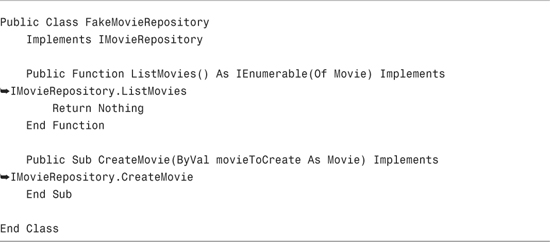
We don’t want the test in Listing 8.10 to access the actual database. We want to avoid accessing the database because this would make the test too slow and possibly change the state of the database between tests. Therefore, we create a fake Movie repository that we can use in place of the real Movie repository. In the Arrange section, the Movie service is created with the fake Movie repository instead of the actual Movie repository.
The code for the fake Movie repository is contained in Listing 8.11. Notice that the fake Movie repository, just like the real one, implements the IMovieRepository interface. That way, because the Movie controller interacts with the IMovieRepository interface instead of a concrete Movie repository class, we can pass the fake Movie repository to the Movie controller and the Movie controller won’t know the difference.
In this chapter, you learned how to perform validation in an ASP.NET MVC application. First, you learned how to represent validation errors with model state. You learned how to add error messages to model state and display the errors in a view by taking advantage of the validation helpers.
Next, you learned how to move all your validation logic into a separate service layer. We separated our application code into a separate controller, service, and repository layer.
You also learned an alternative method of performing validation. You learned how to implement the IDataErrorInfo interface. This interface enables you to implement your validation logic within your model classes instead of within a service layer.
Finally, we discussed how you can create tests for your validation logic. We created a test that verifies that the expected error message is added to model state when a class property is missing a value.

