The best way to improve the performance of an ASP.NET MVC application is by caching. The slowest operation that you can perform in an ASP.NET MVC application is database access. The best way to improve the performance of your data access code is to avoid accessing the database at all. Caching enables you to avoid accessing the database by keeping frequently accessed data in memory.
This chapter is devoted to the topic of improving the performance of your ASP.NET MVC applications through caching. You learn how to cache the results of controller actions, create cache profiles, and work with the cache API. We also discuss how you can test whether caching is enabled and whether data is properly stored in the cache.
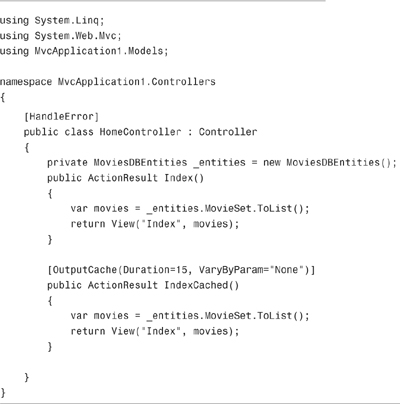
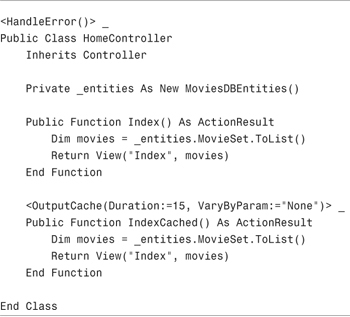
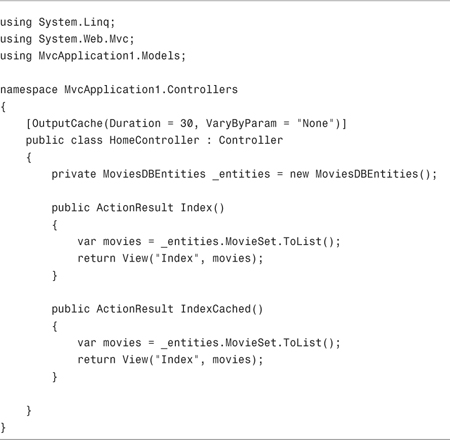
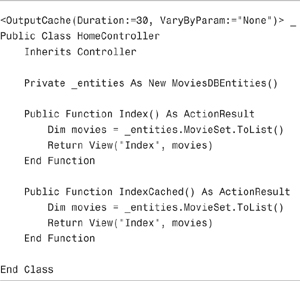
The easiest way to cache your views is to apply the OutputCache attribute to either an individual controller action or an entire controller class. For example, the controller in Listing 11.1 exposes two actions: Index() and IndexCached(). The IndexCached() action caches the view that it returns for 15 seconds.
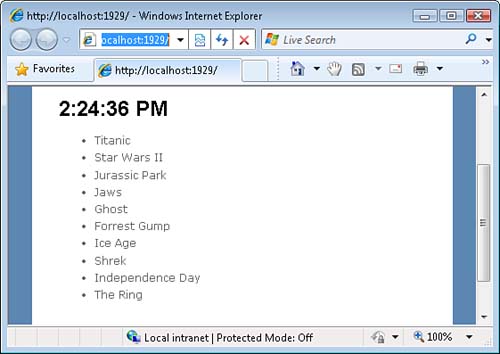
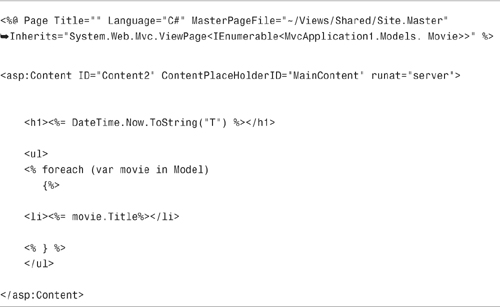
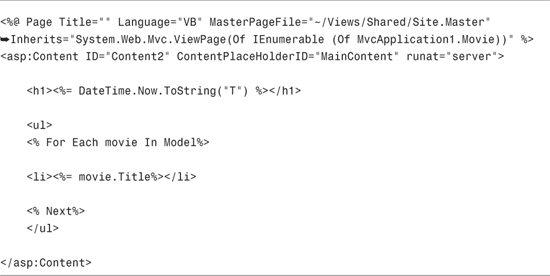
Both controller actions return the same view: the Index view. The Index view is contained in Listing 11.2. This view simply displays the current time and the list of movies returned by the controller actions (see Figure 11.1).
Each time that the Index view is returned by the Index() action, the view displays a new time. When the Index view is returned by the IndexCached() action, on the other hand, the time is not updated until at least 15 seconds pass. (You must keep hitting Refresh on your browser over and over again for 15 seconds to see a change.)
The OutputCache attribute enables you to dramatically improve the performance of your ASP.NET MVC applications. When you invoke the IndexCached() action, the movie records are not retrieved from the database on each request. Instead, the view is cached in memory, and your database can rest quietly.
Note
In this chapter, I focus on using the OutputCache attribute to cache views. However, the OutputCache attribute caches any type of response returned by a controller action. For example, you can also use the OutputCache attribute to cache a JsonResult.
If your data does not change often, you can set the cache duration to a really high number. Get out your calculator and do some math. You would set the duration to the value 3600 seconds to cache a view for 1 hour. You would set the duration to the value 86400 to cache a view for 1 day.
Note
There is no guarantee that a view will be cached for the amount of time that you specify. When memory resources become low, the ASP.NET framework evicts items from the cache automatically.
Note
Experienced developers from the ASP.NET Web Forms world are familiar with the page <%@ OutputCache %> directive. Don’t use the <%@ OutputCache %> directive in a view. The OutputCache directive leaked into the MVC world from the Web Forms world. Pretend that it is not there.
You can apply the OutputCache attribute to an individual controller action or an entire controller. For example, the modified Home controller in Listing 11.3 has an OutputCache attribute applied to the controller class itself. Every action exposed by this controller is cached for 30 seconds.
Caching a page that contains private user data is extremely dangerous. When a page is cached on the server, the same page is served to all users. So, if you cache a page that displays a user credit card number, everyone can see the credit card number (not good!).
The same page is cached for all users even when you require authorization. Imagine, for example, that you create a financial services website and the website includes a page that displays all a user’s investments. The page displays the amount of money that a user has invested in a set of stocks, bonds, and mutual funds.
Because this information is private, you require the user to log in before seeing the page. In other words, each user must be authorized before the user can view the page.
To improve the performance of the financial services page, you decide to enable caching for the page. You add the OutputCache attribute to the controller action that returns the page.
Don’t do that! If you cache the controller action that returns the financial services pages, the private financial data for the first person to request the page will be shared among every subsequent visitor to the application.
In general, adding the OutputCache and Authorize attribute to the same controller action opens a security hole. Avoid doing this:
(C#)
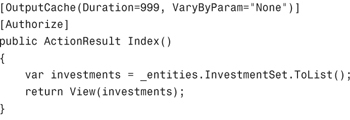

There are a couple of exceptions to this rule. First, it makes sense to cache a page when a group of people needs to view the same cached data. For example, if you create an online magazine site that only authorized members can view, and everyone sees the exact same articles, it makes sense to cache the pages. In other words, if you authorize users by role and the content can be viewed only by members of a particular role, it makes sense to cache the content viewed by members of that role.
Second, if you don’t cache the data on the server and you only cache the data on the client, you can cache the data without sharing the data among multiple users. In the “Setting the Cache Location” section, we discuss how you can specify exactly where data gets cached. Be warned that data is cached on the server by default.
The OutputCache attribute caches the response from a controller action. When a controller action returns a view, the entire rendered output of the view—everything that you see when you select View Source in your web browser—is cached. This content is cached in memory. Every user who makes the same browser request, not only the current user, gets the same cached version of the page.
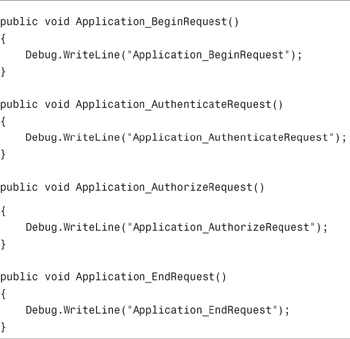
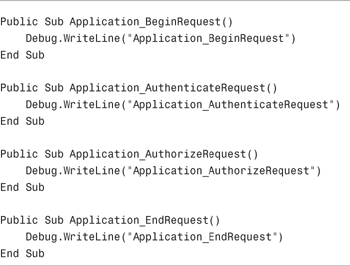
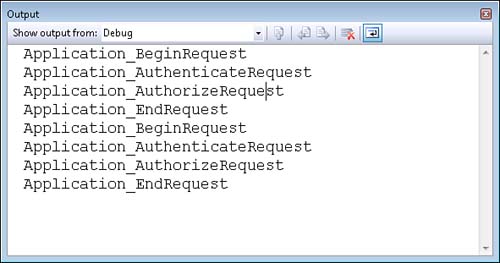
When a view is cached on the server, ASP.NET application events such as the BeginRequest, AuthenticateRequest, AuthorizeRequest, and EndRequest events are still executed. This fact can be demonstrated with the Global.asax handlers contained in Listing 11.4.
In Listing 11.4, several application events are handled and logged to the Visual Studio Console window. When the /Home/IndexCached controller action is invoked, all these events are still raised (see Figure 11.2).
Note
If a page is cached on the client (the browser), the server application events won’t be raised. If a page can be retrieved from the browser cache then there is no need to query the server for the page. If you press Refresh in Internet Explorer, you can bypass the client cache.
During the Application.ResolveRequestCache event, the caching module checks if the current request can be served from the cache. If the request can be served from the cache, the normal request handler is not executed.
Because the normal request handler is not executed when a request is handled by the cache, the controller action associated with the request never gets executed. When a controller action result is cached, the controller logic is not executed until the response rendered by the controller expires from the cache.
Furthermore, any action filters associated with the controller action never get executed after the action result has been added to the cache. If you have assigned any custom action filters to a cached controller action, these action filters will be executed only when the controller is first called. The action filters won’t be executed when the controller response can be served from the cache.
By default, when you use the OutputCache attribute to cache a controller action, the view returned by a controller is cached on the browser, on the server, and on every proxy server in between.
You can control exactly where a view gets cached by setting the Location property on the OutputCache attribute. This property accepts the following values:
• Any (default)—The view is cached on the server, any proxy servers, and the client.
• Client—The view is cached only on the client.
• Downstream—The view is cached on any proxy servers and the client.
• Server—The view is cached only on the server.
• None—The view is not cached.
• ServerAndClient—The view is cached on the server and the client but not any proxy servers.
Why would you want to change the cache location? There might be several reasons.
First, if you want to cache personalized user data, you can change the value of the Location property to Client. That way, the personalized data will be cached on the browser but not on any proxy servers or the web server. Because the view is not cached on the server, the personalized information won’t be shared with other users.
Note
The OutputCache attribute includes a NoStore property. When you set the NoStore property to the value true, a permanent copy of the data cached is not stored on any proxy servers or browsers. Setting NoStore is a good idea when you cache sensitive data on the client.
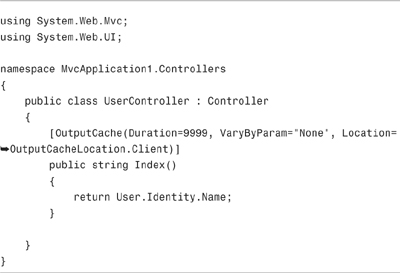
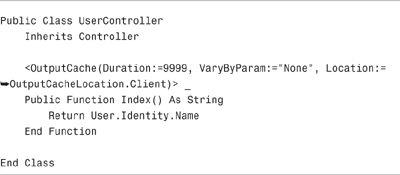
For example, the controller in Listing 11.5 displays the current user’s name. However, because the Location property is set to the value Client, the username is not cached on the server, and the same username is not displayed to multiple users. (Each user sees his own username instead of seeing the username of the first person to invoke the controller action).
Modifying the OutputCache Location property also makes sense when you want to control exactly when content is removed from the cache. If you want complete control over when the cache is updated, it makes sense to cache the content only on the server. In the “Removing Items from the Output Cache” section, you learn how to programmatically remove content from the output cache.
One important issue that you quickly encounter when using caching is the issue of master/detail views. Imagine that you are creating an auction website. You want to create a Details view that displays details on different auction items. When you pass different product IDs to the Details view, you want to display information on different auction items.
Here’s the problem. If you cache the Details page, the information for only one action item will cache. The first auction item requested caches, and details for later auction items will never be shown.
In particular, if the first auction item requested is an auction for the Wingless Quackers the Duck Beanie Baby (the most valuable Beanie Baby of all time), every time someone requests the Details view, everyone sees the details for the Quackers the Duck Beanie Baby auction item.
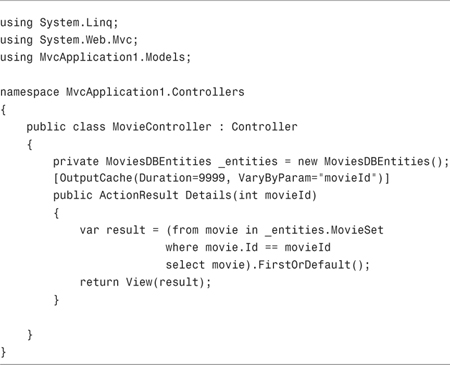
There is a simple way to solve this problem. The OutputCache attribute supports a VaryByParam property. This property accepts the following values:
• None—Create only one cached version of the page
• *—Creates different cached versions of the page when different query string or form parameters are passed to the page
• Comma-separated list of form or query string parameter names
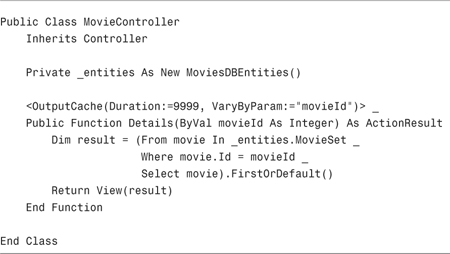
The Details() action exposed by the controller in Listing 11.6 displays details for different movies. When you pass different IDs to the Details action, by passing different values for the MovieID query string parameter, different cached versions of the Details view are created.
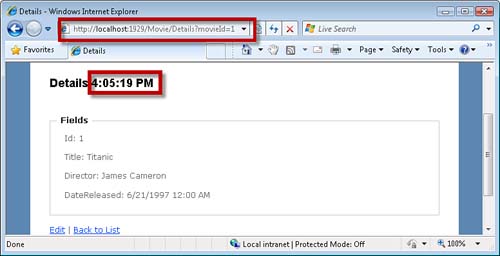
If you invoke the Details() action with different values for the MovieId parameter, you get details for different movies. For example, you can invoke the Details() action by requesting the following URLs:
/Movie/Details?MovieId=1
/Movie/Details?MovieId=2
The first URL returns details on the movie Titanic, and the second URL returns details on the movie Star Wars. The Details view returned by the Details controller action displays the time (see Figure 11.3). You can use the time to determine when the view was cached.
It is important to understand that using VaryByParam results in more cached versions of a view and not less. Each time that you pass another value for the MovieId parameter, more server memory is devoted to caching a new version of the Details view. The time displayed by the Details view does not change when you refresh your browser because you get a cached version of the view.
Note
Different URLs always result in different cached versions of a page. If a parameter is extracted from a URL, different cached versions of a page are created automatically. For example, the default route extracts an Id parameter from the URL. When you invoke a controller action with different values for the Id parameter, different cached versions of the page are generated automatically. Therefore, when using the default route, you never need to use the VaryByParam property with the Id parameter.
In the previous section, you learned how the VaryByParam property enables you to create different cached versions of a view when there is a difference in a query string or form parameter passed to the view. There are additional types of parameters that you can use when creating different cached versions of the same view.
The OutputCache attribute supports the following properties:
• VaryByHeader—Enables you to create different cached versions of a view depending on the value of a browser header.
• VaryByContentEncoding—Enables you to cache both a compressed and uncompressed version of a view. Useful when used with Internet Information Services 7.0 compression (gzip or deflate).
• VaryByCustom—Enables you to specify a custom algorithm for when different cached versions of a view should be created. Accepts the special value browser that indicates that a different cached version of a view should be created when the type or major version of the browser varies.
The VaryByHeader parameter enables you to create different cached versions of a view depending on the value of one or more browser headers.
Whenever a browser makes a request to a website, the browser includes a set of headers in the request. These headers are different depending on the type of browser, the version of the browser, your operating system, and the software you installed. For example, when I use Microsoft Internet Explorer 7.0 to make a request from my personal laptop, the following headers are included in the request:
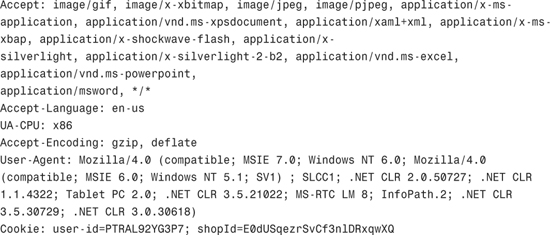
Notice that the browser headers include the Accept-Language header that represents my preferred language (United States English). If my website generates different language versions of the same view, I could use this header to vary the cached version of the page by language.
The browser headers also include the User-Agent header that represents information about the computer performing the browser request. Notice that the header contains information about the version of the .NET framework (.NET CLR) installed on my machine.
Imagine that some of your views contain different content depending on the type of browser used to invoke the controller action that returned the view. You could use the User-Agent header to create different cached versions of the view depending on the type of browser. However, the User-Agent header is too fine-grained. Small variations in the User-Agent header result in unnecessary caching of different versions of the same view.
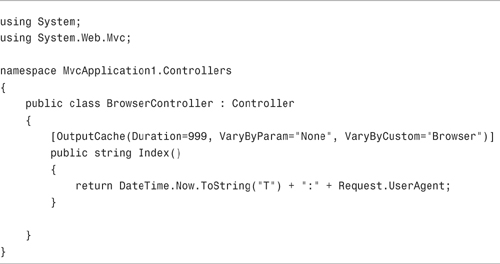
A better option to handle browser differences is to take advantage of the VaryByCustom property. The VaryByCustom property accepts the magic value browser. When VaryByCustom has the value browser, only the type of browser and the major version of the browser is taken into consideration when creating different cached versions of a page.
For example, the controller action in Listing 11.7 returns the User-Agent header. The value returned by this action is cached. You get different cached versions of the action result when the action is invoked with Microsoft Internet Explorer and Mozilla Firefox. You also get different cached versions of the action result depending on whether the action is invoked by Internet Explorer 7 or Internet Explorer 8. (Browser differences other than the type or major version are ignored.)
The property is called the VaryByCustom property for a reason. You can create a custom function in the Global.asax file that determines when different cached versions of a view are created. You can use any criteria for creating different cached versions of the page that you want (the time of day, a random number generator, the weather).
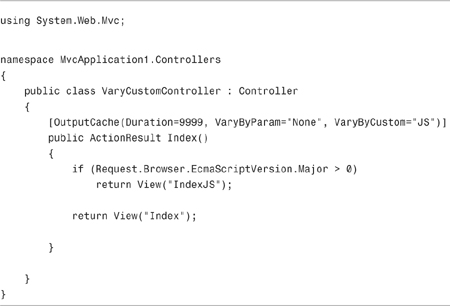
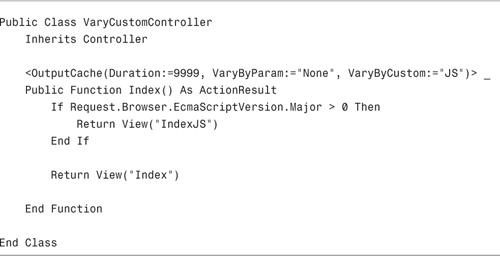
For example, the controller action in Listing 11.8 returns different views depending on the capabilities of the browser invoking the action. If the browser making the request supports JavaScript, one view is returned. If the browser does not support JavaScript, another view is returned.
The controller in Listing 11.8 takes advantage of the GetVaryByCustomString() method defined in the Global.asax file in Listing 11.9. The VaryByCustomString() method determines when the Index() controller action generates different cached versions of the view.
You can remove items from the cache programmatically, with one important qualification. Only items from the server cache can be removed programmatically. You can’t reach out to the web browser through your application code and remove data that has been cached on the browser.
Imagine that you need to display a product catalog in your web application. You cache the product catalog to improve performance. Your website includes an administrative page that enables employees to add new products the catalog. You want to remove the catalog from the cache whenever the catalog is updated.
You can remove an item from the output cache programmatically by calling the shared HttpResponse.RemoveOutputCacheItem() method. Again, this method deletes the item only from the server cache and not the browser cache.
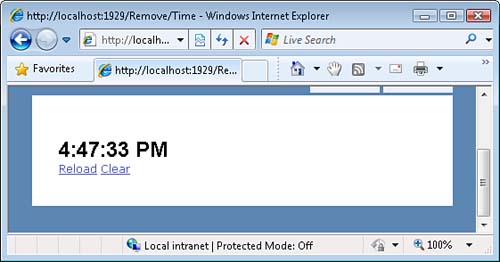
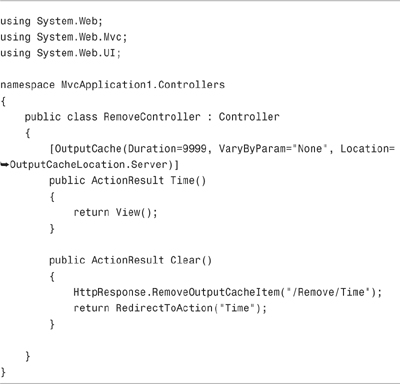
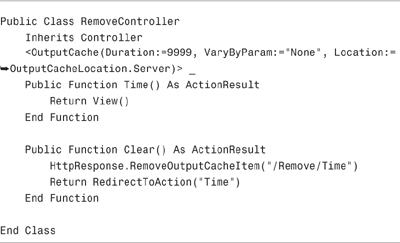
For example, the Time() action in Listing 11.10 returns a view that displays the current time and two links labeled Reload and Clear (see Figure 11.4). When you click the first link, the view is displayed again. Because the view is cached, the time displayed in the view does not change.
The second link invokes the Clear() action. This action invokes the HttpResponse.RemoveOutputCacheItem() method. As the name of the method suggests, this method removes a particular item from the output cache. You designate the item to remove by supplying a URL.
Notice that the Time() action includes an OutputCache attribute with a Location property set to the value Server. The item can be removed from the cache because the item is not cached beyond the server.
A cache profile represents a set of cache settings. Cache profiles provide you with a convenient mechanism for managing cache settings for your controller actions in one centralized location. You define cache profiles in the web configuration (web.config) file. After you define a profile, you can apply the profile to one or more controllers or controller actions.
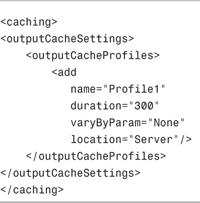
You create a cache profile by adding the profile to the system.webcachingoutputCacheSettingsoutputCacheProfiles element of the web.config file. For example, you can add the contents of Listing 11.11 to the <system.web> section of an MVC application’s web.config file.
The cache profile in Listing 11.11 is named Profile1. This profile represents a cache duration of 300 seconds (5 minutes) and a server-only cache.
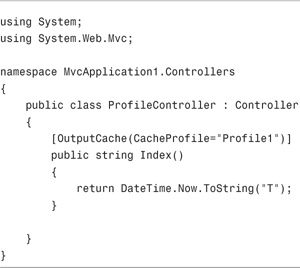
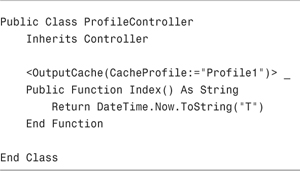
The Index() action in Listing 11.12 uses the Profile1 cache profile.
If you prefer, you can control the cache programmatically instead of declaratively. Controlling the cache through code takes more work but provides you with finer-grain control over the cache. There are two classes that you can manipulate to modify how controller responses are cached: the System.Web.HttpCachePolicy class and the System.Web.Caching.Cache class.
The HttpCachePolicy class enables you to manipulate the cache related HTTP headers sent with a response. When controlling how a response is cached, there are several important HTTP headers that you need to be concerned about.
First, you can use the following two headers to specify how long a response should be cached on proxy servers and browsers:
• Cache-Control—The HTTP 1.1 method to specify how a response gets cached
• Expires—The HTTP 1.0 method to specify the expiration date and time of the response
And you can use the following two headers to indicate whether a resource has already expired in response to a browser request:
• Last-Modified—The HTTP 1.0 and HTTP 1.1 method to indicate the date and time when the resource was last modified.
• ETag—The HTTP 1.1 Entity Tag header enables you to associate a unique version key with a resource.
Note
When you get into how caching is implemented at the level of HTTP, things get messy because of differences between the HTTP 1.0 and HTTP 1.1 protocols. If you want to learn more, start by reading RFC 2616 at www.w3.org/Protocols/rfc2616/rfc2616-sec14.html.
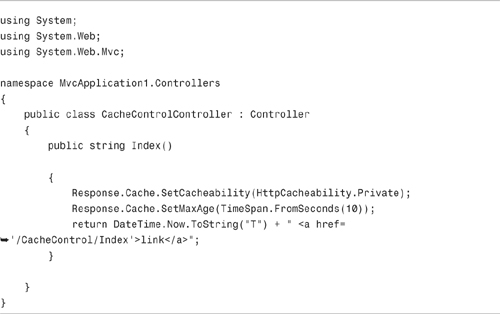
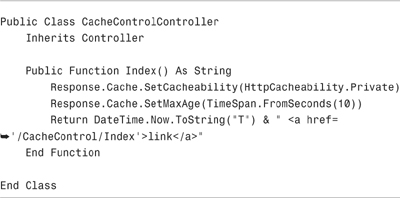
If you want to modify the Cache-Control header to control how proxy servers and browsers cache a response, you can take advantage of the HttpCachePolicy.SetCacheability() method. The Index() action in Listing 11.13 caches a response for 10 seconds.
The SetCacheability() method sets the Cache-Control header to private. When the Cache-Control header has the value private, a response is not cached in any shared caches. (The cached response cannot be shared with multiple people.) Typically, the response is cached only within the browser cache.
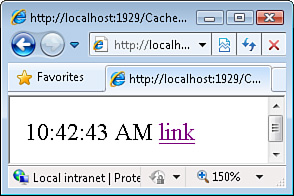
The SetMaxAge() method caches the response for 10 seconds. If you link to this page, the content on the page is updated every 10 seconds. You can test this functionality by clicking the link that the Index() method renders (see Figure 11.5).
The Index() action does not cache the response on the server. If you press the Reload button on your browser, the response is regenerated from the server from scratch. Each time you click Reload, you get a new time.
Note
You can view the HTTP headers transmitted between web server and browser by using a tool such as Firebug or Fiddler:
In the previous section, you learned how to use the HttpCachePolicy class to manipulate how responses get cached on proxy servers and browsers. In this section, we discuss the System.Web.Caching.Cache class. This class represents the server cache.
The Cache class works like a dictionary. You add key and item pairs to the Cache class. When you add an item to the Cache class, the item is cached on the server.
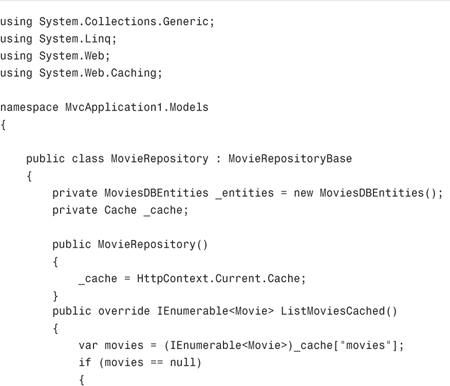
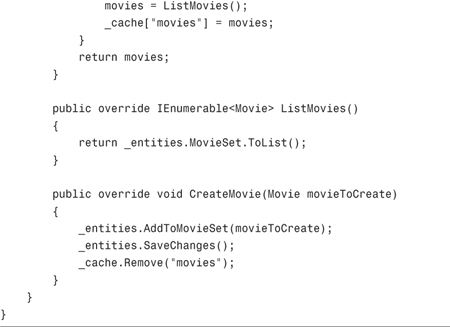
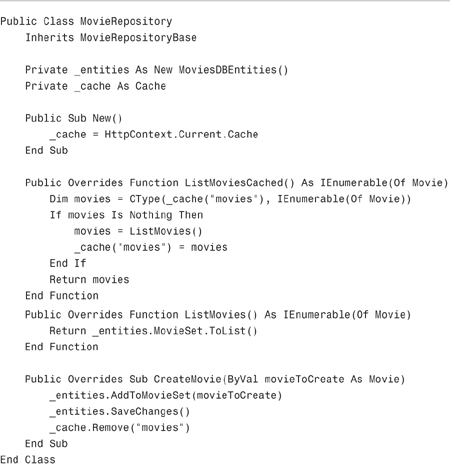
For example, imagine that you create a data repository to represent the Movies database table. Instead of caching the movies in your controller, you want to cache the movies in the repository. The MovieRepository in Listing 11.14 uses the server cache to cache the movies.
Note
You can test the MovieRepository class by using the MovieRepositoryController class included in the code on the book’s website (www.informit.com/title/9780672329982).
A reference to the Cache object is assigned to a private field named _cache in the constructor. The Cache object is exposed by the static (shared) HttpContext.Current property.
The MovieRepository exposes three public methods named CreateMovie(), ListMoviesCached(), and ListMovies(). The CreateMovie() method inserts a new movie into the database. When a new movie is created, the current movies stored in the cache are removed. That way, when the ListMoviesCached() method is called, the new movie will be added to the cache.
The ListMoviesCached() method attempts to return all the movies from the cache. If the movies can’t be retrieved from the cache because the cache is empty, the movies are retrieved from the database by calling the ListMovies() method.
Warning
Make sure you call ToList() before assigning the results of a LINQ query to the cache. If you neglect to call ToList(), the query expression, and not the results of the query, will be assigned to the cache.
There are several reasons why the movies might not be successfully retrieved from the cache. If this is the first time the ListMoviesCached() method has been invoked, the cache will be empty. Second, if the CreateMovie() method has just been called, the movies will have been explicitly removed from the cache. Finally, an ASP.NET application scavenges items from the cache automatically. When memory resources become low, items are evicted from the cache automatically.
Warning
Whenever you retrieve an item from the cache, it is important that you immediately check whether you were successful. There is no guarantee that an item will remain in the cache. If server memory resources get low, items are evicted from the cache automatically.
By default, when you add an item to the cache, the item is cached indefinitely. That means that the item remains in the cache until memory resources become low, the item is explicitly removed, or the application is restarted.
If you want more control over how an item is cached, you can use one of the various overloads of the Cache.Insert() method. This method accepts the following parameters:
• key—The key used to refer to the cached item.
• value—The item added to the cache.
• dependencies—One or more cache dependencies. You can create file dependencies, key dependencies, SQL cache dependencies, aggregate dependencies, or custom dependencies.
• absoluteExpiration—An absolute date and time when an item should be expired from the cache.
• slidingExpiration—An interval of time after which an item should be expired from a cache.
• priority—When memory resources becomes low, this value determines which items get evicted first.
• onRemoveCallback—Enables you to specify a method that is called when an item is removed from the cache.
Notice that there are two ways that you can specify when an item added to the cache should expire. You can supply either an absolute expiration date and time, or you can specify a sliding expiration date.
Providing an absolute expiration date and time is useful when you know when new data will be available. For example, if you know that your product catalog is updated in the database once every day at midnight, it makes sense to expire the product catalog from the cache at midnight.
A sliding expiration is useful when you have too many items to cache. Imagine, for example, that the Movies database table contains information on billions of movies. You can’t cache all the movie data because there is just too much of it. In that case, you can take advantage of a sliding expiration to keep the most frequently requested movies in the cache.
You specify a sliding expiration by supplying a particular time span such as 10 minutes. Just as long as a movie keeps being requested within a 10-minute interval, the movie won’t be expired from the cache. But, when more than 10 minutes pass without the movie requested, the movie will be removed from the cache. In this way, frequently requested items stay in the cache.
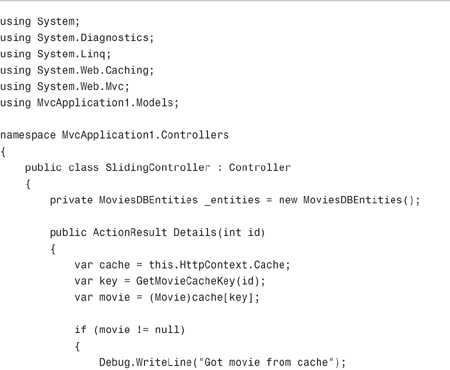
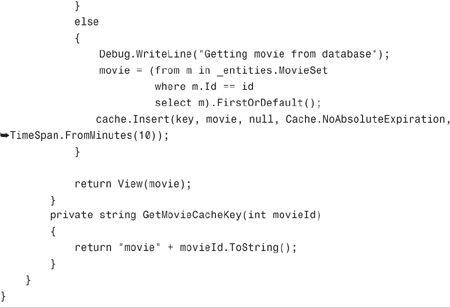
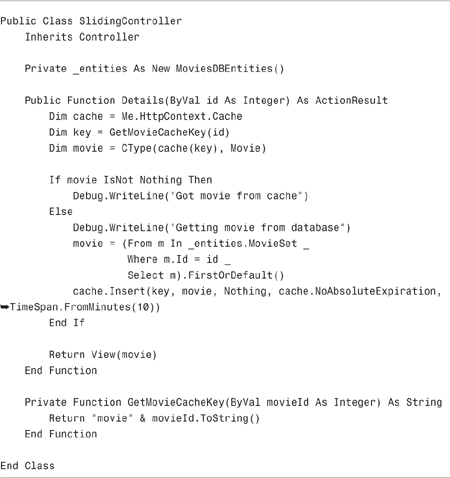
The controller in Listing 11.15 illustrates how you can use a sliding expiration cache policy.
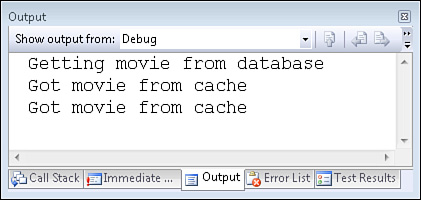
In Listing 11.15, the movie details are kept in the cache just as long as no more than 10 minutes pass without the movie being requested. The Debug class writes to the Visual Studio Console window. You can examine the Console window to determine when an item is retrieved from the cache or when the item is retrieved from the database (see Figure 11.6).
There are two types of unit tests that you might be interested in creating when testing caching. First, you might simply want to make sure that a controller action is decorated with the OutputCache attribute. In other words, you might want to make sure that attribute is present on all the controller actions that you expect.
Alternatively, if you are using the Cache object in your code, you might want to test whether data is saved in the cache. In that case, you need to fake the cache so that you can test whether data is successfully added to the cache.
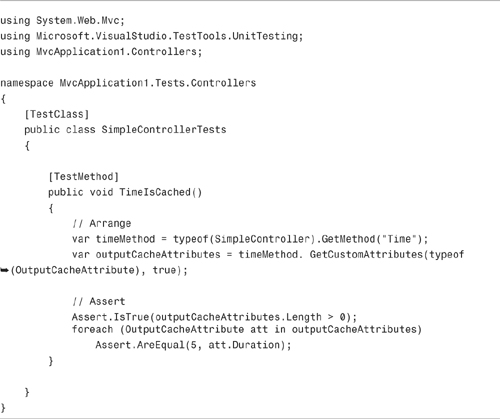
Testing the presence of the OuputCache attribute is straightforward. You can take advantage of the .NET framework GetCustomAttributes() method to get a list of attributes defined on a method. You can check if one of the attributes is the OutputCache attribute. Furthermore, you can check whether the right properties are set on this attribute.
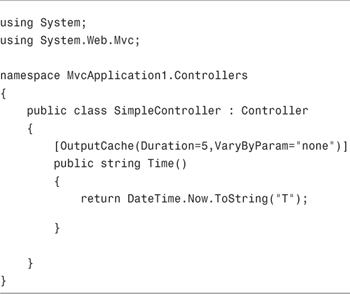
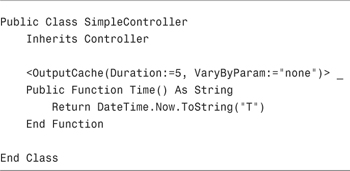
For example, the Simple controller in Listing 11.16 includes a Time() action that returns the current time. This action method is decorated with an OutputCache attribute that caches the action result for 5 seconds.
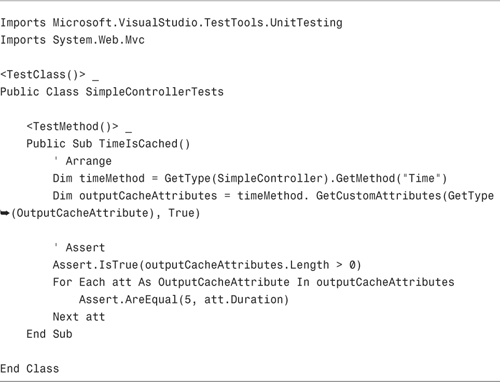
The unit test in Listing 11.17 uses the GetCustomAttributes() method to verify that the OutputCache attribute is present. Next, the unit test verifies that the Duration property is set to the value 5 seconds.
Notice that the unit test in Listing 11.17 loops through a collection of OutputCache attributes. Several OutputCache attributes might be applied to the same controller action.
Imagine that you create an application that contains a repository and service layer. You want to cache the data retrieved from the repository in the service layer. In that case, you might want to build unit tests to verify that the database data is actually getting cached.
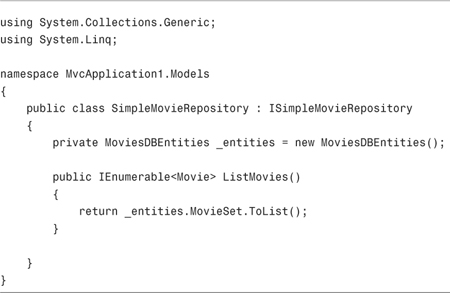
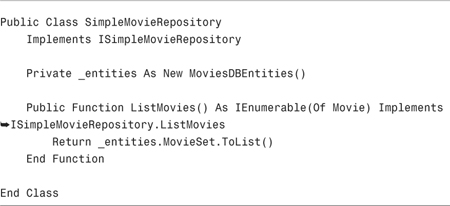
Let’s get concrete. The repository is contained in Listing 11.18. This repository class exposes one method named ListMovies() that returns all the movies from the database.
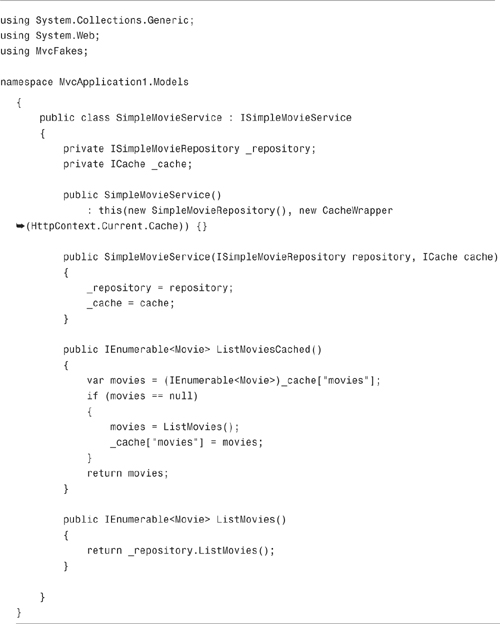
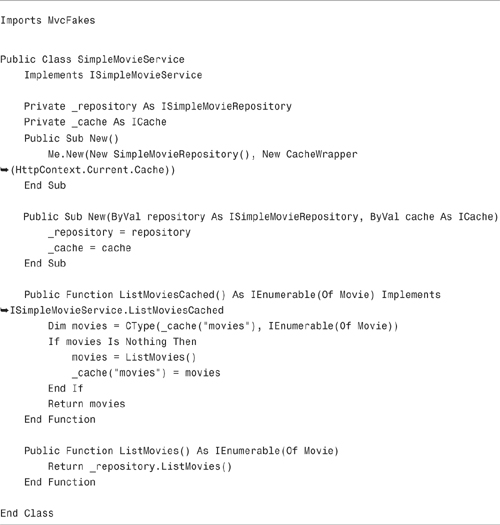
The service is contained in Listing 11.19. This service has two methods named ListMovies() and ListMoviesCached(). The ListMoviesCached() contains the caching logic.
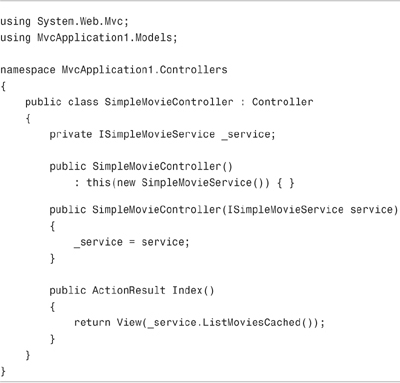
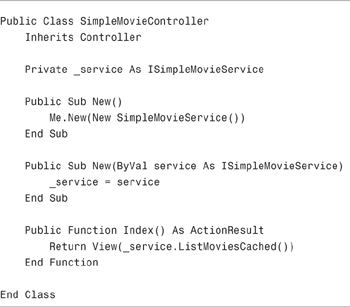
Finally, the controller in Listing 11.20 uses the movie service to retrieve the movies from the database.
Theoretically, the Index() action in Listing 11.20 should be retrieving the movies from the cache. To increase our confidence that everything works in the way that we expect, we need a test.
To test the cache, we need to fake the Cache object. The MVC Fakes project that accompanies this book includes two classes and an interface that you can employ when faking the Cache:
• ICache—This interface contains the methods and properties exposed by the CacheWrapper and the FakeCache classes.
• CacheWrapper—This class is a wrapper class around the normal Cache class that implements the ICache interface. When you call any methods of the CacheWrapper class, the calls are delegated to the normal Cache class.
• FakeCache—This class is a fake version of the normal Cache class. You can use this class in your unit tests as a stand-in for the real Cache.
Note
Why fake the Cache class? After all, the real Cache class has a public constructor. Why not just use the actual Cache class in your unit tests? The problem is that the actual Cache class has dependencies on the HTTP runtime. You get a null reference exception when you try to create a new instance of the Cache class.
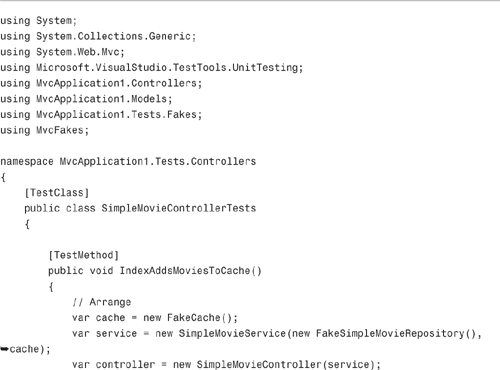
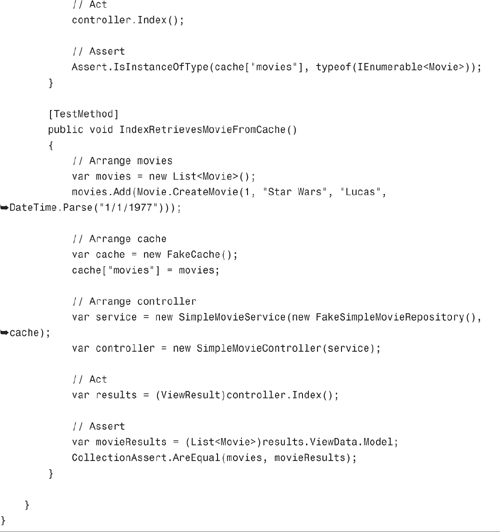
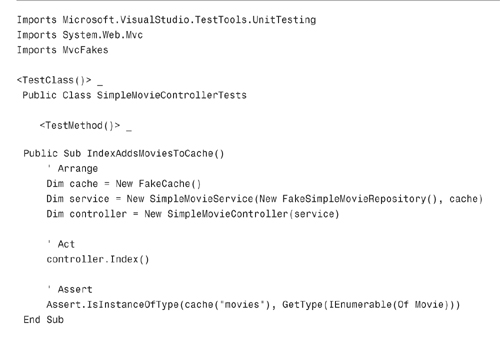
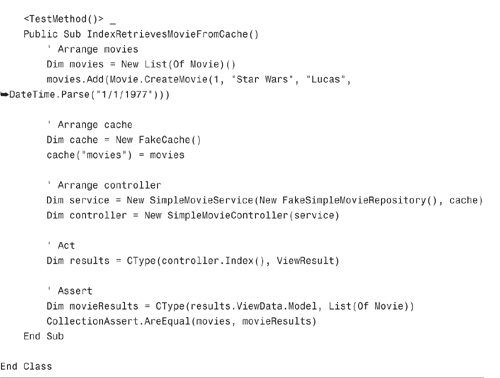
Listing 11.21 contains two tests named IndexAddsMoviesToCache() and IndexRetrievesMoviesFromCache(). The first test verifies that invoking the controller Index() action adds the movies to the cache. The second test verifies that the Index() action returns results from the cache.
Note
When I originally wrote the controller in Listing 11.19, I accidentally called the ListMovies() method instead of the ListMoviesCached() method. In other words, by mistake, I was not using the cache. When I ran the test in Listing 11.20, and it failed, I discovered my mistake. This is proof that tests do make a difference!
This chapter was divided into three parts. In the first part, you learned how to use the OutputCache attribute with MVC controller actions. We discussed how you can use the OutputCache attribute to cache controller responses for a particular duration of time and avoid requesting the same data from the database over and over again.
We also discussed the underlying cache API. You learned to control how proxy servers and browsers cache responses by manipulating cache headers. You also learned how to work directly with the Cache object in your data access code.
Finally, we tackled the ever-important topic of testing. You learned how to test whether the OuputCache attribute has been applied to a controller action. You also learned how to fake the cache in your unit tests.

