Computers and the Internet have revolutionized the music business. Before the Internet, you had to go to a record store or use mail order to get a song. Now you just download it from your favorite online store.
Audio recording and processing have undergone a revolution as well. What used to take a studio full of expensive equipment now can be done with a personal computer and in real time.
In this chapter, you will learn the following:
How to convert between various audio encoding formats
How to dice, slice, and splice together audio clips
How to mix audio tracks to add background music to a voice file
A Half-Hour of Hell for 60 Seconds of Air Time
One of the authors of this book (Steve Oualline) used to write fiction and sold nothing. But one of his stories was selected for a local authors’ show on KPBS, San Diego’s public radio station, and he got to read his story for on-air broadcast. Getting selected was one of the happiest moments of his life. Reading his story into a microphone was one of the worst.
The story started like this:
Howard knew he was in trouble when he opened the front door and saw his wife, Yvonne, crying. “Oh, Howard,” she sobbed, “I wanted to surprise you tonight and cook you a spaghetti dinner just like I did ten years ago when you proposed to me, but I can’t.” 1
That’s not how it was recorded. The recording took place in a small studio. Steve sat in front of a microphone with the host. In the booth behind him sat the producer who spoke to him through earphones. The recording session went like this:
Steve: “Howard knew he was in when he opened.”
Producer: “You missed a word, try again.”
Steve: “Howard knew he was in trouble when…”
Producer: “Too wooden. We need more feeling.”
Steve: “Howard knew he was in trouble…”
Producer: “Too fast. Start again.”
Steve: “Howard knew he was in trouble when he opened the front door and saw his wife, Yvonne, crying. <pause> Was that OK?”
Producer: “Keep going.”
Steve is happy to report that he did get better as he went along (although it went from being abysmal to being just plain lousy). The entire ordeal with like doing a performance with a heckler in your ear. The only bright spot, aside from getting his work on the radio, was that although he had to put up with the producer, he had to put up with me.
Needless to say, the producer had to do a bit of editing. For that he used a $20,000 professional sound mixer/editor. You’re going to do the same thing with a personal computer and some free software.
Getting Started with Audacity
Audacity is an open source audio editor. It would have been an ideal tool for the producer at KPBS to use to cut out 95 percent of the recording session he couldn’t use, if it had existed at the time. It allows you to record from a variety of media, edit soundtracks, add effects and filters, and generally do a lots of other fancy audio-editing stuff.
You can download it from www.audacityteam.org/ . To install it, run the file and accept the defaults.
When you start the program, the splash screen appears, as shown in Figure 12-1. It gives you some pointers to where you might find help. Click OK to dismiss the dialog.

Figure 12-1 Audacity splash screen
The main editing window will open. Initially the soundtracks will be empty. If you record some audio or load some audio files, they will appear in the window, as shown in Figure 12-2.

Figure 12-2 Audacity editing window with sound
If you have a built-in microphone on your computer, you can use it to record some audio. This is a demonstration sound file, not a production sound file. If you are recording audio for real, get a decent microphone.
Start by clicking the red Record button and begin to speak. To stop recording, click the square stop button.
To save your file, select File ➤ Export Audio , as shown in Figure 12-3. (Don’t use File ➤ Save because this saves the editing project.)
If you want to follow along with the original sound file, you can download it from Apress.com. The clip we recorded has some deliberate mistakes (and probably some inadvertent ones).

Figure 12-3 Exporting audio
The Export Audio dialog appears, as shown in Figure 12-4. Enter the file name in the “File name” field and use the “Save as type” pull-down to select MP3 Files. (The MP3 format is the most common compressed audio format.)

Figure 12-4 Export Audio dialog
Clicking Save starts the save process , but there is a problem. The program needs an audio converter called LAME to create MP3 files, so a dialog pops up, warning you of this fact, as shown in Figure 12-5. You need LAME, so click Download.

Figure 12-5 Locate LAME dialog
The Download button takes you to the web page shown in Figure 12-6. We are on a Windows machine , so we will follow the link “LAME installation section.”
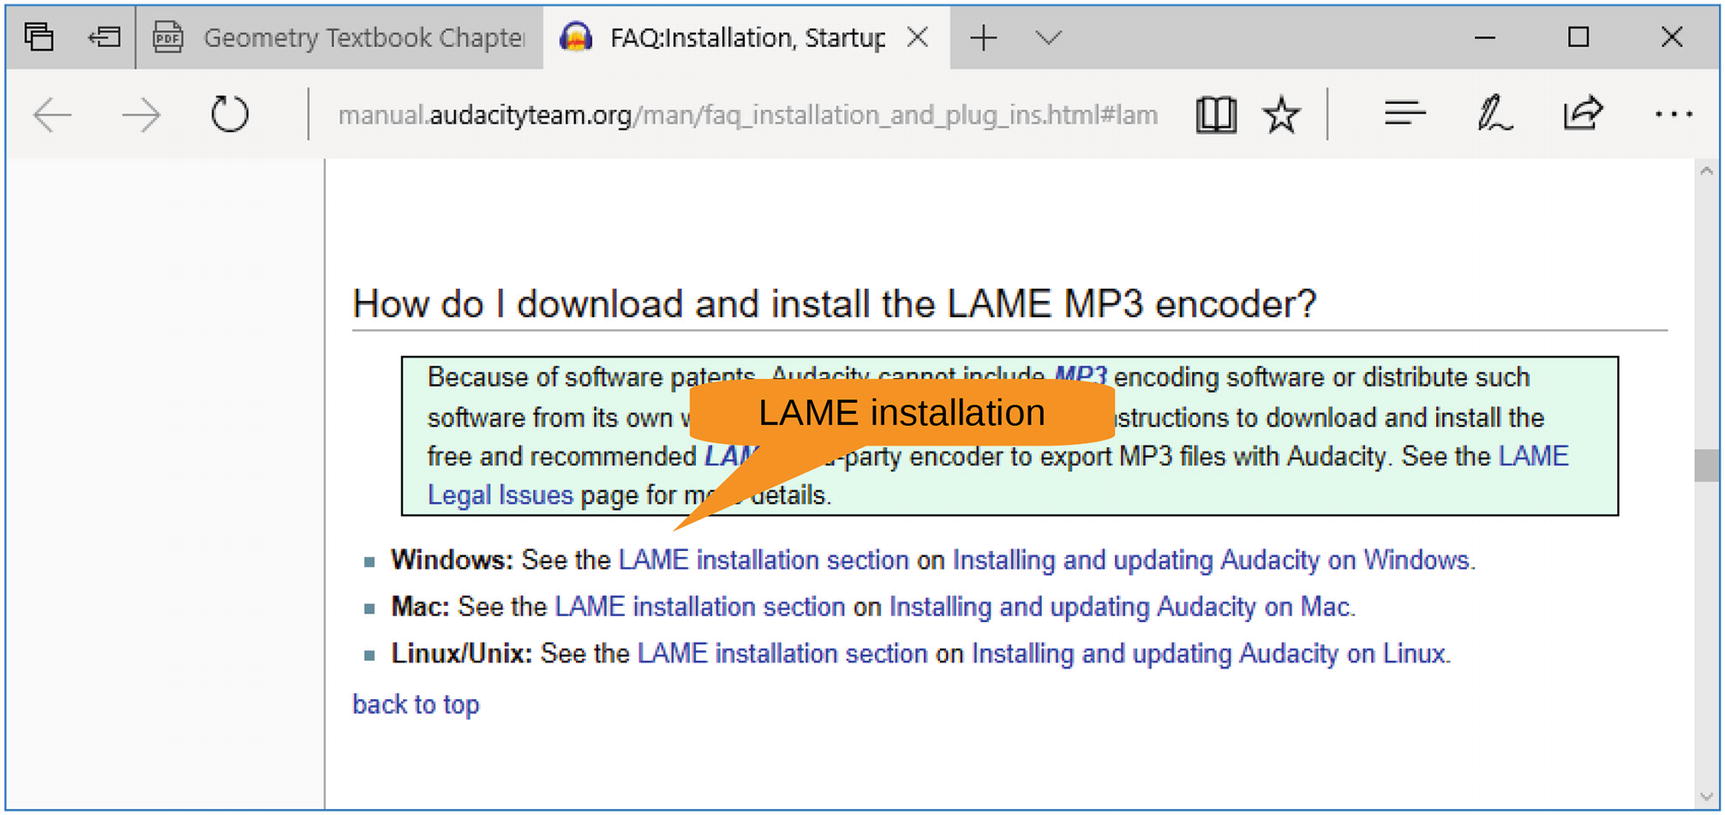
Figure 12-6 LAME installation page
This takes you to the screen shown in Figure 12-7, which is a more detailed page on where to get LAME.

Figure 12-7 More detailed LAME installation page
Clicking the link takes you to the download page for LAME, as shown in Figure 12-8. Scrolling down a little, you see where you can download the installer for LAME. Download the file, run it, and accept all the defaults for the installation.

Figure 12-8 LAME download
Once the LAME encoder is installed, you are back at the Local LAME dialog and can click OK. The MP3 file format contains not only audio but some metadata as well. This includes the artist, song name, album, and other information. When you click OK, the Edit Metadata Tags dialog appears, as shown in Figure 12-9. Since you care about the audio only, you won’t set any tags here. Click OK.

Figure 12-9 Edit Metadata Tags dialog
At this point, Audacity starts encoding the file and pops up a window showing the progress of the operation. For our 25.5-second audio file, this happens quickly.
Now you are back at the editing window , as shown in Figure 12-10. You need to locate the point where the good portion of the audio starts. So, click Play and listen to the audio. As the audio plays, a line will move across the screen showing where you are in the file. (In Figure 12-10, it’s a little past 5.0.) There’s a green triangle pointing to the line as well.
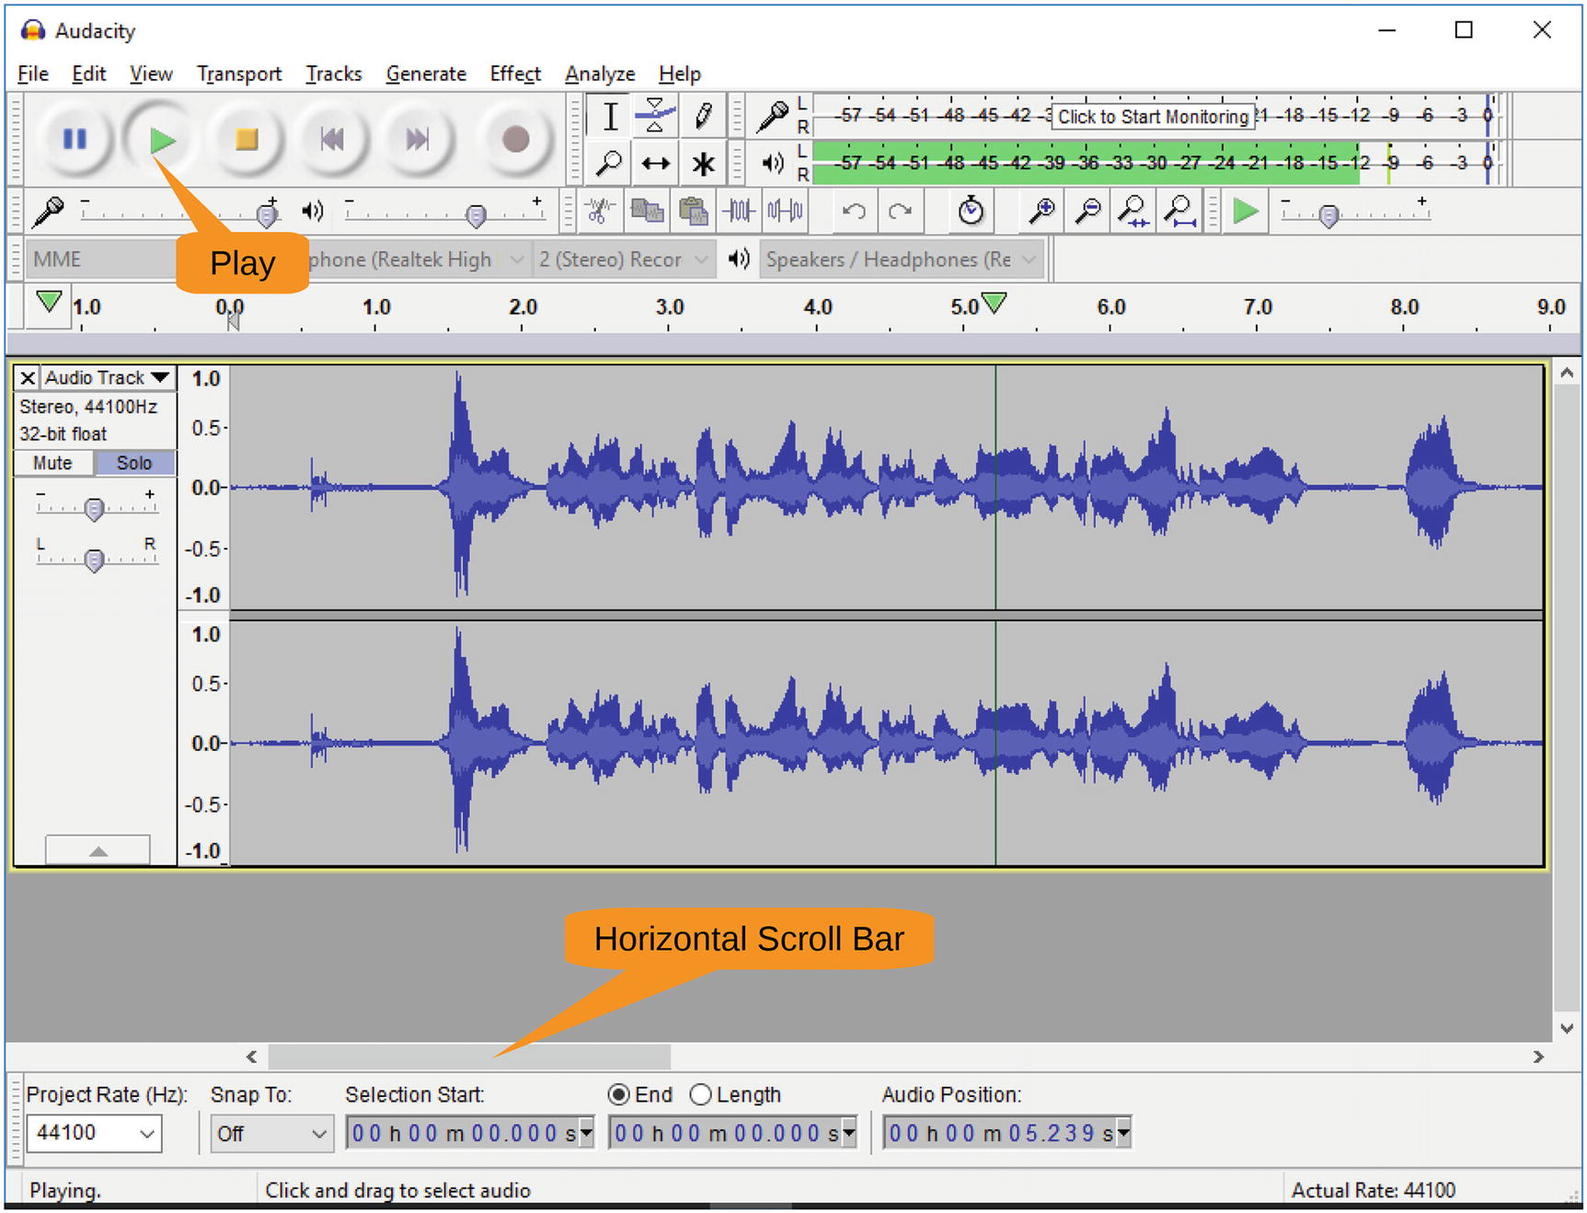
Figure 12-10 Playback
During playback of the example file provided on Apress, you will notice that you want to throw away the first attempt of the sentence. In fact, all the audio up to the 12-second mark is garbage. So, you can use the horizontal scroll bar at the bottom to position the screen to that point, as shown in Figure 12-11.
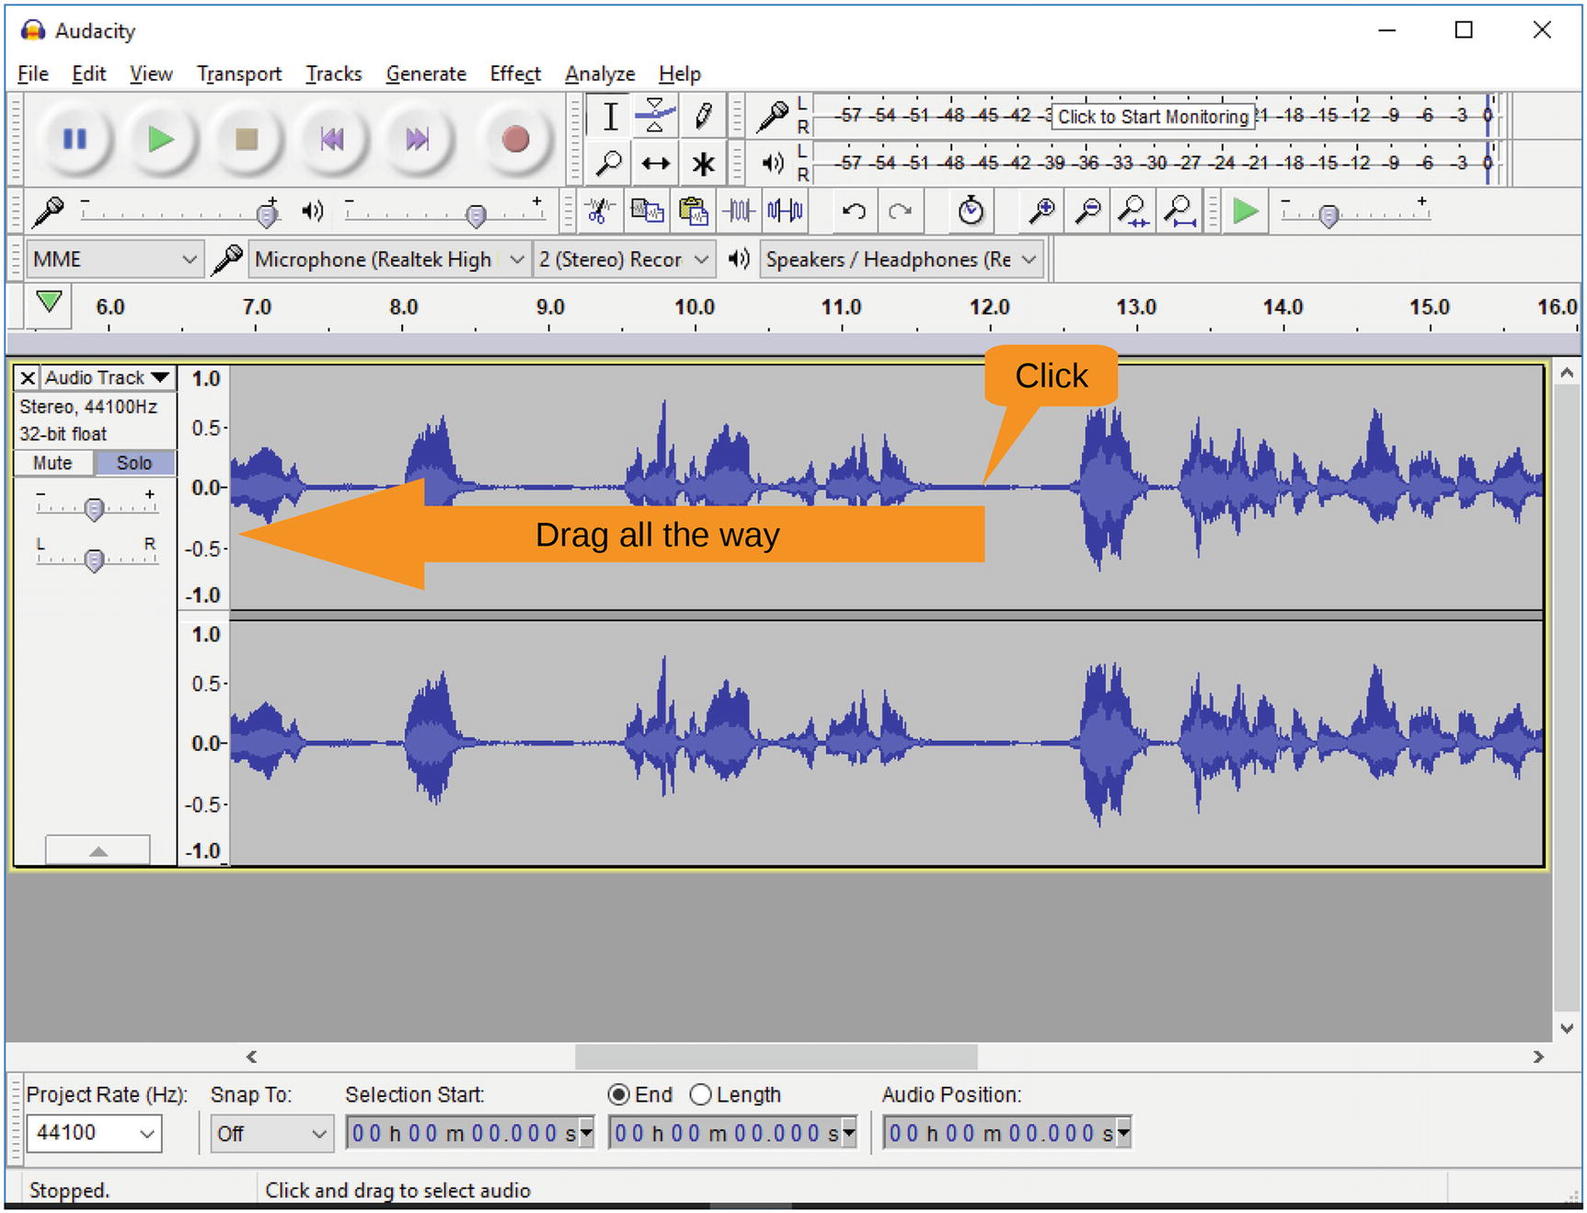
Figure 12-11 The 12-second mark
The waveforms show you that right around 12.4 is when the good stuff begins. Let’s take the cursor and click just before the good stuff starts and drag it all the way to the left. The selected audio will be highlighted, as shown in Figure 12-12.

Figure 12-12 Highlighting the junk
To get rid of the unwanted audio , select Edit ➤ Cut, as shown in Figure 12-13.

Figure 12-13 Cutting the audio
Scrolling to the other end of the audio, you can use the same technique to clip out the last few seconds of silence . Finally, let’s export the audio (using the procedure outlined earlier) to 01-story-good.mp3.
This gives you a basic, clean voice track. So, with a few simple edits, you were able to make it sound great. Now let’s add some musical enhancements to make it a bit fancy.
Adding a Musical Introduction
You will enhance the story by adding a musical introduction. The first step is to find suitable music. For that you are going to look for an old instrumental, something like classical music or something from the 1920s or 1930s for which the copyright has long expired.
For this piece, which is comedy, “Dance of the Cuckoos” would be appropriate. You probably know it as the Laurel and Hardy theme song.
You want only the first few seconds of the song, so let’s do the following using the steps outlined earlier:
Select File ➤ New to start a new project in a new window.
Click the Play button to hear the first few seconds of the piece and determine where the first musical phrase ends.
Drag the selection tool over the rest of the song to select it.
Select Edit ➤ Delete to delete it, leaving you with just the beginning.
Now let’s add the music to the story. Select all of the remaining song with Edit ➤ Select All, as shown in Figure 12-14.

Figure 12-14 Selecting all
Now let’s use Edit ➤ Copy to copy the song to the clipboard , as shown in Figure 12-15.

Figure 12-15 Copying to the clipboard
You need to put this song at the beginning of the story . Go to the story window and click the Rewind button to move the cursor to the beginning of the track, as shown in Figure 12-16.
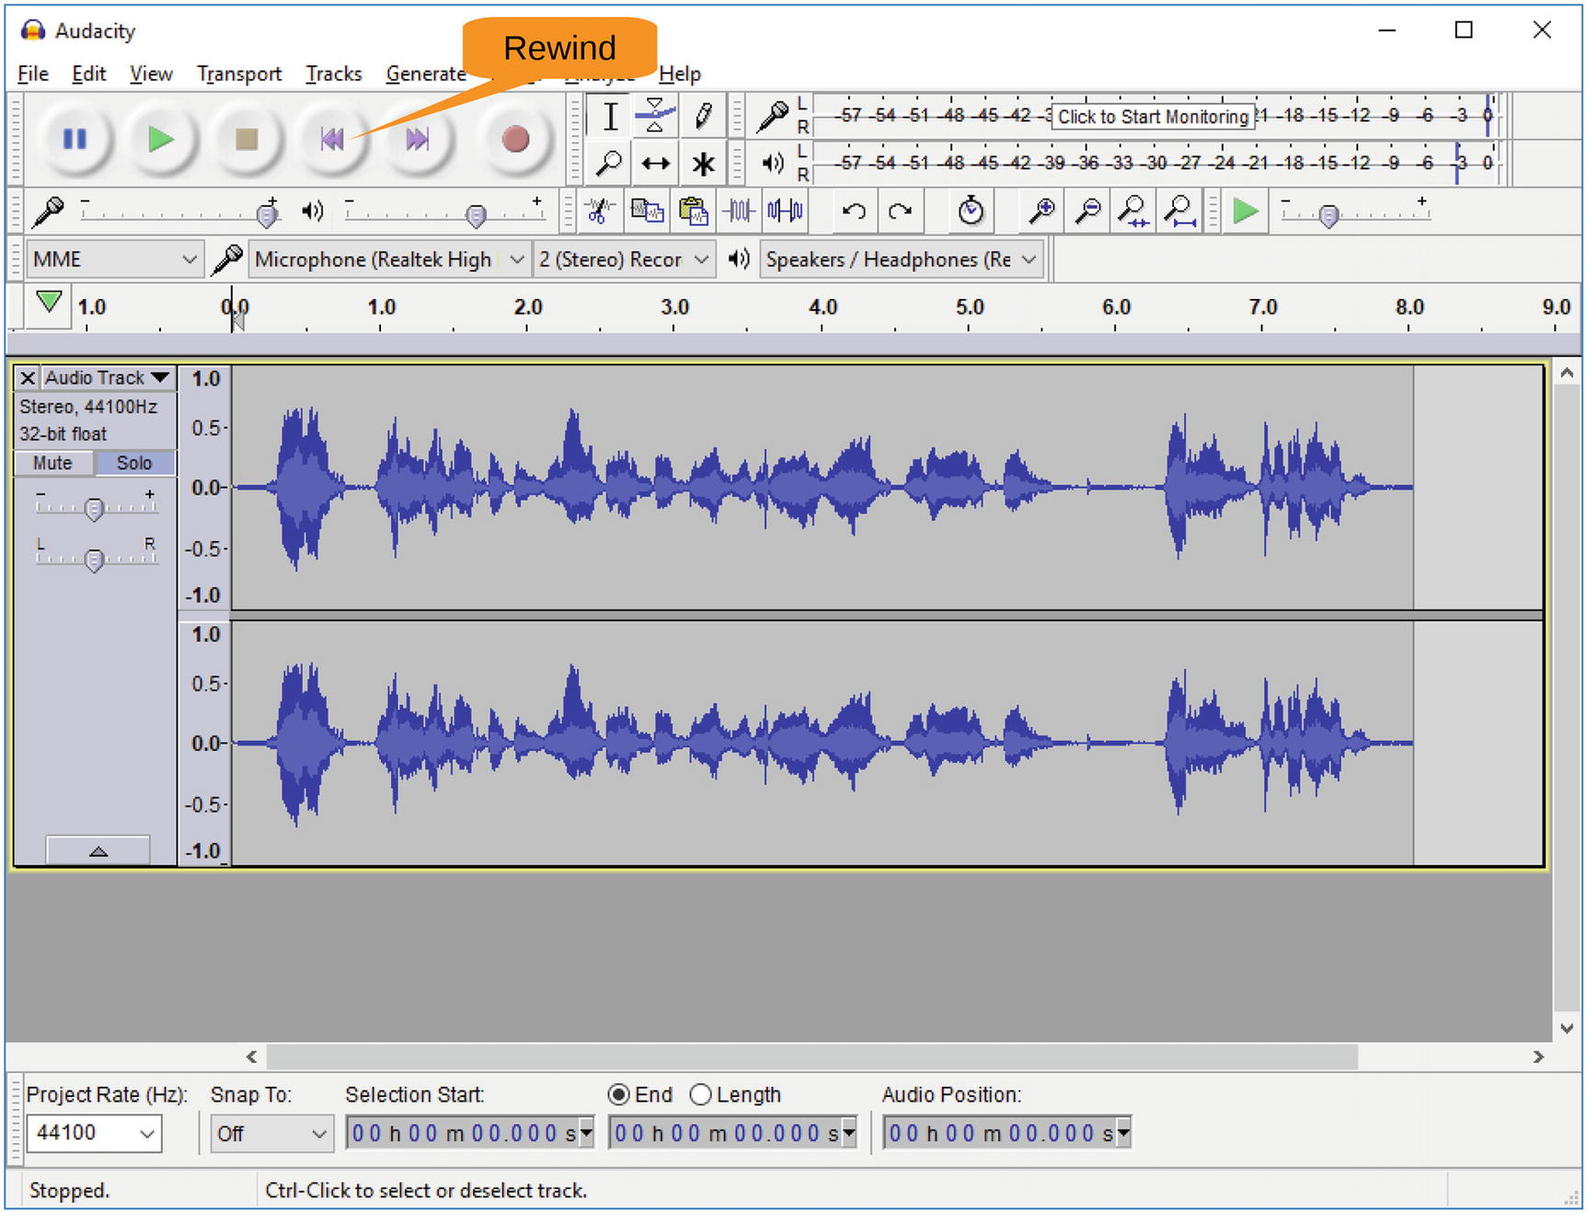
Figure 12-16 Rewind button
You can now insert the musical introduction at the beginning by selecting Edit ➤ Paste , which is so aptly demonstrated in Figure 12-17.

Figure 12-17 Pasting in the music
The waveform in the result looks a little different than it did in the original , as shown in Figure 12-18. That’s because the scale has changed.
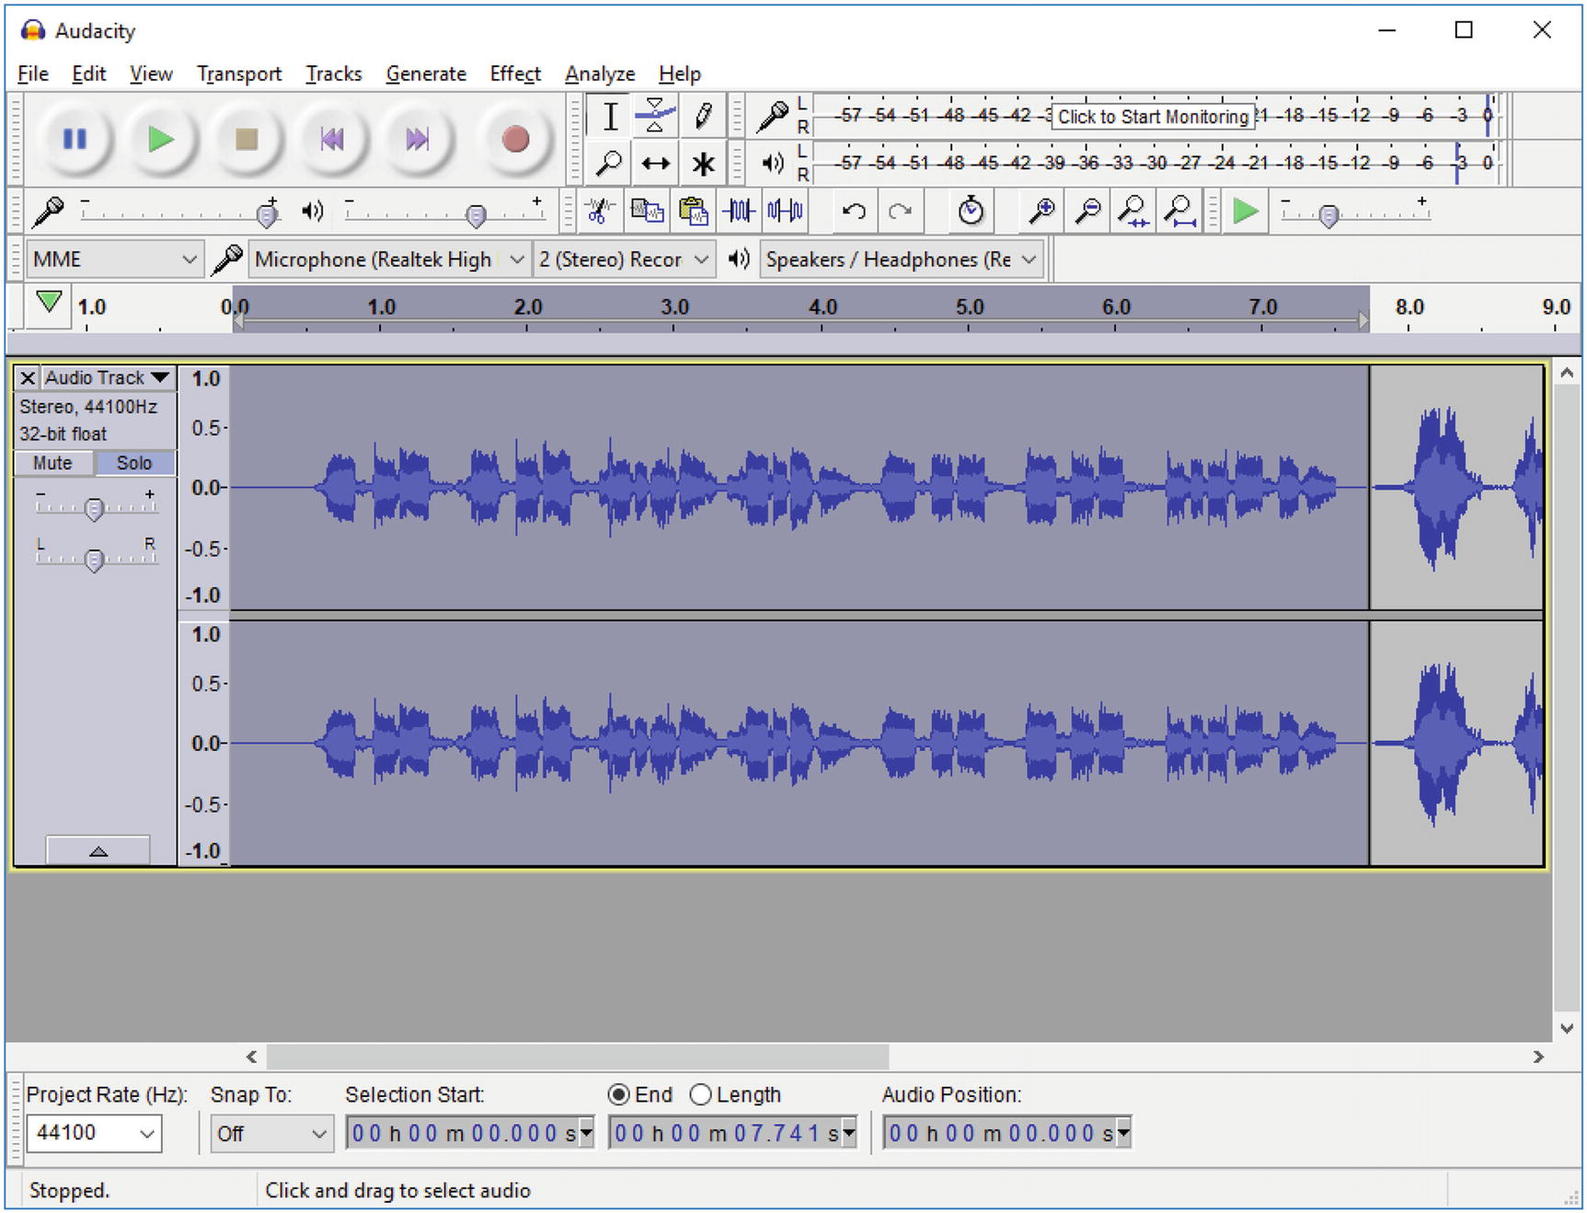
Figure 12-18 Result after pasting
Clicking the Play button, you can hear the result:
DA-T-DA DA-T-DA DA-DA-DA DA DA Howard came home
There is a rather abrupt transition between the music and the voice. Let’s fix that by having the music fade out just before the start of the voice section. Drag the cursor over the last few seconds of the song to select it, as shown in Figure 12-19.

Figure 12-19 Selecting something to fade
Fading out is an effect that can be applied to your selection by selecting Effect ➤ Fade Out, as shown in Figure 12-20.

Figure 12-20 Fading out
As you can see from the resulting waveform , as shown in Figure 12-21, the musical introduction fades out and then the story begins.

Figure 12-21 Fading out
As you can see, Audacity has lots of effects. Play with them to see what they do. Our favorite is Wahwah. When applied to “Dance of the Cuckoo,” it makes the song sound like the musicians were slightly drunk when they were playing.
Adding Background Music
Rather than use the music as an introduction, let’s use it as background music to the entire story. If it is not still on your clipboard, redo the steps just demonstrated to copy it so you can paste it in as the background.
For the background, you will add a new track to the story. When playing the story, Audacity will mix these tracks together. Select the command Tracks ➤ Add New ➤ Stereo Track to add the track to the story, as shown in Figure 12-22.

Figure 12-22 Adding a new track
The track appears below the current track. Let’s use Edit ➤ Paste to dump the music into this location.
By default, the new trace is muted. That’s why the audio is gray. Click the Mute button for this track twice to unmute it, as shown in Figure 12-23. (The second click is required because of the strange way it was muted when pasted.)

Figure 12-23 Clicking Mute
Clicking Play lets you hear the voice and the music. And boy, do you hear the music! It’s actually hard to hear the words. You wanted background music, not overpowering music, so you need to do some edits.
Select all the sound in the track, but drag the selection tool over it. Now you need to apply an effect to reduce the sound. It would make sense to call the effect Volume or Reduce Sound, but sometimes common sense and UI design diverge. To make something quieter, you apply the Amplify effect , as shown in Figure 12-24.

Figure 12-24 Using Amplify
The Amplify dialog appears, as shown in Figure 12-25. Move the slider to the left turn down the music.

Figure 12-25 Amplify dialog
Click OK to lock in the change. As Figure 12-26 shows, the waveforms in the music tracks are now much smaller. Clicking Play lets you hear the results, which are surprisingly lousy. But it does demonstrate how to add background music to a track, which was the goal of the exercise.

Figure 12-26 Background music in the background
Now you can export the audio so you can share it with friends and have good laugh at the result. Audacity does warn you that the soundtracks will be mixed in the result, but that’s a good thing because you just went through all this trouble to get them mixed.
Summary
In this chapter, you learned how to use a few of the features of Audacity. There are many more effects that you can play with. Also, you can mix more than just two tracks. There’s even a DTMF generator so you can use Audacity to dial your phone.
This chapter covered the basic and most useful features. But there are lots of online tutorials, web forums, books, and other resources available if you want to explore further.