
2
building your first robot
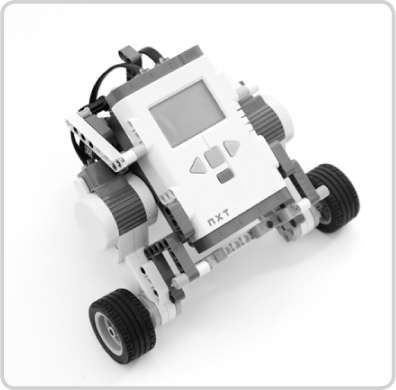
In Chapter 1, you learned that a robot consists of several important components. To make it easier for you to understand how each of these works, you’ll begin by working with only some of them. Specifically, you’ll first learn to work with the NXT motors and the brick as you build a wheeled vehicle (the Explorer, shown in Figure 2-1) that can drive around your room. Once you’ve built the Explorer, you’ll do a quick test to see whether you’ve correctly assembled the robot and to make it move!
building the explorer
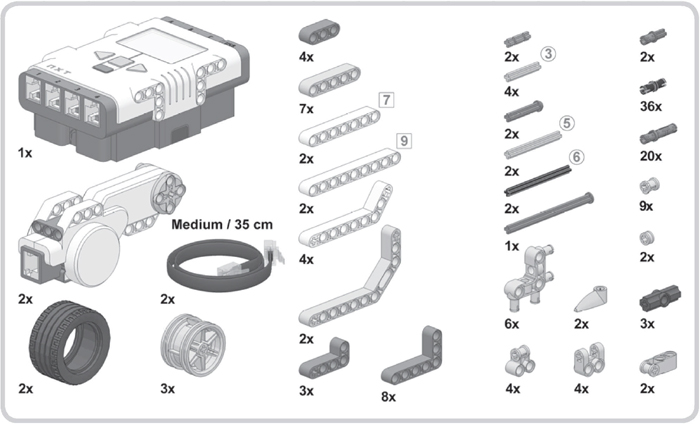
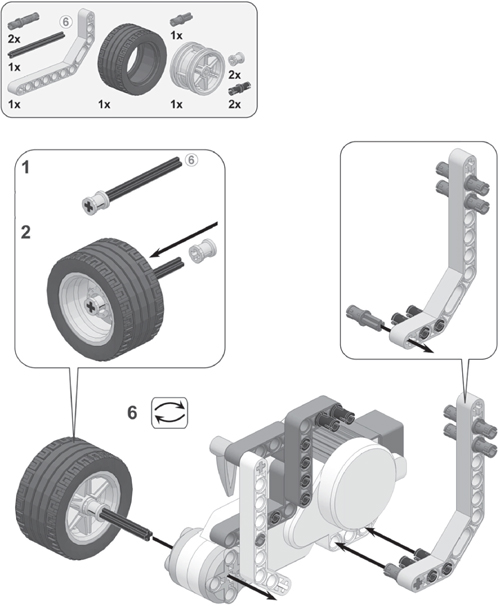
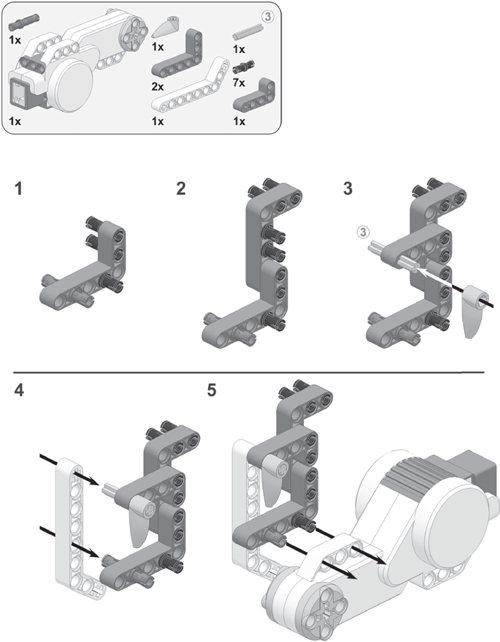
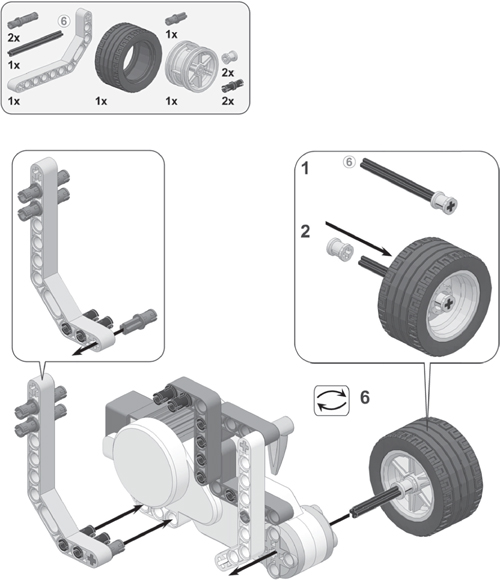
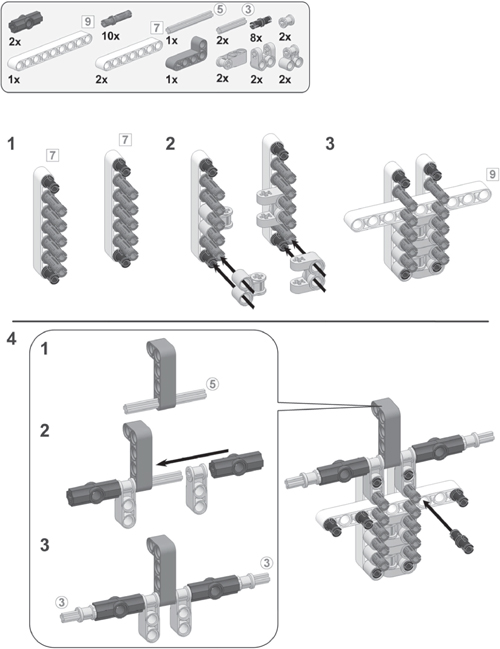
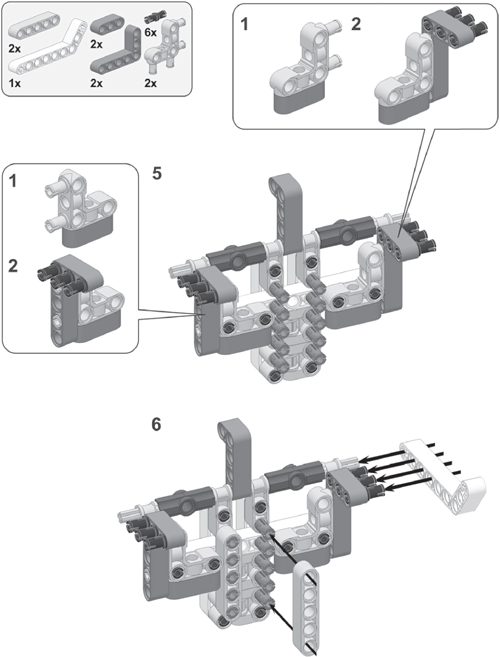
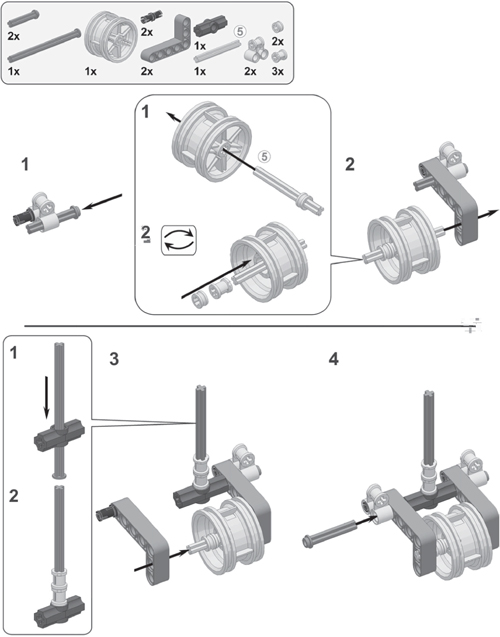
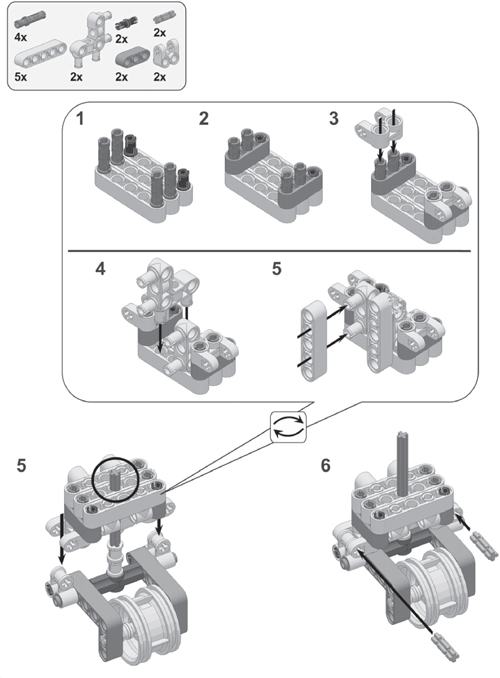
To begin, select the pieces you’ll need for the Explorer by referencing the bill of materials shown in Figure 2-2. Then, assemble the robot as shown in the step-by-step building images on the next pages.
building tip: beams and axles
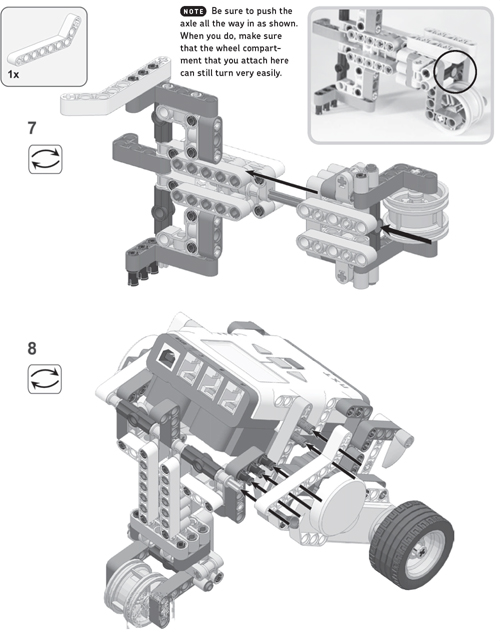
The LEGO MINDSTORMS NXT 2.0 robotics kit contains a lot of beams and axles. Because these parts come in a variety of lengths, it’s sometimes hard to figure out which one you’ll need. To help you sort out which one you’ll need, I’ll indicate the length as shown in the labels on the diagram in Figure 2-3. The numbers in boxes refer to beams; those in circles refer to axles.
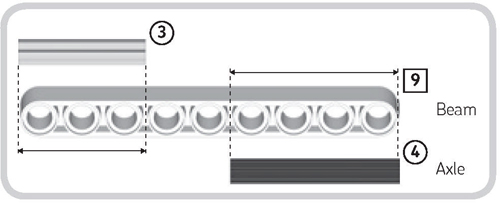
Figure 2-3: Beams and axles come in different lengths, so make sure you pick the correct ones while going through the building instructions. Instead of determining the length of beams and axles yourself, you can also use the 1:1 reference chart on the front inside cover.
To find the length of a beam, simply count the number of holes. For instance, the beam shown in Figure 2-3 has nine holes in it, as indicated by the “9” in the box next to it. The numbers in circles tell you the length of axles. To determine the length of an axle, place it next to a beam, and count how many holes it covers, as shown in Figure 2-3. The black axle shown here covers four holes, so it shows “4” in the circle.
building tip: friction and nonfriction pins
The NXT set also includes pins, which you’ll use to connect two or more parts. The set contains friction pins, which won’t turn easily if you connect them to a beam, and nonfriction pins, which do rotate easily when connected to a beam.
Friction and nonfriction pins may be the same shape, but the pin’s color tells you what type of pin it is, as shown on the front inside cover. When you’re following the building instructions, be sure to pick the correct type of pin as you build. The front inside cover also shows how the pin colors look in the black-and-white images in the book.
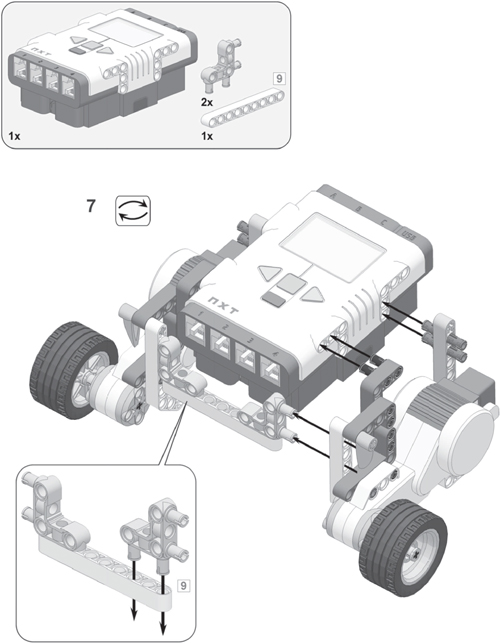
connecting the cables
To use the NXT motors, you need to connect them to the NXT brick using cables. Motors are connected to output ports called A, B, and C, as shown in Figure 2-4.
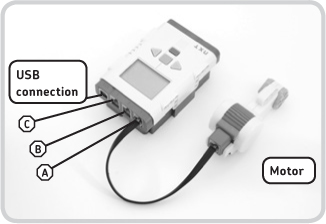
Figure 2-4: Output ports A, B, and C are used to connect motors to the NXT. In this example, the motor is connected to output port A.
Your LEGO MINDSTORMS NXT 2.0 robotics kit has three types of cables: a short cable (20 cm, or 8 inches), four medium-sized ones (35 cm, or 15 inches), and two long cables (50 cm, or 20 inches). For the Explorer robot, you’ll use medium-sized cables to connect the motors to ports B and C, as shown in Figure 2-5.
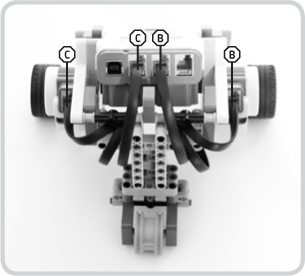
Figure 2-5: When connecting the medium-sized cables to the Explorer, plug one end of a cable into the NXT brick, wrap the cable around the LEGO pieces a few times, and then plug it into the appropriate motor.
When connecting your cables, make sure they do not interfere with the movement of the front wheels or the supporting wheel in the back of the model. To move the cables out of the way, tie them around some of the LEGO pieces in the robot so that the wheels and the caster wheel can spin freely. For example, you can wire the cables as shown in Figure 2-5.
using the NXT buttons to navigate on the NXT brick
Congratulations, you’ve finished building your training vehicle! Now, before you move on to programming in Chapter 3, you’ll learn how to use the buttons on the NXT brick (shown in Figure 2-6) to navigate around the NXT brick’s menus and to run programs stored on the brick.
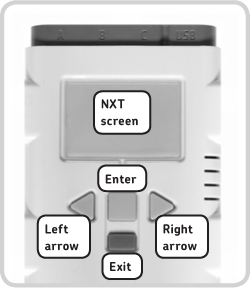
Figure 2-6: The NXT screen and the NXT buttons
turning on the brick
To turn on the brick, press the (orange) Enter button, as shown in Figure 2-7. After you hear the startup sound, you should see the main menu on the brick’s screen, displaying a couple of different icons, as shown in the figure.
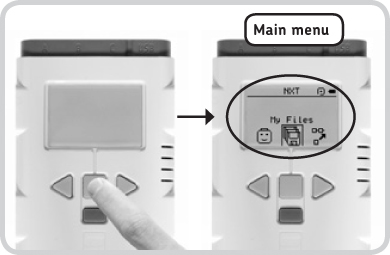
Figure 2-7: Turning on the NXT Brick with the Enter button will open the main menu.
selecting and choosing items
The selected item is always in the middle of the screen, as shown in Figure 2-8. You can switch to icons on the left and the right with the light gray arrow buttons. To select an item (Figure 2-8), press the Enter button.
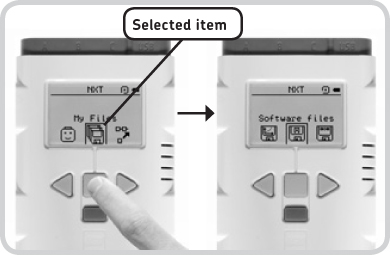
Figure 2-8: You press the Enter button to choose a selected item.
To return to the previous menu (Figure 2-9), press the dark gray Exit button.
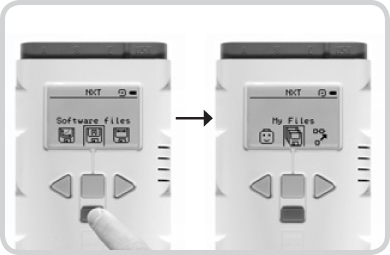
Figure 2-9: You can return to the previous menu by pressing the Exit button.
turning off the brick
To turn off the brick, return to the main menu, and press the Exit button. When you see the option for turning off the brick, either select the check mark to turn it off or select the X icon to cancel (Figure 2-10).
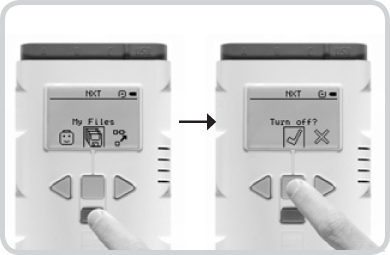
Figure 2-10: Turning off the NXT brick
running a program
NXT robots begin performing their actions when you select and run a program that has been transferred to the brick. You haven’t transferred a program to the brick yet, but you can try a sample program that is already on the brick, called DemoV2. To test your Explorer, run this DemoV2 program by navigating through the menu on the NXT brick, as shown in Figure 2-11.
NOTE If for some reason you can’t find the DemoV2 program on your NXT brick, just skip this step.
If you’ve put together everything properly, your robot should move around and make some sounds. To abort the running program, press the Exit button.
Now that you know how to start and stop programs, you’re ready to create your own programs!
conclusion
You have just learned to work with two essential robot components: the NXT brick and motors. When you ran the DemoV2 program, the program turned the motors, which made the robot move. In Chapters 3 and 4, you’ll learn how these programs work, as well as how you can make your own programs.
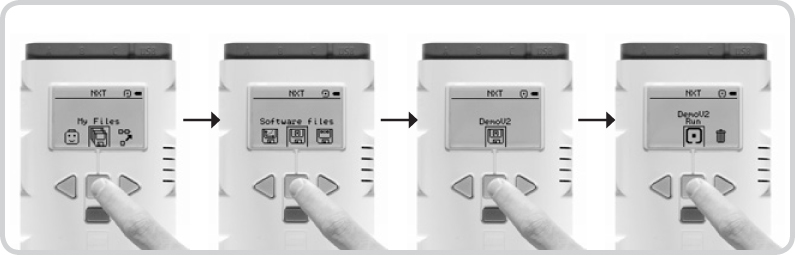
Figure 2-11: Run the DemoV2 program by navigating to My Files▸Software files▸DemoV2▸Run.