The VSM deployment will be divided into two parts: first, installation of VSUM and registering as a plugin with VMware vCenter; second, importing the Nexus 1000V package into VSUM and then deploying Nexus 1000V through the VSUM GUI interface.
For installing and configuring Cisco VSUM, you require one management port group, which will communicate with vCenter. However, Nexus 1000V VSM will require two port groups, control and management. You can use just one VLAN for all of these, but it is preferred to have them configured with separate VLANs.
Download the Nexus 1000V package and VSUM at https://software.cisco.com/download/type.html?mdfid=282646785&flowid=42790 and then use the following procedure to deploy VSUM and VSM:
- Go to vCenter, click on the File menu, and select Deploy OVF Template.
- Browse to the location of the VSUM OVA file and click on Browse... to install the required OVA file, and click on Next, as shown in the following screenshot:

- Click on Next twice.
- Click on Accept for the End User License Agreement page and then click on Next.
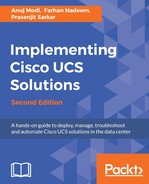
- Specify a name for the VSUM and select the data center where you would like it to be installed. Then click on Next, as shown in the following screenshot:
- Select the Datastore object to install the VSUM.
- Choose Thin Provision for the virtual disk of VSUM and click on Next.
- Under the Destination network page, select the network that you had created earlier for Management. Then, click on Next, as shown in the following screenshot:

- Enter the management IP address, DNS, vCenter IP address, username and password values, as shown in the following screenshot:

- A summary of all your settings is then presented. If you are happy with these settings, click on Finish.
- Once VSUM is deployed in the vCenter, power on the VM. This will take 5 minutes for installation and registration as a vCenter plugin. To view the VSUM GUI, you need to log in to vCenter Server again to activate the VSUM plugin:

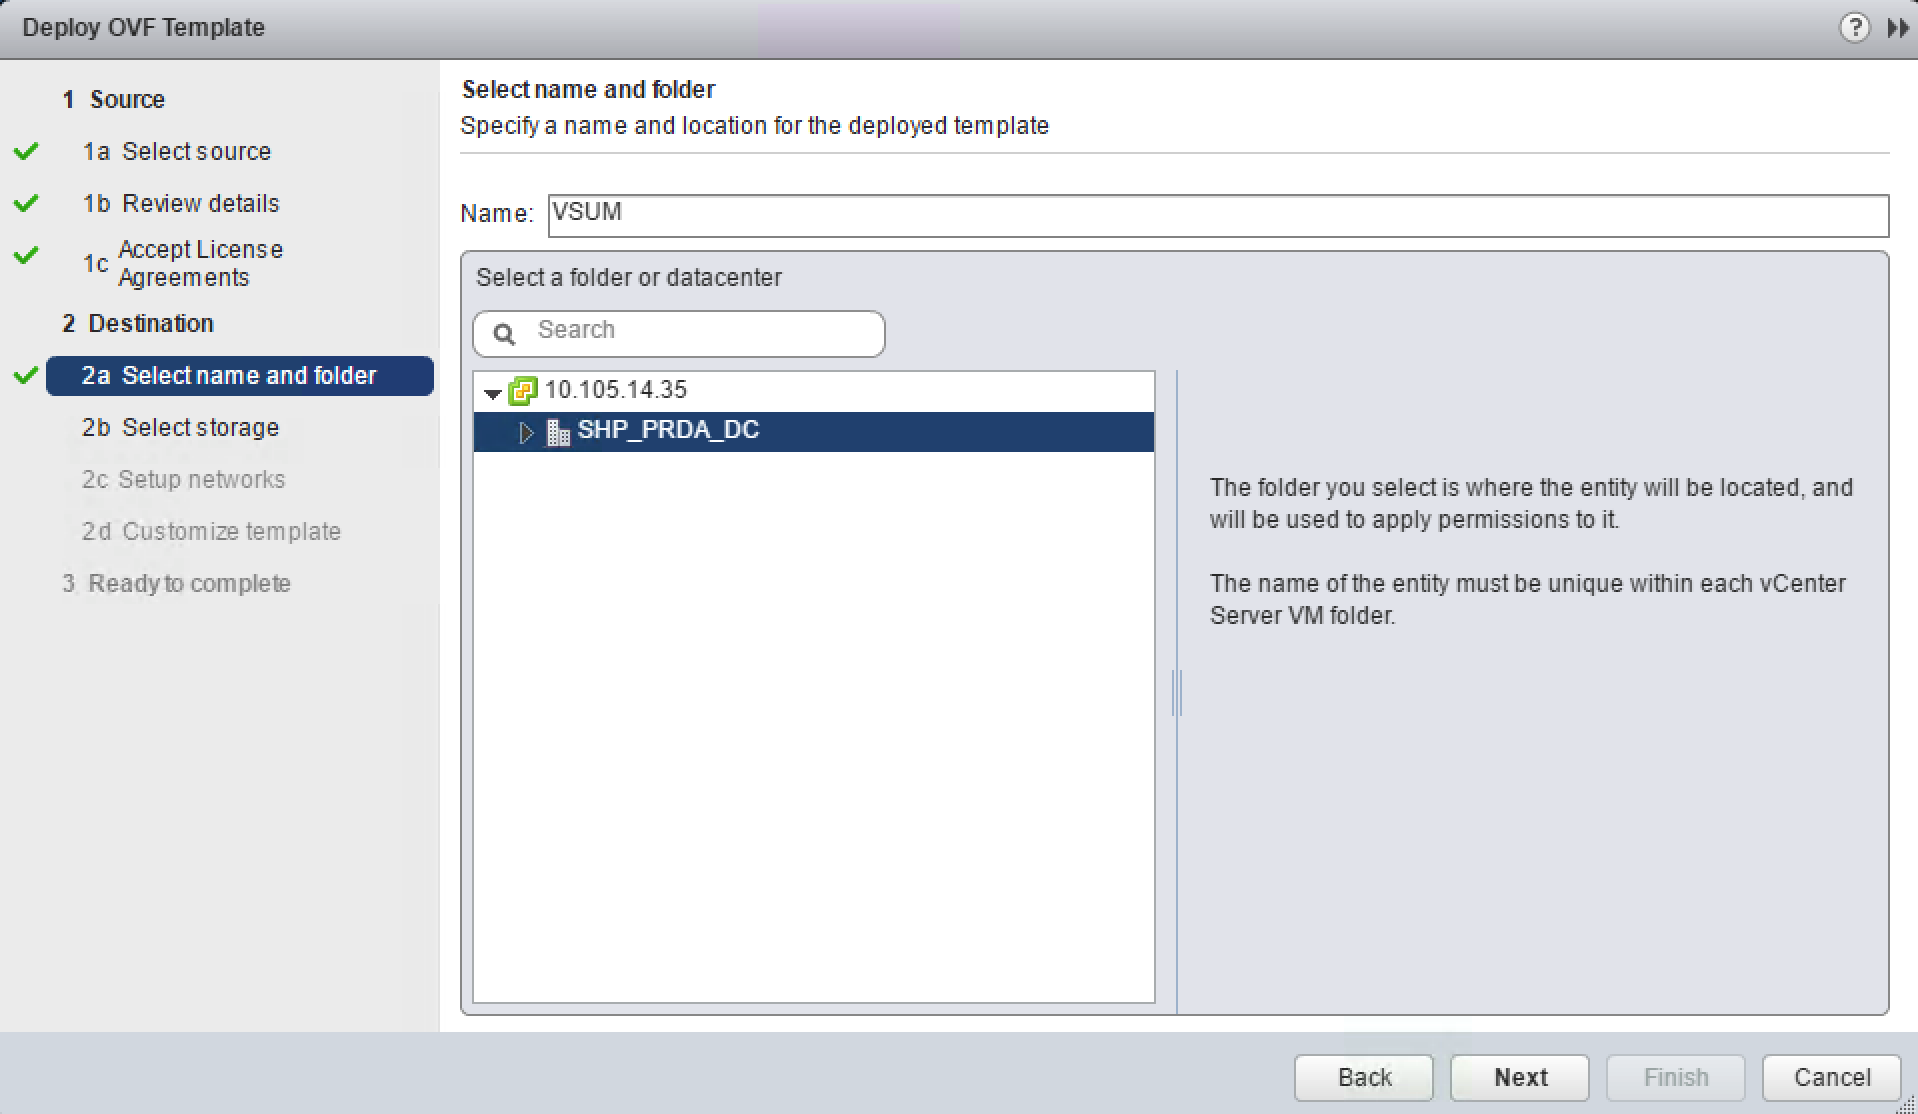
- Click on Cisco Virtual Switch Update Manager and select the Upload option under Image Tasks. Upload the Nexus 1000V package, that was downloaded earlier under Upload switch image. This will open Virtual Switch Image File Uploader and select the appropriate package:
- Once the image is uploaded, this will display under Manage Uploaded switch images.
- Click on the Nexus 1000V tab under Basic Tasks, and click on Install and select the desired data center:

- In the Nexus 1000V installer page, go to install a new control plane VSM, and select the proper options for Nexus1000V Switch Deployment Type, VSM Version, and Choose a Port Group. Select the host, VSM Domain ID, Switch Name, IP Address, Username, and Password. Then, click on Finish. A window will appear to show the progress:

- Once deployed, select the Nexus 1000V VM and click on Power On in the Summary screen.
- Go to VSUM GUI, and click on Dashboard under Nexus 1000V Basic Tasks. Verify that the VC Connection Status is green for your installed VSM:

- You need to create a port profile of Ethernet type for the uplink management. For this, log in to the Nexus 1000V switch using SSH, and type the following commands:
        port-profile type ethernet system-uplink
          vmware port-group
          switchport mode trunk
          switchport trunk allowed vlan 1-1000
          mtu 9000
          no shutdown
          system vlan 1-1000
          state enabled
- Move over to vCenter and add your ESXi host to the Nexus environment.
- Open vCenter, click on Inventory, and select Networking.
- Expand Datacenter and select Nexus Switch. Right-click on it and select Add Host.
- Select one of the unused VMNICs on the host, then select the uplink port group created earlier (the one carrying the system VLAN data), and click on Next.
- On the Network Connectivity page, click on Next.
- On the Virtual Machine Networking page, click on Next. Please do not select the checkbox to migrate virtual machine networking.
- On the Ready to complete page, click on Finish.
- Finally, run the vemcmd show card command to confirm whether the opaque data is now being received by the VEM.
- Log in to your Nexus 1000V switch and type in show module to check whether your host has been added or not.
- Log in to your ESXi server and type VEM Status. As you can see, VEM is now loaded on VMNIC.