
Configure Jenkins to run a test suite using nose, generating a coverage report. This recipe assumes you have already created the network management application as described in the Building a network management application section.
- If you have already downloaded Jenkins and used it for previous recipes, look for a
.jenkinsfolder in your home directory and delete it, to avoid unexpected variances caused by this recipe. - Install Jenkins as explained in Chapter 6, Configuring Jenkins to run Python tests upon commit.
- Open the console to confirm that Jenkins is working.
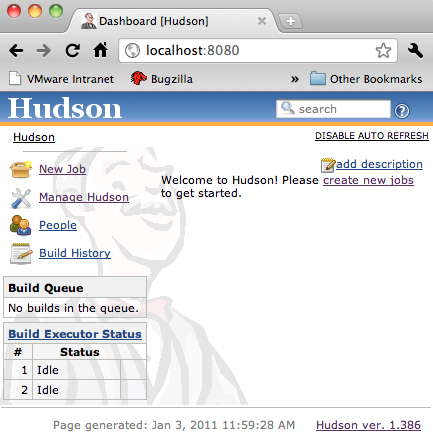
- Click on Manage Jenkins.
- Click on Manage Plugins.
- Click on the Available tab.
- Find the
Cobertura Pluginand click the checkbox next to it. - Find the
Git Pluginand click the checkbox next to it. - At the bottom of the page, click on the Install button.
- Navigate back to the dashboard screen.
- Shutdown Jenkins and start it again.
- Install git source code control on your machine. Refer to Chapter 6, Configuring Jenkins to run Python tests upon commit for links on installing git.
- Create an empty folder for this recipe.
gturnquist$ mkdir /tmp/recipe57 - Initialize the folder for source code maintenance.
gturnquist$ git init /tmp/recipe57 - Copy the network application and SQL script into the folder, add it, and commit the changes.
gturnquist$ cp network.py /tmp/recipe57/
gturnquist$ cp network.sql /tmp/recipe57/
gturnquist$ cd /tmp/recipe57/
gturnquist$ git add network.py network.sql
gturnquist$ git commit -m "Add network app"
[master (root-commit) 7f78d46] Add network app
 2 files changed, 221 insertions(+), 0 deletions(-)
 create mode 100644 network.py
 create mode 100644 network.sql
With these steps, we will explore how to configure Jenkins to build a coverage report and serve it through Jenkins' interface.
- Create a new file called
recipe57.pyto contain our test code for this recipe. - Write a test case that partially exercises the network management application.
from network import * import unittest from springpython.database.factory import * from springpython.database.core import * class EventCorrelationTest(unittest.TestCase): def setUp(self): db_name = "recipe57.db" factory = Sqlite3ConnectionFactory(db=db_name) self.correlator = EventCorrelator(factory) dt = DatabaseTemplate(factory) sql = open("network.sql").read().split(";") for statement in sql: dt.execute(statement + ";") def test_process_events(self): evt1 = Event("pyhost1", "serverRestart", 5) stored_event, is_active, updated_services, updated_equipment = self.correlator.process(evt1) print "Stored event: %s" % stored_event if is_active: print "This event was an active event." print "Updated services: %s" % updated_services print "Updated equipment: %s" % updated_equipment print "---------------------------------" - Copy it into the source code repository. Add it and commit the changes.
gturnquist$ cp recipe57.py /tmp/recipe57/
gturnquist$ cd /tmp/recipe57/
gturnquist$ git add recipe57.py
gturnquist$ git commit -m "Added tests."
[master 0bf1761] Added tests.
 1 files changed, 37 insertions(+), 0 deletions(-)
 create mode 100644 recipe57.py
- Open the Jenkins console.
- Click on New Job.
- Enter recipe57 as the Job Name and pick Build a free-style software project.
- Click on Ok.
- In the Source Code Management section, pick Git. For URL enter
/tmp/recipe57/. - In the Build Triggers section, pick Poll SCM and enter
*****into the schedule box, to trigger a poll once a minute. - In the Build section, select Execute Shell and enter the following adhoc script that loads virtualenv and runs the test suite.
. /Users/gturnquist/ptc/bin/activate
coverage -e
coverage run /Users/gturnquist/ptc/bin/nosetests recipe57.py
coverage xml --include=network.py,recipe57.py
- In the Post-build Actions section, pick Publish Cobertura Coverage Report.
- Enter
coverage.xmlfor Cobertura xml report pattern. - Click on Save to store all job settings.
- Navigate back to the dashboard.
- Click on Enable Auto Refresh.
- Wait about a minute for the build job to run.
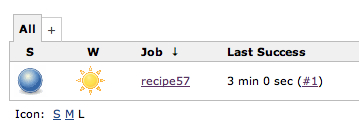
- Click on results (#1 in the previous screenshot).
- Click on Coverage Report. Observe the next screenshot where it reports 89 percent coverage.
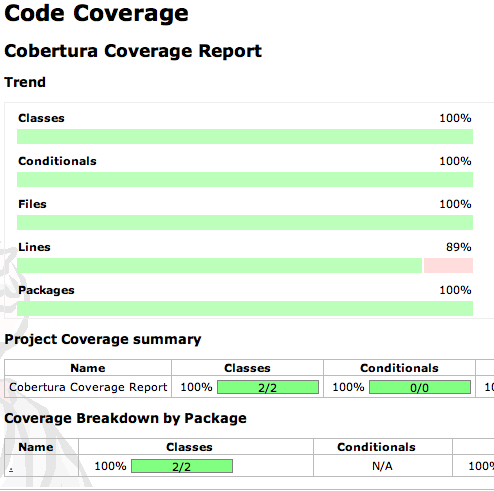
- Click on module
.(dot) to seenetwork.pyandrecipe57.py. - Click on
recipe57.pyto see which lines were covered and which ones were missed.
The coverage tool generates a useful XML file that the Jenkins Cobertura plugin can harvest. It's possible to just generate the HTML report and serve it up through Jenkins, but the XML file allows Jenkins to nicely chart the trend of coverage. It also provides the means to drill down and view the source code along with lines covered and missed.
We also integrated it with source control so that, as changes are committed to the repository, new jobs will be run.
It's important not to get too wrapped up in the coverage report. The coverage tool is useful to track testing, but working purely to increase coverage doesn't guarantee building better code. It should be used as a tool to illuminate what test scenarios are missing instead of thinking about testing the missing line of code.
The nose plugin for the coverage tool doesn't include the ability to generate XML files. This is because the coverage plugin is part of nose and NOT part of the coverage project. It is not up-to-date with the latest features including the XML report.
Tip
I asked Ned Batchelder, the creator of the coverage project, about this lack of XML support from nose. He gave me the tip to run nosetests inside coverage, as shown previously in the Jenkins job. It generates the same .coverage trace data file. It is easy to then execute coverage xml with needed arguments to get our desired report. In fact, we can use any reporting feature of coverage at this stage. Unfortunately, the coverage tool needs the explicit path to nosetests, and running inside Jenkins requires the path to be spelled out.