
As discussed earlier in this chapter, Robot Framework lets us use defined custom keywords.
This gives us the ability to structure keywords in any style. In this recipe, we will define custom keywords that implement the BDD Given-When-Then style of specification.
- We first need to activate our
virtualenvsetup. - For this recipe, we will use the shopping cart application.
- Next, we need to install Robot Framework, as shown in the previous sections of this chapter.
The following steps will explore how to write a BDD Given-When-Then style acceptance test.
- Create a new file called
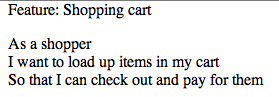
recipe40.htmlto contain our HTML tables. - Create a story file in HTML with an opening statement.
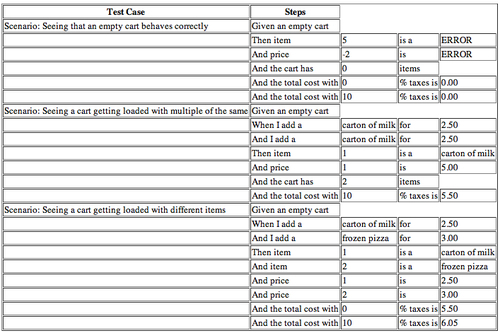
- Add a table with several scenarios used to exercise the Shopping Cart application with a series of Given-When-Then keywords.
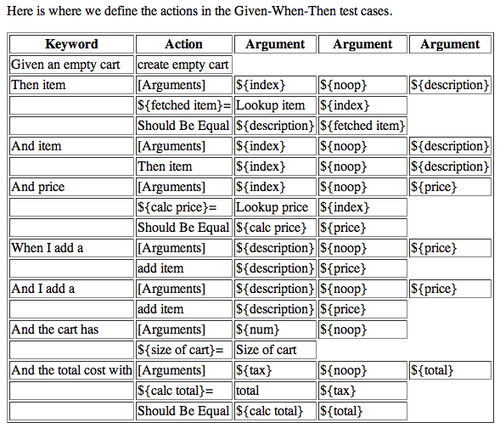
- Add a second table that defines all of our custom Given-When-Then keywords.
- Create a new file called
recipe40.pyto contain Python code that links the custom keywords to theShoppingCartapplication.from cart import * class recipe40: def __init__(self): self.cart = None def create_empty_cart(self): self.cart = ShoppingCart() def lookup_item(self, index): try: return self.cart.item(int(index)) except IndexError: return "ERROR" def lookup_price(self, index): try: return format(self.cart.price(int(index)), ".2f") except IndexError: return "ERROR" def add_item(self, description, price): self.cart.add(description, float(price)) def size_of_cart(self): return len(self.cart) def total(self, tax): return format(self.cart.total(float(tax)), ".2f") - Add a third table to our
recipe40.htmlfile to import our Python module.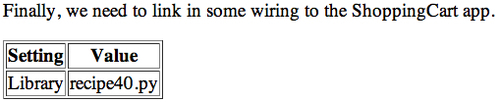
- Run the story by typing
pybot recipe40.html.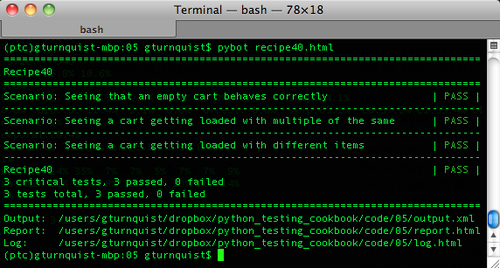
Robot Framework uses HTML tables to define test components. The header row of the table identifies what type of component the table defines.
The first table we created was a set of test cases. Robot Framework spots this by seeing Test Case in the first cell of the header row. The rest of the header cells aren't parsed, which leaves us free to put in descriptive text.
In this recipe, each of our test cases comprised several custom keywords using the Given-When-Then style familiar to BDD testers. Many of these keywords have one or more arguments.
The second table we wrote is used to define our custom Given-When-Then keywords. Robot Framework figures this out by seeing Keyword in the first cell of the header row.
The third table we made contains settings. This is identified by seeing Setting in the first cell of the header row. This table is used to import Python code that contains the final keywords by using the built-in keyword Library.
An important aspect of our custom keywords, in this recipe, is that we wrote them in a natural flowing language.
When I add a carton of milk for 2.50
This is broken up into four HTML cells in order to parameterize the inputs and make the keywords reusable for several test steps.
Robot Framework sees this as a custom keyword, When I add a, with three arguments: carton of milk, for, and 2.50.
Later on, we fill in the actual steps involved with this keyword. In doing so, we are really only concerned with using carton of milk and 2.50. But we still have to treat for like an input variable. We do this by using a place holder variable, ${noop}, which we will simply not use in any following keyword steps.
This entire chunk of HTML that we had to write starts to feel a bit heavy. As mentioned in the earlier recipe Creating a data-driven test suite with Robot, .rst is a great alternative. Unfortunately, writing this recipe using .rst is too wide for the format of this book. Please see that recipe for more details about writing .rst and getting the tools to convert .rst to HTML.
It's true that we had to define both Then item and Add item, which are basically the same, in order to support two different test scenarios. In other BDD tools, these would have been automatically spotted as the same clause. Robot Framework doesn't directly provide a BDD domain specific language, so we had to fill this in for ourselves.
The most efficient way to handle this was to define Then item in detail with all the steps needed, and then code And item to just call Then item.
In contrast, When I add a and And I add a were implemented by both calling add item. Since this clause was a simpler pass-through to our Python module, it wasn't necessary to chain them together like the previous example.
Another option would be to investigate coding our own BDD plugin library to simplify all of this.
In the recipe Creating a data-driven test suite with Robot, we saw that the code that bridges the HTML tables with the ShoppingCart application should be kept as light as possible, and avoid transformations and other manipulations.
It is quite possible to view trapping of an expected exception and returning a string as crossing this line. In our case, the solution was to define a single clause that could handle errors and legitimate values. The clause takes whatever is returned and verifies it using the built-in keyword Should Be Equal.
If this wasn't the case, it may have been smoother to not have the try-expect block, and instead use the built-in keyword Run Keyword And Expect Error linked to another custom Python keyword. But in this situation, I think the goal of keeping things light was satisfied.