
We just explored how to configure Jenkins to run our test suite when we commit the code changes. Jenkins can also be configured to invoke our test suite at scheduled intervals. This is very useful, because we can gear it to make scheduled releases. Daily or weekly releases can provide potential customers with a nice cadence of release.
CI releases are usually understood to not necessarily be final, but instead provide bleeding edge support in case new features need to be investigated early and integrated by the customer.
The following steps are used to set up Jenkins as well as a copy of our tests, so we can poll it at a scheduled interval:
- Set up Jenkins as shown in the earlier recipe Configuring Jenkins to run Python tests upon commit. This should include having setup the Git plugin.
- Create an empty folder for this recipe.
gturnquist$ mkdir /tmp/recipe47 - Initialize the folder for source code maintenance.
gturnquist$ git init /tmp/recipe47
Initialized empty Git repository in /private/tmp/recipe47/.git/
- Copy the shopping cart application into the folder, add it, and commit the changes.
gturnquist$ cp cart.py /tmp/recipe47/
gturnquist$ cd /tmp/recipe47/
gturnquist$ git add cart.py
gturnquist$ git commit -m "Added shopping cart application to setup this recipe."
[master (root-commit) 057d936] Added shopping cart application to setup this recipe.
 1 files changed, 35 insertions(+), 0 deletions(-)
 create mode 100644 cart.py
The following steps will let us explore creating a Jenkins job to periodically run our automated test suite:
- Open the Jenkins console.
- Click on New Job.
- Enter recipe47 as the Job name and pick Build a free-style software project.
- Click on Ok.
- In the Source Code Management section, pick Git. For URL, enter
/tmp/recipe47/. - In the Build Triggers section, pick Build periodically and enter some time in the future. While writing this recipe for the book, the job was created around 6:10 p.m., so entering
15 18 * * *into the schedule box schedules the job five minutes into the future at 6:15 p.m. - In the Build section, select Execute shell and enter the following adhoc script that loads the
virtualenvand runs the test suite.. /Users/gturnquist/ptc/bin/activate nosetests tests.py –with-nosexunit
You need to replace this with the command used to activate your virtualenv followed by the step to run the tests.
- In the Post-build Actions section, pick Publish JUnit test result report and enter
target/NoseXUnit/core/*.xml, so that test results are collected by Jenkins. - Click on Save to store all the job settings.
- Click on Enable Auto Refresh.
- Copy the test suite into the controlled source folder, add it, and commit it.
gturnquist$ cp tests.py /tmp/recipe47/
gturnquist$ cd /tmp/recipe47/
gturnquist$ git add tests.py
gturnquist$ git commit -m "Added tests for the recipe."
[master 0f6ef56] Added tests for the recipe.
 1 files changed, 20 insertions(+), 0 deletions(-)
 create mode 100644 tests.py
- Watch to verify whether Jenkins launches a successful test run.
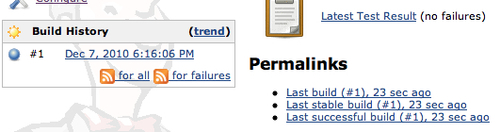
- Navigate to test results, and we can see that four of our tests were run.
This is very similar to the previous recipe, only this time we configured a polling interval for running our test suite instead of polling the version control system. It is useful to run a build once a day to make sure things are stable and working.
Jenkins has lots of options. If you examine the web interface, you can drill into output logs to see what actually happened. It also collects trends showing how long we have had success, when the last build failed, and more.
To be honest, Jenkins has so many plugins and options that an entire book could be devoted to exploring its features. This half of the chapter is merely an introduction to using it with some common jobs that are test-oriented.
So far, we have explored using Jenkins. Later in this chapter, we will visit TeamCity. What are the differences? Why should we pick one or the other?
Feature-wise, they both offer powerful choices. That is why they are both covered in this book. The key thing both provide is setting up jobs to run tests as well as other things like packaging.
A key difference is that Jenkins is an open source product and TeamCity is commercial. You or your company may prefer to have a paid company associated with the product (http://www.jetbrains.com/), which is what TeamCity offers. This doesn't make the decision crystal clear, because the principal developer of Jenkins currently works for CloudBees (http://www.cloudbees.com/), which invests effort in Jenkins as well as products surrounding it.
If commercial support isn't imperative, you may find the pace of development of Jenkins is faster and the number of plugins more diverse. The bottom line is that choosing the product that meets your CI needs requires a detailed analysis and simply can't be answered here.