
This recipe will help us write a plugin that generates a custom report listing successes and failures in a CSV file. It is used to demonstrate how to gather information after each test method completes.
We need to have easy_install loaded in order to install the nose plugin we are about to create. If you don't already have it, please visit http://pypi.python.org/pypi/setuptools to download and install the package as indicated on the site.
If you just installed it now, then you will have to:
- Rebuild your
virtualenvused for running code samples in this book - Reinstall nose using
easy_install
- Create a new file named
recipe14.pyto contain the code for this recipe. - Create a shopping cart application that we can build some tests around.
class ShoppingCart(object): def __init__(self): self.items = [] def add(self, item, price): self.items.append(Item(item, price)) return self def item(self, index): return self.items[index-1].item def price(self, index): return self.items[index-1].price def total(self, sales_tax): sum_price = sum([item.price for item in self.items]) return sum_price*(1.0 + sales_tax/100.0) def __len__(self): return len(self.items) class Item(object): def __init__(self, item, price): self.item = item self.price = price - Create a test case that contains several test methods, including the one deliberately set to fail.
import unittest class ShoppingCartTest(unittest.TestCase): def setUp(self): self.cart = ShoppingCart().add("tuna sandwich", 15.00) def test_length(self): self.assertEquals(1, len(self.cart)) def test_item(self): self.assertEquals("tuna sandwich", self.cart.item(1)) def test_price(self): self.assertEquals(15.00, self.cart.price(1)) def test_total_with_sales_tax(self): self.assertAlmostEquals(16.39, self.cart.total(9.25), 2) def test_assert_failure(self): self.fail("You should see this failure message in the report.") - Run the module using
nosetestsfrom the command line. Looking at the output in the following screenshot, does it appear that a CSV report exists?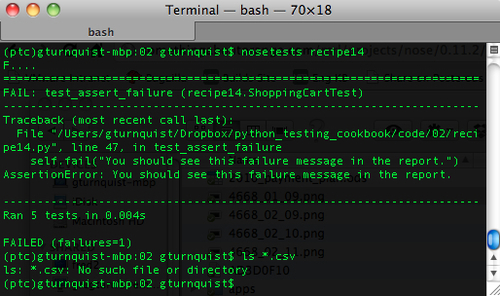
- Create a new file called
recipe14_plugin.pyto contain our new nose plugin. - Create a nose plugin named
CsvReportby subclassingnose.plugins.Plugin.import nose import re from nose.plugins import Plugin class CsvReport(Plugin): name = "csv-report" def __init__(self): Plugin.__init__(self) self.results = []Nose plugin requires a class level
name. This is used to define the–with--<name>command-line option. - Override
Plugin.optionsand add an option to provide the report's filename on the command line.def options(self, parser, env): Plugin.options(self, parser, env) parser.add_option("--csv-file", dest="filename", action="store", default=env.get("NOSE_CSV_FILE", "log.csv"), help=("Name of the report")) - Override
Plugin.configurationby having it fetch the filename from the options.def configure(self, options, conf): Plugin.configure(self, options, conf) self.filename = options.filenameWhen we extend
Plugin, we inherit some other features, likeself.enabled, which is switched on when–with-<name>is used with nose. - Override
addSuccess,addFailure, andaddErrorto collect results in an internal list.def addSuccess(self, *args, **kwargs): test = args[0] self.results.append((test, "Success")) def addError(self, *args, **kwargs): test, error = args[0], args[1] self.results.append((test, "Error", error)) def addFailure(self, *args, **kwargs): test, error = args[0], args[1] self.results.append((test, "Failure", error)) - Override
finalizeto generate the CSV report.def finalize(self, result): report = open(self.filename, "w") report.write("Test,Success/Failure,Details ") for item in self.results: if item[1] == "Success": report.write("%s,%s " % (item[0], item[1])) else: report.write("%s,%s,%s " % (item[0],item[1], item[2][1])) report.close() - Write a test runner that programmatically tests our plugin by running the same test case that we ran earlier.
if __name__ == "__main__": args = ["", "recipe14", "--with-csv-report", "--csv-file=recipe14.csv"] nose.run(argv=args, plugin=[CsvReport()]) - Execute the test runner. Looking at the output in the next screenshot, is there a test report now?
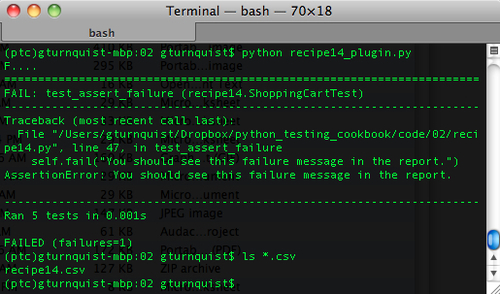
- Open up and view the report using your favorite spreadsheet.
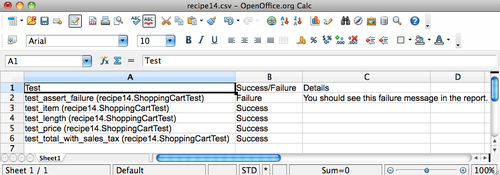
- Create a
setup.pyscript that allows us to install and register our plugin withnosetests.import sys try: import ez_setup ez_setup.use_setuptools() except ImportError: pass from setuptools import setup setup( name="CSV report plugin", version="0.1", author="Greg L. Turnquist", author_email="[email protected]", description="Generate CSV report", license="Apache Server License 2.0", py_modules=["recipe14_plugin"], entry_points = { 'nose.plugins': [ 'recipe14_plugin = recipe14_plugin:CsvReport' ] } ) - Install our new plugin.
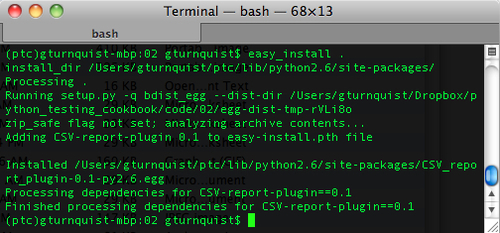
- Run
nosetestsusing--with-csv-reportfrom the command line.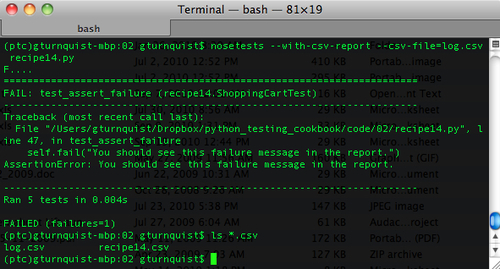
In the previous screenshot, notice how we have the previous log file, recipe14.csv and the new one, log.csv.
Writing a nose plugin has some requirements. First of all, we need the class level name attribute. It is used in several places including defining the command-line switch to invoke our plugin, --with-<name>.
Next, we write options. There is no requirement to override Plugin.options. But, in this case, we need a way to supply our plugin with the name of the CSV report it will write. To avoid destroying the useful machinery of Plugin.options, we call it first, and then add a line for our extra parameter using parser.add_option.
- The first, unnamed arguments are string versions of the parameter
dest: This is the name of the attribute to store the results (see configure)action: This tells what to do with the value of the parameter (store, append, etc.)default: This tells what value to store when none is providedhelp: This provides help information to print out on the command line
Nose uses Python's optparse.OptionParser library to define options.
Note
To find out more about optparse.OptionParser visit http://docs.python.org/optparse.html.
Then, we write configure. There is also no requirement to override Plugin.configure. Because we had an extra option, --csv-file, we need to harvest it.
In this recipe, we want to capture the test case as well as the error report whenever a test method completes. To do this, we implement addSuccess, addFailure, and addError. Because nose varies in what arguments are sent to these methods when called either programmatically or by command-line, we must use Python's *args.
- The first slot of this tuple contains the
test, an instance ofnose.case.Test. Simply printing it is sufficient for our needs. - The second slot of this tuple contains the
error, an instance of the 3-tuple forsys.exc_info(). It is only included foraddFailureandaddError. - No other slots of this tuple are documented on nose's website. We generally ignore them.
This recipe digs a little deeper into the plugin functionality. It focuses on processing done after a test method succeeds, fails, or causes an error. In our case, we just gather the results to put into a report. We could do other things, like capture stack traces, e-mail failures to the development team, or send a page to the QA team letting them know a test suite is complete.
For more details about writing a nose plugin, read the recipe Writing a nose extension to pick tests based on regular expressions.