In this chapter, we are going to develop the contacts management feature of our application, which includes listing, adding, editing, and deleting contacts all of this the Ajax way!
Moreover, we are going to learn new concepts about the RichFaces component framework and Ajax support.
Let's start preparing the space for the core features of the application. As you've seen in Chapter 4, The Application, we want a three-column layout for groups, contacts list, and contact detail. Let's open the home.xhtml file and add a three-column panel grid inside the body:
<h:panelGrid columns="3"
width="100%"
columnClasses="main-group-column, main-contacts-list-column, main-contact-detail-column"> </h:panelGrid>
We are using three new CSS classes (one for every column). Let's open the /view/stylesheet/theme.css file and add the following code:
.main-group-column {
width: 20%;
vertical-align: top;
}
.main-contacts-list-column {
width: 40%;
vertical-align: top;
}
.main-contact-detail-column {
width: 40%;
vertical-align: top;
}
The main columns are ready; now we want to split the content of every column in a separate file (so we don't have a large and difficult file to read) by using the Facelets templating capabilities let's create a new folder inside the /view folder called main, and let's create the following empty files inside it:
contactsGroups.xhtmlcontactsList.xhtmlcontactEdit.xhtmlcontactView.xhtml
Now let's open them and put the standard code for an empty (included) file:
<!DOCTYPE composition PUBLIC "-//W3C//DTD XHTML 1.0 Transitional//EN"
"http://www.w3.org/TR/xhtml1/DTD/xhtml1-transitional.dtd">
<ui:composition xmlns="http://www.w3.org/1999/xhtml"
xmlns:s="http://jboss.com/products/seam/taglib"
xmlns:ui="http://java.sun.com/jsf/facelets"
xmlns:f="http://java.sun.com/jsf/core"
xmlns:h="http://java.sun.com/jsf/html"
xmlns:rich="http://richfaces.org/rich"
xmlns:a="http://richfaces.org/a4j">
<!-- my code here -->
</ui:composition>
Now, we have all of the pieces ready to be included into the home.xhtml file, let's open it and start adding the first column inside h:panelGrid:
<a:outputPanel id="contactsGroups">
<ui:include src="main/contactsGroups.xhtml"/>
</a:outputPanel>
As you can see, we surrounded the include with an a:outputPanel that will be used as a placeholder for the re-rendering purpose.
Include a Facelets tag (ui:include) into the a:outputPanel that we used in order to include the page at that point.
A very important concept to keep in mind while developing is that the Ajax framework can't add or delete, but can only replace existing elements in the page. For this reason, if you want to append some code, you need to use a placeholder.
RichFaces has a component that can be used as a placeholder a4j:outputPanel.
Inside a4j:outputPanel, you can put other components that use the "rendered" attribute in order to decide if they are visible or not. When you want to re-render all the included components, just re-render the outputPanel, and all will work without any problem.
Here is a non-working code snippet:
<h:form>
<h:inputText value="#{aBean.myText}">
<a4j:support event="onkeyup" reRender="out1" />
</h:inputText>
</h:form>
<h:outputText
id="out1"
value="#{aBean.myText}"
rendered="#{not empty aBean.myText}"/>
This code seems the same as that of the a4j:support example, but it won't work.
The problem is that we added the rendered attribute to outputText, so initially, out1 will not be rendered (because the text property is initially empty and rendered will be equal to false). After the Ajax response, the JavaScript Engine will not find the out1 element (it is not in the page because of rendered="false"), and it will not be able to update it (remember that you can't add or delete elements, only replace them).
It is very simple to make the code work:
<h:form>
<h:inputText value="#{aBean.myText}">
<a4j:support event="onkeyup" reRender="out2" />
</h:inputText>
</h:form> <a4j:outputPanel id="out2">
<h:outputText
id="out1"
rendered="#{not empty aBean.myText}"
value="#{aBean.myText}" />
</a4j:outputPanel>
As you can see, you just have to put the out1 component inside a4j:outputPanel (called out2) and tell a4j:support to re-render out2 instead of out1.
Initially, out2 will be rendered but empty (because out1 will not be rendered). After the Ajax response, the empty out2 will be replaced with markup elements that also contain the out1 component (that is now visible, because the myText property is not empty after the Ajax update and the rendered property is true).
A very important concept to keep in mind while developing is that the Ajax framework can't add or delete, but can only replace existing elements of the page. For this reason, if you want to append some code, you need to use a placeholder.
Tip
In the contact list example of Chapter 3, First Steps, we didn't use a placeholder for the "No contact found" h:outputText, because the Ajax action components (such as the "delete" button) re-render the surrounding fContactsList form that acts as a placeholder in this case.
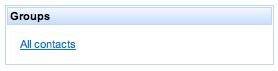
This box will contain all the contacts groups, so the user will be able to organize contacts in different groups in a better way.
We will not implement the group box features in this chapter. Therefore, by now the group column is just a rich:panel with a link to refresh the contact list.
Let's open the contactsGroups.xhtml file and insert the following code:
<h:form>
<rich:panel>
<f:facet name="header">
<h:outputText value="#{messages['groups']}" />
</f:facet>
<h:panelGrid columns="1">
<a:commandLink value="#{messages['allContacts']}"
ajaxSingle="true"
reRender="contactsList">
<f:setPropertyActionListener value="#{null}" target="#{homeContactsListHelper.contactsList}" />
</a:commandLink>
</h:panelGrid>
</rich:panel>
</h:form>
As you can see, we've put a three-column h:panelGrid (to be used in the future) and a:commandLink, which just sets the contactsList property of the homeContactListHelper bean (that we will see in the next section) to null, in order to make the list be read again. At the end of the Ajax interaction, it will re-render the contactsList column in order to show the new data.
Also, notice that we are still supporting i18n for every text using the messages property; the task to fill the messages_XX.properties file is left as an exercise for the user.