
Adding RichFaces libraries to an existing project is safe, and you won't see any different behavior in your existing non-RichFaces code.
In this section, we are going to discover how to integrate the RichFaces libraries manually in your projects.
The latest release of RichFaces can be downloaded as a ZIP (or tar.gz) package from http://www.jboss.org/jbossrichfaces/downloads/ (pick the bin version). Extract the file onto your hard drive and you're done.
You will find the lib folder inside the distribution package, which contains the library JAR files and three other documentation folders:
- apidocs: It contains the javadoc generated document about the Java classes, which come with the library
- tlddocs: It contains documentation about the tags (and their attributes), which come with the library (generated by the Tag Library Documentation Generator)
- docs: It contains the user guide, FAQ document, migration document, and CDK guide
From the same address, you can also download the three plug 'n' skin examples in order to add new skins to your application (however, in the standard package you can choose from a standard set of skins), we'll see how to do that in the Chapter 9, Creating a New plug’n’skin.
This section explains how to configure a basic JSF project in order to add RichFaces support manually.
The first thing to do is (obviously) to add the RichFaces libraries into your lib folder.
|
JAR library |
Description |
|---|---|
|
|
Contains all of the interfaces and base classes of the framework |
|
|
Contains the implementation classes of the framework |
|
|
Contains the implementation classes of the components of the framework |
The other optional libraries are the skins (we used laguna in our example) and are:
laguna-X.Y.Z.GA.jarglassX-X.Y.Z.GA.jardarkX-X.Y.Z.GA.jar
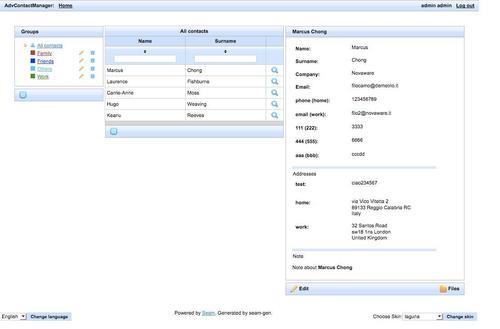
If you develop your own skin, you will need the skin's JAR file to be in your classpath. Here is an example image of the web application we are going to develop using the laguna skin:
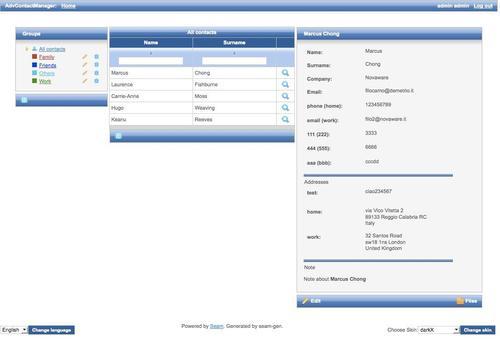
The next screenshot, instead, shows the same application using the darkX skin:
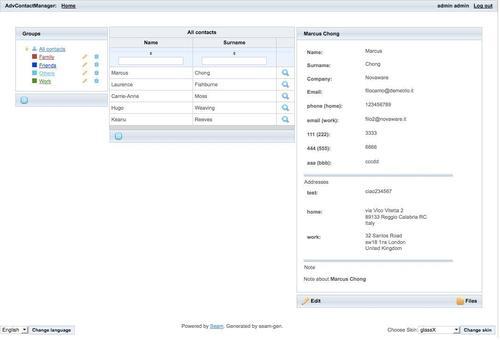
And the glassX skin as shown in the following screenshot:
The libraries might stay in the classpath, so if your project deploys a Web Application Archive (WAR), all of the libraries might stay in the WEB-INF/lib directory.
If you are deploying an Enterprise Archive (EAR), your EAR/lib directory might contain the richfaces-api-X.Y.Z.GA.jar library and the other ones might stay in WEB-INF/lib of the WAR contained in the EAR.
To summarize, we have the following table:
|
Deploy on |
Insert RichFaces libraries into |
RichFaces libraries to be inserted |
|---|---|---|
|
WAR package |
|
|
|
EAR package |
|
|
The second step is to register RichFaces by adding some configuration code to your web.xml file.
We are going to add RichFaces classes and configuration into our JSF application using a standard filter.
First of all, we set some context parameters (just add it inside the web-app element):
<! Skin used by RichFaces -->
<context-param>
<param-name>org.richfaces.SKIN</param-name>
<param-value>laguna</param-value>
</context-param>
<!-- Use RichFaces also for standard HTML controls -->
<context-param>
<param-name>org.richfaces.CONTROL_SKINNING</param-name>
<param-value>enable</param-value>
</context-param>
org.richfaces.SKIN and org.richfaces.CONTROL_SKINNING are skin-related parameters. The first parameter sets the skin that RichFaces has to use, and the second tells the framework to also apply the skin to the standard controls. We'll see the other options in the later chapters.
After that, we have to register and map the RichFaces filter using the following configuration code:
<filter>
<display-name>RichFaces Filter</display-name>
<filter-name>richfaces</filter-name>
<filter-class>org.ajax4jsf.Filter</filter-class>
</filter>
<filter-mapping>
<filter-name>richfaces</filter-name>
<servlet-name>Faces Servlet</servlet-name>
<dispatcher>REQUEST</dispatcher>
<dispatcher>FORWARD</dispatcher>
<dispatcher>INCLUDE</dispatcher>
</filter-mapping>
If you are using a different name for the Faces servlet, you should change it accordingly.
The RichFaces filter can now work properly and you can start coding using its components!
As we have said, RichFaces supports Facelets without problems.
In order to add it to your project, you don't have to define the FaceletViewHandler in the faces-confg.xml file as with the standard Facelets configuration. You just have to configure the org.ajax4jsf.VIEW_HANDLERS context parameter and the RichFaces filter will manage it correctly.
This is the code that you have to insert into your web.xml file:
<context-param>
<param-name>org.ajax4jsf.VIEW_HANDLERS</param-name>
<param-value>com.sun.facelets.FaceletViewHandler</param-value>
</context-param>
As you can see, we have just set the org.ajax4jsf.VIEW_HANDLERS context parameter in order to tell RichFaces to use the Facelet view handler.