
We have almost finished our application! In this chapter, we are going to develop a side feature that would be very useful for us to learn how to use other RichFaces components in a real world application.
We are going to see many cool features that we can reuse in our application with few changes.
For every contact we have in our Address Book, we want to be able to add a short note about them. This can be very useful in a lot of scenarios and it's really easy to implement!
We are going to use the rich:editor component of the RichFaces framework. It creates a WYSIWYG editor based on the TinyMCE JavaScript (http://tinymce.moxiecode.com). This component is very easy to use, but at the same time can be completely customized and extended using the TinyMCE plugins.
In order to connect the editor to the note property of the Contact entity, let's just open the /view/main/contactEdit.xhtml file and insert the following code, just between the closing</a:region> and</rich:graphValidator> tags, before the bottom rich:toolBar:
<rich:spacer height="10"/>
<rich:separator width="320px"/>
<rich:spacer height="15"/>
<h:outputText value="#{messages['note']}"/>
<rich:editor value="#{homeSelectedContactHelper.selectedContact.note}" width="320" height="150"/>
The first part is just to create a separator and the label, the most important part is the highlighted one we've just bound the rich:editor to the note property, and defined two attributes (width and height) to control the dimension of the edit area.
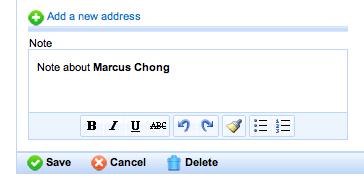
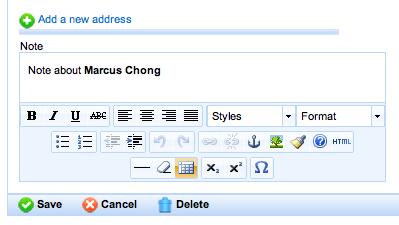
By default, the editor theme used is the simple one, so we have a limited set of control into the button bar, let's try to set the advanced theme, this way:
<rich:editor value="#{homeSelectedContactHelper.selectedContact.note}"
theme="advanced" width="320" height="150"/>
The result is:
Customization capabilities are not limited to just setting the theme, we can also decide to add more buttons (from external plug-ins for example) or to change the disposition.
In the next sample code, we are going to show the basis of customization, adding the paste plugin and relative buttons, and setting the toolbar's position to the top side:
<rich:editor value="#{homeSelectedContactHelper.selectedContact.note} width="320" height="150" theme="advanced" plugins="paste">
<f:param name="theme_advanced_buttons1" value="cut,copy,paste, pasteword,|,bold,italic,underline"/>
<f:param name="theme_advanced_toolbar_location" value="top"/>
<f:param name="theme_advanced_toolbar_align" value="left"/>

</rich:editor>
This is the result:
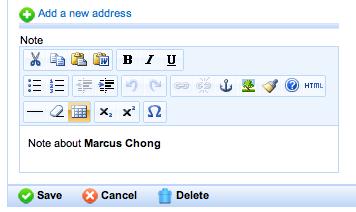
Notice that the toolbars are now on the top and the first one has a different button as we decided (paste and pasteword buttons come from the paste plugin we add).
Using the f:param tag, you can configure every TinyMCE option (read the TinyMCE documentation for more information) as we've seen the option goes inside the name attribute and the option value goes into the value attribute.