
Now it's time to start creating the new skin!
Create a folder called PlugNSkin wherever you like, open the terminal inside this directory, and type (all in one line) the following:
mvn archetype:create
-DarchetypeGroupId=org.richfaces.cdk
-DarchetypeArtifactId=maven-archetype-plug-n-skin
-DarchetypeVersion=3.3.1.GA
-DartifactId=newSkin
-DgroupId=newSkin
-Dversion=1.0
This command creates a generic template of a Maven project for creating the new skin. After the execution, we will have, a new folder called newSkin (the name we specified as artifactId) that contains all the Maven configuration files we need to start our new skin project.
Having the template ready, we have to create the custom skin. Optionally, we can use an existing one as the base skin (and we are going to do so therefore, it will be simpler to start).
Let's go back to our terminal window and enter the following commands:
cd newSkin
mvn cdk:add-skin -Dname=myNewSkin -Dpackage=book.newSkin -DbaseSkin=blueSky -DcreateExt=true
The last two parameters are optional and can be used to select a base skin for the new one and to add the Standard Controls Skinning CSS classes to the new project respectively.
The next screenshot shows the structure of the just generated skin:
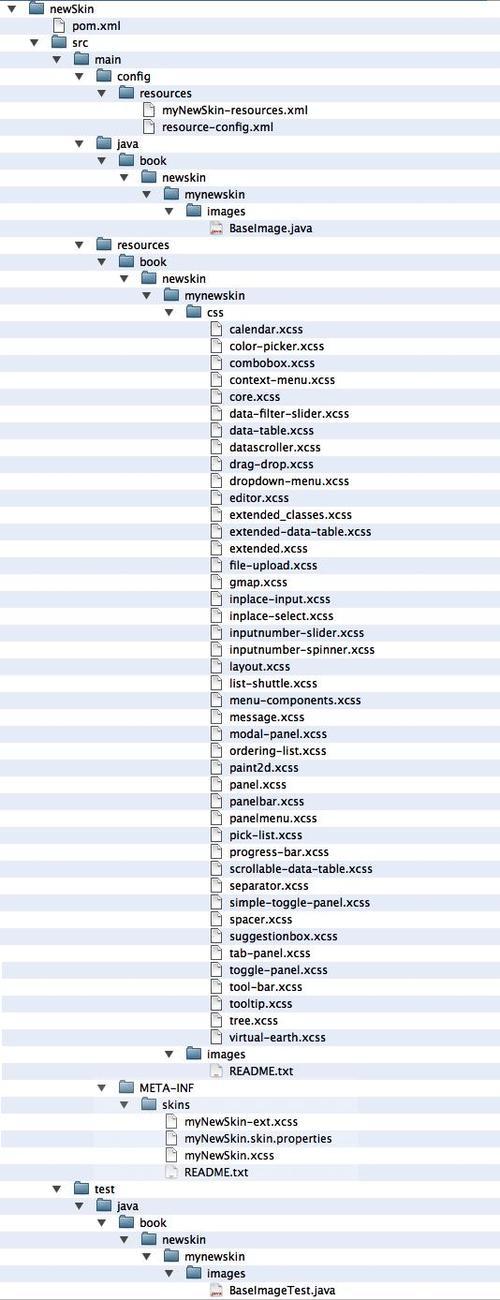
As you can see from the preceding screenshot, the folder contains the following files:
- Configuration files: Both Maven and skin configuration files in order to define the skin properties. Notice that the
myNewSkin.skin.propertiesfile contains the properties of the skin. - XCSS files: Define the CSS classes of the new skin; they are based on the ones coming from the
blueSkyskin, as we added thebaseSkinoption. - A class to store images called
BaseImage.javaand its test class (calledBaseImageTest.java).