
ATA Lightweight installation is straightforward. We can install it using the following steps:
- Log in to the domain controller as domain admin or enterprise admin.
- Launch IE and connect to the ATA center URL.
- Log in to ATA center as administrator:

- When you log in for the first time, it provides the following page. Click on Download gateway setup and install the first Gateway, as illustrated here:

- Then it gives you the option to Download Gateway Setup files. Click on the button to begin:

- After the download completes, extract the ZIP file and run the Microsoft ATA gateway Setup.exe.
- On the initial page, select the relevant language and click on Next to continue.
- In the next window, it will give you a confirmation about Gateway deployment type. By default, it detects the type as Lightweight Gateway. Click on Next to proceed with the installation:

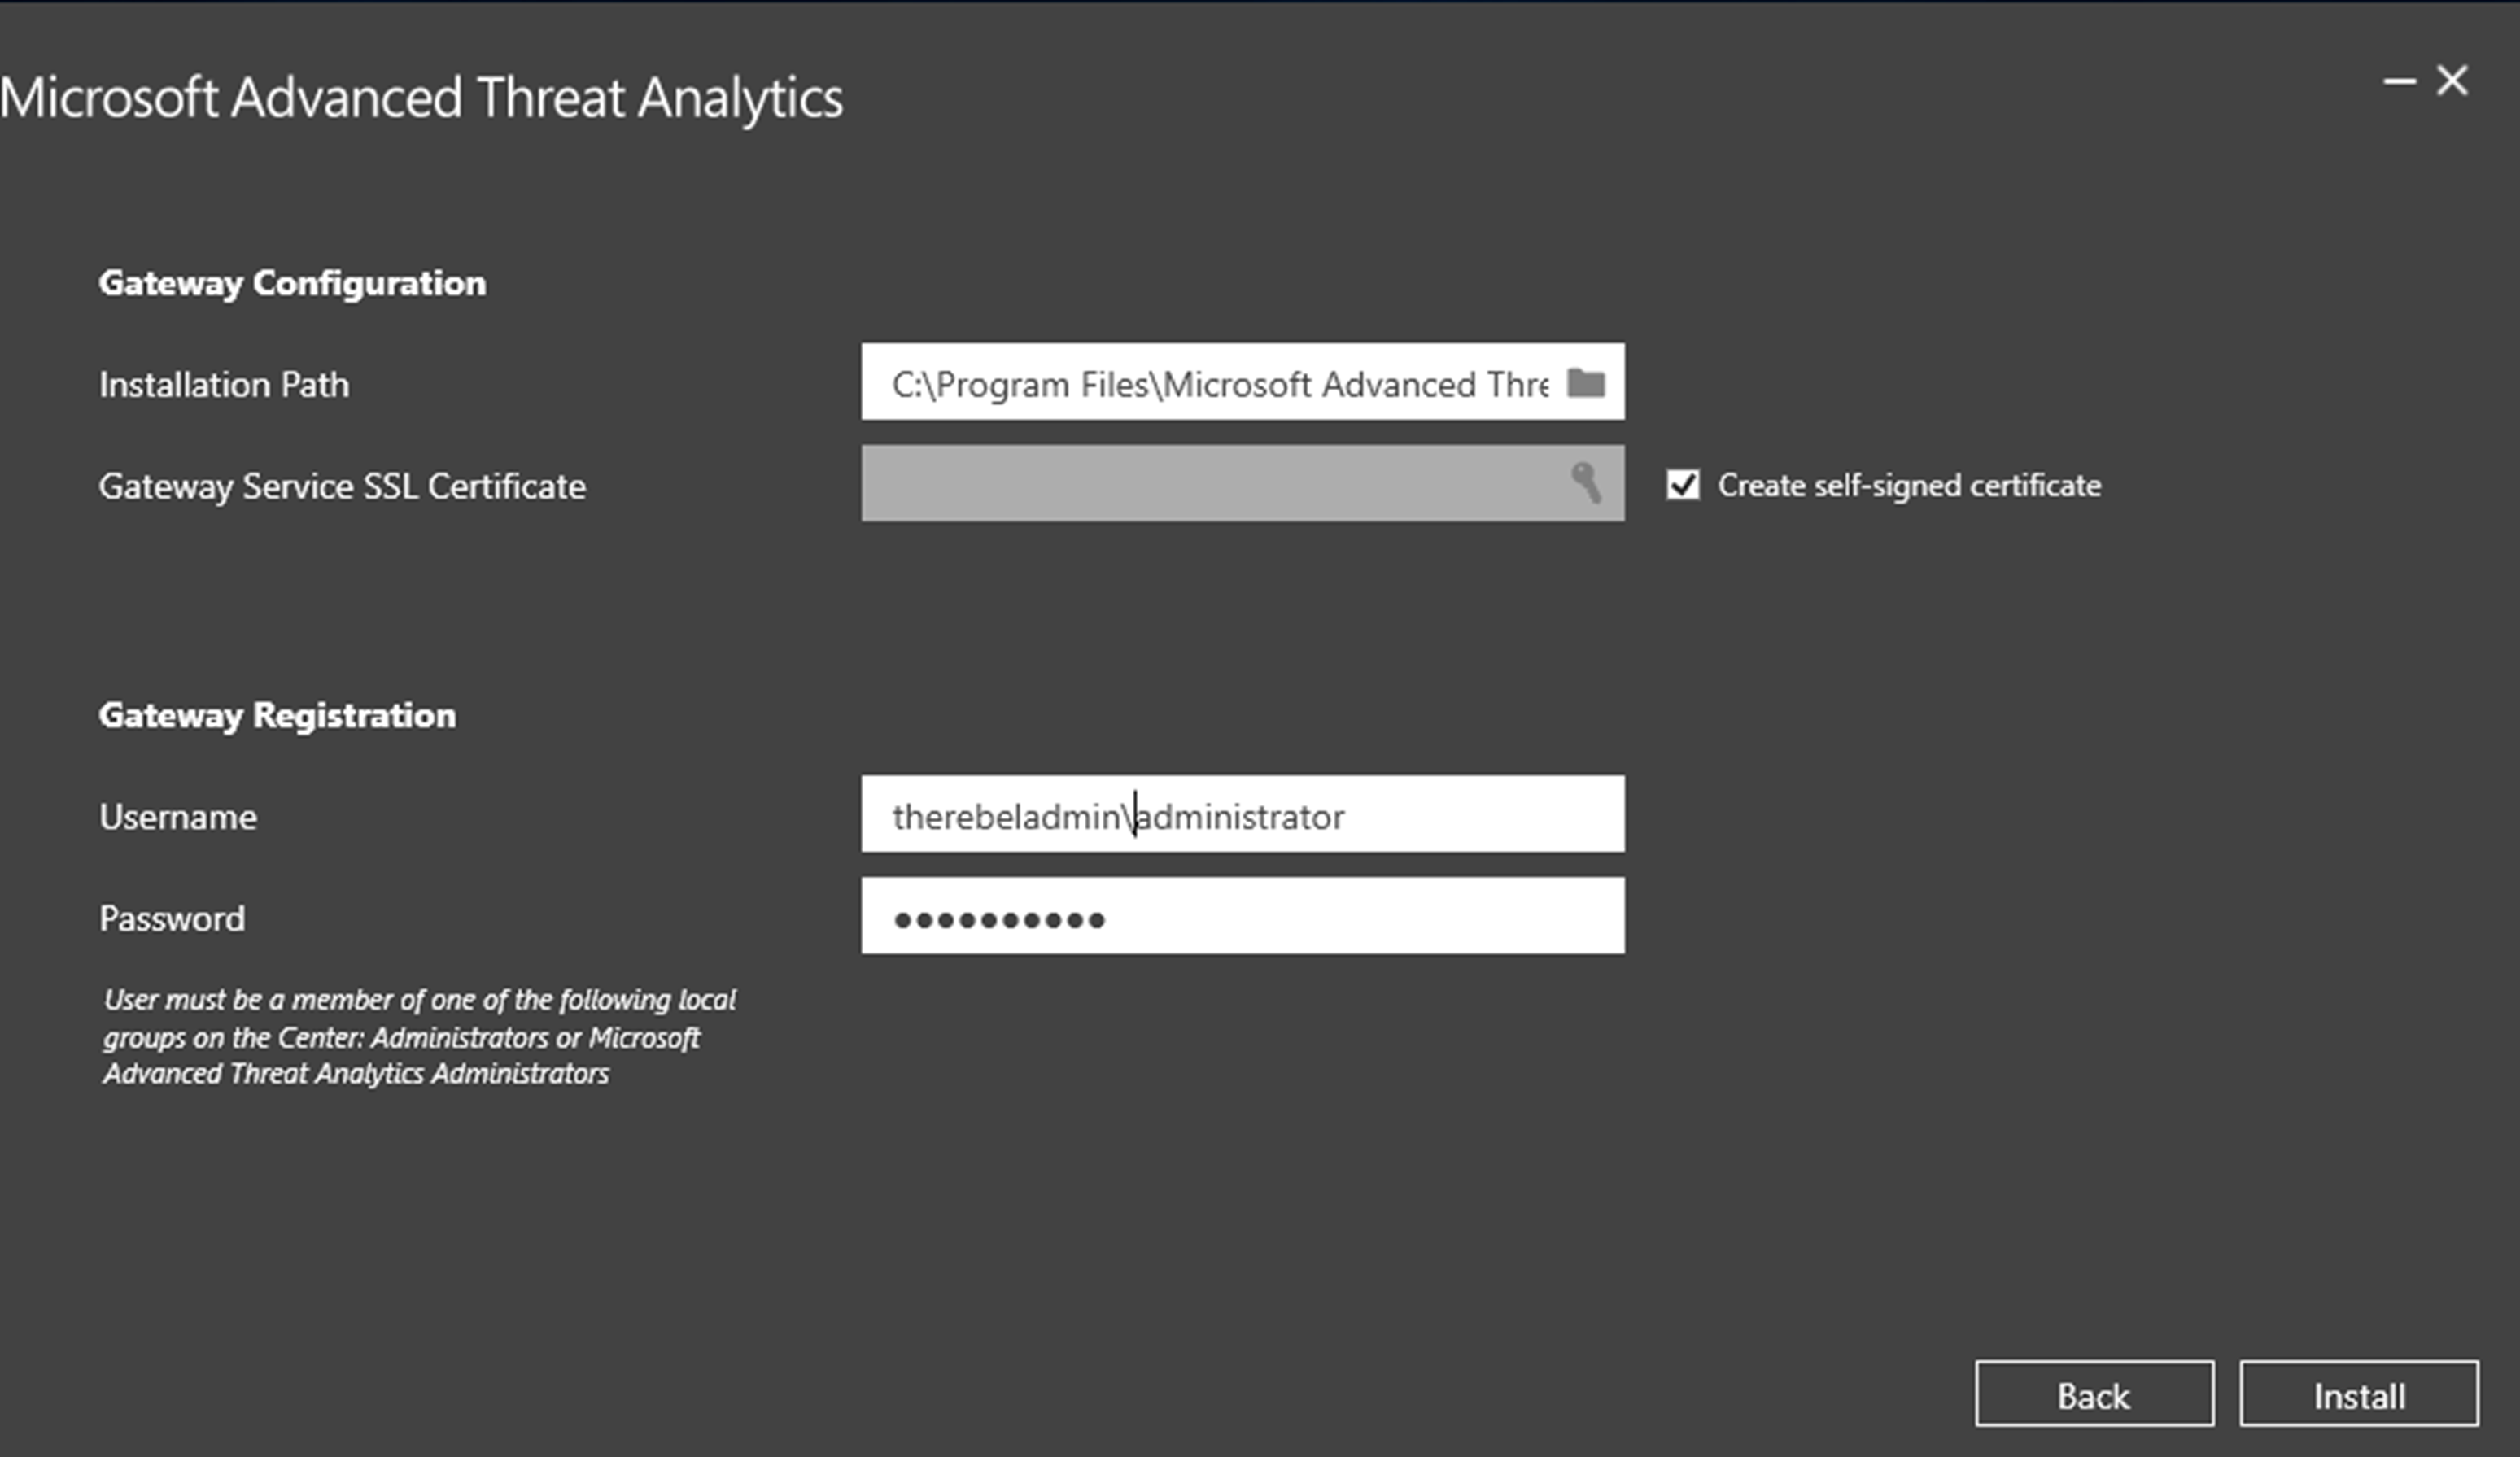
- In the next window, we can specify the Installation Path, Gateway Service SSL Certificate information, and account details to register the gateway with the ATA center. This account should be a member of the ATA administrator group. After you type in the data, click on Install to begin the installation:
- Once installation is completed, we can see the new gateway successfully connected with ATA center:

This completes the initial ATA deployment and it's ready to rock.