
In this section, together with the RDL layout, we will also add a Word layout to our report:
- Go to Report Layout Selection and filter for report ID 50111.
- Select Actions | Custom Layouts.
- Click New, select Insert Word layout, and click OK. This will add an empty Word layout to the report and reference the dataset structure as an XML mapping.
- Choose Process | Export Layout and save the Default.docx report into the .SrcCustomerCategory eport folder. You might call the report layout Rep50111.ItemLedgerEntryAnalysis.docx.
- Bind the report to the RDL layout within the extension, change the default layout to Word, and change record sorting by specifying the following report properties in the AL report object. Consider the following code:
report 50111 "Item Ledger Entry Analysis"
{
DefaultLayout = Word;
RDLCLayout = './Src/CustomerCategory/report/Rep50111.ItemLedgerEntryAnalysis.rdl';
WordLayout = './Src/CustomerCategory/report/Rep50111.ItemLedgerEntryAnalysis.docx';
Caption = 'Item Ledger Entry Analysis';
UsageCategory = ReportsAndAnalysis;
ApplicationArea = All;
dataset
{
dataitem("Item Ledger Entry";"Item Ledger Entry")
{
 DataItemTableView=SORTING("Item No.") ORDER(Ascending);
- In Visual Studio Code, right-click the DOCX file and choose Open externally. This will open Microsoft Word.
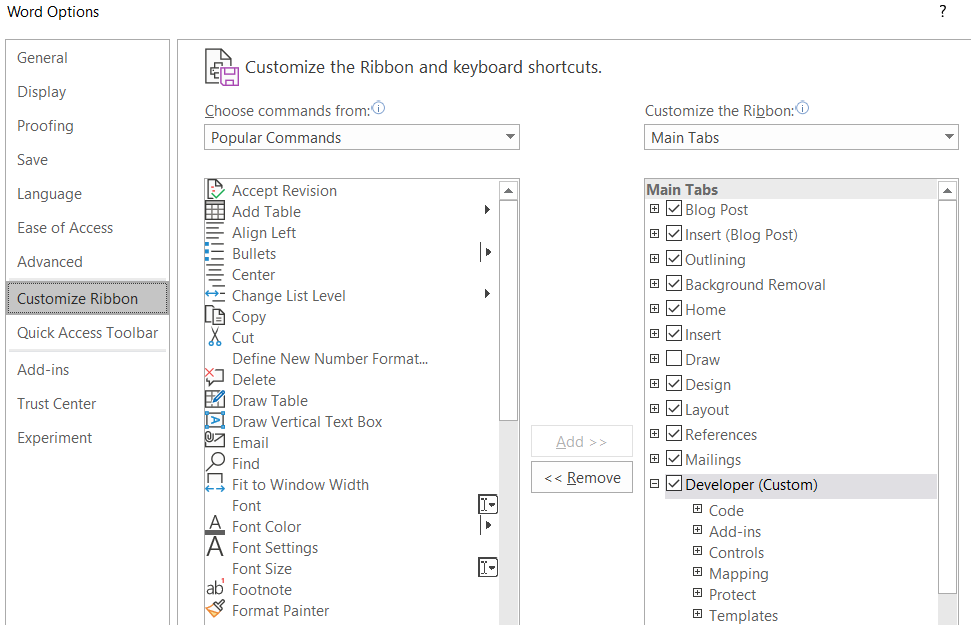
- If you haven't already, be sure that you have the Developer tab enabled. Click on File | Options | Customize Ribbon. In the main tab, check the Developer (custom) ribbon option and click OK:
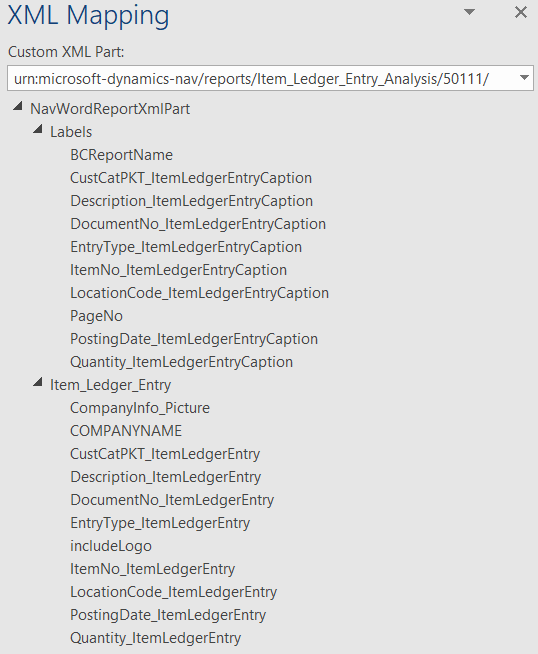
- Back in the Word layout, select the Developer tab and click on the XML Mapping pane.
- In the Custom XML Part box, select the last entry from the drop-down menu and expand the Labels and Item_Ledger_Entry nodes from the NavWorldReportXMLPart root.
It should look like this:
Let's add a Word layout list report to our extension:
- Right-click in the XML Mapping pane, select Item_Ledger_Entry the drop-down menu, and choose CompanyInformation_Picture. Right-click on it and select Insert Content Control | Picture. This will add a placeholder for the company information logo in the Word layout.
- Add an extra line. Right-click in the XML Mapping pane, select Labels, and choose BCReportName. Right-click on it and select Insert Content Control | Plain Text.
- Add an extra line. Right-click in the XML Mapping pane, select the Item_Ledger_Entry drop-down menu, and choose COMPANYNAME. Right-click on it and select Insert Content Control | Plain Text.
- Add an extra line. In the Word ribbon, click on Insert | Table and create a 7-row x 2-column table.
- In the first row, for each cell, place the cursor in the XML Mapping pane, select Labels, right-click in each caption element, and select Insert Content Control | Plain Text. Here is a list of the column captions:
- ItemNo_ItemLedgerEntryCaption
- PostingDate_ItemLedgerEntryCaption
- CustCatPKT_ItemLedgerEntryCaption
- DocumentNo_ItemLedgerEntryCaption
- Description_ItemLedgerEntryCaption
- LocationCode_ItemLedgerEntryCaption
- Quantity_ItemLedgerEntryCaption
- Select the second row of the table. In the XML Mapping pane, select Item_Ledger_Entry element, right-click on it, and select Insert Content Control | Repeating. This will make the line elements repeat for every record in the Item Ledger Entry dataset.
- In the second row, inside the repeater element, place the cursor in every cell in the XML Mapping pane, expand the Item_Ledger_Entry drop-down menu, right-click in the field element, and select Insert Content Control | Plain Text. Here is a list of the column fields:
- ItemNo_ItemLedgerEntry
- PostingDate_ItemLedgerEntry
- CustCatPKT_ItemLedgerEntry
- DocumentNo_ItemLedgerEntry
- Description_ItemLedgerEntry
- LocationCode_ItemLedgerEntry
- Quantity_ItemLedgerEntry
This will be the result:

Save and close the Word file.
The Word layout is now ready to be deployed. Build the extension (Ctrl + Shift + B) and deploy the package into your online or containerized sandbox (F5). Once the web client is loading, search (Alt + Q) for Report Layout Selection, filter for the current report, and change the selected layout to Word (built-in), as shown here:

After searching for the Item Ledger Entry Analysis report, choose to include the company logo in the report output and print it to Microsoft Word. Here is the outcome:

This concludes this section, where we created and beautified a report from scratch. In the next section, we will have a look at the most common task for a developer: copying and refactoring an existing report to cope with customer feature requirements.