
To start developing Azure functions with Visual Studio Code, you need to install the following extensions:
- Azure Account, which you can download from https://marketplace.visualstudio.com/items?itemName=ms-vscode.azure-account.
- Azure Functions, which you can download from https://marketplace.visualstudio.com/items?itemName=ms-azuretools.vscode-azurefunctions.
You also need to install Azure Functions Core Tools, a set of tools that allow you to develop and test your functions on your local machine.
To develop Azure functions with Visual Studio Code, follow these steps:
- The first thing you need to do is log into your Azure subscription by using the Azure: Sign In command from the Visual Studio Code Command Palette:
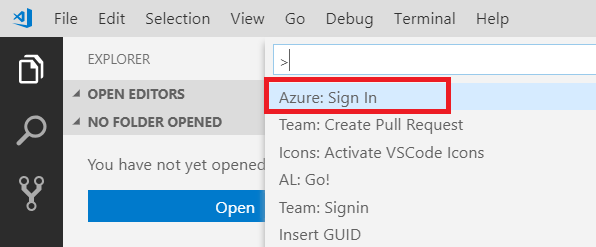
After entering your credentials, you will see the account connected to your subscription at the bottom bar of Visual Studio Code.
- Now, on the Visual Studio Code sidebar, select the Azure Functions extension and click on the Create New Project button:
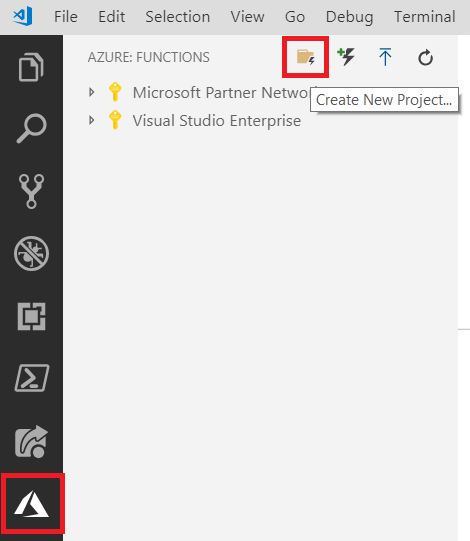
Select a folder that you want to place your Azure Functions project in.
- Then, you will be prompted to choose a language to develop your function in. From the list of supported languages, I've selected C#, as shown here:

- Next, you have to select either of the following runtime versions for your Azure function:
- Azure Functions v2 (.NET Standard): Based on .NET Core (cross-platform), this is the new available runtime.
- Azure Functions v1 (.NET Framework): Based on .NET Framework, this only supports development and hosting in the Azure portal or on Windows computers.
Here, I've selected Azure Functions v2 (.NET Standard):

- Now, set a name for your Azure Functions project (here, I've named it EmailValidatorCore):

- After naming the project, provide a namespace:

- Now, you need to select the authentication type for your function. For simplicity, I've selected Anonymous (everyone can call our function):

- Now, choose where to open the project that will be created (Current window, New window, and Add to workspace are the available options).
Visual Studio Code will start downloading the required packages for your Azure Functions project, and, when it's finished, a set of files will be created. The following is the template of your Azure function:

Here, you have the following files:
- host.json: This file contains the global configuration options that affect all the functions in your project. In our project, we have the runtime version (2.0).
- local.settings.json: This file contains the settings of your project.
- EmailValidatorCore.cs: This is your function's source code (C#).
Please note that you may have some temporary errors in your code (missing references). This occurs when Visual Studio Code needs to download all the .NET Core packages. To get the correct references, you need to execute the .NET: Restore Project command from the Command Palette, as follows:

Select the proposed option and click OK, as follows:

Your project's references are now fixed and you can start coding your function.
As in the previous example, we want to create a function for validating email addresses, and we can reuse the same C# code to do so. Here, you've seen how to start creating an Azure Functions project by using Visual Studio Code directly.