7. Working with Graphic Objects
Graphic Objects
The Insert tab of Microsoft Excel’s Ribbon includes buttons and menus that make it easy to add a variety of graphic objects to your worksheets and charts:
• Picture lets you add your own images, such as a company logo or product illustration.
• Clip Art enables you to insert professionally created graphic images.
• Shapes enables you to draw a variety of interesting and useful shapes, lines, and connectors quickly and easily.
• SmartArt, which is new in Excel 2007, offers a wide variety of graphic elements that you can use to visually communicate information.
• WordArt enables you to add highly stylized text to your documents.
• Text boxes offer a flexible way to add annotations to a document.
This chapter explains how you can include all of these types of graphic objects in your Excel documents.
Inserting Pictures
Excel enables you to insert pictures from files saved on disk into your Excel worksheets and chart sheets. This makes it possible to include a company logo, product photo, line drawing, or some other custom graphic image.
• Excel supports most image file formats.
• Another way to insert a picture into an Excel document is to open the picture in a graphics program, select it, and use the program’s Copy command to copy it to the Windows clipboard. Then switch to the Excel document and use Excel’s Paste command to paste the contents of the clipboard into the document. I tell you more about using the Copy and Paste commands in Chapter 3.
To insert a picture from a file
1. Click Insert > Illustrations > Picture (Figure 1) to display the Insert Picture dialog (Figure 2).
Figure 1. The Illustrations group of the Ribbon’s Insert tab.

Figure 2. Use this dialog to locate, select, and insert the image you want to include in your document.

2. Locate and select the file you want to insert.
3. Click Insert. The picture file is inserted and the Picture Tools Format tab appears (Figure 3).
Figure 3. When an inserted picture is selected, the Picture Tools Format tab appears on the Ribbon.

• The Picture Tools Format tab (Figure 3) includes tools for working with a selected picture. I tell you more about many of these tools later in this chapter.
• To limit the list of images in the Insert Picture dialog (Figure 2) to a specific file format, choose an option from the pop-up menu after File name (Figure 4).
Figure 4. Choose the type of picture you want listed in the Insert Picture dialog by choosing an option from this pop-up menu.

Inserting Clip Art
Microsoft Office comes with a collection of clip art images that you can use in your documents. These images are accessible from the Office Clip Organizer, which is available to all Microsoft Office programs.
• Additional images are available online on the Microsoft Office Online Web site for you to download and install into the Office Clip organizer.
To insert clip art
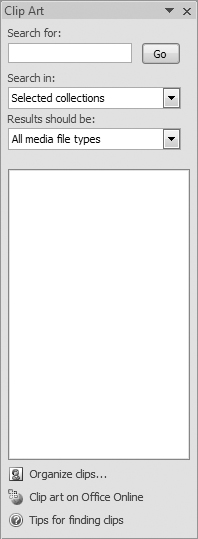
1. Choose Insert > Illustrations > Clip Art (Figure 1) to display the Clip Art pane (Figure 5).
Figure 5. The Clip Art pane before a search.
2. Enter a search word in the Search for box.
3. To search only some collections of clip art, display the Search in drop-down list (Figure 6) and click check boxes to toggle search location options on or off. You can click the + button beside a category to display options within it.
Figure 6. Select the collections you want to search.

4. To specify the type of media you want to find, display the Results should be drop-down list (Figure 7) and click check boxes to toggle media type options on or off. You can click the + button beside a category to display options within it.
Figure 7. Indicate the type of media you’re interested in.

5. Click Go.
6. Wait while Excel searches for clip art that matches the criteria you specified. When it’s done, it displays matches in the Clip Art pane (Figure 8).
Figure 8. The items that match your search criteria appear in the Clip Art pane.

7. Click the thumbnail view of a clip art item to insert it in the document (Figure 9).
Figure 9. When you click a Clip Art item, it is inserted in your document.

• After step 5, a dialog may appear, asking whether you want to include thousands of additional images from Microsoft Office Online. If you have a live Internet connection, you can click Yes; otherwise, click No.
• The Picture Tools Format tab (Figure 9) includes tools for working with a selected picture. I tell you more about many of these tools later in this chapter.
Drawing Shapes, Lines, & Connectors
The Shapes menu on the Insert tab’s Illustrations group (Figure 10) makes it easy to draw predefined shapes, lines, and connectors on your worksheets or charts.
Figure 10. The Shapes menu includes buttons for all kinds of lines and shapes.

To draw a line, arrow, or connector
1. Click Insert > Illustrations > Shapes to display the Shapes menu (Figure 10).
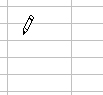
2. Click the button for the line, arrow, or connector you want to insert to activate the appropriate drawing tool. The mouse pointer turns into a crosshairs pointer (Figure 11) or, in the case of the Scribble button, a pencil (Figure 12).
Figure 11. When you click a Shape menu button, the mouse pointer changes into a crosshairs pointer ...

Figure 12. ... or, in the case of the Scribble tool, a pencil pointer.
3. Position the mouse pointer where you want to begin drawing.
4. To draw a straight line, arrow, or double arrow, press the mouse button down and drag. As you move the mouse, a line is drawn (Figure 13). Release the mouse button to stop drawing (Figures 14 and 15).
Figure 13. Drag to draw a line.
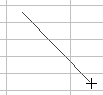
Figure 14. A freshly drawn line.

Figure 15. A freshly drawn arrow.
or
To draw a curve, move the mouse to stretch a line (Figure 13) and click where you want the curve to appear (Figure 16). Repeat this process to draw as many curves as desired. Then either click the starting point or double-click the ending point to stop drawing (Figure 17).
Figure 16. Using the Curve tool, click to indicate where the curve should appear.

Figure 17. A curved line with two curves.

or
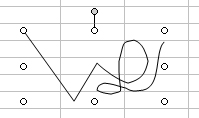
To draw a freeform shape, combine clicking and dragging to draw straight lines and freeform lines: click from point to point to draw straight lines and drag (with a pencil tool that appears automatically) to draw freeform lines (Figure 18). Either click the starting point or double-click the ending point to stop drawing (Figure 19).
Figure 18. Using the Freeform tool, click to draw straight lines and drag to draw freeform lines.
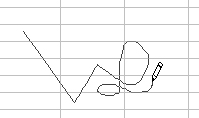
Figure 19. Double-clicking ends the line without creating a closed-in shape.
or
To draw a scribble, press the mouse button down and drag the pencil pointer to get the desired line shape (Figure 20). Release the mouse button to stop drawing (Figure 21).
Figure 20. To use the Scribble tool, hold the mouse button down and drag the pencil pointer.
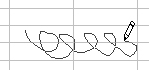
Figure 21. Releasing the mouse button completes the scribble.

or
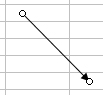
To draw a connector, press the mouse button down and drag a line between the items you want to connect (Figure 22). When you release the mouse button, the connector appears (Figure 23).
Figure 22. To use a connector tool, just drag from the starting point to the ending point.

Figure 23. When you release the mouse button, the connector is drawn.

• You can point to a button on the Shapes menu to learn its name and distinguish between plain lines and connectors.
• To draw a line or arrow that’s perfectly vertical, horizontal, or at a 45° angle, hold down ![]() in step 4.
in step 4.
• The small white circles in Figures 14, 15, 17, 19, 21, and 23 are selection handles. I tell you more about selection handles later in this chapter.
To draw a shape
1. Click Insert > Illustrations > Shapes to display the Shapes menu (Figure 10).
2. Click the button for the shape you want to insert to activate the appropriate drawing tool. The mouse pointer turns into a crosshairs pointer (Figure 11).
3. Position the crosshairs where you want to begin drawing the shape or line.
4. Press the mouse button and drag. As you move the mouse, the shape or line begins to take form (Figure 24).
Figure 24. Drag to draw the shape.

5. Release the mouse button to complete the shape (Figure 25).
Figure 25. A freshly drawn shape.
• The shape tools makes it easy to draw complex shapes. (Do you think I could draw something like what you see in Figure 25? No way!)
• As discussed in the previous section, you can use connectors to draw lines between two shapes (Figure 23).
Inserting SmartArt
Excel’s new SmartArt feature makes it very easy to insert complex graphic elements that you can use to created visualized representations of information. SmartArt graphics include lists, diagrams, and organization charts.
To insert a SmartArt graphic
1. Click Insert > Illustrations > SmartArt (Figure 1) to display the Choose a SmartArt Graphic dialog.
2. In the left column of the dialog, click the category of SmartArt you want to insert.
3. In the middle of the dialog, click the button for the art you want to insert. A description of the art you selected appears on the right side of the dialog (Figure 26).
Figure 26. The Choose a SmartArt Graphic dialog.

4. Click OK. The art appears in the worksheet window, along with the Text pane, which you can use to enter or edit art contents (Figure 27).
Figure 27. A Text pane appears beside the freshly inserted SmartArt graphic so you an modify its contents.

5. In the Text pane, replace the placeholder text with the text you want to appear in the art.
6. Modify the art’s basic structure as follows:
• To insert another text box, press ![]() after the previous text box.
after the previous text box.
• To delete a text box, click the text box and press ![]() .
.
7. When you’re finished making changes, click outside the SmartArt graphic. The Text pane disappears (Figure 28)
Figure 28. A completed cycle chart. (A writer’s life is an endless cycle.)

Adding Text Boxes
Text boxes offer a flexible way to add comments or other text to a worksheet or chart. A text box can be any size and can include any amount of text. And, like a graphic, it can be positioned anywhere on a worksheet or chart.
To add a text box
1. Click Insert > Text > Text Box (Figure 29). The mouse pointer turns into a special crosshairs pointer (Figure 30).
Figure 29. The Text group on the Ribbon’s Insert tab.

Figure 30. The mouse pointer turns into a special crosshairs pointer when you click the Text Box button.

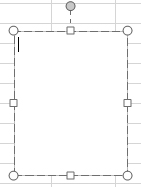
2. Position the crosshairs where you want to begin drawing the text box.
3. Press the mouse button and drag. As you move the mouse, the text box begins to take form (Figure 31).
Figure 31. Drag to draw a text box.
4. Release the mouse button to complete the text box. An insertion point appears within it (Figure 32).
Figure 32. When you release the mouse button, the text box appears with a blinking insertion point inside it.
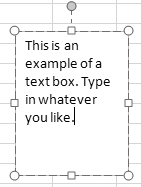
5. Enter the text you want in the text box (Figure 33).
Figure 33. You can type whatever text you like in the text box.
• A text box is like a little word processing document within an Excel sheet. Once created, you can enter and format text within it.
• Text boxes offer more flexibility than worksheet cells when entering long passages of text.
• To edit text in a text box, double-click inside it to select one or more characters. Then use the arrow keys to move the insertion point. Use standard editing techniques to modify text.
Inserting WordArt
WordArt offers a way to add highly stylized and colorful text to a worksheet or chart. You might find it useful for adding titles or labels to your work.
To insert Wordart
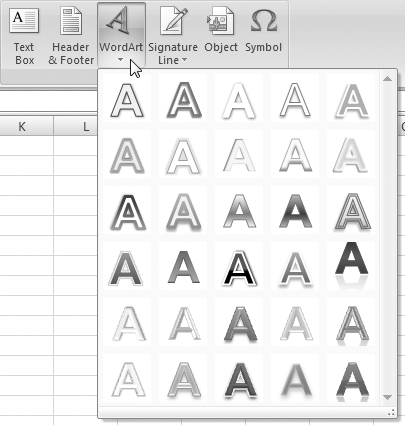
1. Click Insert > Text > WordArt to display the WordArt menu (Figure 34).
Figure 34. The WordArt menu offers a wide variety of text styles.
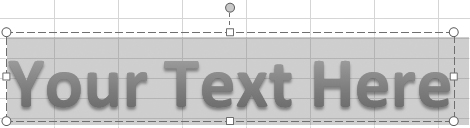
2. Click the text style you want to use. A selected block of sample text appears in your document (Figure 35).
Figure 35. A sample text block appears.
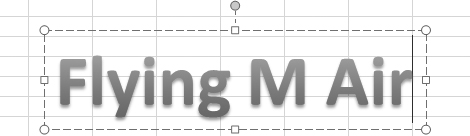
3. With the sample text still selected, type in the text you want to appear. The sample text is replaced with your text (Figure 36).
Figure 36. Type in your text to replace the sample.
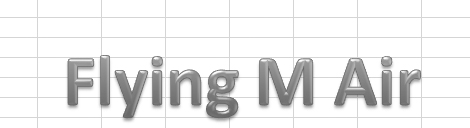
4. Click outside the WordArt image to remove the selection box (Figure 37).
Figure 37. When you click outside the WordArt image, the selection box and handles disappear.
• Once you have created a WordArt image, you can use buttons on the WordArt toolbar to modify it. The toolbar only appears when the WordArt image is selected.
Selecting & Deselecting Objects
Once you have drawn or inserted a graphic object into your Excel document, you must select it to work with it.
To select an object
1. Position the mouse pointer on the object. A four-headed arrow appears beneath the mouse pointer arrow (Figure 38).
Figure 38. When you position the mouse pointer on an object, a four-headed arrow appears with the mouse pointer arrow.

2. Click. Selection handles appear around the object (Figure 39).
Figure 39. Selection handles appear around selected objects.

• If a shape does not have any fill, you must click on its border to select it. I tell you about fill color later in this chapter.
To select multiple objects
1. Follow the instructions above to select the first object (Figure 39).
2. Hold down ![]() and continue to click objects until all have been selected (Figure 40).
and continue to click objects until all have been selected (Figure 40).
Figure 40. Hold down ![]() and click to select other objects.
and click to select other objects.

• To deselect objects from a multiple selection, hold down ![]() while clicking on the objects you want to deselect.
while clicking on the objects you want to deselect.
To deselect an object
Click on any other object or anywhere else in the window. The selection handles disappear.
Grouping & Ungrouping Objects
Grouping multiple objects enables you to select, move, and modify all of the objects in the group by clicking any one of them.
To group objects
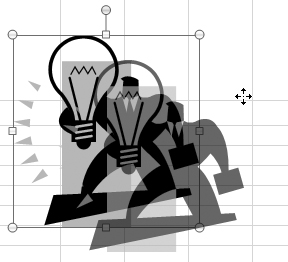
1. Select all the objects you want to include in the group (Figure 40).
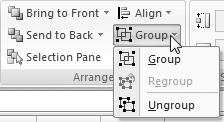
2. Click Drawing Tools > Format > Arrange > Group > Group (Figure 41).
Figure 41. The Group menu lets you group and ungroup items.
The objects are grouped together, with only one set of selection handles (Figure 42).
Figure 42. The objects selected in Figure 40 after grouping them. Note that the clip art image of the man with the light bulb was not selected and is not part of the group—even though it appears that it is.

To ungroup objects
1. Select the grouped objects you want to ungroup (Figure 42).
2. Click Drawing Tools > Format > Arrange > Group > Ungroup (Figure 41).
Separate selection handles appear for each object (Figure 40).
Moving Objects
In many cases, when you insert or draw a graphic object, it doesn’t end up exactly where you want it. No problem; you can always move it.
To move an object by dragging
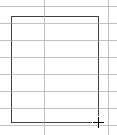
1. Position the mouse pointer on the object or on the edge of the object so that the four-headed arrow appears (Figure 43).
Figure 43. Position the mouse pointer on the object.

2. Press the mouse button and drag. An outline of the object moves along with the mouse pointer (Figure 44).
Figure 44. Drag to move the object.
3. When the object’s outline is in the desired position, release the mouse button. The object moves.
• To restrict an object’s movement so that it moves only horizontally or vertically, hold down ![]() while dragging.
while dragging.
• To restrict an object’s movement so that it snaps to the worksheet gridlines, hold down ![]() while dragging.
while dragging.
To move an object with the Cut & Paste commands
1. Select the object you want to move.
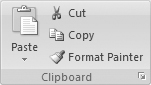
2. Choose Home > Clipboard > Cut (Figure 45) or press ![]() . The object disappears.
. The object disappears.
Figure 45. The Clipboard group.
3. To paste the object into a different sheet, switch to that sheet.
4. Choose Home > Clipboard > Paste (Figure 45) or press ![]() . The object appears.
. The object appears.
5. If necessary, drag the object into the desired position on the sheet.
Copying Objects
One way to get multiple identical objects is to simply copy one of them.
To copy an object by dragging
1. Position the mouse pointer on the object or on the edge of the object so that the four-headed arrow appears.
2. While holding down ![]() , press the mouse button and drag. An outline of the object moves along with the mouse pointer (Figure 46).
, press the mouse button and drag. An outline of the object moves along with the mouse pointer (Figure 46).
Figure 46. Hold down ![]() while dragging ...
while dragging ...

3. When you release the mouse button, a copy of the object appears at the outline (Figure 47).
Figure 47. ... to copy an object.

To copy an object with the Copy & Paste commands
1. Select the object you want to copy.
2. Choose Home > Clipboard > Copy (Figure 45) or press ![]() .
.
3. To paste the object into a different sheet, switch to that sheet.
4. Choose Home > Clipboard > Paste (Figure 45) or press ![]() .
.
Deleting Objects
If you decide you no longer want an object in your worksheet or chart, you can delete it.
To delete an object
1. Select the object(s) you want to delete.
2. Press ![]() .
.
or
Choose Home > Editing > Clear > Clear All (Figure 48).
Figure 48. The Clear menu on the Editing group when an object is selected.

The object(s) disappear.
• If you select an object in a group, deleting that object will delete the entire group of objects. If you only want to delete one object in a group, you must ungroup the objects first. I explain how to group and ungroup objects earlier in this chapter.
Resizing Objects
In many instances an object you draw or insert won’t be the size you want it to be. Fortunately, Excel offers three ways to resize objects: by dragging, by setting options in the Size group, and by setting options in the Size tab of the Size and Properties dialog.
To resize an object by dragging
1. Select the object you want to resize.
2. Position the mouse pointer on a selection handle. The mouse pointer turns into a double-headed arrow (Figure 49).
Figure 49. Position the mouse pointer on a selection handle and it turns into a resizing pointer.

3. Press the mouse button and drag to stretch or shrink the object. The mouse pointer turns into a crosshairs and an outline of the object moves with your mouse pointer as you drag (Figure 50).
Figure 50. Drag to stretch (or shrink) the object.

4. When the outline of the object reflects the size you want, release the mouse button. The object is resized (Figure 51).
Figure 51. When you release the mouse button, the object resizes.

• To resize an object or group proportionally, drag a corner selection handle.
• To resize multiple objects at the same time, select the objects, then resize one of them. All selected objects will be resized.
To resize an object with Size group options
1. Select the object you want to resize.
2. If necessary, click the Format tab to display its options.
3. Enter new values in the Shape Height and Shape Width boxes of the Size group (Figure 52).
Figure 52. The Format tab’s Size group.

The object resizes immediately.
To resize an object with the Size and Properties dialog
1. Select the object you want to resize.
2. Click the Dialog Box Launcher button in the lower-right corner of the Format tab’s Size group (Figure 52).
3. The Size and Properties dialog appears. If necessary, click the Size tab to display its options (Figure 53).
Figure 53. The Size tab of the Size and Properties dialog offers options for resizing and rotating graphic images.
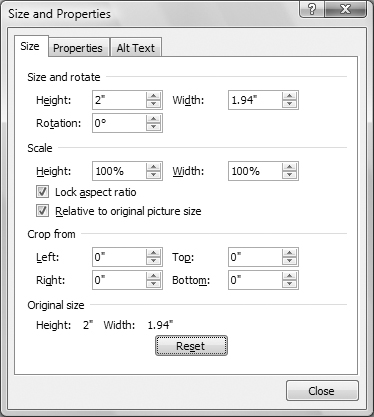
4. To set the object size to exact measurements, enter values in the Height and Width boxes under Size and rotate.
or
To set the object size as a percentage of the object’s current size, enter values in the Height and Width boxes under Scale.
The image is resized as you make your changes.
5. When you’re finished setting object size, click Close to dismiss the dialog.
• To resize an object proportionally, turn on the Lock aspect ratio check box in step 4.
• To resize a picture relative to its original size, turn on the Relative to original picture check box in step 4. This option is only available for some types of graphic objects.
• To reset an object’s size to its original size, click the Reset button near the bottom of the dialog. This button is only available for some types of graphic objects.
• You can leave the Size and Properties dialog open while you select other objects to work with.
Rotating Objects
You can also rotate objects to adjust their position or achieve special graphic effects. Excel offers three ways to do this.
To rotate an object by dragging
1. Select the object you want to rotate.
2. Position the mouse pointer on the round green handle that appears outside its selection handles. The mouse pointer changes to a rotation pointer, which looks like an arrow on an arc (Figure 54).
Figure 54. When you position the mouse pointer on the green rotation handle, it turns into a rotation pointer.

3. Press the mouse button down and drag to the right or left. An outline of the object rotates (Figure 55).
Figure 55. Drag the green handle to rotate the object.
4. When the object is in the desired position, release the mouse button. The object is redrawn with the rotation you specified (Figure 56).
Figure 56. When you release the mouse button, the image is redrawn with the rotation you specified.

To rotate or flip an object with Rotate menu commands
1. Select the object you want to rotate.
2. Click Format > Arrange > Rotate to display the rotate menu (Figure 57).
Figure 57. The Arrange group’s Rotate menu includes commands for rotating or flipping objects.

3. Choose the rotate or flip command you want. The image rotates or flips according to the command you chose.
To rotate an object with the Size and Properties dialog
1. Select the object you want to rotate.
2. Choose Format > Arrange > Rotate > More Rotation Options (Figure 57).
3. The Size and Properties dialog appears. If necessary, click the Size tab to display its options (Figure 53).
4. Enter a rotation value in the Rotation box in the Size and rotate area of the dialog. The value you enter should be an angle between 0 and 359.
The object is rotated as you make your changes.
5. When you’re finished click Close to dismiss the dialog.
• Entering a positive value in the Rotation box rotates clockwise; entering a negative value in the Rotation box rotates counterclockwise.
• To reset an object’s rotation to its original angle, click the Reset button near the bottom of the dialog. This button is only available for some types of graphic objects.
• You can leave the Size and Properties dialog open while you select other objects to work with.
Modifying AutoShapes
In addition to resizing and rotating, Auto-Shape objects can be modified in several other ways. For example, you can change the AutoShape to a different AutoShape or customize the AutoShape’s settings.
To change an AutoShape
1. Select the AutoShape you want to change.
2. Click Format > Insert Shape > Edit Shape > Change Shape to display a menu of AutoShapes (Figure 58).
Figure 58. You can change an AutoShape by simply choosing a different one from the Change Shape submenu on the Edit Shape menu.

3. Click to select the AutoShape you want to change the currently selected shape to. The shape changes.
To customize an AutoShape by dragging
1. Select the AutoShape you want to customize.
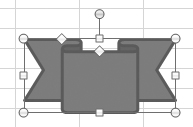
2. Position the mouse pointer on the yellow diamond-shaped handle. The mouse pointer turns into a hollow white arrowhead pointer.
3. Drag the yellow diamond. As you drag, the outline of the customized shape moves with the mouse pointer (Figures 59 and 61).
4. Release the mouse button. The shape changes (Figures 60 and 62).
Figures 59 & 60. Drag a yellow diamond (left) to customize the AutoShape (right).

Figures 61 & 62. You can even turn a smile (left) into a frown (right).
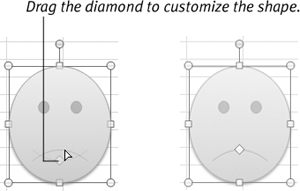
• This technique can only be used on AutoShape lines or shapes that display one or more yellow diamonds when selected.
Aligning Objects
The Align menu in Excel’s Arrange group makes it easy to set alignment for multiple selected objects.
To align objects
1. Select the objects you want to align (Figure 63).
Figure 63. Start by selecting the objects you want to align.

2. Click Format > Arrange > Align to display the Align menu (Figure 64).
Figure 64. Choose an option from the Align menu.

3. Choose one of the six alignment commands at the top of the menu.
The objects are aligned according to the option you chose (Figure 65).
Figure 65. Align Middle aligns the vertical middles of objects.

• If the objects you selected include both drawn objects and pictures, you may see two Format tabs in step 2 (Figure 66). You can work with either one.
Figure 66. It is possible to see two Format tabs!
• If your results after step 3 aren’t what you expected, use the Undo command or press ![]() to revert back to the original alignment of the objects. Then try again. Sometimes it’s easier to start over than to fix an error. I tell you about the Undo command in Chapter 3.
to revert back to the original alignment of the objects. Then try again. Sometimes it’s easier to start over than to fix an error. I tell you about the Undo command in Chapter 3.
• Choosing one of the Distribute options in step 3 distributes space evenly between selected objects, either horizontally (Figure 67) or vertically.
Figure 67. Distribute Horizontally puts equal space between objects.

Changing Stacking Order
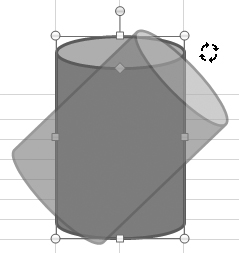
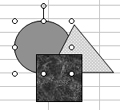
Each time you draw a shape or insert a picture, Excel puts it on a new drawing layer. When one object overlaps another object, the first object may be partially obscured by the one “on top” of it (Figure 68).
Figure 68. Because each object is drawn in a separate layer, objects can be obscured by other objects “on top” of them.

To change stacking order
1. Select the object(s) you want to move to another layer (Figure 69).
Figure 69. To change an object’s layer, start by selecting it.
2. Click an option on the Format tab’s Arrange group (Figures 70 and 71):
• Format > Arrange > Bring to Front moves the object(s) to the top layer (Figure 72).
• Format > Arrange > Bring to Front > Bring Forward moves the object(s) up one layer.
• Format > Arrange > Send to Back moves the object(s) to the bottom layer (Figure 73).
• Format > Arrange > Send to Back > Send Backward moves the object(s) down one layer.
Figure 70. Use the Bring to Front button and menu to bring a selected object to the top of the stack.
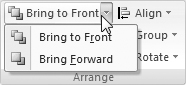
Figure 71. Use the Send to Back button and menu to send a selected object to the bottom of the stack.

Figure 72. A selected object can be brought to the top layer ...
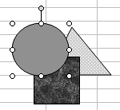
Figure 73. ... or sent to the bottom layer.
• Once you’ve put objects in the stacking order you want, consider grouping them so they stay just the way you want them to. I tell you how to group objects earlier in this chapter.
Other Formatting Options
Excel offers a variety of other options for formatting drawn objects, such as shapes and WordArt, and pictures, such as clip art and inserted image files. All of these options can be found on groups under the Drawing Tools Format tab or Picture Tools Format tab when the object is selected.
In this section, I provide a brief overview of some of the other options available for formatting graphic objects in your Excel worksheets and charts.
To apply shape styles
1. Select the shape you want to modify.
2. Click Format to display the Format tab’s Shape Styles group (Figure 74).
Figure 74. The Shape Styles group on the Drawing Tools’ Format tab.

3. Click to select options to modify the shape:
• Theme buttons, which appear in a one-line scrolling list, enable you to apply a set of predefined formatting combinations.
• Shape Fill (Figure 75) lets you choose colors, pictures, gradients, or textures to apply to the interior of the shape.
Figure 75. The Shape Fill menu offers options for formatting the interior of a shape.

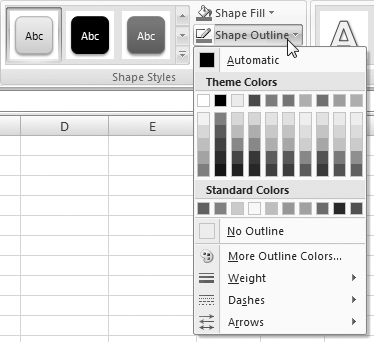
• Shape Outline (Figure 76) enables you to set the color, line thickness or weight, line style, and arrow formatting for a shape outline or line.
Figure 76. The Shape Outline menu includes options for formatting a shape’s outline or a line.
• Shape Effects (Figure 77) enables you to apply special effects to the shape.
Figure 77. The Shape Effects menu includes submenus full of special effects.

or
Click the Dialog Box Launcher button in the bottom-right corner of the Shape Styles group (Figure 74) to display the Format Shape dialog (Figure 78), set options for categories as desired, and click Close.
Figure 78. You can also use the Format Shape dialog to set formatting options for shapes and lines.

To apply WordArt styles
1. Select the WordArt image you want to modify.
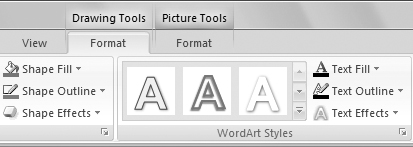
2. Click Format to display the Format tab’s WordArt Styles group (Figure 79).
Figure 79. The WordArt Styles group on the Drawing Tools’ Format tab.

3. Click to select options to modify the WordArt image:
• Theme buttons, which appear in a one-line scrolling list, enable you to apply a set of predefined formatting combinations.
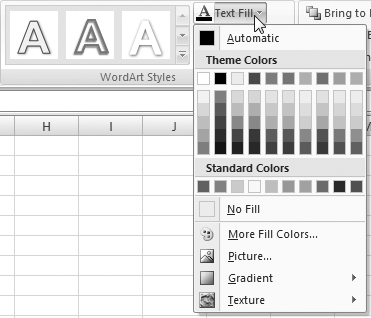
• Text Fill (Figure 80) lets you choose colors, pictures, gradients, or textures to apply to the interior of the WordArt image.
Figure 80. Text Fill controls the interior of WordArt images.
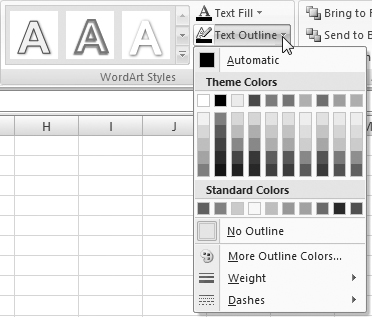
• Text Outline (Figure 81) enables you to set the color, line thickness or weight, and lines style for the WordArt image outline.
Figure 81. Text Outline controls the outline of WordArt images.
• Text Effects (Figure 82) enables you to apply special effects to the WordArt image.
Figure 82. The Text Effects menu includes submenus of special effects that can be applied to WordArt images.

To adjust picture settings
1. Select the picture you want to modify.
2. Click Format to display the Format tab’s Adjust group (Figure 83).
Figure 83. The Adjust group on the Picture Tools’ Format tab.
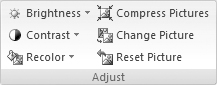
3. Click to select options to modify the picture:
• Brightness (Figure 84) lets you adjust the picture’s brightness.
Figure 84. Use the Brightness menu to set the brightness of the picture.

• Contrast (Figure 85) lets you adjust the picture’s contrast.
Figure 85. The Contrast menu offers options for setting picture contrast.

• Recolor (Figure 86) enables you to choose color variations or set one color as transparent.
Figure 86. You can apply different color settings with the Recolor menu’s options.

• Compress Picture enables you to set image compression options, so the image takes up less disk space.
• Change Picture displays the Insert Picture Dialog (Figure 2) so you can replace the picture with a different one.
• Reset Picture restores the picture to its original settings.
To apply picture styles
1. Select the picture you want to modify.
2. Click Format to display the Format tab’s Picture Styles group (Figure 87).
Figure 87. The Picture Styles group on the Picture Tools’ Format tab.

3. Click to select options to modify the picture:
• Theme buttons, which appear in a one-line scrolling list, enable you to apply a set of predefined formatting combinations.
• Picture Shape (Figure 88) enables you to select a shape for your picture. The picture’s image will only appear in the interior of the shape.
Figure 88. The Picture Shape menu lets you specify a shape for the picture.

• Picture Border (Figure 89) enables you to set the color, line thickness or weight, and line style for the picture’s border.
Figure 89. Use the Picture Border menu to set border options for a picture.

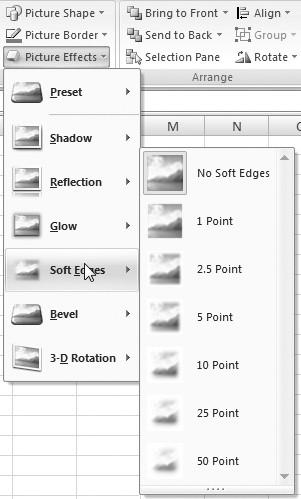
• Picture Effects (Figure 90) enables you to apply special effects to the picture.
Figure 90. The picture Effects menu offers a range of special effects for pictures.
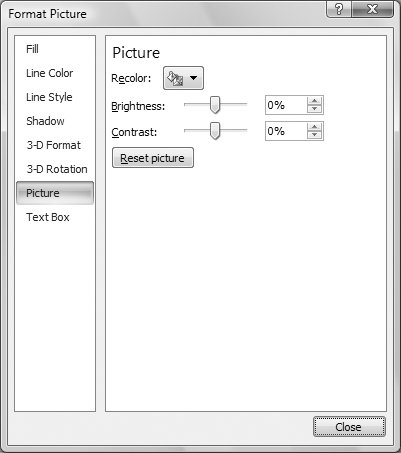
Click the Dialog Box Launcher button in the bottom-right corner of the Picture Styles group (Figure 87) to display the Format Picture dialog (Figure 91), set options for categories as desired, and click Close.
Figure 91. Use the Format Picture dialog to set all kinds of options for a selected picture.