
14. Web Publishing
Web Publishing
The World Wide Web has had a huge impact on publishing since 1995. Web pages, which can include text, graphics, and hyperlinks, can be published on the Internet or an intranet, making them available to audiences 24 hours a day, 7 days a week. They provide information quickly and inexpensively to anyone who needs it.
Microsoft Excel’s Save As command enables you to save worksheets and charts as HTML documents, making it easy to publish Excel data on the Web.
• This chapter explains how to create Web pages from Excel documents. Modifying the HTML underlying those pages is beyond the scope of this book.
• HTML (or HyperText Markup Language) is a system of codes for defining Web pages.
• Web pages are normally viewed with Web browser software. Microsoft Internet Explorer and Firefox are two examples of Web browsers.
• To access the Internet, you need an Internet connection, either through an organizational network or dial-up connection. Setting up a connection is beyond the scope of this book; consult the documentation that came with your System or Internet access software for more information.
• To publish a Web page, you need access to a Web server. Contact your Network Administrator or Internet Service Provider (ISP) for more information.
• A hyperlink (or link) is text or a graphic that, when clicked, displays other information from the Web.
• An intranet is like the Internet, but it exists only on the internal network of an organization and is usually closed to outsiders.
• If you have access to Excel Services on a Microsoft Office SharePoint Server, you can publish your worksheets to that server for Internet or intranet access. Consult your Network Administrator for details.
Creating Web Pages
Excel has built-in Web publishing features that make it easy to publish Excel documents as standard Web pages (Figure 1). This enables you to publish formatted worksheets and charts on the Web so the information can be viewed by others on the Internet or on your company’s intranet.
Figure 1. A workbook saved as Web pages. Note the sheet tabs at the bottom of the page; click a tab to view another sheet on a separate Web page.

• Figure 1 shows what the Web page looks like with Microsoft Internet Explorer 6.0, which is the default Web browser on my system. If your system has a different default Web browser, the page may look different.
• Although previous versions of Excel enabled you to publish workbooks as interactive Web pages, doing so with Excel 2007 requires Excel Services and a Microsoft Office SharePoint Server. A discussion of these server-related features is beyond the scope of this book.
To save a workbook as Web Pages
1. Open or activate the workbook that you want to save as a Web page (Figure 2).
Figure 2. Start by opening the workbook you want to save as a Web page.

2. Choose Microsoft Office > Save As > Other Formats (Figure 3) or press ![]() .
.
Figure 3. Choose Other Formats from the Save As submenu.

3. The Save As dialog appears. Choose Web Page from the Save as type pop-up menu (Figure 4). The dialog changes to offer Web publishing options (Figure 5).
Figure 4. Choose Web Page from the Save as type pop-up menu.

Figure 5. Use this Save As dialog to save the workbook or selection as Web pages.

4. Use the top portion of the dialog to select a disk location for the Web page and its supporting images.
5. In the File name text box, enter a name for the Web page.
6. Select one of the Save options to specify what you want to save as a Web page:
• Entire Workbook is all the sheets in the workbook.
• Selection is the currently displayed sheet or, if multiple cells were selected when you opened the Save As dialog, the cell reference for the selection.
7. To enter a title for the Web page, click the Change Title button. Then enter a new title in the Set Page Title dialog that appears (Figure 6) and click OK.
Figure 6. The Set Page Title dialog enables you to enter a custom page title for the Web page.
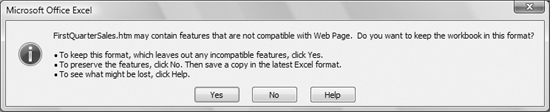
9. If the workbook, sheet, or selection includes features that cannot be saved as part of a Web page, a dialog like the one in Figure 7 appears. Click Yes.
Figure 7. This dialog appears if a worksheet includes features that can’t be saved as part of a Web page.
Excel creates the HTML, image, and other supporting files required to display the Excel document as Web pages. All supporting files are saved in a folder with the same name as the Web page file (Figure 8).
Figure 8. Excel creates all the HTML, image, and other supporting files necessary to view the workbook, sheet, or selection as Web pages.

• You can further customize the appearance of a Web page created by Excel by modifying its HTML code with your favorite Web authoring program or HTML editor.
• Excel can also create single-file Web pages in which all files for a page, including images, are embedded in a single MIME encapsulated aggregate HTML (MHTML) file. This format, which is supported by Internet Explorer 4.0 and later, is handy for sending Web pages to others via e-mail. To create a single-file Web page, in step 3, choose Single File Web Page from the Save as type pop-up menu.
To automatically save a workbook as Web Pages
1. Follow steps 1 through 7 in the previous section to prepare a workbook or worksheet to be saved as a Web page.
2. Click the Publish button in the Save As dialog to display the Publish as Web Page dialog (Figure 9).
Figure 9. Use this dialog to set additional options for publishing a workbook or worksheet as a Web page.
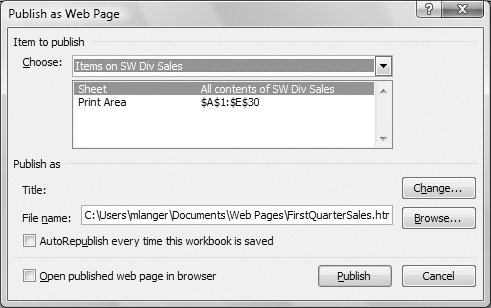
3. Turn on the check box for AutoRepublish every time this workbook is saved.
4. Click Publish.
• This feature is especially useful if you can save your Web pages directly to a Web server. This way, the pages are automatically updated—with no additional work on your part—when changed or revised.
Hyperlinks
A hyperlink is text or a graphic that, when clicked, displays other information. Excel enables you to create two kinds of hyperlinks:
• A link to a URL (Uniform Resource Locator), which is the Internet address of a document or individual. Excel makes it easy to create links to two types of URLs:
• http:// links to a Web page on a Web server.
• mailto: links to an e-mail address.
• A link to another document on your hard disk or network.
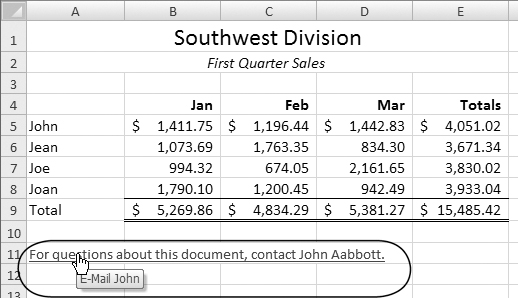
By default, hyperlinks appear as colored, underlined text (Figure 10).
Figure 10. A hyperlink appears as colored, underlined text. When you point to it, the mouse pointer turns into a hand with a pointing finger and a box with the link’s URL or ScreenTip (as shown here) appears.
• Although you can create a link to any document on your hard disk or accessible over a local area network or the Internet, clicking the link will only open the document if you have a program capable of opening it—such as the program that created it.
• Clicking a cell that contains a hyperlink opens the linked location. To select a cell containing a hyperlink, point to the cell, press the mouse button, and hold the mouse button down until the cell is selected.
To insert a hyperlink
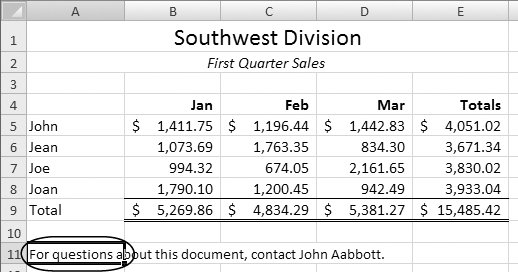
1. Select the cell or object that you want to convert to a hyperlink (Figure 11).
Figure 11. Select the cell you want to convert to a hyperlink.
2. Click Insert > Links > Hyperlink (Figure 12) or press ![]() .
.
Figure 12. The Insert tab’s Links group has only one button.

The Insert Hyperlink dialog appears (Figure 13).
Figure 13. The Insert Hyperlink dialog for inserting a link to an existing file or Web page.

3. Choose one of the Link to buttons on the left side of the dialog:
• Existing File or Web Page (Figure 13) enables you to link to a file on disk or a Web page. If you select this option, you can either select one of the files or locations that appears in the list or type a path or URL in the Address box (Figure 14).
Figure 14. Use the Address text box to enter the URL for the link location.
![]()
• Place in This Document (Figure 15) enables you to link to a specific location in the current document. If you select this option, choose a heading or enter a cell reference.
Figure 15. The Insert Hyperlink dialog for inserting a link to a place in the current document.

• Create New Document (Figure 16) enables you to create and link to a new document. If you select this option, you can either enter a pathname for the document or click the Change button and use the Create New Document dialog that appears to create a new document.
Figure 16. The Insert Hyperlink dialog for inserting a link to a new document.

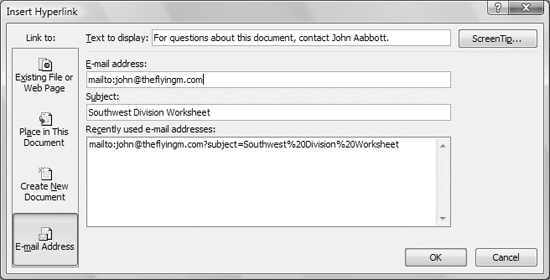
• E-mail Address (Figure 17) enables you to link to an e-mail address. If you select this option, you can either enter the e-mail address in the E-mail address box or select one of the recently used e-mail addresses in the list.
Figure 17. The Insert Hyperlink dialog for inserting a link to an e-mail address.
4. Click OK to save your settings and dismiss the Insert Hyperlink dialog.
The selected cell or object turns into a hyperlink (Figure 10).
• The Text to display box near the top of the Insert Hyperlink dialog (Figures 13, 15, 16, and 17) determines what text appears as the link in the worksheet cell.
• To specify what should appear in the ScreenTip box when you point to the hyperlink, click the ScreenTip button in the Insert Hyperlink dialog (Figures 13, 15, 16, and 17). Then enter the text you want to appear in the Set Hyperlink ScreenTip dialog (Figure 18) and click OK. Figure 10 shows an example of a custom ScreenTip. Keep in mind that this feature is not compatible with all Web browsers.
Figure 18. Use this dialog to set up a custom ScreenTip for a hyperlink.

To follow a hyperlink
1. Position the mouse pointer on the hyperlink. The mouse pointer turns into a pointing finger and a ScreenTip appears in a box nearby (Figure 10).
2. Click once.
If the hyperlink points to an Internet URL, Excel starts your default Web browser, connects to the Internet, and displays the URL.
or
If the hyperlink points to a location in the current file, that location appears.
or
If the hyperlink points to a file on your hard disk or another computer on the network, the file opens.
or
If the hyperlink points to an e-mail address, Excel starts your default e-mail program and prepares a preaddressed new message form.
To modify or remove a hyperlink
1. Select the cell or object containing the hyperlink. (You can select a cell with a hyperlink by pointing to it and then holding down the mouse button until the mouse pointer turns into a fat plus sign.)
2. Click Insert > Links > Hyperlink (Figure 12) or press ![]() .
.
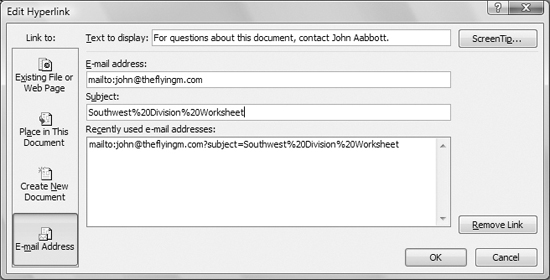
The Edit Hyperlink dialog appears (Figure 19).
Figure 19. Use the Edit Hyperlink dialog to modify or remove a hyperlink.
3. To change the link information, make changes as discussed earlier in this section.
or
To remove the link, click the Remove Link button.
4. Click OK.