
12. Using Other Programs
Using Excel with Other Programs
Microsoft Excel works well with a number of other programs. These programs can expand Excel’s capabilities:
• OLE objects created with other Microsoft Office and Windows programs can be inserted into Excel documents.
• Excel documents can be inserted into documents created with other Microsoft Office programs.
• Excel documents can be e-mailed to others using Microsoft Outlook.
This chapter explains how you can use Excel with some of these other programs.
• This chapter provides information about programs other than Microsoft Excel. To follow instructions for a specific program, that program must be installed on your computer.
OLE Objects
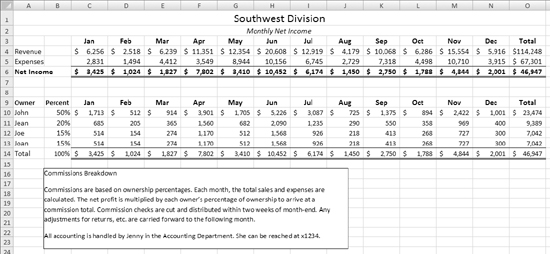
An object is all or part of a file created with an OLE-aware program. OLE or Object Linking and Embedding is a Microsoft technology that enables you to insert a file as an object within a document (Figure 1)—even if the file was created with a different program. Clicking or double-clicking the inserted object starts the program that created it so you can modify its contents.
Figure 1. A Microsoft Word Document object inserted in a Microsoft Excel document.
Excel’s Object command enables you to insert OLE objects in two different ways:
• Create and insert a new OLE object. This method starts a specific OLE-aware program so you can create an object.
• Insert an existing OLE object. This method enables you to locate, select, and insert an existing file as an object.
• All Microsoft programs are OLE-aware. Many software programs created by other developers are also OLE-aware; check the documentation that came with a specific software package for details.
• Excel comes with a number of OLE-aware programs that can be used to insert objects. The full Microsoft Office package includes even more of these programs.
• You can learn more about inserting text and graphic objects in Chapter 7.
To insert a new object
1. Select a cell near where you want the object to appear.
2. Click Insert > Text > Object (Figure 2) to display the Object dialog.
Figure 2. Click Object in the Text group.

3. If necessary, click the Create New tab to display its options (Figure 3).
Figure 3. The Object dialog. The options in the Object type list vary depending on the software installed in your computer.

4. In the Object type list, select the type of object that you want to insert.
5. Click OK.
Excel starts the program that you selected. It may take a moment for it to appear. Figure 4 shows a frame for a Microsoft Word document in the Excel worksheet window. The Word Ribbon appears at the top of the program window.
Figure 4. A frame containing a Microsoft Word object inserted into an Excel document. The Ribbon is also for Word.

6. Use the program to create the object that you want.
7. When you are finished creating the object, click outside the object. The object’s frame and any toolbars or menus that appeared disappear and you can continue working with Excel.
8. If necessary, resize the object and drag it into position in the Excel document (Figure 1).
• Some of the programs that come with Excel and appear in the Object dialog may not be fully installed. If that is the case, Excel will prompt you to insert the program CD to install the software.
• Some OLE-aware programs may display a dialog or similar interface. Use the controls within the dialog to create and insert the object.
To insert an existing object
1. Select a cell near where you want the object to appear.
2. Click Insert > Text > Object (Figure 2) to display the Object dialog.
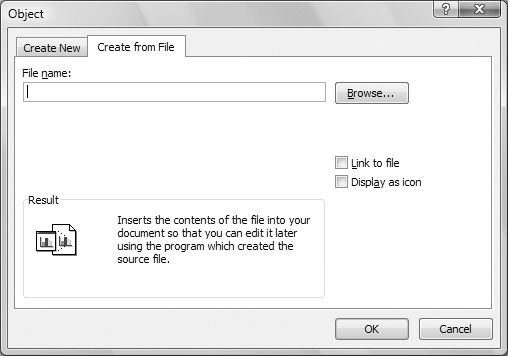
3. Click the Create from File tab to display its options (Figure 5).
Figure 5. The Create from File tab of the Object dialog.
4. Click the Browse button.
5. Use the Browse dialog that appears (Figure 6) to locate and select the file that you want to insert. Then click Insert.
Figure 6. Use this dialog to select the file you want to insert.

6. The pathname for the file appears in the Object dialog. Click OK. The file is inserted as an object in the document.
• To insert a file as an object, the program that created the file must be properly installed on your computer or accessible through a network connection. Excel displays a dialog if the program is missing.
To customize an inserted object
Follow the instructions in the previous two sections to create and insert a new object or insert an existing object. In the Object dialog (Figure 3 or 5), turn on check boxes as desired:
• Link to File creates a link to the object’s file so that when it changes, the object inserted within the Excel document can change. This option is only available when inserting an existing file as an object.
• Display as icon (Figure 7) displays an icon that represents the object rather than the object itself. Double-clicking the icon opens the object and displays its contents.
Figure 7. An inserted Microsoft Word 2007 document displayed as an icon.

Using Word with Excel
Word is the word processing component of Microsoft Office. A word processor is a program for creating formatted text-based documents (Figure 8). Word can also create mailing labels, merge static text with data (a data merge or mail merge), and create documents with pictures and other graphic elements.
Figure 8. Word processing software like Word is most often used to create formatted documents.

You can use Word with Excel to:
• Include information from a Word document in an Excel document (Figure 1).
• Perform a Word data merge with an Excel list as a data source.
• Because performing a data merge is primarily a function of Word rather than Excel, it is not covered in detail in this book.
To include Word document content in an Excel document
To insert a Word document as an object in an Excel document, consult the section about OLE objects earlier in this chapter.
Or
1. In the Word document, select the text that you want to include in the Excel document (Figure 9).
Figure 9. Select the text you want to include.

2. Click Home > Clipboard > Copy (Figure 10) or press ![]() .
.
Figure 10. The Clipboard group is the same in Word as it is in Excel.

3. Switch to Excel and either:
• Double-click in the cell where you want the content to appear to position the insertion point there (Figure 11).
• Create a text box to hold the content and position the insertion point inside the text box (Figure 12).
Figures 11 & 12. Position the insertion point in a cell (above) or text box (below).

4. Click Home > Clipboard > Paste (Figure 10) or press ![]() . The selection appears in the selected cell (Figure 13) or text box (Figure 14).
. The selection appears in the selected cell (Figure 13) or text box (Figure 14).
Figures 13 & 14. The text is pasted into the cell (above) or the text box (below).
![]()

• You can also use drag-and-drop editing to drag a Word document selection into an Excel document. I tell you how in Chapter 3.
• I explain how to create a text box in Chapter 7.
To use an Excel table as a data source for a Word data merge
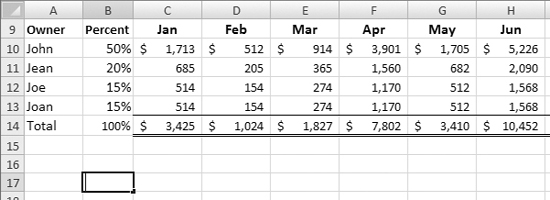
1. Follow the instructions in Chapter 10 to create an Excel table and enter data into it (Figure 15).
Figure 15. Start with an Excel list, like this one.

2. Switch to Word and choose an option from the Start Mail Merge menu on the Mailings tab’s Start Mail Merge group (Figure 16).
Figure 16. Choose a Start Mail Merge command for the type of document you want to create.

3. Choose Mailings > Start Mail Merge > Select Recipients > Use Existing List (Figure 17).
Figure 17. Choose Use Existing List from the Select Recipient List menu.

4. Use the Select Data Source dialog that appears (Figure 18) to locate, select, and open the Excel file containing the table you want to use for the merge.
Figure 18. Use this dialog to locate, select, and open the Excel file you want to use for the merge.

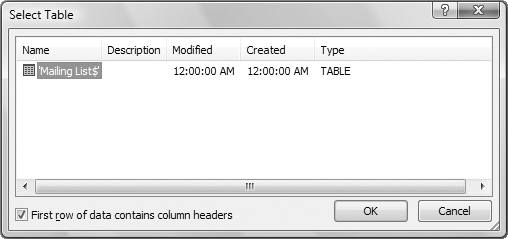
5. If the Select Table dialog appears (Figure 19), select the worksheet containing the data you want to use. If the first row of the Excel worksheet contains column headings, make sure the check box for First row of data contains column headers is turned on. Then click OK.
Figure 19. If the Select Table dialog appears, use it to indicate which worksheet contains the data.
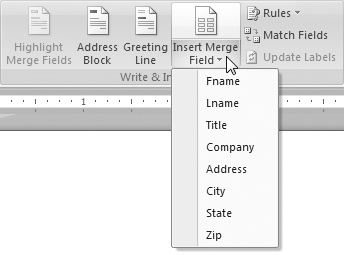
6. Use the Insert Merge Field menu in the Mailings tab’s Write & Insert Fields group (Figure 20) to insert fields from the Excel table.
Figure 20. You can insert fields into your Word document with the Insert Merge Field menu.
• Because performing a data merge is a function of Word rather than Excel, it is not covered in detail in this book.
Using Outlook with Excel
Outlook is the e-mail, newsgroup, and personal information management software component of Microsoft Office. E-mail software enables you to send and receive electronic mail messages (Figure 21). Personal information management software enables you to store and organize address book and calendar data.
Figure 21. Outlook’s e-mail interface.

You can use Outlook with Excel to e-mail an Excel document to a friend, family member, or co-worker.
• To learn more about using Outlook, consult the documentation that came with the program or its onscreen help feature.
To send an Excel document via e-mail
1. Display the Excel document you want to send via e-mail.
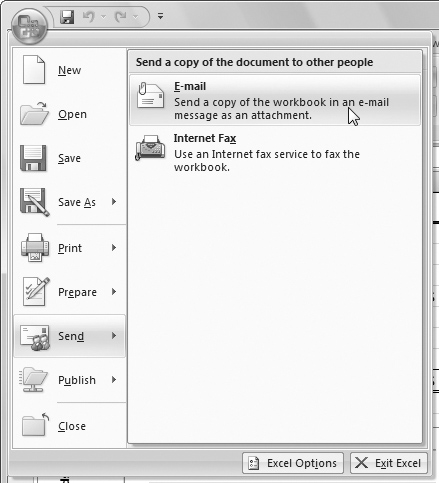
2. Choose Microsoft Office > Send > E-mail (Figure 22).
Figure 22. Choose E-mail from the Send submenu under the Microsoft Office menu.
3. Excel starts Outlook and displays an empty e-mail window with the To field selected (Figure 23). Enter the e-mail address for the person you want to send the document to.
Figure 23. Outlook displays an untitled e-mail form.

4. If desired, edit the contents of the Subject field.
5. In the message body, enter a message to accompany the file. Figure 24 shows an example.
Figure 24. Here’s what a finished message might look like. Note that the name of the Excel document being sent appears in the Attachments area.

6. To send the message, click the Send button. Outlook connects to the Internet and sends the message.
7. Switch back to Excel to continue working with the document.
• These instructions assume that Outlook is the default e-mail program as set in your Windows configuration. If a different program has been set as the default e-mail program, ignore steps 3 through 6 and send the message as you normally would with your e-mail program.
• Outlook (or your default e-mail program) must be properly configured to send and receive e-mail messages. Check the program’s documentation or onscreen help if you need assistance with setup.