
In this recipe, we will design a very simple comic strip in Microsoft Word using pictures from the website http://www.sxc.hu and speech bubbles from Microsoft Word. Later, we will copy and paste this comic strip in Paint (this comic strip is going to be out of sequence) and save it as a .png document, that is to say a picture file. Afterwards, we are going to carry out our matching activity in Moodle 1.9.5 with the comic strip on top of the activity. We can also ask our students to write a story based on the comic strip (they will have to place it in order) using the information in the speech bubbles. Let's Moodle it!
First of all, we are going to surf the website http://www.sxc.hu to get enough images to create a comic strip. When we enter the website, we will search for silhouette images, as these make it easier to let the imagination of our students fly away. So we are going to type silhouette in the search box and click on Browse as shown in the following screenshot:

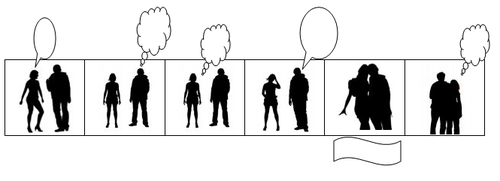
Afterwards, we will choose six images containing the same or similar characters so that we can create a coherent comic strip. It will take some time, but the results will be quite rewarding. After selecting the pictures, right-click on the pictures and select Copy. Now paste the image in Microsoft Word. Repeat the same steps six times, as we are working with six images in this case.
We have just chosen the images to work with. The next step is to create the comic strip in Microsoft Word. You may be wondering how this can be done. It is quite simple. We are going to insert a table with only six columns. After the table is inserted, we are going to cut and paste the six images into the six columns of the table—that is, a separate column for each image. We have just created a comic strip as shown in the following screenshot:

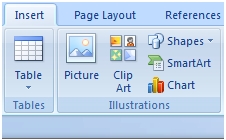
When concluding this comic strip, we will add speech bubbles that Microsoft Word provides. In the Insert menu, select the Shapes option as shown in the following screenshot:
We will choose some speech bubbles and cloud bubbles to create suspense and to allow our students to think freely. We can also add a Flowchart banner to include some text instead of speech from the characters of the comic strip. The result is displayed in the following screenshot:
After creating the comic strip in Microsoft Word, we are going to design the activity in Moodle. In this case, we are going to work with a matching activity. So these are the steps to follow:
- Click on Add an activity and select Quiz.
- Complete the Name block with the name of the activity. In this case, you are going to write Matching.
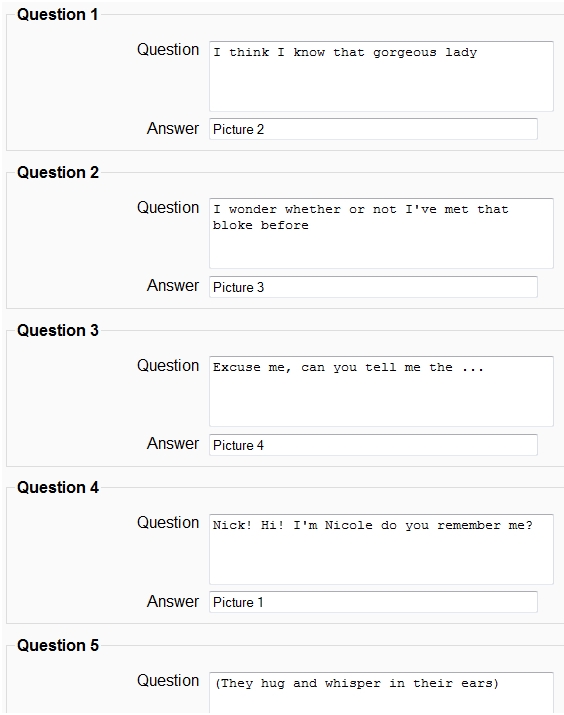
- In the Introduction block, you are going to write an introduction to the comic strip—for example, this is a comic strip about two people, a man called Nick and a woman called Nicole. The pictures are not in the correct order. You will have to arrange them in order when you perform the writing task.
- Click on Insert an image icon and browse for the
COMIC_STRIP.pngfile. - Then click on Upload.
- Right-click on the image and select Open file location.
- Copy the path and paste it in the Image URL block.
- Complete the Alternate text block in case the image cannot be displayed.
- Click on OK.
- Complete the other blocks, and then click on Save and display.
In the block, Create a new question, click on the drop-down box and select Matching.
- You are going to complete the Question name block with the title of the activity. In this case, you can write Matching text to speech bubbles.
- In the block, Image to display, click on the drop-down box and select the image that you want to upload. In this case, the image to be uploaded is the comic strip as shown in the following screenshot:

- Complete the Question blocks as shown in the following screenshot:
- Click on Save changes.
- Go back to the course.
- If you want to try out the activity yourself, it should appear as follows:

We can insert a writing activity here. We can ask our students to write a story based on this comic strip.
We can ask our students to write a story using the comic strip so that they can take full advantage of their own creations. Therefore, in my opinion, a Journal activity is appropriate. Besides, it is very simple and fast to design. In the same Weekly outline section or in the next one, we are going to add a Journal. Follow these steps:
- Click on the drop-down box of Add an activity and select Journal.
- Complete the Journal name. You can write 'Order the comic strip and write a story'.
- Complete the Journal question. You can upload the same comic strip or a modified version with the speech bubbles written. (Follow the previous steps to do this).
- Click on Save and display.
- Go back to the course.