In this recipe, we are going to design Venn diagrams with pictures for our students and we will provide labels for them to help in their writing. This activity will help us to design a visually rich activity and facilitate students to imagine themselves in future situations and how to organize their thinking in their mind's eye. So, we are going to design the Venn diagrams in Microsoft Word using clip art. Later, we will upload it into our Moodle course as a resource. So, let's get ready!
As I have already mentioned, we are going to draw Venn diagrams in Microsoft Word. The topic that I have chosen to deal with is "Living in the country versus living in an overcrowded city". We are not going to mention the geographical situations of such places; we will only show their pictures. In this recipe, we are going to use Clip art on Office Online.
We are going to start Microsoft Word to draw the Venn diagrams using a template, with the clip art from the website. These are the steps that you have to follow:
- Click on Insert and select SmartArt.
- Click on Relationship and select Basic Venn, as shown in the next screenshot:
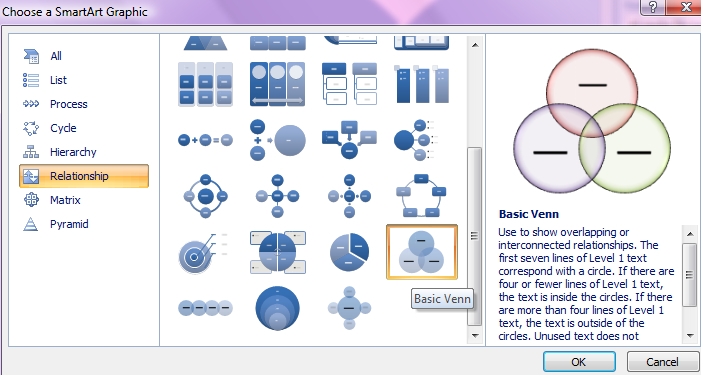
- Click on OK.
- Click on one circle in order to remove it, as shown in the next screenshot:
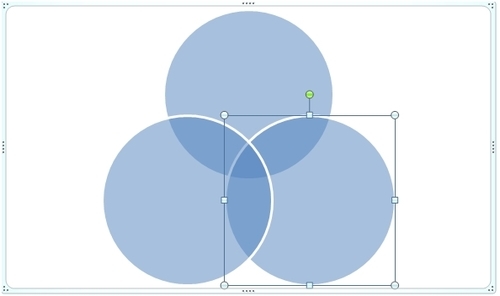
- Press Delete so that we have only two circles.
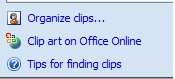
- Click on Insert and select Clip art.
- Select Clip art on Office Online, as shown in the next screenshot:
- Complete the Search block to find the picture.
- Click on the picture that you want to insert. Click on Add to Basket when a pop up appears.
- Next, click on Download.
- Then click on Open with.
- Right click on picture, select Copy and paste the image to the desired position in the document.
After creating the Venn diagrams with clip art, we will create the activity in our Moodle course. We are going to include our document as a resource and then design a writing activity where students are going to upload a single file. They may use the same file with their writing or they may create another one. So select the Weekly outline section where you want to insert the activity and follow these steps:
- Click on Add a resource and select Link to a file or website.
- Complete the Name block.
- Complete the Summary block.
- Click on Choose or upload a file.
- Click on Upload a file.
- Click on Browse and search for your file.
- Click on Upload this file.
- Click on Choose.
- In Target, select New window.
- Click on Save and return to course.
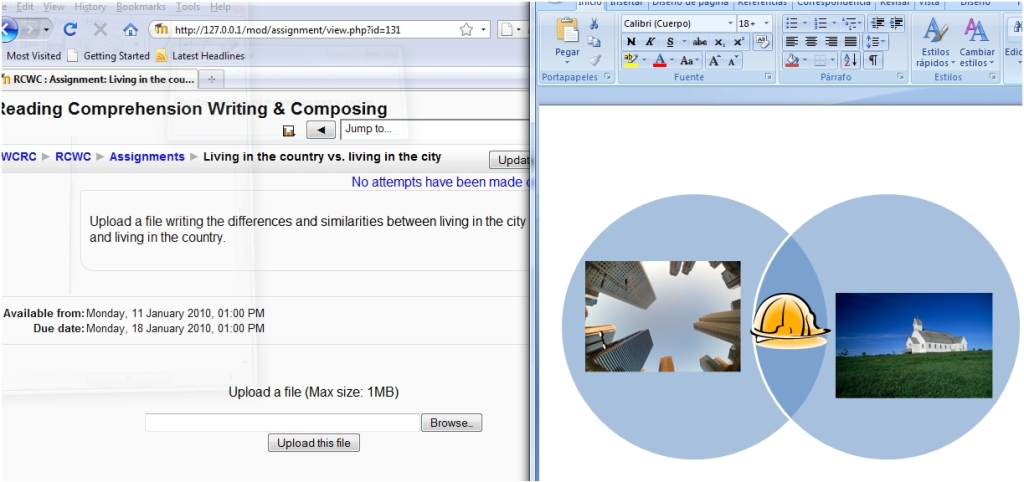
Now we are going to design the Assignment that we want our students to write. Follow these steps in order to create the Assignment:
- Click on Add an activity, and within Assignment, select Upload a single file.
- Complete the Assignment name block.
- Complete the Description block.
- Click on Save and return to course.
- The activity appears as shown in the next screenshot: