
It is very important to verify the impact of changes before you apply them to your production systems. This applies to both small changes like modifying a query and large changes such as refactoring the application and schema as well as MySQL upgrades. You may think that the optimal performance test is based on your production schema and data using the same queries that the application executes. However, it is not always as simple as it sounds to recreate the right workload, so sometimes it is necessary to use standard benchmark suites.
This chapter starts out with some best practices when executing benchmarks and an overview of some of the most common benchmarks and tools used with MySQL. Then Sysbench which is the most commonly used benchmark will be considered in more detail.
Best Practices
It is easy to install a benchmark program and execute it. The difficult part is to use it right. Performing MySQL benchmark tests shares some of the concepts of performance tuning, and the first and most important point is that you need to work in an “informed way.” This means that you must know your tools well and clearly define the goal and success criteria of the tests. For your tools, you need to know how to use them correctly as executing them with default parameters likely will not produce the test that you want.
This is tied together with the goal of the benchmark. What is it you need to determine? For example, you may want to verify the effect of changing some configuration variable in which case you must make sure your tests are set up, so that area is tested. Consider an option such as innodb_io_capacity which influences how fast InnoDB writes. If your benchmark is a read-only test, changing innodb_io_capacity will not make any difference. In this context, you also need to make sure that you only change one thing at a time and only make relatively small changes – just as you should do when making changes to your production system. Otherwise, if you change several settings at the same time, then some may contribute positively to the result and others negatively, but you have no way to determine which changes to keep and which to revert. If you make large changes, you may overshoot the optimal value, so you end up discarding that change even though there is room for improvements.
When reading the results at the end of the test, you need to understand what the benchmark measures; otherwise, the result is just a meaningless number. This also includes defining which variables to adjust during the tests, and as for performance tuning in general, it is important to keep the number of variables limited, so you easily can identify the effect of each variable. For a result to be valid, you must also ensure that the test is repeatable, that is, if you execute the same test twice, then you get the same result. One requirement for a test to be repeatable is that you have a well-defined starting state of the system.
Do not assume that one client is enough to generate the load you are aiming at. How many clients are required depends on the number of concurrent queries and the benchmark you are executing.
That leads to the next important point. Your benchmarks should reflect the workload of the application. It does not help you have used an online transaction processing (OLTP) benchmark to prove that your configuration changes work great, if your application has an online analytical processing (OLAP) workload, or that you have a great read-only performance if your application is write-heavy.
You may think that the optimal way to design a benchmark is to capture all queries executed in production and replay them as the benchmark. This definitely has some merits, but there are also challenges. It is expensive to collect all queries executed, though if you already have the MySQL Enterprise Audit log enabled for auditing purposes, that can be used. There may also be data privacy problems of copying the production data to the test system. Finally, it is difficult to scale the test to change the size of the data set (whether down to make it more manageable or up to test growth) or to increase the test workload compared to the current production load. For these reasons, it is often necessary to use artificial benchmarks.
You can use the MySQL Enterprise Audit log (requires subscription) or the general query log (very high overhead) to capture all queries for a period. This includes timestamps when the queries were executed, so you can use the log to replay the queries in the same order with the same concurrency. It does however require that you create a script yourself to extract the queries and execute them.
The next point is about the benchmark results which also relates to the previous points. When you have the result of a benchmark, it is important to understand what the result means and that you do not discard results just because they look wrong. As such, a benchmark result is “never wrong”; it is the result of some work. If the result is unexpected, it is important to understand why it ended up that way. Maybe, you did not use the parameters you intended or used a different table size than expected, but it may also be that something else interfered with the benchmark, or something third. If something interfered with the benchmark, is it something that could also happen in production? If it can, then the benchmark is very much relevant, and you need to decide how you will handle such a case in production.
To understand what happened during a benchmark, it is also important that you monitor MySQL and the host system. One option is to use the same monitoring solution as that you use for your production system. However, benchmarks on a test or development system are a bit different than a production system as you are typically interested in higher-frequency sampling but for a shorter duration during a benchmark, so it can be useful using a dedicated monitoring solution specifically for benchmarks. One such option is dim_STAT (http://dimitrik.free.fr/) developed by Dimitri Kravtchuk who is a performance architect for MySQL and who is behind many of the MySQL Server benchmarks.
In general, understanding the result is not a simple thing. One thing you also need to be aware of is what happens during a benchmark if there is a temporary stall. Does the benchmark hold back on subsequent queries, or does it keep submitting queries? If it holds back, then the subsequent queries will effectively be faster than they should be as in the real world as users do not stop submitting requests just because there is a backlog.
Finally, a benchmark typically produces several metrics, so you need to analyze the result as it makes most relevance for your system. For example, is the latency or throughput the most important? Or do you have requirements to both? Or are you more interested in some third metric?
Standard TPC Benchmarks
There is an almost endless list of benchmarks, but in the end the ones that are commonly used boils down to a handful of tests. This does not mean that you should not consider other benchmarks; in the end the important thing is that the benchmark works for your requirements.
Common TPC benchmarks
Name | Type | Description |
|---|---|---|
TPC-C | OLTP | This is maybe the most classic of the TPC benchmarks and dates back to 1992. It simulates the queries of a wholesale supplier and uses nine tables. |
TPC-DI | Data Integration | Tests extract, transform, and load (ETL) workloads. |
TPC-DS | Decision Support | This benchmark includes complex queries of a data warehouse (star schema). |
TPC-E | OLTP | This is meant as a replacement for TPC-C with a more complex schema and queries, so it is more realistic for modern databases. It includes 33 tables. |
TPC-H | Decision Support | This is another classic benchmark which is often used to test optimizer features. It consists of 22 complex queries meant to simulate the reporting side of an OLTP database. |
TPC-VMS | Virtualization | This uses the TPC-C, TPC-DS, TPS-E, and TPC-H benchmarks to determine performance metrics for virtualized databases. |
The advantages of these standard benchmarks are that you are more likely to find tools implementing them and you can compare with results obtained by other people.
If you want to learn more about the TPC benchmarks as well as how to perform database benchmarks the best way, consider the book by Bert Scalzo: Database Benchmarking and Stress Testing (Apress), www.apress.com/gp/book/9781484240076.
In the same way as there are standard benchmarks, there are also some common benchmark tools.
Common Benchmarks Tools
Implementing a benchmark is far from trivial, so in most cases it is preferred to use a preexisting benchmark tool that can execute the benchmark for you. Some tools are cross-platform and/or can use several different database systems, whereas others are more specific. You should choose the one that implements the benchmarks you need and work on the platform that you have your production system on.
Common benchmarks used with MySQL
Benchmark | Description |
|---|---|
Sysbench | This is the most commonly used benchmark and the one that will be covered most in this chapter. It has built-in tests for OLTP workloads, non-database tests (such as pure I/O, CPU, and memory tests), and more. Additionally, the latest versions support custom workloads. It is open source and is mostly used on Linux. It can be downloaded from https://github.com/akopytov/sysbench. |
DBT2 | DBT2 can be used to emulate OLTP workloads using an order system (TPC-C). DBT2 can also be used to automate Sysbench and is available from https://dev.mysql.com/downloads/benchmarks.html. |
DBT3 | DBT3 implements the TPC-H benchmark and is used to test the performance of complex queries. It is one of the favorite tests used by the MySQL optimizer developers to verify the performance after implementing new optimizer features. A copy of DBT3 is available from https://sourceforge.net/projects/osdldbt/. |
HammerDB | The HammerDB tool is a free cross-database tool with support for both Microsoft Windows and Linux. It has support for the TPC-C and TPC-H benchmarks and is available from https://hammerdb.com/. |
Database Factory | Database Factory is a powerful benchmark tool for Microsoft Windows that supports several databases and benchmarks. It supports the TPC-H, TPC-C, TPC-D, and TPC-E benchmarks and more. It is a commercial product (free trial available): www.quest.com/products/benchmark-factory/. |
iiBench | iiBench is testing how fast you can insert data into the database and thus is useful if you regularly need to ingest large amount of data. It can be downloaded from https://github.com/tmcallaghan/iibench-mysql. |
DVD Store Version 3 | The DVD Store combines data for a sample DVD store with a benchmark. It can generate data for any given size with standard sizes being 10 MB, 1 GB, and 100 GB. It is also useful as general test data and can be downloaded from https://github.com/dvdstore/ds3. It is based on the older Dell DVD Store Database Test Suite. |
mysqlslap | The mysqlslap tool is special as it is included with the MySQL installation. It can be used to generate a concurrent workload against a table of your choice. It is a very simple tool, so it cannot be used for too many purposes, but it is easy to use. The manual page for mysqlslap can be found at https://dev.mysql.com/doc/refman/en/mysqlslap.html. |
The tool that is most commonly used with MySQL is Sysbench, and the remainder of this chapter covers its installation and example usages.
Sysbench Installation
Since Sysbench is an open source tool, there are several forks available. MySQL maintains one of these forks; however, to get the version with the most recent features, it is recommended to use the fork by Alexey Kopytov. (This is also the fork recommended by MySQL performance architect Dimitri Kravtchuk.) The examples in this chapter all use Kopytov’s fork version 1.0.17 (but note the version listed on outputs is 1.1.0), but the examples will be similar for other Sysbench forks as long as the fork is new enough to include the features demonstrated.
There is support for installing Sysbench using native Linux packages, from Homebrew on macOS, or to compile it yourself. While installing using native packages is simpler, it is in general better to compile yourself as it ensures you compile against the MySQL 8 development libraries, and you can compile Sysbench on more platforms than where there are packages available.
For details about all the installation instructions, including required dependencies and using native packages, see https://github.com/akopytov/sysbench. Support for Microsoft Windows has been dropped in Sysbench 1.0. It is currently unknown whether support will be reintroduced. If you are using Microsoft Windows, the recommendation is to install Sysbench through Windows Subsystem for Linux (WSL) (https://msdn.microsoft.com/en-us/commandline/wsl/about) in which case the instruction in this chapter should work with minor modifications (depending on the Linux distribution you choose). An alternative is to use a virtual machine, for example, in VirtualBox.
Compiling software may not be very common any longer, but fortunately it is straightforward to compile Sysbench. You will need to download the source code and then configure the build, compile it, and finally install it.
Installing the MySQL 8 development libraries
The output depends on what you have already installed. Notice how several other MySQL packages, including mysql-community-server, are pulled in as dependencies. This is because the mysql-community-devel package in this case replaces another preexisting package which triggers a chain of dependency updates.
If you have an older version of MySQL or a fork installed, all related packages will be upgraded. For this reason, it is best to compile Sysbench on a host where you can freely replace packages or the correct MySQL 8 development libraries are already installed.
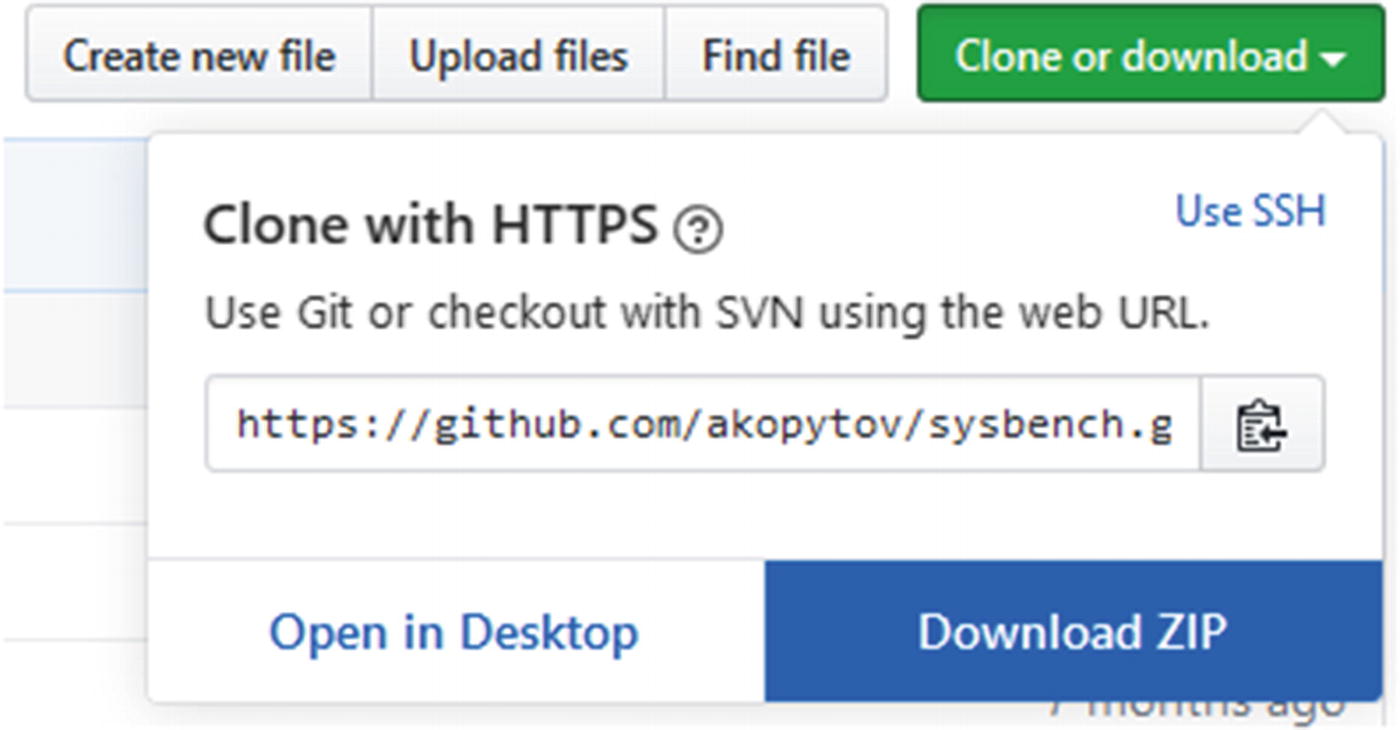
Downloading the Sysbench source code from GitHub in a browser
Click Download ZIP and the file will download. Once the source code is downloaded, unzip it.
Configuring Sysbench for compilation and installation
The end of the configuration shows the options that will be used for the compilation. Make sure that MySQL support says yes. The default is to install in /usr/local. You can change that using the --prefix option when executing configure, for example, ./configure --prefix=/home/myuser/sysbench.
The -j option tells make to compile the source in parallel which can reduce the compilation time. However, Sysbench is in all cases quick to compile, so it is not of great importance in this case.
That is it. You are now ready to use Sysbench to perform benchmark.
Executing Benchmarks
Sysbench includes several benchmarks that are ready to use. This ranges from non-database built-in tests to various database tests. The non-database tests are considered built-in as they are defined within the Sysbench source code itself. The other tests are defined in Lua scripts and are installed in the /usr/local/share/sysbench/ directory (assuming you installed into the default location).
This and the next section assume you have a MySQL instance available for testing on the same host as where you have installed Sysbench. If that is not the case, you need to adjust the hostnames as necessary.
The files with the .lua extension except oltp_common.lua (shared code for the OLTP tests) are the tests available. The Lua language1 is a lightweight programming language that is often used for embedding code into programs. Working with Lua programs is similar to working with scripting languages such as Python except your code gets executed through another program (Sysbench in this case).
Obtaining help for the oltp_read_only test
The values in square brackets are the default values.
prepare: Executes the steps required to set up the test, for example, by creating and populating the tables needed by the test.
warmup: Ensures the buffers and caches are warm, for example, that table data and indexes have been loaded into the InnoDB buffer pool. This is special for the OLTP benchmarks.
run: Executes the test itself. This command is provided by all tests.
cleanup: Removes any tables used by the test.
In this case, the user is expected to connect from localhost. In general, that will not be the case, so you need to change the hostname part of the account to reflect where the Sysbench user is connecting from. The username was chosen as sbtest as that is the default used by Sysbench. The sbtest schema is also created as the Sysbench tests require it to exist when first connecting.
It is strongly recommended to choose a strong password for the account.
Preparing the test
This creates the four tables as sbtest1, sbtest2, sbtest3, and sbtest4 using four threads. The prepare step will be quick in this case as the tables are small; however, if you perform benchmarks using large tables, it can take a significant amount of time to set up the test. As benchmark testing typically involves executing a range of tests, you can speed up the testing by creating a binary backup (copying the tables, either with MySQL shut down or using a tool such as MySQL Enterprise Backup) or a file system snapshot. For each subsequent test, you can restore the backup instead of recreating the tables.
Warming MySQL up for the test
So the warmup phase may not be equivalent to running the actual benchmark for a while.
You can also use the --warmup-time=N option when executing the benchmark to disable statistics for the first N seconds.
--events=N: The maximum number of events to execute. The default is 0.
--time=N: The maximum duration in seconds. The default is 10.
When the value is 0 for one of the options, it means infinite. So, if you set both --events and --time to 0, the test will run forever. This can, for example, be useful, if you are not interested in the benchmark statistics themselves but want to collect monitoring metrics or want to create a workload while performing some other task.
The author of this book uses Sysbench with both the number of events and time limits set to 0 to generate a concurrent workload for tests creating backups.
Executing a Sysbench test for one minute
Notice that unlike the prepare and warmup phases, the run command was run with eight threads. The number of threads is often one of the things that is varied in a series of tests to determine how concurrent a workload the system can sustain. It is necessary to specify the number of tables and rows that the run command should use as otherwise the default values will be used (there is no state shared between the Sysbench commands).
Cleaning up after a test
Notice that it is necessary to specify the number of tables; otherwise, only the first table will be dropped.
The built-in tests are great, but what makes Sysbench a really strong tool is that you can also define your own benchmarks.
Creating Custom Benchmarks
As you saw in the previous section, the database tests that are included with Sysbench are defined in Lua scripts (www.lua.org/). This means that all that you need to do to define your own tests is to create a Lua script with the definition of the test and save it in Sysbench’s shared directory. One example where this can be useful is if you want to create a test based on the specific requirements of your application either to test the effect of indexes, refactoring your application, or similar.
This section will put together a small example test script, so you can see the principles of creating your own tests. The test can also be found in sequence.lua in this book’s GitHub repository.
A great way to learn how to write your own Sysbench Lua scripts is to study the existing ones. In addition to the example in this chapter, you can look at the Lua scripts shipped with Sysbench and another relatively simple example in https://gist.github.com/utdrmac/92d00a34149565bc155cdef80b6cba12.
Overview of the Custom Script
Using a custom sequence table
The LAST_INSERT_ID() function is used in the UPDATE statement to assign the session value for the last inserted id, so it can be fetched afterward in the SELECT statement.
Support for the prepare, run, cleanup, and help commands.
The prepare and run commands can be executed in parallel.
Support for specifying the number of tables, table size, and whether explicit transactions are used.
Validation that the number of rows per table is in the range 1–99999. The id column of the tables is created as a varchar(10), and the keys are prefixed with sbkey, so there can be at most five digits.

Overview of the functions in the sequence test
The Prepare, Run, and Cleanup groups represent commands, and the Helpers group contains the two helper functions that will be used from multiple commands. The run and help commands are special as they always exist. The help is automatically generated based on the options that the script adds, so no special consideration is required for that. There is also a little code that is outside functions, of which the first is a sanity check and the options that the script will support.
Defining the Options
The options that the script supports are configured by adding elements to the sysbench.cmdline.options hash. This is one of the built-in features of Sysbench that you can use in your scripts. Another is sysbench.cmdline.command which is the name of the command that has been provided for the execution.
Verifying a command is specified and adding the options
The built-in error() function is used to emit the error message with a list of supported commands, if the command is not set. It is not necessary to verify whether the command is one of the supported ones as Sysbench will automatically validate that.
The option values are made available in the sysbench.opt hash, for example, to get the number of tables in the test, you can use sysbench.opt.tables. The hash is available globally, so you do not need to do anything before you can use it.
You are now ready to implement the three commands that the script supports. Since the run command is mandatory, it is the first one that will be discussed.
The run Command
thread_init(): This is called when Sysbench initializes the script.
thread_done(): This is called when Sysbench is done executing the script.
event(): This is where the actual test is implemented and is called once per iteration.
For this simple test, all the initialization that is required is to create the connection to MySQL which consists of initializing the database driver and to use that to create the connection. The driver is available from the sysbench object. By creating the connections in the thread_init() function , Sysbench can reuse the connections instead of creating a new connection for each iteration. If you want to simulate creating a new connection for each group of queries, you can also choose to do that by adding the code in the event() function and make the connection object local in the same way as it will be done later for the prepare and cleanup commands.
All that is required in this case is to close the connection which is done using the disconnect() method of the connection.
The event() function
This code uses one option, the --skip_trx option. If --skip_trx is disabled, then the test relies on the auto-commit feature; otherwise, explicit BEGIN and COMMIT are executed.
In the Sysbench Lua scripts, you cannot use START TRANSACTION to begin a transaction.
The do_increment() and helper functions
The gen_table_name() function generates the table name based on an integer, and the gen_key() function similarly generates a key value based on an integer id. The table name and key value are used in a few other places in the script, so by splitting the logic into helper functions, you can ensure they are generated in the same way throughout the script.
The do_increment() function itself starts out generating the table name and key based on random values based on the number of tables and the number of rows in each table in the test. In a real application, you may not have such a uniform access to the sequences, in which case you can modify the logic in the script. Finally, the UPDATE and SELECT statements are executed. A possible extension of the script is to use the generated sequence number in some other query, but be careful that you do not end up doing work that is not relevant to what you are trying to benchmark.
That is all that is required for the run command. Notice that nothing was done to implement parallel execution; that is handled automatically by Sysbench unless you do not want to treat all threads the same. An example where the threads should not perform identical work is the prepare command where each thread will be responsible for its own tables.
The prepare Command
The do_prepare() and create_table() functions
The first thing that is done in the do_prepare() function is to verify that the number of rows is within the range 1–99999. This is done using the assert() function where the first argument must evaluate to true; otherwise, the error message given as the second output is printed and the script exists.
The do_prepare() function is called once per thread, so the parallelization is handled for you (more about this at the end of the example), but you need to ensure that each table is only created once. That is done through the for loop where the modulus of sysbench.tid (the Sysbench thread id) with the number of threads is used to determine the table numbers handled by each thread.
The actual table creation is performed in create_table() to separate out the tasks to make it easier to maintain the script. If the table already exists, it is dropped and then created, and finally the table is populated with the number of rows requested. All rows are inserted in a single transaction to improve the performance. If you need to populate larger tables, it is worth committing after every few thousand rows, but since the maximum number of rows in this table is 99999 and the rows are very small, it is fine to keep things simple and just use a single transaction per table.
The cleanup Command
The cleanup() function
The cleanup() function only supports serial execution, so it can just loop over the tables and drop them one by one.
This leaves a question: How does Sysbench know that the prepare command can be run on parallel, but the cleanup command cannot?
Registering Commands
The sysbench.cmdline.PARALLEL_COMMAND constant is built-in and specifies that the command should be executed in parallel. It is important that this code is after the definition of do_prepare() as otherwise a nil value is assigned. In practice, it is convenient to add the code at the end of the script.
Example commands for the sequence test
Note that as for the oltp_read_only test, the sbtest schema must exist before executing the prepare command. It is left as an exercise to the reader to try the script with different values for --threads, --tables, --table_size, and --skip_trx.
Summary
This chapter has discussed how benchmarks can be used with MySQL. First, some general best practices using benchmarks were discussed. The single most important things are that you have determined what to benchmark and what is considered the success criteria. This is not all that different from performance tuning in general. It is also important that you understand the tests the benchmark performs and what the result means. Often, you will need to collect additional metrics either through your normal monitoring solution or through specialized scripts to determine whether the benchmark was a success.
Next, the standard TPC benchmarks were covered. The TPC-C and TPC-E benchmarks are good for testing OLTP workloads with TPC-C being the most used as it is the oldest, but TPC-E being the most realistic for modern applications. The TPC-H and TPC-DS use complex queries that can be great, for example, to explore changes that can affect the query plan.
While you can choose to implement a benchmark from scratch yourself, it is more likely you will use a preexisting benchmark tool. The most commonly used tool with MySQL is Sysbench which was covered in some detail. First, Sysbench was installed by compiling it. Then it was shown how the standard Sysbench benchmarks can be executed. The real strength of Sysbench, though, is that you can define your own custom tests. A simple example was shown in the last section.
In the same way as it is not always possible to use a real-world benchmark, it is not always possible to use read-world data for general testing. The next chapter explores some generic data sets often used with MySQL and of which several are also used in this book.