
We have facilitated the users of our application to send feedback to the development team. However, we have not implemented an option for the team to receive follow-up information about their feedback yet.
There are several possibilities to return follow-up information to the user. The least appealing would be to create a new APEX account for the user so he can look into Team Development himself.
Another option would be to return an e-mail whenever a follow-up is produced.
A third option that we will explain further in this recipe is to build a page using built-in APEX views.
Make sure that the environment created in the previous recipe on 'Using Feedback' is available.
In the first place, we have to create some follow-up.
- Go to Team Development.
- Navigate to the Feedback section and select the Feedback tab on the overview.
- Go to the Expanded view.
- Press the Follow up button on the Feedback entry.
- In the Enter follow up text area, enter We have added more information.
- Press Create Follow Up.
Now, we have to communicate this new information to the user.
First, we'll build a simple Interactive Report to show all feedback given by the current user.
- Go to the Enterprise Application in the Application Builder.
- Press Create Page.
- Select Report and press Next.
- Select Interactive Report and press Next.
- Name the Page and Region Feedback Overview and press Next.
- Select Use an existing tab set and create a new tab within the existing tab set from the Radio Group and enter the New Tab Label Feedback.
- Press Next.
- Use the following query in the SQL Statement area:
select feedback_id
, feedback_number
, feedback
, public_response
from apex_team_feedback
where logging_apex_user = :APP_USER
[1346_12_01.sql]
- Change Link to Single Row View to No and press Next.
- Press Finish.
We now have a page that will show some information about the logged feedback that the application user has added.
Now, we'll create a page to show the follow-ups for this feedback.
- Go to the Enterprise Application in the Application Builder.
- Press Create Page.
- Select Report and press Next.
- Select Interactive Report and press Next.
- Name the Page and Region Feedback follow-up and press Next.
- Select Use an existing tab set and reuse an existing tab within that tab set from the radio group and press Next.
- Select the Feedback tab from the pulldown list and press Next.
- Use the following query in the SQL Statement area (change P7 if your page has another ID).
select follow_up
from apex_team_feedback_followup
where feedback_id = :P7_FEEDBACK_ID
[1346_12_02.sql]
- Change Link to Single Row View to No and press Next.
- Press Finish.
- Press Edit Page.
- Right-click on the feedback follow-up region and select Create Page Item.
- Select Hidden and press Next.
- Name it P7_FEEDBACK_ID (or change the page number according to what your situation might be) and press Next.
- Set Value Protected to No and press Next.
- Press Create Item.
Now, we just have to link the two pages together.
- Go to the Feedback Overview Page in the Application Builder.
- Right-click on the Feedback Overview region and select Edit Report Attributes.
- Press on the pencil icon next to FEEDBACK_ID.
- Scroll down to the Column Link section.
- Enter #FEEDBACK_ID# into the Link Text (or use the shortcut under the text item).
- Make sure target is set to Page in this Application and enter 7 (or the number of your page) into the Page field.
- In the item list set Name to P7_FEEDBACK_ID and Value to #FEEDBACK_ID# for item 1.
- Press Apply Changes Twice.
- Run the Feedback Overview Page logging in as the user that entered the feedback earlier in the recipe.
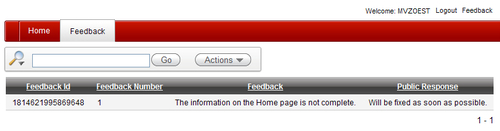
As we can see, the feedback we entered in the recipe Using Feedback in this chapter is shown.
Press the link on the Feedback_Id column to see the next page.
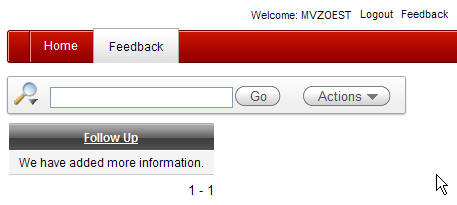
And there we have it. This is a very simple page, but it can be expanded much further.
Application Express in general and Team Development in particular offer some built-in views to select information directly from the database. Two of those views have been shown here: apex_team_feedback and apex_team_feedback_followup.
Besides the columns that we have used in the example, much more information can be gathered to use to our advantage.