
AJAX is an abbreviation of Asynchronous JavaScript and XML. AJAX is a method of communication between a client and the server where the website resides. AJAX makes it possible to dynamically respond to actions on the client side. For example, it is possible to directly check an e-mail address while you are typing! Or set the color of an object when clicking on another object. AJAX is mostly used to dynamically fetch data from the server to use in the webpage.
Until APEX 4.0, using AJAX in your webpage was really advanced programming with JavaScript. As from APEX 4.0, it is a lot easier to use AJAX with the help of dynamic actions. We will make a page with a tag cloud and a region where you can see the news articles. When you click on a tag in the tag cloud, APEX will show the articles which are related to the selected tag. This information is an AJAX call and is implemented using a dynamic action.
We will create a new page. Make sure you have created and have access to the tables APP_NEWS, APP_TAGS, and APP_TGS_NWS.
- Go to your application and click the Create page button.
- Select Blank page.
- Enter a page alias, for example tagnews. Click Next.
- Enter a name for the page. For example News articles by tags. Click Next.
- Select No. Click Next.
- Click Finish.
- Click the Edit page icon.
- In the regions section, click the Add icon.
- Select PL/SQL dynamic content.
- Enter a title for the region, in this case Tag cloud. Click Next.
- In the PL/SQL source text area, enter the following code:
declare
--
cursor c_tags is
select tns.tgs_id
, tgs.tag
, count(tns.tgs_id) num_of_times
from app_tgs_nws tns
, app_tags tgs
where tgs.id = tns.tgs_id
group by tns.tgs_id, tgs.tag
order by 1;
--
l_min_num number(3);
l_max_num number(3);
l_size number(2);
l_multiplx number(2);
begin
select min(num_of_times) min_num
, max(num_of_times) max_num
into l_min_num, l_max_num
from (select tns.tgs_id
, tgs.tag
, count(tns.tgs_id) num_of_times
from app_tgs_nws tns
, app_tags tgs
where tgs.id = tns.tgs_id
group by tns.tgs_id, tgs.tag);
--
l_multiplx := round(72/l_max_num);
--
for r_tags in c_tags
loop
l_size := round(l_multiplx * r_tags.num_of_times);
sys.htp.print (q'!<a onmouseover="this.style.cursor='pointer';" onclick=document.getElementById("PXX_TAG").value="!'||r_tags.tag||'";
style="font-size:'||to_char(l_size)||'px; text-decoration:none;">'||r_tags.tag||'</a>'),
sys.htp.print(' '),
end loop;
end;
[1346_03_05.txt]
Replace XX in PXX_TAG with the page number. The onmouseover event is necessary to change the cursor as if it were pointing to a link. The onclick event copies the value of the tag that is clicked on to the hidden item PXX_TAG. This is needed to build the query. The item will be referenced in the dynamic action. But first, we need to create the item.
- Click the create region button. The tag cloud region is now ready. Now we will create the hidden item.
- In the items section, click the add icon.
- Select hidden. Click next.
- In the item name text item, enter the name PXX_TAG where XX is the page number you are creating. You can see the page number in the first line in the create item section.
- In the region list box, select the tag cloud region you just selected. Click Next two times.
- Click the Create item button. The hidden item is ready. Now we will create the region for the news articles.
- In the regions section, click the add icon.
- Select HTML.
- Again, select HTML and click next.
- Enter a title for the region, for example Related articles. Click Next.
- Leave the region source empty and click the Create region button.
- The last step is the creation of the dynamic action.
In the dynamic actions sections, click the add icon.
- Select Advanced.
- Enter a name for this action, for example show_articles. Click Next.
- In the event list box, select Click.
- In the selection type list box, select Region.
- In the region list box, select the tag cloud region. Click Next.
- In the action list box, select Set value. A settings section appears.
- In the set type list box, select PL/SQL function body.
- In the PL/SQL function body text area, enter the following code:
declare
cursor c_nws is
select title
, text
from app_news
where upper(text) like '%'||upper(:PXX_TAG)||'%';
--
l_text varchar2(32000) := '';
begin
for r_nws in c_nws
loop
l_text := l_text || '<h1>' || r_nws.title || '</h1>';
l_text := l_text || '<br>';
l_text := l_text || replace(r_nws.text,:PXX_TAG,'<b>'||:PXX_TAG||'</b>'),
l_text := l_text || '<br>';
l_text := l_text || '<br>';
end loop;
return l_text;
end;
- [1346_03_06.txt]
Replace the xx in the :PXX_TAG by the page number. This script loops through the records of a query. The query selects the records where the text contains the tag the user clicked on. The results of the query are displayed using the htp.p function.
- In the page items to submit text field, enter PXX_TAG where XX is the page number.
- In the Escape Special Characters list box, select No. Click Next.
In the next step we must set the affected objects.
- In the selection type list box, select region. In the region list box, select the HTML region (related articles). Click the Create button.
- In the processes section, click the Add icon.
- Select PL/SQL. Click Next.
- Enter a name for the PL/SQL process, for example populate_tags.
- In the point list box, select On Load Before Header. Click Next.
- In the PL/SQL text area, enter the following code:
declare
cursor c_app_tags
is
select id
, tag
from app_tags
order by id;
--
cursor c_instr(b_tag in varchar2)
is
select id
, instr(upper(text),upper(b_tag)) tag_found
from app_news;
begin
delete from app_tgs_nws;
--
for r_app_tags in c_app_tags
loop
for r_instr in c_instr(r_app_tags.tag)
loop
if r_instr.tag_found > 0
then
insert into app_tgs_nws
values (r_app_tags.id,r_instr.id);
end if;
end loop;
end loop;
--
commit;
end;
- [1346_03_25.txt]
This piece of code populates the intersection table between APP_NWS and APP_TAGS. First the table is truncated, and then the code loops through the text of the APP_NWS table to search for the tags from the table APP_TAGS. If it finds a match, a row is inserted into the APP_TGS_NWS table. This process is started each time the user enters this page. In this way, changes in the APP_NWS table are immediately visible. So when a row is inserted into the APP_NWS table with a text which contains something like "APEX", the tag cloud will show the APEX tag bigger. Click the Create process button.
The page is now ready. Run the page and see how the articles change when you click on a tag.
We use the<a> tag where we put some extra JavaScript code. First there is the onmouseover event, which changes the cursor style to pointer (the "hand"). Second there is the onclick event, which copies the tag to the hidden item.
In the dynamic action, a PL/SQL function is executed which loops through a cursor of a query that selects all records with articles related to the tag (the like operator is used). In the dynamic action, the set value function is used to replace the contents of the affected region by the contents of the variable l_text.
Actually the affected region, related articles, is a div and the dynamic action is an AJAX process which retrieves the data from the server (the query) and puts them in the div. In JavaScript you would use the following for divs:
$('divid').html("some text or HTML code");
And you would use the following for items:
$('#P_ITEM').val('some text'),
The last case is similar to a dynamic action where the affected object is an item.
You can test all this yourself:
- Go to the page and click on the edit icon in the page section.
- Create a JavaScript function.
- In the HTML header and body attribute, enter the following in the HTML header text area:
<script type="text/javascript"> function set_div(){ document.getElementById("dynamicdiv").innerHTML = "This is some text in a div"; } </script> - [1346_03_07.txt]
- Click the Apply changes button.
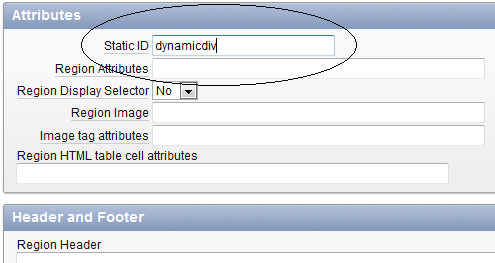
- Assign an ID for the related articles div (region):
- Click on the related articles region. In the attributes section, enter dynamicdiv in the static ID text field. Click the Apply changes button.
Create a text item:
- In the items section, click on the add icon.
- Select text field. Click Next. In the item name text field, enter a name and in the Region list box, select the tag cloud region. Click Next three times. Click the Create item button.
- Click on the newly created item. In the element section, enter the following in the HTML form element attributes:
onblur=set_div();
- [1346_03_08.txt]
The onblur event fires when the user navigates out of the item, by the tab key, the enter key, or by clicking the mouse pointer somewhere else.
- Click the Apply changes button.
Run the page. Click on the item you just created and navigate out of the item using the tab or enter key. The div should show the text "This is some text in a div". This is just an example to show you what a dynamic action actually does. Don't mind the strange onblur event on the item to trigger an event. An onclick event was not possible as the entire tag cloud had an onclick event triggering the dynamic action to set the related articles region.
The static ID for the div is necessary, otherwise APEX generates its own ID, which looks something like "R431819100396833156". And then you have to find the div ID using the page source of the webpage.