
Before a developer can do something in APEX, he or she needs to have a workspace. The workspace is linked to a schema. In this recipe, you will be creating a workspace manually and assign a schema to it.
Before you can do this recipe, you need to have access to the internal workspace. The internal workspace is a special workspace where the APEX administration applications reside. There is also one user created already and that is the admin user.
There are three ways to start the APEX administration:
- Use the link
http://yourhost:port/apex/apex_adminand log in using the admin login credentials. - Use the link in the lower left corner of the login page (Administration).
- Use the link
http://yourhost:port/apexand log in as admin on the internal workspace.

The password can be set using the apxxepwd.sql script. You can find this script in the Apex directory in the Oracle home of the RDBMS 11g installation or in the downloaded ZIP file of APEX. It is the same directory where the APEX install script is. Run the script as the sys user with the password as the first parameter:
@apxxepwd <password>
Here, you should substitute<password> with your own chosen password. The next logon as admin user you need to change the password. Provide the current, just created password and the new password twice (to confirm). After that, log out and log in using the new, changed password and you're in.
- Go to Instance Administration | Manage Workspaces.
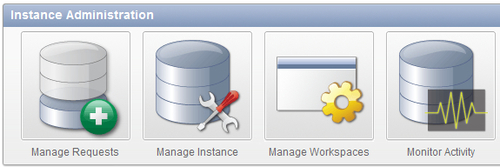
- In the workspace actions section, click Create workspace.
- In the next step, enter a workspace name, for example, Test.
- You can also enter a workspace ID and a description to explain what the workspace is used for.
- Click Next.
- If you want to create a workspace on an existing schema, enter the schema name and select Yes in the "re-use existing schema" list box. If you want to create a new schema, select No in the "re-use existing schema" list box and enter a username, a password and the size of the tablespace. Click Next.
- Next, enter the administrator username and password. Usually, the administrator username is ADMIN (it is also default displayed). Also enter the e-mail address of the administrator user. Click Next.
- Click the Create workspace button.
- The workspace is ready now and it already has one user, the ADMIN user.
You can now add users to the workspace. We'll cover that later in the chapter.
Every workspace has initially one user: the workspace Administrator user. This user can create more users for the workspace, set workspace preferences, and make a request for more storage or a new schema. Every user can be made a workspace administrator. Log in as workspace administrator and go to Administration | Manage Users and Groups.
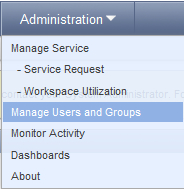
Select the user to be changed by clicking on the edit pencil on the left of the user. In the account privileges section, select Yes in the "User is a workspace administrator" radio button.