
In this recipe, we will show you how to work with templates. We will create a report which presents data from the APP_CUSTOMERS table.
Make sure you have installed Oracle BI Publisher desktop. BI Publisher desktop is packed with BI Publisher Enterprise. You can find it in<local hard drive>:OraHome_1xmlpXMLPTools, assuming that you have installed Oracle BI Publisher in OraHome_1. During installation, all Microsoft applications such as Word and Outlook need to be closed.
After installation, Microsoft Word is enriched with a BI Publisher add-on. How the plug-in looks depends on the version of Word.
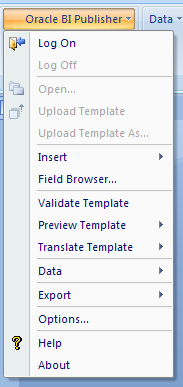
- Open Microsoft Word.
- Select Add-ons.
- Click the Oracle BI Publisher tab and select Data Load sample XML data.

- In the pop-up window, select the file that you just created in APEX. Click to open the file.
- It seems that nothing happens. That is OK.
- Click the Oracle BI Publisher tab again and select Insert Table wizard.
- A pop-up window with a wizard appears.

- Select Table and click Next.
- Click Next.
- We want to select all columns, so click the button with the double arrows.
- Click Next.
- If desired, you can group the report in the next step. If you don't want to group, just click Next.
- In the next step, you can enter the sort order. Select the column that you want to use to order the data (or leave the sort by list box empty) and click Next.
- In the last step, you can enter a different name for the labels. Click Finish.
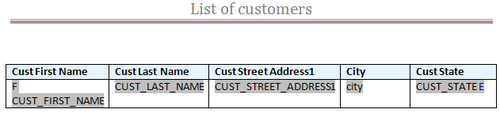
- The wizard is ready now and if everything went OK, you will see a table with a header and five columns.
- You can also add a header and a footer to the document to make it complete.
- Save the report by clicking on the Save button. In the pop-up window that appears, select RTF in the Save as list box. In the filename field, enter a name for the report, for example, customers_layout.rtf. Select the desired map and click Save.
- Close Microsoft Word. The layout is ready and saved in the
.rtffile.
Take a closer look at the .rtf file in Microsoft Word. In the second row of the table that you see, you can see the names of the columns of the report query. Just before the first column, you see an "F". Behind the last column, you see an "E". These are actually control fields. "F" stands for "for each" and "E" stands for "end". This is very important, because APEX recognizes these fields. On running the report, APEX loops through the records and replaces the columns by the values of the query.