
By default a workspace has got one schema where it uses the objects from. You can add more schemas to a workspace. This recipe tells you how to do that.
There are two ways to add a schema to a workspace:
- Log in to the internal workspace as administrator and go to Manage workspaces | Manage workspace to schema assignments.
- Log in as workspace administrator and go to Administration | Manage service | Make a service request.
- Go to Administration | Manage service | Make a service request.
- Click the Request schema icon.
- In the next step, select Use an existing schema and enter the name of the schema you want to add. Click Next.
- You will get a message that you have requested that the existing schema be assigned to the workspace.
We will now continue as the instance administrator so log on to the internal workspace as administrator.
The internal administrator will now get a message when he or she logs on to the internal workspace.
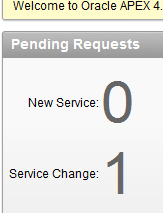
- Click on the 1 behind the service change.
- You will get an overview of open requests. Click the View request link.
- An overview of the request is shown now. Click the Assign schema button in the upper-right corner to approve the request.
- The requestor of the schema will get an e-mail with the message that the request is approved.
You can add one or more schemas to a workspace. When you create an application, you can choose which schema you will use for the application. But you can of course reference to tables from another schema if your schema is granted the necessary privileges. So, a workspace can access more schemas but an application is limited to only one schema. You can see which parsing schema an application uses. Log on to the internal workspace and go to Manage workspaces and click the Parsing schemas link in the manage applications section.
You can also control which schemas a user can access in SQL workshop. Log on as the workspace administrator and go to administration manage users and groups. Edit a user by clicking on the edit pencil. You will see that in the account privileges section there is an item called accessible schemas, where you can enter the names of the schemas where the user has access to in SQL workshop. This item is not available when you edit a user via the internal workspace.