In the previous three recipes of this chapter, we have created Features, To-do's, and Bugs. When creating those, we also noticed the possibility of linking these to Milestones.
Milestones are moments of significance in a project. This is different for every project of course, but examples of a Milestone can be a release, a demo, or (when in a Scrum project) the end of a sprint.
In this recipe, we are going to see how we can create a milestone, link it to existing objects in Team Development, and how the calendar can help in keeping track of progress.
Open the Milestones in Team Development. This section also has a Dashboard overview. One of the pieces of this Dashboard is especially interesting. Have a look at the Component Counts.
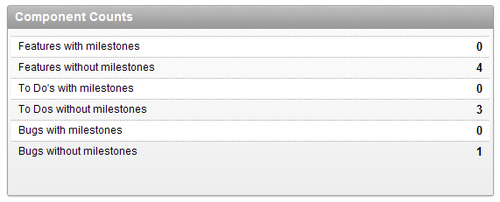
This overview shows exactly how many Features, To-do's, and Bugs there are and if they are linked to a Milestone. Using this, we can see if all pieces of the project are assigned.
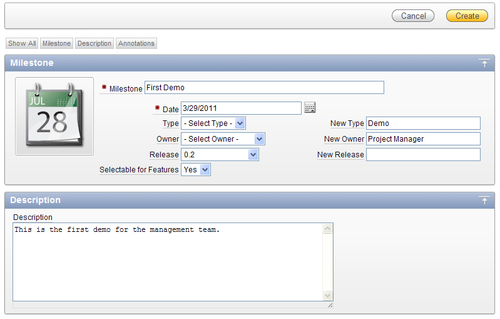
For this example, we are going to create the Milestone First Demo.
- Press the Create Milestone button.
- The Milestone is called First Demo.
- Select the Date of March 29th 2011.
- Enter a New Type called Demo.
- Enter a New Owner called Project Manager.
- Select the "0.2" Release.
- Leave Selectable for Features on Yes.
- Enter the description: This is the first demo for the management team.
- Press the Create button.
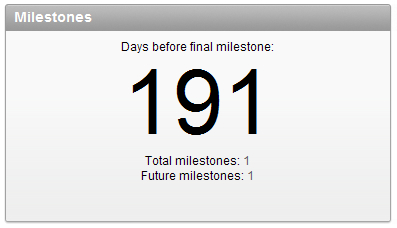
We are automatically returned to the Milestone Dashboard. Prominent in the screen is now a large number that counts down the number of days until the final Milestone is reached.
To assign the Features, To-do's, and Bugs to this Milestone, we have a bit of a cumbersome task ahead of us. Because we can't assign them from within a Milestone, we are going to have to open each Feature, To-do, and Bug and assign them to a Milestone from there.
- Return to the Team Development overview.
- Go to Features.
- Click on the Features tab.
- Click on the Edit icon in front of the first Feature.
- Select the First Demo Milestone from the appropriate select list.
- Click the Apply Changes button.
- Repeat this for the other Features.
- Repeat the procedure for To-do's and Bugs.
This showed that it can be a big job to assign Features, To-do's, and Bugs to a Milestone afterwards. It is better to have a decent planning of Milestones ready before starting a project. Then we can directly assign all project deliverables to a Milestone when the deliverable is created.
Now that we have assigned all Features, To-do's and Bugs to the Milestone, we can take a look at the Milestone Dashboard again. The content of this is a lot more interesting now.
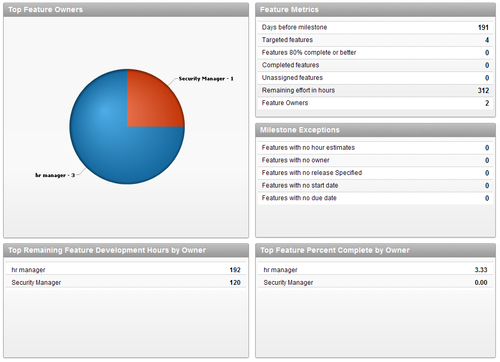
On top of the screen is an Edit button. This is the same as the Edit icon on the Milestones tab. Press it to open the Milestone Edit window.
In this window, there are now two new sections to give an overview of the associated To-do's and Features.
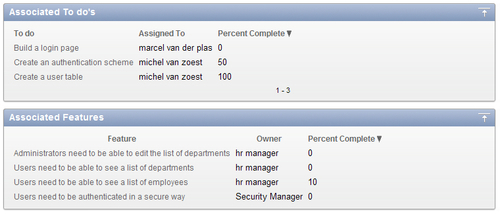
This is also a nice way to keep track of the progress of the project.
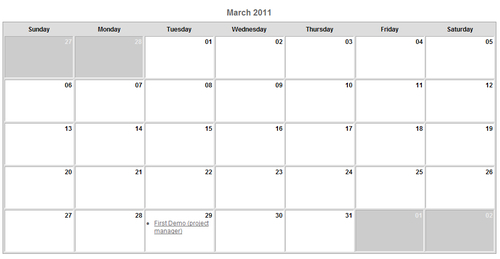
The Edit window can also be reached by going to the Calendar tab and clicking on the link of the corresponding Milestone. When more Milestones are created, the Project Managers can quickly see the status of their project and take action if necessary.
