
In the previous paragraph we showed you how to create a workspace manually. You can semi-automate this process by putting a link on the login page so any end-user can request their own workspace. This request will be handled by the instance administrator. This recipe will show you how to create a workspace by request.
First of all, you need to put the link on the login page:
- Log in as admin on the internal workspace.
- Go to Manage instance.
- In the instance settings section, click Instance settings.
- In the self service section, click the Request radio button.
- In the e-mail section, enter the name of the SMTP-server that you use to send outgoing mails. If you don't know the name of your SMTP-server, contact your system administrator.
- Click the Apply changes button.
The result is that you will see a link Request a Workspace in the workspace section.
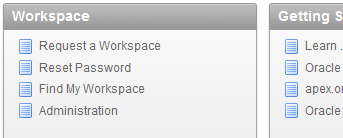
- Go to the login page of APEX.
- In the workspace section in the lower-left corner, click Request a workspace.
- A wizard is started with a welcome message. Click Next.
- Enter your name and your e-mail address. Click Next.
- Enter a name for the workspace and click Next.
- In the next step you can choose whether to use an existing schema or a new schema. We will request a new schema. Click Next.
- Enter the name of the new schema and click Next.
- In the next step enter the reason you request the workspace and click Next.
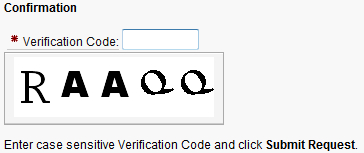
- In the last step, confirm your request by entering the Captcha (this is an extra check that the request comes from you and not from any search-robot) and clicking Submit Request.
- The request is made now and the administrator gets a signal that there is a request. Log in as administrator on the internal workspace and go to the homepage. You will see something like this:
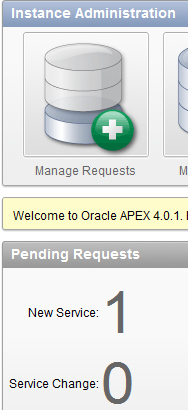
- Click on the number (1) to see the request.

- Click on the Provision link.
- In the next step you can approve or decline the request. If you decline the request, you will get a text area with a standard mail text where you can put some text yourself, for example, why you decline the request. For this recipe, we will approve the request for the workspace.
- Click the Approve button.
- You will see a text area which shows a standard mail text to the requestor of the workspace. You can put some additional text here if you want to. After that, click the Approve and send email button.
- A message appears that the workspace is accepted and that an e-mail is sent.
- The requestor will receive an e-mail with the login details.
- With these details, the user can log in to the new workspace.
If the requestor does not receive an e-mail, something could be wrong with the outgoing internet connection. You can check a few things to make sure your Oracle database has internet access.
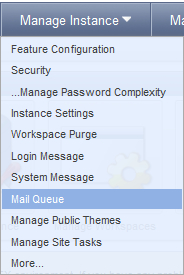
First of all, check if the mail is really sent. You can check that by going to Manage Instance | Mail queue (in the manage meta data section).
All pending e-mails that have not yet been sent are in the list. If an error occurred, you can see the error message in the error column. If you think that this error has been fixed, you can resend the e-mail by clicking the Send all mail button. APEX will then try again.
Another possible reason for not sending e-mails is that you have not yet set up the e-mail. Go to Manage Instance | Instance settings (in section instance settings). Go to the e-mail section and verify that SMTP host address and Administration E-mail address are entered.
If you request a workspace, you usually get a username that is the same as your e-mail address. This user is also the workspace administrator.