
Working with Dialogs
The Android SDK offers extensive support for dialogs. A dialog is a smaller window that pops up in front of the current window to show an urgent message, to prompt the user for a piece of input, or to show some sort of status like the progress of a download. The user is generally expected to interact with the dialog and then return to the window underneath to continue with the application. Technically, Android allows a dialog fragment to also be embedded within an activity’s layout, and we’ll cover that as well.
Dialogs that are explicitly supported in Android include the alert, prompt, pick-list, single-choice, multiple-choice, progress, time-picker, and date-picker dialogs. (This list could vary depending on the Android release.) Android also supports custom dialogs for other needs. The primary purpose of this chapter is not to cover every single one of these dialogs but to cover the underlying architecture of Android dialogs with a sample application. From there you should be able to use any of the Android dialogs.
It’s important to note that Android 3.0 added dialogs based on fragments. The expectation from Google is that developers will only use fragment dialogs, even in the versions of Android before 3.0. This can be done with the fragment-compatibility library. For this reason, this chapter focuses on DialogFragment.
Dialogs in Android are asynchronous, which provides flexibility. However, if you are accustomed to a programming framework where dialogs are primarily synchronous (such as Microsoft Windows, or JavaScript dialogs in web pages), you might find asynchronous dialogs a bit unintuitive. With a synchronous dialog, the line of code after the dialog is shown does not run until the dialog has been dismissed. This means the next line of code could interrogate which button was pressed, or what text was typed into the dialog. In Android however, dialogs are asynchronous. As soon as the dialog has been shown, the next line of code runs, even though the user hasn’t touched the dialog yet. Your application has to deal with this fact by implementing callbacks from the dialog, to allow the application to be notified of user interaction with the dialog.
This also means your application has the ability to dismiss the dialog from code, which is powerful. If the dialog is displaying a busy message because your application is doing something, as soon as your application has completed that task, it can dismiss the dialog from code.
Understanding Dialog Fragments
In this section, you learn how to use dialog fragments to present a simple alert dialog and a custom dialog that is used to collect prompt text.
DialogFragment Basics
Before we show you working examples of a prompt dialog and an alert dialog, we would like to cover the high-level idea of dialog fragments. Dialog-related functionality uses a class called DialogFragment. A DialogFragment is derived from the class Fragment and behaves much like a fragment. You will then use the DialogFragment as the base class for your dialogs. Once you have a derived dialog from this class such as
public class MyDialogFragment extends DialogFragment { ... }
you can then show this dialog fragment MyDialogFragment as a dialog using a fragment transaction. Listing 10-1 shows a code snippet to do this.
Listing 10-1. Showing a Dialog Fragment
public class SomeActivity extends Activity
{
    //....other activity functions
    public void showDialog()
    {
        //construct MyDialogFragment
        MyDialogFragment mdf = MyDialogFragment.newInstance(arg1,arg2);
        FragmentManager fm = getFragmentManager();
        FragmentTransaction ft = fm.beginTransaction();
        mdf.show(ft,"my-dialog-tag");
    }
    //....other activity functions
}
Note We provide a link to a downloadable project at the end of this chapter in the “References” section. You can use this download to experiment with the code and the concepts presented in this chapter.
From Listing 10-1, the steps to show a dialog fragment are as follows:
- Create a dialog fragment.
- Get a fragment transaction.
- Show the dialog using the fragment transaction from step 2.
Let’s talk about each of these steps.
Constructing a Dialog Fragment
When constructing a dialog fragment, the rules are the same as when building any other kind of fragment. The recommended pattern is to use a factory method such as newInstance() as you did before. Inside that newInstance() method, you use the default constructor for your dialog fragment, and then you add an arguments bundle that contains your passed-in parameters. You don’t want to do other work inside this method because you must make sure that what you do here is the same as what Android does when it restores your dialog fragment from a saved state. And all that Android does is to call the default constructor and re-create the arguments bundle on it.
When you inherit from a dialog fragment, you need to override one of two methods to provide the view hierarchy for your dialog. The first option is to override onCreateView() and return a view. The second option is to override onCreateDialog() and return a dialog (like the one constructed by an AlertDialog.Builder, which we’ll get to shortly).
Listing 10-2 shows an example of overriding the onCreateView().
Listing 10-2. Overriding onCreateView() of a DialogFragment
public class MyDialogFragment extends DialogFragment
    implements View.OnClickListener
{
    .....other functions
    public View onCreateView(LayoutInflater inflater,
            ViewGroup container, Bundle savedInstanceState)
    {
        //Create a view by inflating desired layout
        View v =
 inflater.inflate(R.layout.prompt_dialog, container, false);

        //you can locate a view and set values
        TextView tv = (TextView)v.findViewById(R.id.promptmessage);
        tv.setText(this.getPrompt());

        //You can set callbacks on buttons
        Button dismissBtn = (Button)v.findViewById(R.id.btn_dismiss);
        dismissBtn.setOnClickListener(this);

        Button saveBtn = (Button)v.findViewById(R.id.btn_save);
        saveBtn.setOnClickListener(this);
        return v;
    }
    .....other functions
}
In Listing 10-2, you are loading a view identified by a layout. Then you look for two buttons and set up callbacks on them. This is very similar to how you created the details fragment in Chapter 8. However, unlike the earlier fragments, a dialog fragment has another way to create the view hierarchy.
As an alternate to supplying a view in onCreateView(), you can override onCreateDialog() and supply a dialog instance. Listing 10-3 supplies sample code for this approach.
Listing 10-3. Overriding onCreateDialog() of a DialogFragment
public class MyDialogFragment extends DialogFragment
    implements DialogInterface.OnClickListener
{
    .....other functions
    @Override
    public Dialog onCreateDialog(Bundle icicle)
    {
        AlertDialog.Builder b = new AlertDialog.Builder(getActivity())
          .setTitle("My Dialog Title")
          .setPositiveButton("Ok", this)
          .setNegativeButton("Cancel", this)
          .setMessage(this.getMessage());
        return b.create();
    }
    .....other functions
}
In this example, you use the alert dialog builder to create a dialog object to return. This works well for simple dialogs. The first option of overriding onCreateView() is equally easy and provides much more flexibility.
AlertDialog.Builder is actually a carryover from pre-3.0 Android. This is one of the old ways to create a dialog, and it’s still available to you to create dialogs within DialogFragments. As you can see, it’s fairly easy to build a dialog by calling the various methods available, as we’ve done here.
Once you have a dialog fragment constructed, you need a fragment transaction to show it. Like all other fragments, operations on dialog fragments are conducted through fragment transactions.
The show() method on a dialog fragment takes a fragment transaction as an input. You can see this in Listing 10-1. The show() method uses the fragment transaction to add this dialog to the activity and then commits the fragment transaction. However, the show() method does not add the transaction to the back stack. If you want to do this, you need to add this transaction to the back stack first and then pass it to the show() method. The show() method of a dialog fragment has the following signatures:
public int show(FragmentTransaction transaction, String tag)
public int show(FragmentManager manager, String tag)
The first show() method displays the dialog by adding this fragment to the passed-in transaction with the specified tag. This method then returns the identifier of the committed transaction.
The second show() method automates getting a transaction from the transaction manager. This is a shortcut method. However, when you use this second method, you don’t have an option to add the transaction to the back stack. If you want that control, you need to use the first method. The second method could be used if you wanted to simply display the dialog, and you had no other reason to work with a fragment transaction at that time.
A nice thing about a dialog being a fragment is that the underlying fragment manager does the basic state management. For example, even if the device rotates when a dialog is being displayed, the dialog is reproduced without you performing any state management.
The dialog fragment also offers methods to control the frame in which the dialog’s view is displayed, such as the title and the appearance of the frame. Refer to the DialogFragment class documentation to see more of these options; this URL is provided at the end of this chapter.
Dismissing a Dialog Fragment
There are two ways you can dismiss a dialog fragment. The first is to explicitly call the dismiss() method on the dialog fragment in response to a button or some action on the dialog view, as shown in Listing 10-4.
Listing 10-4. Calling dismiss()
if (someview.getId() == R.id.btn_dismiss)
{
    //use some callbacks to advise clients
    //of this dialog that it is being dismissed
    //and call dismiss
    dismiss();
    return;
}
The dialog fragment’s dismiss() method removes the fragment from the fragment manager and then commits that transaction. If there is a back stack for this dialog fragment, then the dismiss() pops the current dialog out of the transaction stack and presents the previous fragment transaction state. Whether there is a back stack or not, calling dismiss() results in calling the standard dialog fragment destroy callbacks, including onDismiss().
One thing to note is that you can’t rely on onDismiss() to conclude that a dismiss() has been called by your code. This is because onDismiss() is also called when a device configuration changes and hence is not a good indicator of what the user did to the dialog itself. If the dialog is being displayed when the user rotates the device, the dialog fragment sees onDismiss() called even though the user did not press a button in the dialog. Instead, you should always rely on explicit button clicks on the dialog view.
If the user presses the Back button while the dialog fragment is displayed, this causes the onCancel() callback to fire on the dialog fragment. By default, Android makes the dialog fragment go away, so you don’t need to call dismiss() on the fragment yourself. But if you want the calling activity to be notified that the dialog has been cancelled, you need to invoke logic from within onCancel() to make that happen. This is a difference between onCancel() and onDismiss() with dialog fragments. With onDismiss(), you can’t be sure exactly what happened that caused the onDismiss() callback to fire. You might also have noticed that a dialog fragment does not have a cancel() method, just dismiss(); but as we said, when a dialog fragment is being cancelled by pressing the Back button, Android takes care of cancelling/dismissing it for you.
The other way to dismiss a dialog fragment is to present another dialog fragment. The way you dismiss the current dialog and present the new one is slightly different than just dismissing the current dialog. Listing 10-5 shows an example.
Listing 10-5. Setting Up a Dialog for a Back Stack
if (someview.getId() == R.id.btn_invoke_another_dialog)
{
    Activity act = getActivity();
    FragmentManager fm = act.getFragmentManager();
    FragmentTransaction ft = fm.beginTransaction();
    ft.remove(this);

    ft.addToBackStack(null);
    //null represents no name for the back stack transaction

    HelpDialogFragment hdf =
        HelpDialogFragment.newInstance(R.string.helptext);
    hdf.show(ft, "HELP");
    return;
}
Within a single transaction, you’re removing the current dialog fragment and adding the new dialog fragment. This has the effect of making the current dialog disappear visually and making the new dialog appear. If the user presses the Back button, because you’ve saved this transaction on the back stack, the new dialog is dismissed and the previous dialog is displayed. This is a handy way of displaying a help dialog, for example.
Implications of a Dialog Dismiss
When you add any fragment to a fragment manager, the fragment manager does the state management for that fragment. This means when a device configuration changes (for example, the device rotates), the activity is restarted and the fragments are also restarted. You saw this earlier when you rotated the device while running the Shakespeare sample application in chapter 8.
A device-configuration change doesn’t affect dialogs because they are also managed by the fragment manager. But the implicit behavior of show() and dismiss() means you can easily lose track of a dialog fragment if you’re not careful. The show() method automatically adds the fragment to the fragment manager; the dismiss() method automatically removes the fragment from the fragment manager. You may have a direct pointer to a dialog fragment before you start showing the fragment. But you can’t add this fragment to the fragment manager and later call show(), because a fragment can only be added once to the fragment manager. You may plan to retrieve this pointer through restore of the activity. However, if you show and dismiss this dialog, this fragment is implicitly removed from the fragment manager, thereby denying that fragment’s ability to be restored and repointed (because the fragment manager doesn’t know this fragment exists after it is removed).
If you want to keep the state of a dialog after it is dismissed, you need to maintain the state outside of the dialog either in the parent activity or in a non-dialog fragment that hangs around for a longer time.
DialogFragment Sample Application
In this section, you review a sample application that demonstrates these concepts of a dialog fragment. You also examine communication between a fragment and the activity that contains it. To make it all happen, you need five Java files:
- MainActivity.java: The main activity of your application. It displays a simple view with help text in it and a menu from which dialogs can be started.
- PromptDialogFragment.java: An example of a dialog fragment that defines its own layout in XML and allows input from the user. It has three buttons: Save, Dismiss (cancel), and Help.
- AlertDialogFragment.java: An example of a dialog fragment that uses the AlertBuilder class to create a dialog within this fragment. This is the old-school way of creating a dialog.
- HelpDialogFragment.java: A very simple fragment that displays a help message from the application’s resources. The specific help message is identified when a help dialog object is created. This help fragment can be shown from both the main activity and the prompt dialog fragment.
- OnDialogDoneListener.java: An interface that you require your activity to implement in order to get messages back from the fragments. Using an interface means your fragments don’t need to know much about the calling activity, except that it must have implemented this interface. This helps encapsulate functionality where it belongs. From the activity’s point of view, it has a common way to receive information back from fragments without needing to know too much about them.
There are three layouts for this application: for the main activity, for the prompt dialog fragment, and for the help dialog fragment. Note that you don’t need a layout for the alert dialog fragment because the AlertBuilder takes care of that layout for you internally. When you’re done, the application looks like Figure 10-1.
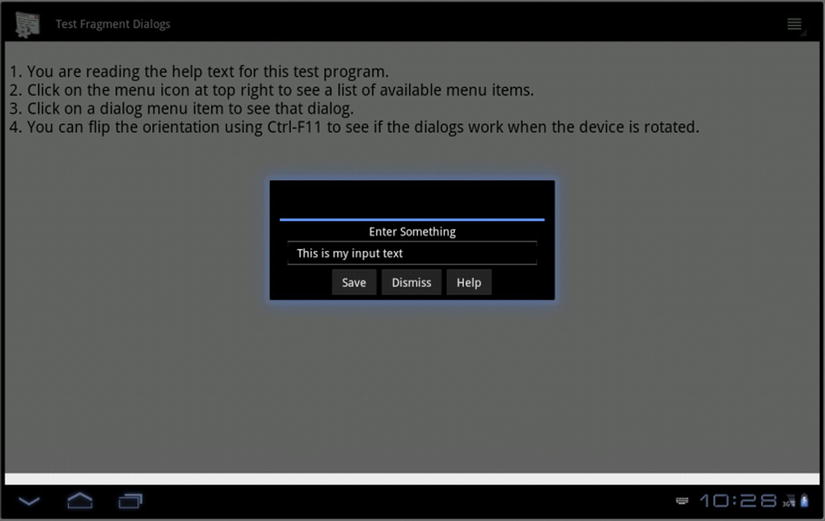
Figure 10-1. The user interface for the dialog fragment sample application
Dialog Sample: MainActivity
Let’s get to the source code, which you can download from the book’s web site (see the “References” section). We’ll use the DialogFragmentDemo project. Open up the source code for MainActivity.java before we continue.
The code for the main activity is very straightforward. You display a simple page of text and set up a menu. Each menu item invokes an activity method, and each method does basically the same thing: gets a fragment transaction, creates a new fragment, and shows the fragment. Note that each fragment has a unique tag that’s used with the fragment transaction. This tag becomes associated with the fragment in the fragment manager, so you can locate these fragments later by tag name. The fragment can also determine its own tag value with the getTag() method on Fragment.
The last method definition in the main activity is onDialogDone(), which is a callback that is part of the OnDialogDoneListener interface that your activity is implementing. As you can see, the callback supplies a tag of the fragment that is calling you, a boolean value indicating whether the dialog fragment was cancelled, and a message. For your purposes, you merely want to log the information to LogCat; you also show it to the user using Toast. Toast will be covered later in this chapter.
Dialog Sample: OnDialogDoneListener
So that you can know when a dialog has gone away, create a listener interface that your dialog callers implement. The code of the interface is in OnDialogDoneListener.java.
This is a very simple interface, as you can see. You choose only one callback for this interface, which the activity must implement. Your fragments don’t need to know the specifics of the calling activity, only that the calling activity must implement the OnDialogDoneListener interface; therefore the fragments can call this callback to communicate with the calling activity. Depending on what the fragment is doing, there could be multiple callbacks in the interface. For this sample application, you’re showing the interface separately from the fragment class definitions. For easier management of code, you could embed the fragment listener interface inside of the fragment class definition itself, thus making it easier to keep the listener and the fragment in sync with each other.
Dialog Sample: PromptDialogFragment
Now let’s look at your first fragment, PromptDialogFragment, whose layout is in /res/layout/prompt_dialog.xml and Java code is under /src in PromptDialogFragment.java.
This prompt dialog layout looks like many you’ve seen previously. There is a TextView to serve as the prompt; an EditText to take the user’s input; and three buttons for saving the input, dismissing (cancelling) the dialog fragment, and popping a help dialog.
The PromptDialogFragment Java code starts out looking just like your earlier fragments. You have a newInstance() static method to create new objects, and within this method you call the default constructor, build an arguments bundle, and attach it to your new object. Next, you have something new in the onAttach() callback. You want to make sure the activity you just got attached to has implemented the OnDialogDoneListener interface. In order to test that, you cast the activity passed in to the OnDialogDoneListener interface. Here’s that code:
try {
    OnDialogDoneListener test = (OnDialogDoneListener)act;
}
catch(ClassCastException cce) {
    // Here is where we fail gracefully.
    Log.e(MainActivity.LOGTAG, "Activity is not listening");
}
If the activity does not implement this interface, a ClassCastException is thrown. You could handle this exception and deal with it more gracefully, but this example keeps the code as simple as possible.
Next up is the onCreate() callback. As is common with fragments, you don’t build your user interface here, but you can set the dialog style. This is unique to dialog fragments. You can set both the style and the theme yourself, or you can set just style and use a theme value of zero (0) to let the system choose an appropriate theme for you. Here’s that code:
int style = DialogFragment.STYLE_NORMAL, theme = 0;
setStyle(style,theme);
In onCreateView() you create the view hierarchy for your dialog fragment. Just like other fragments, you do not attach your view hierarchy to the view container passed in (that is, by setting the attachToRoot parameter to false). You then proceed to set up the button callbacks, and you set the dialog prompt text to the prompt that was passed originally to newInstance().
The onCancel() and onDismiss() callbacks are not shown because all they do is logging; you’ll be able to see when these callbacks fire during the fragment’s lifecycle.
The final callback in the prompt dialog fragment is for the buttons. Once again, you grab a reference to your enclosing activity and cast it to the interface you expect the activity to have implemented. If the user pressed the Save button, you grab the text as entered and call the interface’s callback onDialogDone(). This callback takes the tag name of this fragment, a boolean indicating whether this dialog fragment was cancelled, and a message, which in this case is the text typed by the user. Here it is from the MainActivity:
public void onDialogDone(String tag, boolean cancelled,
                         CharSequence message) {
    String s = tag + " responds with: " + message;
    if(cancelled)
        s = tag + " was cancelled by the user";
    Toast.makeText(this, s, Toast.LENGTH_LONG).show();
    Log.v(LOGTAG, s);
}
To finish handling a click on the Save button, you then call dismiss() to get rid of the dialog fragment. Remember that dismiss() not only makes the fragment go away visually, but also pops the fragment out of the fragment manager so it is no longer available to you.
If the button pressed is Dismiss, you again call the interface callback, this time with no message, and then you call dismiss(). And finally, if the user pressed the Help button, you don’t want to lose the prompt dialog fragment, so you do something a little different. We described this earlier. In order to remember the prompt dialog fragment so you can come back to it later, you need to create a fragment transaction to remove the prompt dialog fragment and add the help dialog fragment with the show() method; this needs to go onto the back stack. Notice, too, how the help dialog fragment is created with a reference to a resource ID. This means your help dialog fragment can be used with any help text available to your application.
Dialog Sample: HelpDialogFragment
You created a fragment transaction to go from the prompt dialog fragment to the help dialog fragment, and you placed that fragment transaction on the back stack. This has the effect of making the prompt dialog fragment disappear from view, but it’s still accessible through the fragment manager and the back stack. The new help dialog fragment appears in its place and allows the user to read the help text. When the user dismisses the help dialog fragment, the fragment back stack entry is popped, with the effect of the help dialog fragment being dismissed (both visually and from the fragment manager) and the prompt dialog fragment restored to view. This is a pretty easy way to make all this happen. It is very simple yet very powerful; it even works if the user rotates the device while these dialogs are being displayed.
Look at the source code of the HelpDialogFragment.java file and its layout (help_dialog.xml). The point of this dialog fragment is to display help text. The layout is a TextView and a Close button. The Java code should be starting to look familiar to you. There’s a newInstance() method to create a new help dialog fragment, an onCreate() method to set the style and theme, and an onCreateView() method to build the view hierarchy. In this particular case, you want to locate a string resource to populate the TextView, so you access the resources through the activity and choose the resource ID that was passed in to newInstance(). Finally, onCreateView() sets up a button-click handler to capture the clicks of the Close button. In this case, you don’t need to do anything interesting at the time of dismissal.
This fragment is called two ways: from the activity and from the prompt dialog fragment. When this help dialog fragment is shown from the main activity, dismissing it simply pops the fragment off the top and reveals the main activity underneath. When this help dialog fragment is shown from the prompt dialog fragment, because the help dialog fragment was part of a fragment transaction on the back stack, dismissing it causes the fragment transaction to be rolled back, which pops the help dialog fragment but restores the prompt dialog fragment. The user sees the prompt dialog fragment reappear.
Dialog Sample: AlertDialogFragment
We have one last dialog fragment to show you in this sample application: the alert dialog fragment. Although you could create an alert dialog fragment in a way similar to the help dialog fragment, you can also create a dialog fragment using the old AlertBuilder framework that has worked for many releases of Android. Look at the source code in AlertDialogFragment.java.
You don’t need a layout for this one because the AlertBuilder takes care of that for you. Note that this dialog fragment starts out like any other, but instead of an onCreateView() callback, you have a onCreateDialog() callback. You implement either onCreateView() or onCreateDialog() but not both. The return from onCreateDialog() is not a view; it’s a dialog. Of interest here is that to get parameters for the dialog, you should be accessing your arguments bundle. In this example application, you only do this for the alert message, but you could access other parameters through the arguments bundle as well.
Notice also that with this type of dialog fragment, you need your fragment class to implement the DialogInterface.OnClickListener, which means your dialog fragment must implement the onClick() callback. This callback is fired when the user acts on the embedded dialog. Once again, you get a reference to the dialog that fired and an indication of which button was pressed. As before, you should be careful not to depend on an onDismiss() because this could fire when there is a device configuration change.
Dialog Sample: Embedded Dialogs
There’s one more feature of a DialogFragment that you may have noticed. In the main layout for the application, under the text, is a FrameLayout that can be used to hold a dialog. In the application’s menu, the last item causes a fragment transaction to add a new instance of a PromptDialogFragment to the main screen. Without any modifications, the dialog fragment can be displayed embedded in the main layout, and it functions as you would expect.
One thing that is different about this technique is that the code to show the embedded dialog is not the same as the code to do a pop-up dialog. The embedded dialog code looks like this:
ft.add(R.id.embeddedDialog, pdf, EMBED_DIALOG_TAG);
ft.commit();
This looks just the same as in Chapter 8, when we displayed a fragment in a FrameLayout. This time, however, you make sure to pass in a tag name, which is used when the dialog fragment notifies your activity of the user’s input.
Dialog Sample: Observations
When you run this sample application, make sure you try all the menu options in different orientations of the device. Rotate the device while the dialog fragments are displayed. You should be pleased to see that the dialogs go with the rotations; you do not need to worry about a lot of code to manage the saving and restoring of fragments due to configuration changes.
The other thing we hope you appreciate is the ease with which you can communicate between the fragments and the activity. Of course, the activity has references, or can get references, to all the available fragments, so it can access methods exposed by the fragments themselves. This isn’t the only way to communicate between fragments and the activity. You can always use the getter methods on the fragment manager to retrieve an instance of a managed fragment, and then cast that reference appropriately and call a method on that fragment directly. You can even do this from within another fragment. The degree to which you isolate your fragments from each other with interfaces and through activities, or build in dependencies with fragment-to-fragment communication, is based on how complex your application is and how much reuse you want to achieve.
A Toast is like a mini alert dialog that has a message and displays for a certain amount of time and then goes away automatically. It does not have any buttons. So it can be said that it is a transient alert message. It’s called Toast because it pops up like toast out of a toaster.
Listing 10-10 shows an example of how you can show a message using Toast.
Listing 10-10. Using Toast for Debugging
//Create a function to wrap a message as a toast
//show the toast
public void reportToast(String message)
{
    String s = MainActivity.LOGTAG + ":" + message;
    Toast.makeText(activity, s, Toast.LENGTH_SHORT).show();
}
The makeText() method in Listing 10-10 can take not only an activity but any context object, such as the one passed to a broadcast receiver or a service, for example. This extends the use of Toast outside of activities.
References
- www.androidbook.com/proandroid5/projects: This chapter’s test project. The name of the ZIP file is ProAndroid5_ch10_Dialogs.zip. The download includes an example of the date- and time-picker dialogs in PickerDialogFragmentDemo.
- http://developer.android.com/guide/topics/ui/dialogs.html: Android SDK document that provides an excellent introduction to working with Android dialogs. You will find here an explanation of how to use managed dialogs and various examples of available dialogs.
- http://developer.android.com/reference/android/content/DialogInterface.html: The many constants defined for dialogs.
- http://developer.android.com/reference/android/app/AlertDialog.Builder.html: API documentation for the AlertDialog builder class.
- http://developer.android.com/reference/android/app/ProgressDialog.html: API documentation for ProgressDialog.
- http://developer.android.com/guide/topics/ui/controls/pickers.html: An Android tutorial for using the date-picker and time-picker dialogs.
Summary
This chapter discussed asynchronous dialogs and how to use dialog fragments, including the following topics:
- What a dialog is and why you use one
- The asynchronous nature of a dialog in Android
- The three steps of getting a dialog to display on the screen
- Creating a fragment
- Two methods for how a dialog fragment can create a view hierarchy
- How a fragment transaction is involved in displaying a dialog fragment, and how to get one
- What happens when the user presses the Back button while viewing a dialog fragment
- The back stack, and managing dialog fragments
- What happens when a button on a dialog fragment is clicked, and how you deal with it
- A clean way to communicate back to the calling activity from a dialog fragment
- How one dialog fragment can call another dialog fragment and still get back to the previous dialog fragment
- The Toast class and how it can be used as a simple alert pop-up