
Broadcast Receivers and Long-Running Services
A broadcast receiver is another component in an Android process, along with activities, content providers, and services. A broadcast receiver is a component that can respond to a broadcast message sent by a client. This message is modeled as an intent. Further, a broadcast message (intent) can be responded to by more than one receiver.
A client component such as an activity or a service uses the sendBroadcast(intent) method, available on the Context class, to send a broadcast. Receiving components of the broadcast intent will need to inherit from a BroadcastReceiver class available in the Android SDK. These broadcast receivers need to be registered in the manifest file through a receiver component tag to indicate that the receiver is interested in responding to a certain type of broadcast intent.
Sending a Broadcast
Listing 16-1 shows sample code that sends a broadcast event. This code creates an intent with a unique intent action string, puts an extra field called message on it, and calls the sendBroadcast() method. Putting the extra on the intent is optional.
Listing 16-1. Broadcasting an Intent
//This code is in class: TestBCRActivity.java
//Project: TestBroadcastReceiver, Download: ProAndroid5_Ch16_TestReceivers.zip
private void testSendBroadcast(Activity activity) {
    //Create an intent with a unique action string
    String uniqueActionString = "com.androidbook.intents.testbc";
    Intent broadcastIntent = new Intent(uniqueActionString);

    //Allow stand alone cross-processes that have broadcast receivers
    //in them to be started even though they are in stopped state.
    broadcastIntent.addFlags(Intent.FLAG_INCLUDE_STOPPED_PACKAGES);

    broadcastIntent.putExtra("message", "Hello world");
    activity.sendBroadcast(broadcastIntent);
}
In Listing 16-1, the action is an arbitrary identifier that suits your needs. To make this action string unique, you may want to use a namespace similar to a Java package. Also, we will talk about the cross-process FLAG_INCLUDE_STOPPED_PACKAGES later in this chapter in the section called “Out-of-Process Receivers.”
Coding a Simple Receiver
Listing 16-2 shows a broadcast receiver that can respond to the broadcasted intent from Listing 16-1.
Listing 16-2. Sample Broadcast Receiver Code
//This class is in TestBroadcastReceiver project in the download
//The download for this chapter is: ProAndroid5_Ch16_TestReceivers.zip
public class TestReceiver extends BroadcastReceiver {
    private static final String tag = "TestReceiver";
    @Override
    public void onReceive(Context context, Intent intent)     {
        Log.d("TestReceiver", "intent=" + intent);
        String message = intent.getStringExtra("message");
        Log.d(tag, message);
    }
}
Creating a broadcast receiver is quite simple. Extend the BroadcastReceiver class and override the onReceive() method. We are able to see the intent in the receiver and extract the message from it. Next we need to register the broadcast receiver in the manifest file as a receiver.
Registering a Receiver in the Manifest File
Listing 16-3 shows how you can declare a receiver as the recipient of the intent whose action is com.androidbook.intents.testbc.
Listing 16-3. A Receiver Definition in the Manifest File
<!--
In filename: AndroidManifest.xml
Project: TestBroadcastReceiver, Download: ProAndroid5_Ch16_TestReceivers.zip
-->
<manifest>
<application>
...
<activity>...</activity>
...
<receiver android:name=".TestReceiver">
    <intent-filter>
        <action android:name="com.androidbook.intents.testbc"/>
    </intent-filter>
</receiver>
...
</application>
</manifest>
The receiver element is a child node of the application element like the other component nodes such as an activity.
With the receiver (Listing 16-2) and its registration in the manifest file (Listing 16-3) available, you can invoke the receiver using the client code in Listing 16-1. We have included a reference to the downloadable ZIP file ProAndroid5_Ch16_TestReceivers.zip for this chapter at the end of this chapter. This ZIP file has two projects. The code referenced so far is in the project TestBroadcastReceiver.
Accommodating Multiple Receivers
The idea of a broadcast is that there could be more than one receiver. Let’s replicate TestReceiver (see Listing 16-2) as TestReceiver2 and see if both can respond to the same broadcast message. The code for TestReceiver2 is presented in Listing 16-4.
Listing 16-4. Source code for TestReceiver2
//Filename: TestReceiver2.java
//Project: TestBroadcastReceiver, Download: ProAndroid5_Ch16_TestReceivers.zip
public class TestReceiver2 extends BroadcastReceiver {
    private static final String tag = "TestReceiver2";
    @Override
    public void onReceive(Context context, Intent intent)     {
        Log.d(tag, "intent=" + intent);
        String message = intent.getStringExtra("message");
        Log.d(tag, message);
    }
}
Add this receiver to your manifest file as shown in Listing 16-5.
Listing 16-5. TestReceiver2 Definition in the Manifest File
<!--
In filename: AndroidManifest.xml
Project: TestBroadcastReceiver, Download: ProAndroid5_Ch16_TestReceivers.zip
-->
<receiver android:name=".TestReceiver2">
    <intent-filter>
        <action android:name="com.androidbook.intents.testbc"/>
    </intent-filter>
</receiver>
Now, if you fire off the event as in Listing 16-1, both receivers will be called.
We have indicated in Chapter 13 that the main thread runs all the broadcast receivers that belong to a single process. You can prove this by printing out the thread signature in each of the receivers, including the main line invoking code. You will see the same thread running through this code sequentially. The sendBroadcast() queues the broadcast message and lets the main thread get back to its queue. Response to this queued message by a receiver is carried out by the same main thread in order. When there are multiple receivers, it is not good design to rely on the order of execution as to which receiver is invoked first.
Working with Out-of-Process Receivers
The intention of a broadcast is more likely that the process responding to it is an unknown one and separate from the client process. You can prove this by replicating one of your receivers presented so far and creating a separate .apk file from it. Then when you fire off the event from Listing 16-1, you will see that both the in-process receivers (those that are in the same project or .apk file) and out-of-process receivers (those that are in a separate .apk file) are invoked. You will also see through the LogCat messages that the in-process and out-of-process receivers run in their respective main threads.
However, after API 12 (Android 3.1) there are some wrinkles around broadcast receivers that are in external processes. This is due to the launch model adapted by the SDK for security concerns. You can read about this more in one of the reference links provided for this chapter. With this change an application when installed will be in a stopped state. Intents that can start components can now specify to target those applications that are only in started state. By default the old behavior persists. However, for broadcast intents the system automatically adds a flag to exclude applications that are in stopped state. To overcome the previous point, one can explicitly set an intent flag on the broadcast intent to include those stopped applications as valid targets. This is what you see in code Listing 16-1.
We have included an additional separate stand-alone project called StandaloneBroadcastReceiver in the chapter’s downloadable ZIP file ProAndroid5_Ch16_TestReceivers.zip to test this concept. To try it, you have to deploy both the invoking project TestBroadcastReceiver and the stand-alone receiver’s project StandloneBroadcastReceiver on the emulator. You can then use the TestBroadcastReceiver project to send the broadcast event and monitor the LogCat for the receivers responding from the StandaloneBroadcastReceiver.
Using Notifications from a Receiver
Broadcast receivers often need to communicate to the user about something that happened or as a status. This is usually done by alerting the user through a notification icon in the system-wide notification bar. We will now show you how to create a notification from a broadcast receiver, send it, and view it through the notification manager.
Monitoring Notifications Through the Notification Manager
Android shows icons of notifications as alerts in the notification area. The notification area is located at the top of device in a strip that looks like Figure 16-1. The look and placement of the notification area may change based on whether the device is a tablet or a phone and may at times also change based on Android release.

Figure 16-1. Android notification icon status bar
The notification area shown in Figure 16-1 is called the status bar. It contains system indicators such as battery strength, signal strength, and so on. When we deliver a notification, the notification will appear as an icon in the area shown in Figure 16-1. The notification icon is illustrated in Figure 16-2.
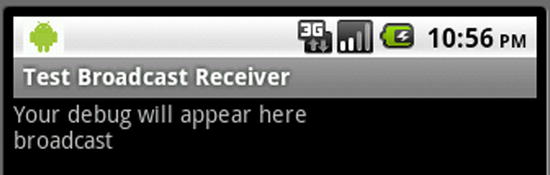
Figure 16-2. Status bar showing a notification icon
The notification icon is an indicator to the user that something needs to be observed. To see the full notification, you have to hold a finger on the icon and drag the title strip shown in Figure 16-2 down like a curtain. This will expand the notification area, as shown in Figure 16-3.
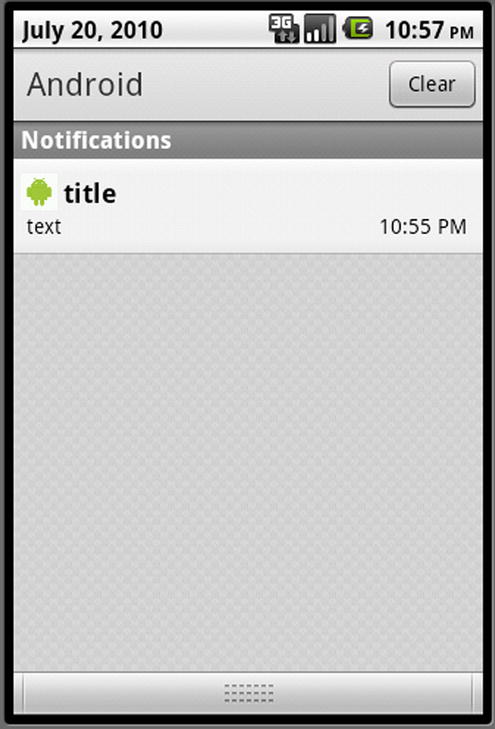
Figure 16-3. Expanded notification view
In the expanded view of the notification in Figure 16-3, you get to see the details supplied to the notification. You can click the notification detail to fire off the intent to bring up the full application to which the notification belongs. You can use this view to clear notifications. Also depending on the device and release there may be alternate ways of opening the notifications. Let’s see now how to generate a notification icon like the one shown in Figures 16-2 and 16-3.
Sending a Notification
When you create a notification object, it needs to have the following elements:
- An icon to display
- Ticker text like “hello world”
- The time when it is delivered
Once you have a notification object constructed, you get the notification manager reference by asking the context for a system service named Context.NOTIFICATION_SERVICE. Then you ask the notification manager to send the notification. Listing 16-6 has the source code for a broadcast receiver that sends the notification shown in Figures 16-2 and 16-2.
Listing 16-6. A Receiver That Sends a Notification
//Filename: NotificationReceiver.java
//Project: StandaloneBroadcastReceiver, Download: ProAndroid5_Ch16_TestReceivers.zip
public class NotificationReceiver extends BroadcastReceiver {
    private static final String tag = "Notification Receiver";
    @Override
    public void onReceive(Context context, Intent intent) {
        Log.d(tag, "intent=" + intent);
        String message = intent.getStringExtra("message");
        Log.d(tag, message);
        this.sendNotification(context, message);
    }
    private void sendNotification(Context ctx, String message)   {
        //Get the notification manager
        String ns = Context.NOTIFICATION_SERVICE;
        NotificationManager nm =
            (NotificationManager)ctx.getSystemService(ns);
        //Prepare Notification Object Details
        int icon = R.drawable.robot;
        CharSequence tickerText = "Hello";
        long when = System.currentTimeMillis();
        //Get the intent to fire when the notification is selected
        Intent intent = new Intent(Intent.ACTION_VIEW);
        intent.setData(Uri.parse("http://www.google.com"));
        PendingIntent pi = PendingIntent.getActivity(ctx, 0, intent, 0);
        //Create the notification object through the builder
        Notification notification =
            new Notification.Builder(ctx)
                .setContentTitle("title")
                .setContentText(tickerText)
                .setSmallIcon(icon)
                .setWhen(when)
                .setContentIntent(pi)
                .setContentInfo("Addtional Information:Content Info")
                .build();
        //Send notification
        //The first argument is a unique id for this notification.
        //This id allows you to cancel the notification later
        //This id also allows you to update your notification
        //by creating a new notification and resending it against that id
        //This id is unique with in this application
        nm.notify(1, notification);
    }
}
The content view of a notification is displayed when the notification is expanded. This is what you see in Figure 16-2. The content view needs to be a RemoteViews object. However, we don’t pass a content view directly. Based on the parameters passed to the Builder object, the Builder object creates an appropriate RemoteViews object and sets it on the notification. The Builder interface also has a method to directly set the content view as a whole if needed.
The steps for directly using remote views for a content view of a notification are as follows:
- Create a layout file.
- Create a RemoteViews object using the package name and the layout file ID.
- Call setContent() on the Notification.Builder object before calling the build() method to create the notification object, which is then sent to the notification manager.
Keep in mind that only a limited set of controls may participate in a remote view, such as FrameLayout, LinearLayout, RelativeLayout, AnalogClock, Button, Chronometer, ImageButton, ImageView, ProgressBar, TextView.
The code in Listing 16-6 creates a notification using the Builder object to set the implicit content view (through title and text) and the intent to fire (in our case, this intent is the browser intent). A new notification can be created to be resent through the notification manager in order to update the previous instance of it using the unique ID of the notification. The ID of the notification, which is set to 1 in Listing 16-6, is unique within this application context. This uniqueness allows us to continuously update what is happening to that notification and also cancel it if needed.
You may also want to look at the various flags available while creating a notification, such as FLAG_NO_CLEAR and FLAG_ONGOING_EVENT, to control the persistence of these notifications. You can use the following URL to check these flags:
http://developer.android.com/reference/android/app/Notification.html
Starting an Activity in a Broadcast Receiver
Although you’re advised to use the notification manager when a user needs to be informed, Android does allow you to spawn an activity explicitly. You can do this by using the usual startActivity() method but with the following flags added to the intent that is used as the argument to the startActivity():
- Intent.FLAG_ACTIVITY_NEW_TASK
- Intent.FLAG_FROM_BACKGROUND
- Intent.FLAG_ACTIVITY_SINGLE_TOP
Exploring Long-Running Receivers and Services
So far, we have covered the happy path of broadcast receivers where the execution of a broadcast receiver is unlikely to take more than 10 seconds. The problem space is a bit complicated if we want to perform tasks that take longer than 10 seconds.
To understand why, let’s review a few facts about broadcast receivers:
- A broadcast receiver, like other components of an Android process, runs on the main thread. Hence holding up the code in a broadcast receiver will hold up the main thread and will result in ANR. The time limit on a broadcast receiver is 10 seconds compared to 5 seconds for an activity. It is a bit of a reprieve, but not very much.
- The process hosting the broadcast receiver will start and terminate along with the broadcast receiver execution. Hence the process will not stick around after the broadcast receiver’s onReceive() method returns. Of course, this is assuming that the process contains only the broadcast receiver. If the process contains other components, such as activities or services, that are already running, then the lifetime of the process takes these component life cycles into account as well.
- Unlike a service process, a broadcast receiver process will not get restarted.
- If a broadcast receiver were to start a separate thread and return to the main thread, Android will assume that the work is complete and will shut down the process even if there are threads running, bringing those threads to an abrupt stop.
- Android automatically acquires a partial wake lock when invoking a broadcast service and releases it when it returns from the service in the main thread. A wake lock is a mechanism and an API class available in the SDK to keep the device from going to sleep or to wake it up if it is already asleep.
Given these predicates, how can we execute longer-running code in response to a broadcast event?
Understanding Long-Running Broadcast Receiver Protocol
The answer lies in resolving the following:
- We will clearly need a separate thread so that the main thread can get back and avoid ANR messages.
- To stop Android from killing the process and hence the worker thread, we need to tell Android that this process contains a component, such as a service, with a life cycle. So we need to create or start that service. The service itself cannot directly do the work for more than 5 seconds because that happens on the main thread, so the service needs to start a worker thread and let the main thread go.
- For the duration of the worker thread’s execution, we need to hold on to the partial wake lock so that the device won’t go to sleep. A partial wake lock will allow the device to run code without turning on the screen and so on, which allows for longer battery life.
- The partial wake lock must be obtained in the main line code of the receiver; otherwise, it will be too late. For example, you cannot do this in the service, because it may be too late between the startService() being issued by the broadcast receiver and the onStartCommand() of a service that begins execution.
- Because we are creating a service, the service itself can be brought down and brought back up because of low-memory conditions. If this happens, we need to acquire the wake lock again.
- When the worker thread started by the onStartCommand() method of the service completes its work, it needs to tell the service to stop so that it can be put to bed and not brought back to life by Android.
- It is also possible that more than one broadcast event can occur. Given that, we need to be cautious about how many worker threads we need to spawn.
Given these facts, the recommended protocol for extending the life of a broadcast receiver is as follows:
- Get a (static) partial wake lock in the onReceive() method of the broadcast receiver. The partial wake lock needs to be static to allow communication between the broadcast receiver and the service. There is no other way of passing a reference of the wake lock to the service, as the service is invoked through a default constructor that takes no parameters.
- Start a local service so that the process won’t be killed.
- In the service, start a worker thread to do the work. Do not do the work in the onStart() method of the service. If you do, you are basically holding up the main thread again.
- When the worker thread is done, tell the service to stop itself either directly or through a handler.
- Have the service turn off the static wake lock.
Understanding IntentService
Recognizing the need for a service to not hold up the main thread, Android has provided a utility local service implementation called IntentService to offload work to a worker thread so that the main thread can be released after scheduling the work to the subthread. Under this scheme, when you call startService() on an IntentService, the IntentService will queue that request to a subthread using a looper and a handler so that a derived method of the IntentService is called to do the actual work on a single worker thread.
Here is what the API documentation for IntentService says:
IntentService is a base class for Services that handle asynchronous requests (expressed as Intents) on demand. Clients send requests through startService(Intent) calls; the service is started as needed, handles each Intent in turn using a worker thread, and stops itself when it runs out of work. This “work queue processor” pattern is commonly used to offload tasks from an application's main thread. The IntentService class exists to simplify this pattern and take care of the mechanics. To use it, extend IntentService and implement onHandleIntent(Intent). IntentService will receive the Intents, launch a worker thread, and stop the service as appropriate. All requests are handled on a single worker thread—they may take as long as necessary (and will not block the application's main loop), but only one request will be processed at a time.
This idea is demonstrated using a simple example in Listing 16-7. You extend the IntentService and provide what you want to do in the onHandleIntent() method.
Listing 16-7. Using IntentService
//You can see file Test30SecBCRService.java for example
//Project: StandaloneBroadcastReceiver, Download: ProAndroid5_Ch16_TestReceivers.zip
public class MyService extends IntentService {
    public MyService()
    { super("some-java-package-like-name-used-for-debugging"); }
    protected void onHandleIntent(Intent intent)  {
        //log thread signature if you want to see that it is running on a separate thread
        //Ex: Utils.logThreadSignature("MyService");
        //do the work in this subthread
        //and return
    }
}
Once you have a service like this, you can register this service in the manifest file and use client code to invoke this service as context.startService(new Intent(context, MyService.class)). This will result in a call to onHandleIntent() in Listing 16-7. You will notice that if you were to use the commented out method Utils.logThreadSignature() in Listing 16-7 in your actual code, it will print the ID of the worker thread and not the main thread. You can see the Utils class in the project and download references listed in the comments section of Listing 16-7.
Extending IntentService for a Broadcast Receiver
From the perspective of a broadcast receiver, an IntentService is a wonderful thing. It lets us execute long-running code without blocking the main thread. Not only that, being a service, an IntentService provides a process that keeps running when the broadcast code returns. So can we use the IntentService for the needs of a long-running operation? Yes and no.
Yes, because the IntentService does two things: First, it keeps the process running because it is a service. Second, it lets the main thread go and avoids related ANR messages.
To understand the “no” answer, you need to understand wake locks a bit more. When a broadcast receiver is invoked through an alarm manager, the device may not be on. So the alarm manager partially turns on the device (just enough to run the code without any UI) by making a call to the power manager and requesting a wake lock. The wake lock gets released as soon as the broadcast receiver returns.
This leaves the IntentService invocation without a wake lock, so the device may go to sleep before the actual code runs. However, IntentService, being a general-purpose extension to a service, it does not acquire a wake lock. So we need further props on top of an IntentService. We need an abstraction.
Mark Murphy has created a variant of the IntentService called WakefulIntentService that keeps the semantics of using an IntentService but also acquires the wake lock and releases it properly under a variety of conditions. You can look at his implementation at http://github.com/commonsguy/cwac-wakeful.
Exploring Long-Running Broadcast Service Abstraction
WakefulIntentService is a good abstraction. However, we want to go a step further so that our abstraction parallels the method of extending IntentService as in Listing 16-7 and does everything that an IntentService does but also provides few more benefits:
- Pass the original intent that was passed to the broadcast receiver to the overridden method onHandleIntent. This allows us to largely hide the broadcast receiver, simulating a programming experience that a service is started in response to a broadcast message. This is really the goal for this abstraction while some extras are thrown in.
- Acquire and release wake locks (similar to WakefulIntentService).
- Deal with a service being restarted.
- Allow a uniform way to deal with the wake lock for multiple receivers and multiple services in the same process.
We will call this abstract class ALongRunningNonStickyBroadcastService. As the name suggests, we want this service to allow for long-running work. It will also be specifically built for a broadcast receiver. This service will also be nonsticky (we will explain this concept later in the chapter, but briefly, this indicates that Android will not start the service if there are no messages in the queue). To allow for the behavior of an IntentService, it will extend the IntentService and override the onHandleIntent method.
Combining these ideas, the abstract ALongRunningNonStickyBroadcastService service will have a signature that looks like Listing 16-8.
Listing 16-8. Long-Running Service Abstract Idea
public abstract class ALongRunningNonStickyBroadcastService extends IntentService {
//...other implementation details
//the following method will be called by the onHandleIntent of IntentService
//this is where the actual work happens in this derived abstract class
protected abstract void handleBroadcastIntent(Intent broadcastIntent);
//...other implementation details

}
The implementation details for this ALongRunningNonStickyBroadcastService are a touch involved, and we will cover them soon after we explain why we are going after this type of service. We want to demonstrate first the utility and simplicity of having it.
Once we have this abstract class of Listing 16-8, the MyService example in Listing 16-7 can be rewritten as in Listing 16-9.
Listing 16-9. Long-Running Service Sample Usage
public class MyService extends ALongRunningNonStickyBroadcastService {
    //..other implementation details
    protected void handleBroadcastIntent(Intent broadcastIntent)  {
        //You can use the following method to see which thread runs this code
        //Utils.logThreadSignature("MyService");
        //do the work here
        //and return
    }
    //..other implementation details
}
The simplicity of Listing 16-9 is that this code is invoked as soon as a client fires off a broadcast intent. Especially the fact that you are receiving directly, unmodified, the same intent that invoked the broadcast receiver. It is as if the broadcast receiver has disappeared from the solution.
As you can see, you can extend this new long-running service class (just like IntentService and WakefulIntentService) and override a single method and do very little to nothing in the broadcast receiver. Your work will be done in a worker thread (thanks to IntentService) without blocking the main thread.
Listing 16-9 is a simple example demonstrating the concept. Let’s turn to a more complete implementation that implements a long-running service that can run for 60 seconds in response to a broadcast event (proving that we can run for more than 10 seconds and avoid an ANR message). We will call this service appropriately Test60SecBCRService (BCR stands for broadcast receiver), and its implementation is shown in Listing 16-10.
Listing 16-10. Source code for Test60SecBCRService
//Filename: Test30SecBCRService.java
//Project: StandaloneBroadcastReceiver, Download: ProAndroid5_Ch16_TestReceivers.zip
public class Test60SecBCRService extends ALongRunningNonStickyBroadcastService {
   public static String tag = "Test60SecBCRService";
   //Required by IntentService to pass the classname for debug needs
   public Test60SecBCRService(){
      super("com.androidbook.service.Test60SecBCRService");
   }
   /* Perform long-running operations in this method.
    * This is executed in a separate thread.
    */
   @Override
   protected void handleBroadcastIntent(Intent broadcastIntent)  {
      //Utils class is in the download project mentioned
      Utils.logThreadSignature(tag);
      Log.d(tag,"Sleeping for 60 secs");
      //Use the thread to sleep for 60 seconds
      Utils.sleepForInSecs(60);
      String message =
         broadcastIntent.getStringExtra("message");
      Log.d(tag,"Job completed");
      Log.d(tag,message);
   }
}
As you can see, this code successfully simulates doing work for 60 seconds and still avoids the ANR message. The utility methods in Listing 16-10 are self-explanatory and available in the download projects for this chapter. The project name and download filename are in the comments section of the code in Listing 16-10.
Designing A Long-Running Receiver
Once we have the long-running service in Listing 16-10, we need to be able to invoke the service from a broadcast receiver. Again we are going after an abstraction to hide the broadcast receiver as much as possible.
The first goal of a long-running broadcast receiver is to delegate the work to the long-running service. To do this, the long-running receiver will need the class name of the long-running service to invoke it. The second goal is to acquire a wake lock. The third goal is to transfer the original intent that the broadcast receiver is invoked on to the service. We will do this by sticking the original intent as a Parcelable in the intent extras. We will use original_intent as the name for this extra. The long-running service then extracts original_intent and passes it to the overridden method of the long-running service (you will see this later in the implementation of the long-running service). This facility thus gives the impression that the long-running service is indeed an extension of the broadcast receiver.
Let us abstract out these three things and provide a base class. The only bit of information this long-running receiver abstraction needs is the name of the long-running service class (LRSClass) through an abstract method called getLRSClass().
Putting these needs together, source code for the implementation of the abstract class ALongRunningReceiver is in Listing 16-11.
Listing 16-11. ALongRunningReceiver Abstraction
//Filename: ALongRunningReceiver.java
//Project: StandaloneBroadcastReceiver, Download: ProAndroid5_Ch16_TestReceivers.zip
public abstract class  ALongRunningReceiver extends BroadcastReceiver  {
    private static final String tag = "ALongRunningReceiver";
    @Override
    public void onReceive(Context context, Intent intent)  {
       Log.d(tag,"Receiver started");
       //LightedGreenRoom abstracts the Android WakeLock
       //to keep the device partially on.
       //In short this is equivalent to turning on
       //or acquiring the wake lock.
       LightedGreenRoom.setup(context);
       startService(context,intent);
       Log.d(tag,"Receiver finished");
    }
    private void startService(Context context, Intent intent)  {
       Intent serviceIntent = new Intent(context,getLRSClass());
       serviceIntent.putExtra("original_intent", intent);
       context.startService(serviceIntent);
    }
    /*
     * Override this method to return the
     * "class" object belonging to the
     * nonsticky service class.
     */
    public abstract Class getLRSClass();
}
In the preceding broadcast receiver code, you see references to a class called LightedGreenRoom. This is a wrapper around a static wake lock. In addition to being a wake lock, this class tries to cater to working with multiple receivers, multiple services, etc., so that all waki-ness is properly coordinated. For the purpose of understanding, you can treat it as if it is a static wake lock. This abstraction is called a LightedGreenRoom because it is aimed at saving power for the device like the various “green” movements. Furthermore it is called “Lighted” because it starts off being “lighted” first as the broadcast receiver turns it on as soon as it is kicked off. The last service to use it will turn it off.
Once the receiver abstraction is available, you’ll need a receiver that works hand in hand with the 60-second long-running service in Listing 16-11. Such a receiver is provided in Listing 16-12.
Listing 16-12. A Sample Long-Running Broadcast Receiver, Test60SecBCR
//Filename: Test60SecBCR.java
//Project: StandaloneBroadcastReceiver, Download: ProAndroid5_Ch16_TestReceivers.zip
public class Test60SecBCR extends ALongRunningReceiver {
   @Override
   public Class getLRSClass() {
      Utils.logThreadSignature("Test60SecBCR");
      return Test60SecBCRService.class;
   }
}
Just like the service abstraction in Listings 16-10 and 16-11, the code in Listing 16-12 uses an abstraction for the broadcast receiver. The receiver abstraction starts the service indicated by the service class returned by the getLRSClass() method.
Thus far, we have demonstrated why we needed the two important abstractions to implement long-running services invoked by broadcast receivers:
- ALongRunningNonStickyBroadcastService (Listing 16-8)
- ALongRunningReceiver (Listing 16-11)
Abstracting a Wake Lock with LightedGreenRoom
As mentioned earlier, the primary purpose of the LightedGreenRoom abstraction is to simplify the interaction with the wake lock, and a wake lock is used to keep the device on during background processing. You really don’t need the details of the implementation of the LightedGreenRoom, but merely its interface and the calls that are made against it. Just keep in mind that it is a thin wrapper around the Android SDK wake lock. In its simplest implementation, it can just be as simple as turning the wake lock on (acquire) and off (release). Listing 16-13 shows how a wake lock is used typically as stated in the SDK.
Listing 16-13. Psuedocode for working with the WakeLock API
//Get access to the power manager service
PowerManager pm =
   (PowerManager)inCtx.getSystemService(Context.POWER_SERVICE);

//Get hold of a wake lock
PowerManager.WakeLock wl =
   pm.newWakeLock(PowerManager.PARTIAL_WAKE_LOCK, tag);

//Acquire the wake lock
wl.acquire();

//do some work
//while this work is being done the device will be on partially

//release the Wakelock
wl.release();
Given this interaction, the broadcast receiver is supposed acquire the lock, and when the long-running service is finished, it needs to release the lock. As said earlier there is no good way to pass the wake lock variable to the service from the broadcast receiver. The only way the service knows about this wake lock is to use a static or application-level variable.
Another difficulty in acquiring and releasing a wake lock is the reference count. As a broadcast receiver is invoked multiple times, if the invocations overlap, there are going to be multiple calls to acquire the wake lock. Similarly, there are going to be multiple calls to release. If the number of acquire and release calls don’t match, we will end up with a wake lock that at worst keeps the device on for far longer than needed. Also, when the service is no longer needed and the garbage collection runs, if the wake lock counts are mismatched, there will be a runtime exception in the LogCat. These issues have prompted us to do our best to abstract the wake lock as a LightedGreenRoom to ensure proper usage. There will be one of these objects per process that keeps a wake lock and ensures it is turned on and off properly. The included project has an implementation for this class. If you find that code too complicated due to the number of conditions it takes into account, you can just start with a simple static variable and turn it on and off as the service starts and closes and refine it to suit your particular conditions.
A reasonable approach for the broadcast receiver and the service to communicate with each other is through a static variable. Instead of making WakeLock static, we have made the entire LightedGreenRoom a static instance. However, every other variable inside LightedGreenRoom stays local and nonstatic.
Every public method of LightedGreenRoom is also exposed as a static method for convenience. We have used the convention of naming these methods starting with "s_". You can choose, instead, to get rid of the static methods and directly call the single object instance of LightedGreenRoom.
Implementing a Long-Running Service
To present the long-running service abstraction, we have to take one more detour to explain the lifetime of a service and how it relates to the implementation of onStartCommand. This is the method that is ultimately responsible for starting the worker thread and the semantics of a service.
When a service is started through startService, the service gets created first, and its onStartCommand method is called. Android has provisions to keep this process in memory so that the service can be completed even when serving multiple incoming client requests. However, under demanding memory conditions, Android may choose to reclaim the process and call the onDestroy() method of the service.
Note Android tries to call the onDestroy() method for a service to reclaim its resources when the service is not executing its onCreate(), onStart(), or onDestroy() method, or in other words when the service is idle.
However, unlike an activity that is shut down, a service is scheduled to restart again when resources are available if there are pending startService intents in the queue. The service will be woken up and the next intent delivered to it via onStartCommand(). Of course, onCreate() will be called when the service is brought back.
Because services are automatically restarted if they are not explicitly stopped, it is reasonable to think that, unlike activities and other components, a service component is fundamentally a sticky component.
Understanding a Nonsticky Service
A service will not be automatically restarted if a client explicitly calls stopService. Depending on how many clients are still connected, this stopService method can move the service into a stopped state, at which time the service’s onDestroy method is called and the service life cycle is complete. Once a service has been stopped like this by its last client, the service will not be brought back.
This protocol works well when everything happens as per design, where start and stop methods are called and executed in sequence and without a miss. Prior to Android 2.0, devices have seen a lot of services hanging around and claiming resources even though there was no work to be done, meaning Android brought the services back into memory even though there were no messages in the queue. This would have happened when stopService was not invoked either because of an exception or because the process was taken out between onStartCommand and stopService.
Android 2.0 introduced a solution so that we can indicate to the system, if there are no pending intents, that it shouldn’t bother restarting the service. This is done by returning the nonsticky flag (Service.START_NOT_STICKY) from onStartCommand.
However, nonsticky is not really that nonsticky. Even if we mark the service as nonsticky, if there are pending intents, Android will bring the service back to life. This setting applies only when there are no pending intents.
Understanding a Sticky Service
What does it mean for a service to be really sticky then? The sticky flag (Service.START_STICKY) means that Android should restart the service even if there are no pending intents. When the service is restarted, call onCreate and onStartCommand with a null intent. This will give the service an opportunity, if need be, to call stopSelf if that is appropriate. The implication is that a service that is sticky needs to deal with null intents on restarts.
Understanding Redeliver Intents Option
Local services in particular follow a pattern where onStart and stopSelf are called in pairs. A client calls onStart. The service, when it finishes that work, calls stopSelf. If a service takes, say, 30 minutes to complete a task, it will not call stopSelf for 30 minutes. Meanwhile, the service is reclaimed due to low-memory conditions and higher-priority jobs. If we use the nonsticky flag, the service will not wake up, and we would never have called stopSelf.
Many times, this is OK. However, if you want to make sure whether these two calls happen for sure, you can tell Android not to unqueue the start event until stopSelf is called. This ensures that when the service is reclaimed, there is always a pending event unless the stopSelf is called. This is called redeliver mode, and it can be indicated in reply to the onStartCommand method by returning the Service.START_REDELIVER_INTENT flag.
Coding a Long-Running Service
Now that you have the background on IntentService, service-start flags, and the lighted green room, we’re ready to take a look at the long-running service in Listing 16-14.
Listing 16-14. A Long-Running Service Abstraction
//Filename: ALongRunningNonStickyBroadcastService.java
//Project: StandaloneBroadcastReceiver, Download: ProAndroid5_Ch16_TestReceivers.zip
public abstract class ALongRunningNonStickyBroadcastService
extends IntentService  {
    public static String tag = "ALongRunningBroadcastService";
    //This is what you override to do your work
    protected abstract void
    handleBroadcastIntent(Intent broadcastIntent);

    public ALongRunningNonStickyBroadcastService(String name){
        super(name);
    }
    /*
     * This method can be invoked under two circumstances
     * 1. When a broadcast receiver issues a "startService"
     * 2. when android restarts this service due to pending "startService" intents.
     *
     * In case 1, the broadcast receiver has already
     * set up the "lightedgreenroom" and thereby gotten the wake lock
     *
     * In case 2, we need to do the same.
     */
    @Override
    public void onCreate()   {
        super.onCreate();

        //Set up the green room
        //The setup is capable of getting called multiple times.
        LightedGreenRoom.setup(this.getApplicationContext());

        //It is possible that more than one service of this type is running.
        //Knowing the number will allow us to clean up the wake locks in ondestroy.
        LightedGreenRoom.s_registerClient();
    }
    @Override
    public int onStartCommand(Intent intent, int flag, int startId)   {
        //Call the IntentService "onstart"
        super.onStart(intent, startId);

        //Tell the green room there is a visitor
        LightedGreenRoom.s_enter();

        //mark this as nonsticky
        //Means: Don't restart the service if there are no
        //pending intents.
        return Service.START_NOT_STICKY;
    }
    /*
     * Note that this method call runs in a secondary thread setup by the IntentService.
     *
     * Override this method from IntentService.
     * Retrieve the original broadcast intent.
     * Call the derived class to handle the broadcast intent.
     * finally tell the lighted room that you are leaving.
     * if this is the last visitor then the lock
     * will be released.
     */
    @Override
    final protected void onHandleIntent(Intent intent)    {
        try {
            Intent broadcastIntent
            = intent.getParcelableExtra("original_intent");
            handleBroadcastIntent(broadcastIntent);
        }
        finally {
            //release the wake lock if you are the last one
            LightedGreenRoom.s_leave();
        }
    }
    /* If Android reclaims this process, this method will release the lock
     * irrespective of how many visitors there are.
     */
    @Override
    public void onDestroy() {
        super.onDestroy();
        //Do any cleanup, if needed, when a service no longer needs a wake lock
        LightedGreenRoom.s_unRegisterClient();
    }
}
This class extends IntentService and gets all the benefits of a worker thread as set up by IntentService. In addition, it specializes the IntentService further so that it is set up as a nonsticky service. From a developer’s perspective, the primary method to focus on is the abstract handleBroadcastIntent() method. Listing 16-15 shows you how to set up the receiver and the corresponding service in the manifest file.
Listing 16-15. The Long-Running Receiver and Service Definition
<!--
In filename: AndroidManifest.xml
Project: StandaloneBroadcastReceiver, Download: ProAndroid5_Ch16_TestReceivers.zip
-->
<manifest...>
......
<application....>
<receiver android:name=".Test60SecBCR">
    <intent-filter>
       <action android:name="com.androidbook.intents.testbc"/>
    </intent-filter>
</receiver>
<service android:name=".Test60SecBCRService"/>
</application>
.....
<uses-permission android:name="android.permission.WAKE_LOCK"/>
</manifest>
Notice that you will need the wake lock permission to run this long-running receiver abstraction. Complete source code for all of the receivers and long-running services is available in the downloadable projects for this chapter. Listing 16-15 brings out the essence of the long-running services invoked by a broadcast receiver. This abstraction states that you write a couple of lines to create a receiver like the Test60SecBCR (Listing 16-12), and then write a java method similar to the one in code Test60SecBCRService (Listing 16-10). Given the receiver and the java method that you want to run for a long time, you can execute that method in response to the broadcast event. This abstraction ensures that the method then can run as long as it takes without producing an ARM. The abstraction takes care of a) keeping the process alive, b) calling the service, c) taking care of the wake lock, and d) transferring the broadcast intent to the service. In the end this abstraction simulates “calling a method that can execute without time limits” from a broadcast event.
Additional Topics in Broadcast Receivers
Due to space limitations, we are not able to cover all aspects of broadcast receivers in this book. One topic we haven’t covered at all is the security opportunities available to restrict both sending and receiving broadcasts. You can use the export attribute on a receiver to allow whether it can be invoked from external processes or not. You can also enable or disable a receiver either through the manifest file or programmatically. We have also not covered a method called sendOrderBroadcast that facilitates calling broadcast receivers in an order including chaining them. You can read up on these aspects from the main API docs for the BroadcastReceiver class.
Furthermore, in version 4 of the Android support library SDK there is a class called LocalBroadcastManager that is used to optimize calls to broadcast receivers that are strictly local. Being local, all security limitations need not be considered. As per the SDK, there is also system-level optimization for when this class is used.
Also in version 4 of the Android support library SDK, there is a class called WakefulBroadcastReceiver that encapsulates some of the same concepts that we have covered for long-running service needs.
References
Here are helpful references to the topics that are covered in this chapter:
- http://developer.android.com/reference/android/content/BroadcastReceiver.html: The BroadcastReceiver API. You will find at this link more about ordered broadcasts and about the BroadcastReceiver life cycle. This is an excellent resource.
- http://developer.android.com/reference/android/support/v4/content/WakefulBroadcastReceiver.html: Android API reference.
- http://developer.android.com/reference/android/support/v4/content/LocalBroadcastManager.html: Android API reference.
- http://developer.android.com/reference/android/app/Service.html: The Service API. This reference is especially good to have while working with long-running services.
- http://developer.android.com/reference/android/app/NotificationManager.html: The NotificationManager API.
- http://developer.android.com/reference/android/app/Notification.html: The Notification API. You will see here the various options available for working with a notification, such as content views and sound effects.
- http://developer.android.com/reference/android/widget/RemoteViews.html: The RemoteViews API. RemoteViews are used to construct custom detailed views of notifications.
- http://www.androidbook.com/item/3514: Authors’ research on long-running services.
- http://www.androidbook.com/item/3482: Authors’ research on broadcast receivers. This note also explains how to start an activity from a receiver.
- http://www.androidbook.com/proandroid5/projects: A list of downloadable projects from this book. For this chapter, look for a ZIP file named ProAndroid5_Ch16_TestReceivers.zip. This ZIP file has two projects: TestBroadcastReceiver and StandaloneBroadcastReceiver. The latter is dependent on the former, so install them in that order. The source code snippets in this chapter are annotated with their filenames and in what projects they are available.
Summary
In this chapter, we have covered broadcast receivers, notification managers, and the role of service abstraction in putting broadcast receivers to their best use. We also have given a practical abstraction to simulate long running broadcast services out of broadcast receivers.