In the previous chapter, you saw how to create a Hyper-V cluster. As with anything in IT, creating the cluster is the easy bit. You’ve then got to manage it. You’ve already seen how to manage Hyper-V hosts using Hyper-V Manager, which is an excellent tool for managing one or more stand-alone hosts. When you cluster Hyper-V hosts, you manage them as a cluster, using Failover Cluster Manager.
Caution
If you’re using external storage in your cluster (iSCSI, SAN, etc.), and you have to shut your cluster down, you should shut down the nodes first and then the storage server. If you shut down the storage first, you could lose the connections to your storage and potentially lose data. When starting the cluster, reverse this, so that the storage is online before you start any of the nodes. You can bring the nodes up in any order.
This chapter is a continuation of Chapter 10. A Hyper-V cluster isn’t of much use if you don’t have any VMs, so you’ll start by learning how to create and manage VMs on your cluster. You’ll learn how to manage the cluster’s networking and storage. Eventually, you’ll have to add extra nodes into the cluster (or move nodes out of the cluster), which will be explained toward the end of the chapter.
Note
Migrating virtual machines (VMs) between hosts won’t be covered in this chapter. We’ll postpone migrations until Chapter 14.
Before getting into the technical topics of the chapter, we should say something about how you manage your cluster. Many administrators see a cluster with two, four, or many nodes and just see it as that many servers. That is a big mistake!
- 1.
People
- 2.
Processes
- 3.
Technology
The people who manage your cluster must understand the technologies they’re working with. They must understand, use, and be committed to the processes that are put in place to manage the cluster. Most of all, they have to be people that are trusted to manage a critical piece of your organization’s environment.
When you make a change to a cluster, very often that change, such as creating a new VMswitch, has to occur on all nodes in the cluster. If your administrators have a process to follow, the chances of something going wrong are minimized, even more so if the process is backed by automation of some kind. The vast majority of major problems we’ve seen with Hyper-V environments can be traced back to human error, often because people have stepped outside the process and just done stuff! Set up automated processes for as many administration tasks as you can, to ensure that administration is efficient and safe. Don’t forget your change control processes. They protect you and your administrators as well as the organization.
Technology is the third thing to consider. Make sure you’re using the correct technology to get the job done. A failover cluster is only created to protect some vital aspect of your organization’s IT environment. Make sure you have the right technology to do the job, including hardware, software, and management tools.
Hyper-V clusters are managed with Failover Cluster Manager rather than Hyper-V Manager. This includes the management of VMs, which is our cue to investigate that topic.
Managing Virtual Machines
Creation
Modification
Destruction
The first step in this process is creating a VM.
Creating Virtual Machines
In early chapters of this book, you learned how to create VMs, using Hyper-V Manager or PowerShell, when working with a single Hyper-V host. You use Failover Cluster Manager to create VMs when your Hyper-V hosts are clustered.
ANTIVIRUS SOFTWARE
It’s very important to the performance of your Hyper-V hosts, whether they are physical hosts or you’re using nested virtualization, as in this chapter, that you exclude the files used for the VMs from your antivirus (AV) scanning.
Scanning a .vhdx file every time you do something in the VM will slow performance dramatically. Your VMs should have AV protection, which will catch any malicious actions on the VM, but you shouldn’t impose AV scanning on your VMs (or their files) from the host.
- 1.
Open Failover Cluster Manager.
- 2.
Expand HVCL01.
- 3.
Click Roles.
- 4.
Under Actions, click Virtual Machines…
- 5.
Click New Virtual Machine…
- 6.
Select the target node, as shown in Figure 11-1. In this case, you’ll use W19HVC01.

Selecting the node to host a new VM
- 7.
A check will be made to determine if the Hyper-V management tools are installed on the machine you are using. You need Hyper-V Manager as well as the PowerShell tools.
- 8.
The New Virtual Machine Wizard will be displayed. This is the same wizard you’ve used through Hyper-V Manager.
- 9.
Click Next, to skip the Before You Begin page.
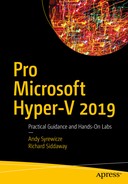
- 10.
Provide a name for the new VM and the location on the disk to store the VM, as shown in Figure 11-2.
Setting the name and location for the VM
- 11.
The location should be on one of the Clustered Shared Volumes (CSV) you have created; otherwise, the other nodes in the cluster can’t access the VM. In this case, you’re using Vol1, which was created in Chapter 10. In Vol1, a folder called VirtualMachines has been created to house all VMs on that volume. A folder with the same name has also been created on Vol2.
- 12.
Click Next.
- 13.
Select Generation 2.
- 14.
Click Next.
- 15.
Leave Startup memory as 1024MB.
- 16.
Select Use Dynamic Memory.
- 17.
Click Next.
- 18.
Click Next, to skip configuring the network. You’ll configure the VMswitches on the cluster nodes later.
- 19.
Set the Virtual Hard Disk size to 80GB.
- 20.
Modify the disk location, if desired.
- 21.
Click Next.
- 22.
Accept default of Install an operating system later.
- 23.
Click Next.
- 24.
Check details and change, if needed.
- 25.
Click Finish.
- 26.
The VM will be created and then configured for high availability (HA).
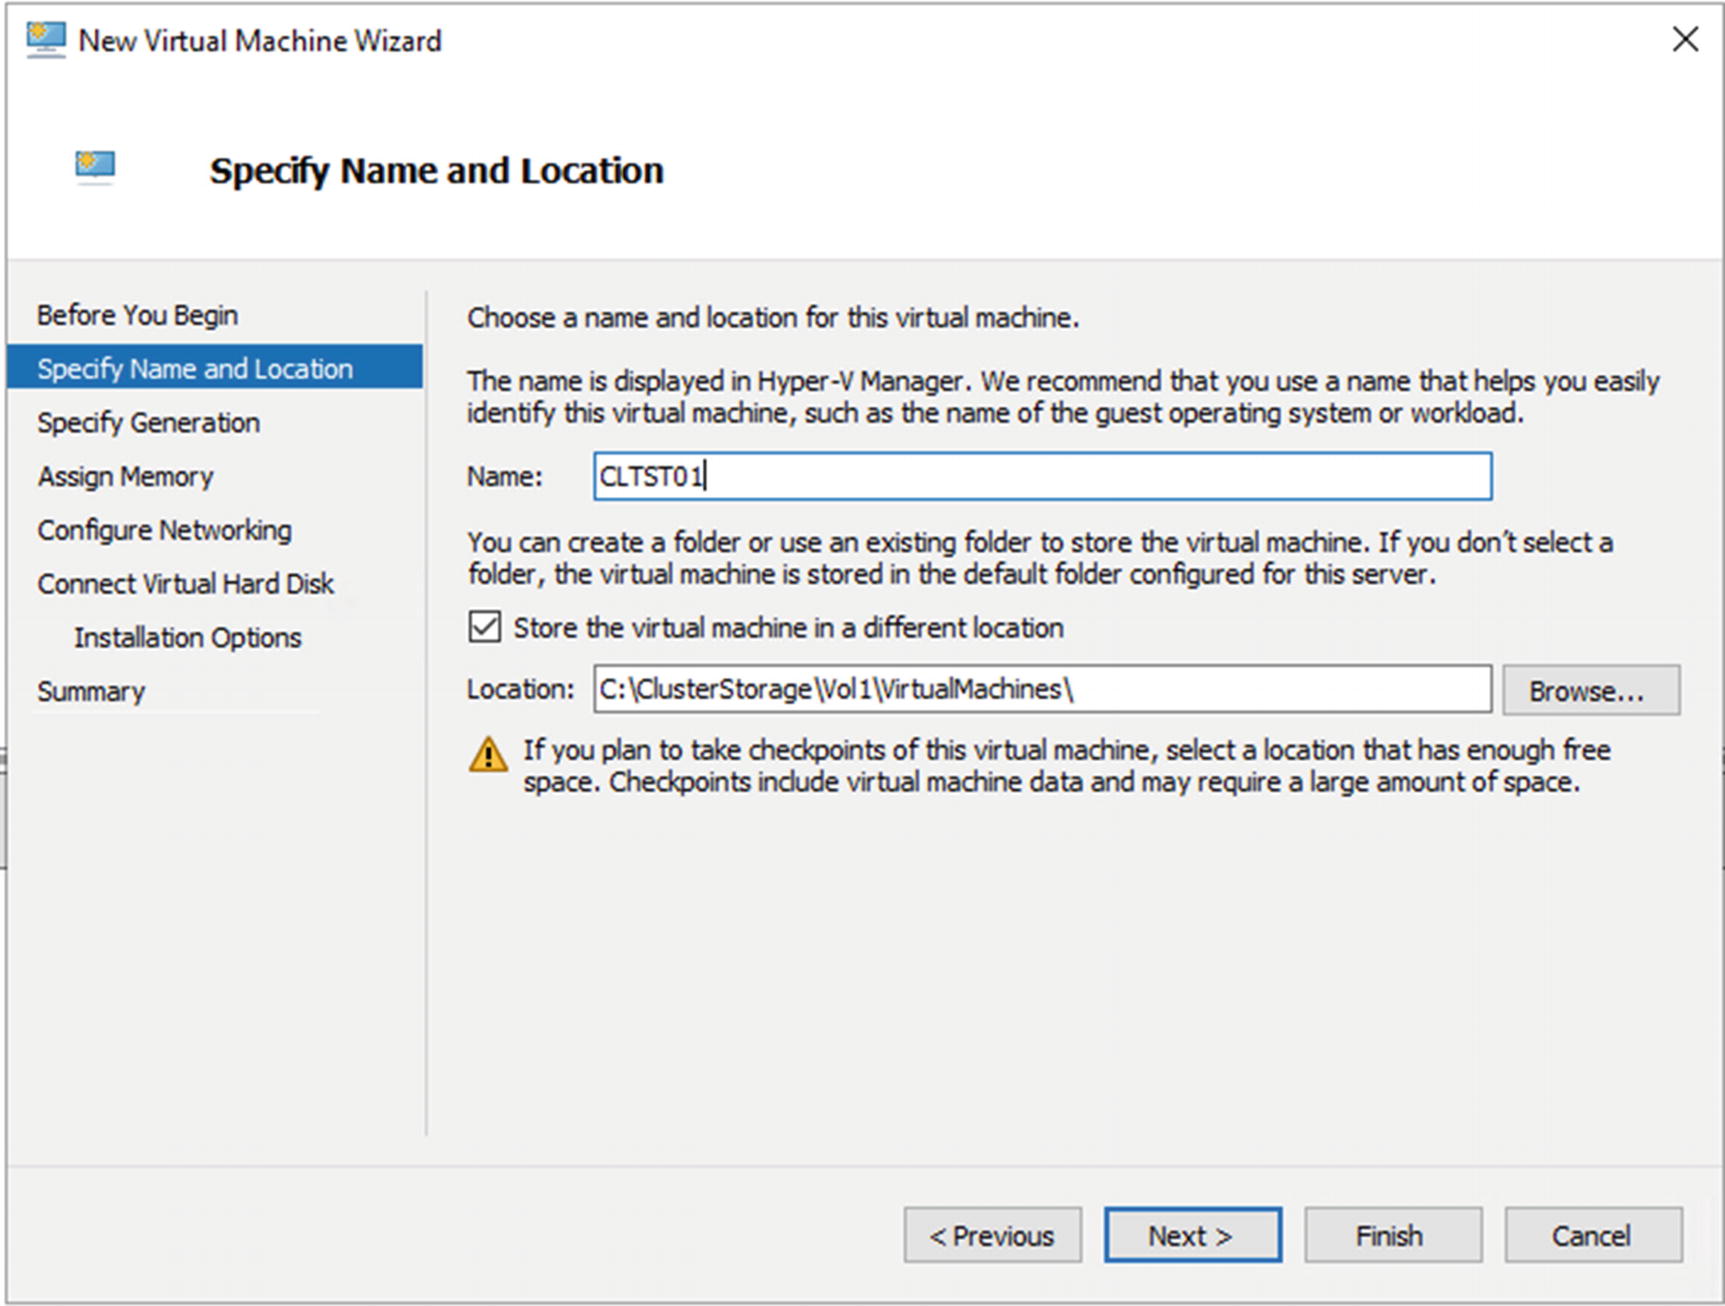
- 27.
On the Summary page (Figure 11-3), view the report, if required.
Summary page after New Virtual Machine and High Availability Wizard have completed
- 28.
Click Finish.
- 29.
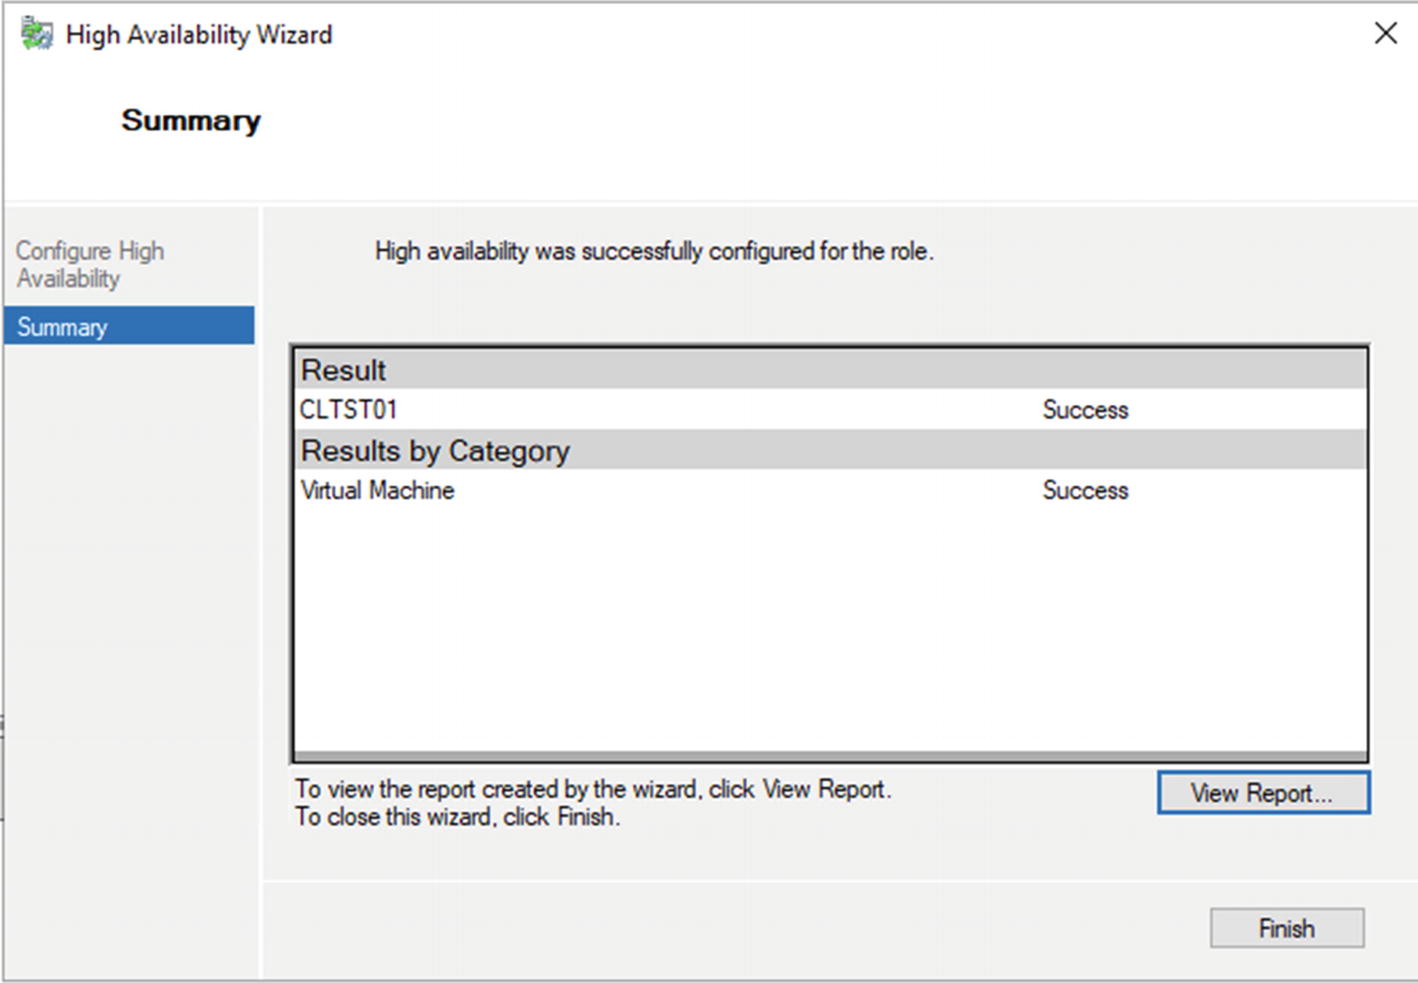
The new VM is visible in the Roles pane, as shown in Figure 11-4.

A high-availability VM viewed in Failover Cluster Manager. Notice the standard VM actions in the Actions pane. Additional actions, such as Move, will be explained in later chapters.
TRY IT YOURSELF
Create a VM, CLTST01, on the Hyper-V cluster, using the steps in this section. You should also install an OS onto the VM.
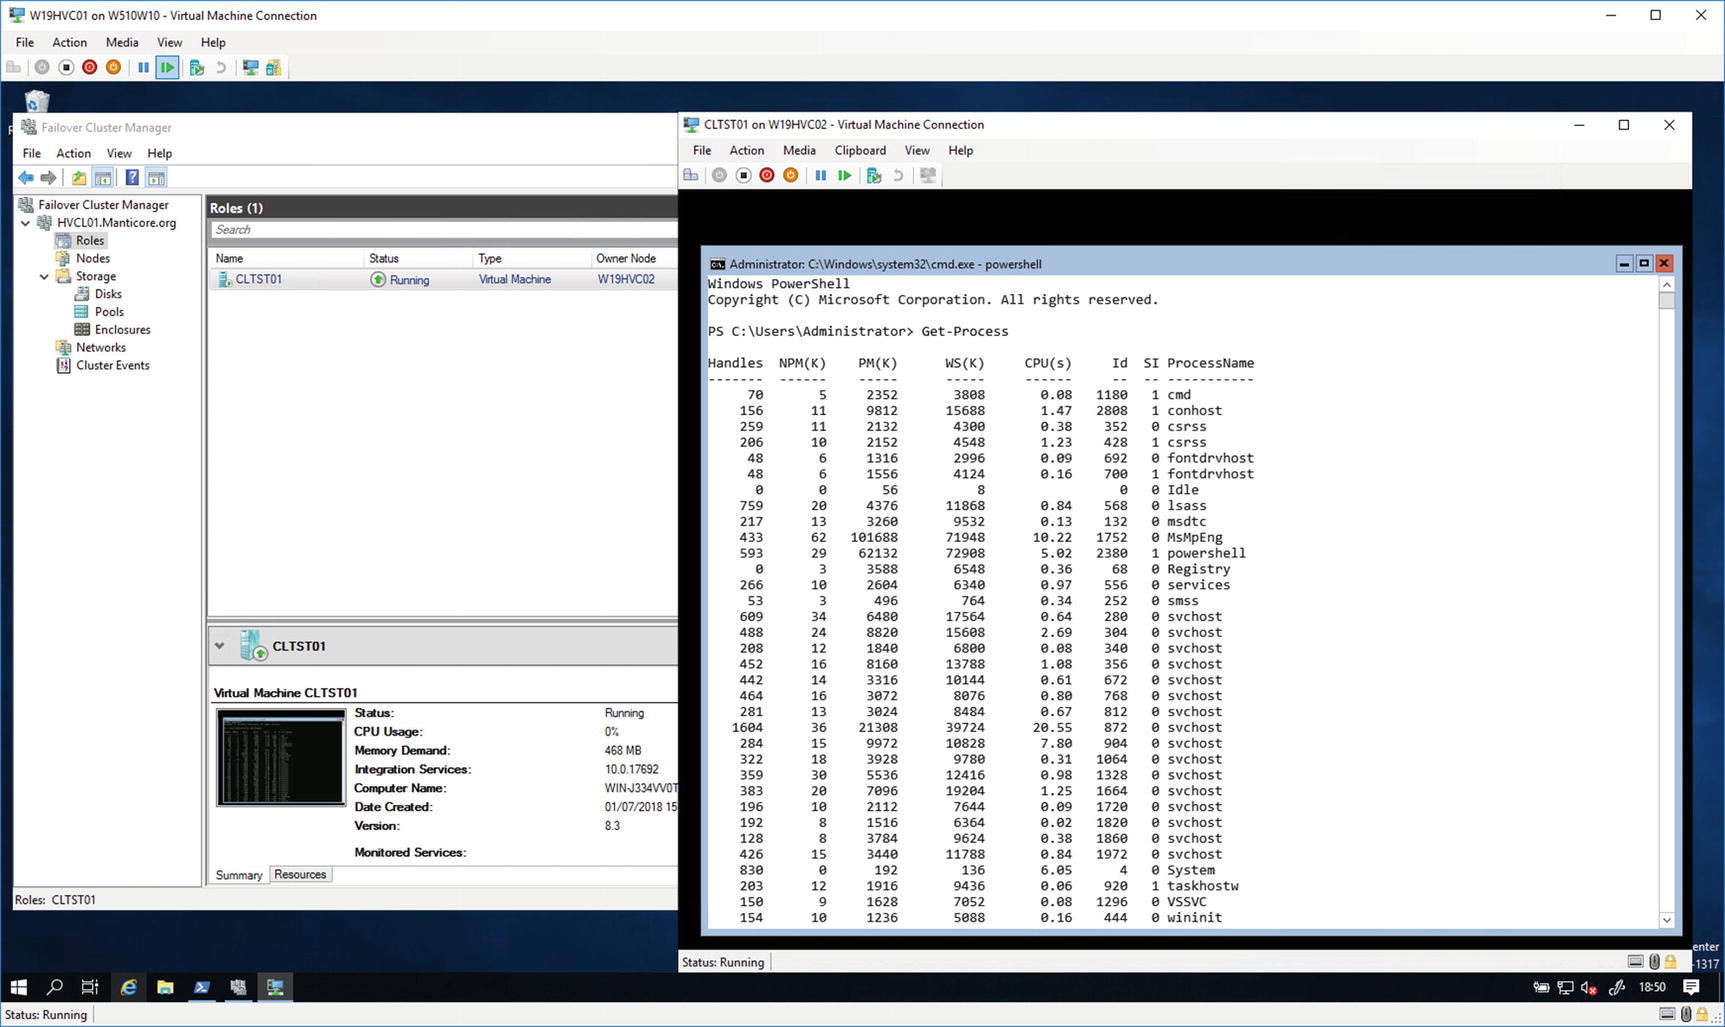
Nested virtualization. The VM on the right of the figure (CLTST01) is a Windows Server 2019 instance of Server Core running on the VM that is the cluster node HVC01, also running on Windows Server 2019.
ABOVE AND BEYOND
ISO images for operating installation
Other software installation packages
Utility tools
Scripts
The need for a volume containing your tool set will become more important if you use System Center Virtual Machine Manager (SCVMM) in your environment. You’ll need a volume to store the templates SCVMM can use when creating VMs.
Once you’ve created a VM, how do you administer it?
Virtual Machine Administration
You use Failover Cluster Manager for VM administration on a Hyper-V cluster, because it exposes the VM migration tools for moving VMs between cluster nodes and storage locations.
It is possible to use Hyper-V Manager to manage the VMs on your cluster, but you can only view and manage the VMs on a single node at a time. If you want a view of all of the VMs on the cluster, you need to use Failover Cluster Manager.
You can run Failover Cluster Manager from one of the cluster nodes or an administration machine.
TRY IT YOURSELF
Connect to the cluster using Failover Cluster Manager from a remote administration machine (not part of the cluster). Compare with using Failover Cluster Manager on a cluster node. Any differences?
Add Network Adapter to Virtual Machine
If you’ve worked through the practical sections, including creating a VM on the cluster, as in the previous section, you’ll realize that the VM can’t communicate on the network, because there isn’t a virtual switch to which the network adapter that’s automatically created when you build a new VM can connect.
We stated earlier that you should automate the creation and configuration of the nodes in your Hyper-V cluster. This ensures that all nodes are configured in an identical manner. This will become even more important when you look at the implications of migrating VMs between hosts, in Chapter 14.
Using PowerShell Direct, you connect to each node in turn and run the New-VMSwitch cmdlet. The switch type will automatically be set to External, because you’ve specified to connect the switch to a network adapter.
Note
You’ll probably have to restart the nodes when you make these changes, as Windows moves the IP address from the physical network adapter to the switch.
TRY IT YOURSELF
Create the virtual switches on all of the nodes in your cluster. Which is quicker and more efficient: using Hyper-V Manager or running a script?
Get the VM and pipe the object into Get-NetworkAdapter (there’s only one on the VM at this stage), then pipe into Connect-VMNetworkAdapter, supplying the switch name you want to use, in this case, CLAN.
TRY IT YOURSELF
Connect the VM’s automatically created network adapter to the virtual switch you just created. How would you modify the script, if the VM had multiple network adapters?
Your VM now has a connected network adapter, so you can perform any final configuration work.
One common task you’ll need to perform is adding storage to a VM.
Add Virtual Disk to Virtual Machine
You’ve seen how to manage VMs in previous chapters, so we’re not going to repeat all of that material. But as a quick example, to show that managing a VM on a cluster isn’t that different from doing so on a stand-alone host, let’s add a virtual disk to the VM we’ve just created.
- 1.
Open Failover Cluster Manager.
- 2.
Expand HVCL01.
- 3.
Click Roles.
- 4.
Click on a VM—CLTST01.
- 5.
Click Settings in the Actions pane.
- 6.
Click SCSI Controller.
- 7.
Click Hard Drive.
- 8.
Click Add.
- 9.
Select Virtual hard disk.
- 10.
Click New.
- 11.
Click Next, to bypass the Before You Begin page.
- 12.
Click Dynamically expanding.
- 13.
Click Next.
- 14.
Change name to Data01.vhdx.
- 15.
Change location to match the VM (clustered shared volume).
- 16.
Select Create new blank virtual hard disk.
- 17.
Set the size to 100GB.
- 18.
Click Next.
- 19.
Click Finish.
TRY IT YOURSELF
Add a new virtual hard disk to the VM you created on the cluster.
You start by getting the new disk, which has the partition style of RAW, meaning that it hasn’t been formatted. You must initialize the disk. We’ve used a partition style of GPT to match the default in modern Windows systems. You could use the older MBR style, if preferred. A partition is created on the disk, using all of the available space. A drive letter of E has been assigned. If you already have a number of disks in the machine and want the system to allocate the drive letter, change -DriveLetter 'E' to -AssignDriveLetter. The final step is to format the disk to NTFS and supply a system label for the disk.
The examples you’ve seen in this section show that you can use all of the knowledge and skills you’ve built up so far to manage VMs on stand-alone Hyper-V hosts, to also manage VMs on clusters. You just have to be aware that you’re working on a cluster and that some things are slightly different.
When you created the cluster in Chapter 10, you added two 1TB disks to each node. The universal constant in IT is the need for more storage, so how can you expand the storage in your cluster?
Managing Storage
Managing the storage for your cluster includes two main areas. First, you must plan your storage. When you created the cluster in Chapter 10, the instructions said to create four 1TB disks, to be used as shared storage. In reality, you must plan how much storage you’ll need and how it might grow.
Second, you must be able to add storage to your cluster. In this chapter, we’ll show you how to increase the storage available through Storage Spaces Direct. Other storage technologies will be covered in Chapter 12, when you learn about guest clusters.
Planning your cluster’s storage is a multistep process.
Planning Storage Needs
In Chapter 1, you learned about the steps involved in moving an organization from a physical to a virtual environment. One of the steps in that process was calculating the amount of storage used by the physical storage. That is the starting point for the cluster storage requirements. On top of that figure, you’ll have to allocate space—for either existing VMs will grow or new VMs will be required, and they’ll all need storage.
Note
Always, always, always err on the side of caution when deciding the amount of storage you’ll need. Storage is relatively cheap, and it’s easier (and often cheaper) to buy more than you think you’ll need, rather than rush to add extra capacity later.
Which technology will you use, for example, SAN, iSCSI, or Storage Spaces Direct?
What level of redundancy do you want? Mirroring doubles the required storage, and RAID 5 will take one disk out of the array for parity.
How many volumes do you need?
What level of free space do you want to keep on the disks?
Once you’ve determined your storage needs, you must think about capacity planning.
- 1.
Determine the threshold at which you require extra disk space.
- 2.
Measure how much of your storage is used on a regular basis.
- 3.
Graph the results to determine a trend.
Note
Remember that there can be significant, sudden jumps in the amount of storage used, owing to new projects, so be sure to include those in your planning.
Once you have determined a trend, you can predict when you’ll run out of storage. This allows you start the discussions about acquiring new storage in sufficient time to prevent a lack of storage becoming a problem.
Assume that you’ve been performing the capacity planning discussed above and have seen the need for new storage. How do you add the storage to the cluster?
Add Storage to Cluster
The cluster you created in Chapter 10 uses Storage Spaces Direct for storage. Microsoft recommends that you use one (1) storage pool per cluster. A storage pool can contain up to 416 disks, which don’t have to be of the same size.
The new disks will be automatically added to the storage pool. The disks will automatically rebalance their contents to give the most even distribution possible.
- 1.
Open Failover Cluster Manager.
- 2.
Expand HVCL01.
- 3.
Select Storage.
- 4.
Select Pools.
- 5.
Select the Physical Disks tab at the bottom of the GUI.
This code, adapted from https://blogs.technet.microsoft.com/filecab/2016/11/21/deep-dive-pool-in-spaces-direct/ , gets the physical disks in the storage pool and for each disk determines the node, calculates the size and free space in GB, and calculates the percentage of free space available. When the percentage of free space available drops to a value that’s too low (40% is a good starting point), it’s time to think about adding more disk.
TRY IT YOURSELF
Use the procedure in this section to add one or more disks to the nodes in your cluster and add them into the storage pool.
You’ve added extra disks to the cluster, but the CSV are still the original size. To utilize the new storage capacity, either create new volumes (see Chapter 10) or extend the current volumes.
Extending a Cluster Shared Volume
This is where a consistent naming convention comes in handy. Get the disks name Vol1?—Vol1 and Vol2, in this case—and extract the partition information for the CSV. Find the maximum possible size of the partition, based on the new disk size, and resize the partition to that size.
TRY IT YOURSELF
Use the procedure in this section to extend the virtual disks created from the storage pool on your cluster.
CSV are accessible by each node in the cluster. Each volume (virtual disk in Storage Spaces Direct terminology) has an owner node. You may have to change the owner node, for example, if you plan to take a node offline.
Change a Node That Owns a Disk
Clusters are used to provide resiliency, so you expect the nodes to be online most, if not all, of the time. If you take down a node, any disks owned by that node will failover to another node. This is the expected behavior of the cluster. It’s a better practice to manually failover any disks owned by a node rather than relying on the automatic failover, because the failover is under your control and happens before the current owner goes offline.
ABOVE AND BEYOND
Automatic failover of resources is usually very reliable. Very occasionally, you may see problems. A couple of examples we’ve seen may help, if you ever have to troubleshoot failover issues.
First, if the nodes aren’t all patched to the same level, there was a known bug in automatic failover that caused the cluster to lose contact with the storage when the node went offline.
The second example involves moving a cluster between datacenters and changing the IP addresses of the nodes and the cluster. This can cause problems with the storage failing over between nodes.
- 1.
Open Failover Cluster Manager.
- 2.
Expand HVCL01.
- 3.
Expand Storage.
- 4.
Select disks.
- 5.
Right-click the disk, or disks, to failover.
- 6.
Click Move.
- 7.
Click Select Node…
- 8.
Select the node in the dialog box.
- 9.
Click OK.
- 10.
The failover will occur within a few seconds. The Owner Node in the Disks pane will change to match the node you selected.
TRY IT YOURSELF
Select one of the data disks and initiate a failover to the other node in the cluster, using the procedure in this section.
You performed most of the networking configuration when you created the cluster in Chapter 10, but you must think about adding a migration network.
Create Migration Network
Migrating VMs between the nodes in the cluster can involve significant network traffic. Microsoft recommends configuring a specific network for migration, so that migrations don’t impact user access to the VMs. A 1GB NIC provides sufficient bandwidth for migration traffic in a small environment with low migration requirements. In larger networks, you may look at using a number of teamed network adapters on the migration network, but you should throttle the migration VLAN to 2GB, as a starting point.
Adding a network to the cluster specifically for the traffic involved in migrating VMs between nodes is a good idea, as it removes the traffic from the other cluster networks, especially the network over which users access the VMs.
You saw how to add networks to the cluster in the section “Creating a Hyper-V HA Cluster,” so this is another recap. We’ll use 192.168.30.0/26 for the network. That’ll supply sufficient IP addresses for the cluster.
- 1.
Create a new private switch on your Hyper-V host (or create a new VLAN, if use physical hosts).
New-VMSwitch -Name Migration -SwitchType Private
- 2.
Add an adapter to each node using the new switch.
Add-VMNetworkAdapter -VMName W19HVC01 -SwitchName Migration
Add-VMNetworkAdapter -VMName W19HVC02 -SwitchName Migration
- 3.
On W19HVC01, rename the new adapter to Migration. Set the IP address to 192.168.30.1, with a subnet mask of 255.255.255.192. Remember: New adapters are always named Ethernet.
- 4.
On W19HVC02, rename the new adapter to Migration. Set the IP address to 192.168.30.2, with a subnet mask of 255.255.255.192.
- 5.
In Failover Cluster Manager ➤ Networks, rename the new network to Migration network. Ensure it’s configured to allow cluster traffic only.
- 6.
In the Actions pane, click Live Migration Settings…
- 7.
Unselect all networks except the Migration network.
- 8.
Click OK.
TRY IT YOURSELF
Create and configure a migration network for your Hyper-V cluster.
These instructions can be used to create other networks for your cluster. Remember to configure the VMswitch to be of type Internal or External, if you require the cluster nodes to communicate with just the VM host or external clients, respectively.
TRY IT YOURSELF
Configure a management network for your Hyper-V cluster.
So far in this chapter, you’ve seen how to create and manage VMs on the cluster, how to manage the cluster’s storage, and how to manage the networking aspects of the cluster. One last thing must be covered in this chapter: how to add and remove nodes from the cluster.
Managing Cluster Nodes
Servers use their resources—CPU, memory, disk, and network—to support workloads. Clusters can be thought of in the same way, except that the resources are provided through the individual nodes. We’ve stated before that you should put as much memory as possible in your Hyper-V hosts, as it’s usually the resource that controls the number of VMs that you can run on the host.
A cluster of Hyper-V hosts will eventually run out of resources and can’t support any further increase in the number of VMs it’s running. You’ve seen how to add disk to the cluster. If your nodes are at capacity, as far as CPU and memory are concerned, your only option is to add one or more nodes to the cluster.
Add a Cluster Node
The new node should be configured in exactly the same way as the existing nodes, including any virtual switches. We keep saying that you should automate your node creation with scripts, but once you’ve had to build a few nodes, and spent the time correcting configuration mistakes, you’ll appreciate why we repeat the message.
If you’re using Storage Spaces Direct, decide if you’re going to add more disk storage capacity with this node and, if so, how much. This isn’t a real issue when adding nodes, but it could become one when removing nodes.
- 1.
Open Failover Cluster Manager.
- 2.
Expand HVCL01.
- 3.
Select Nodes.
- 4.
In the Action pane, click Add Node…
- 5.
Click Next, to bypass the Before You Begin page.
- 6.
Supply the name of the new node and Click Add. The node will be verified, which may take some time.
- 7.
Click Next.
- 8.
On the Validation Warning page, select Yes to run the validation report and No to skip the report.
- 9.
Click Next.
- 10.
On the Confirmation page, click Next.
- 11.
The node will be added to the cluster.
- 12.
View the report, if required.
- 13.
Click Finish.
Note
If you don’t run the validation report while adding the node and get an error, then go back and repeat the exercise, but this time, run the validation report, to help determine the reason for the failure.
You’ll recognize that the wizard is similar to the one you used to create the cluster initially.
Use -NoStorage to prevent the addition of any shared storage on the new node to the cluster, during the process of adding the node to the cluster.
TRY IT YOURSELF
Create a machine to be an extra node for your cluster and add it to the cluster.
Sometimes, it’s necessary to remove a node from the cluster, for example, if the node has experienced a motherboard failure or must be retired.
Remove a Cluster Node
All VMs have been migrated to other nodes.
Any shared storage attached to the node, especially, using Storage Spaces Direct has been removed. If you have multiple disks attached to the node that are used in Storage Spaces Direct, remove them one at a time, to allow the storage pool to reconfigure itself. If you remove multiple disks at the same time, you risk corrupting your storage pool.
- 1.
Open Failover Cluster Manager.
- 2.
Expand HVCL01.
- 3.
Select Nodes.
- 4.
Right-click the node to be evicted.
- 5.
Select More Actions from the context menu.
- 6.
Click Evict.
- 7.
Click Yes on the confirming dialog box.
- 8.
The node will be evicted from the cluster and will no longer be displayed under Nodes in Failover Cluster Manager.
You’ll be prompted to confirm the removal of the node.
TRY IT YOURSELF
Remove the new node from the cluster.
That brings you to the end of the chapter, and the techniques you’ve learned in it will enable you to successfully manage your Hyper-V cluster. All that remains is for you to complete the lab, to consolidate your knowledge.
Lab Work
- 1.
Complete all of the Try It Yourself sections in this chapter. In particular, you should practice the techniques using the GUI and PowerShell. The ability to use both will make you a better administrator.
- 2.
You will also have to install an OS into the VM you created on the cluster.
- 3.
If you have time, create a second virtual machine, CLTST02, on the cluster. Use a different CSV for the storage.