
The NAV 2015 Client Add-in API (also known as Client Extensibility) provides the capability to extend the Role Tailored Client for Windows, Web, or Tablet through the integration of external, non-NAV controls. The Client Add-in API uses .NET interfaces as the binding mechanism between a control add-in and the NAV framework. Different interfaces and base classes are available to use, or a custom interface can be created. Controls can be designed to raise events that call on the OnControlAddin trigger on the page field control that hosts the add-in. They can also add events and methods that can be called from within C/AL.
Contrary to the limitations on other integration options, Client Add-ins can be graphical and appear on the RTC display as part of, or mingled with, native NAV controls. Following are a few simple examples of how Client Add-ins might be used to extend RTC UI behavior:
- A NAV text control that looks normal but offers a special behavior. When the user double-clicks on it, the field's contents would display in a popup screen accompanied by other related information or even a graphical display.
- A dashboard made up of several dials or gauges showing the percentage of chosen resources relative to target limits or goals. The dials are defined to support click and drill into the underlying NAV detail data.
- An integrated sales call mapping function displays customer locations on a map and creating a sequenced call list with pertinent sales data from the NAV database.
- Interactive visualization of a workflow or flow of goods in a process, showing the number of entries at each stage, supporting filtering to display selected sets of entries.
- Entry and storage of a written document signature on a touch screen.
Some Client Add-ins will be created, packaged, and distributed by ISV Partners who specialize in an application area. When enhancing a system for a customer's specific application, we may decide to create a special purpose add‑in.
As with any API, there is a defined approach that we must use to create a Client Add-in to interface with the NAV Windows RTC. So long as the code within the add-in is a well-behaved .NET code, we have a great deal of flexibility in the structure of the code within the add-in. The control can be one we create, a standard WinForms control, or one that we've acquired from a third party.
Once we have the .NET control we're going to use for our application, we need to build the add-in structure which envelopes the control. The most logical toolsets for building add-ins are the current versions of Visual Studio or one of the free downloadable tools such as Visual Studio Express for C#. When building an add-in, we must make sure that we are using a compatible version of .NET framework. The Developer and IT Pro Help in NAV 2015 contain many Help sections covering a wide variety of topics relating to Client Add-ins. Here's a partial list:
- Binding a Windows Client Control Add-in to the Database
- Client Extensibility API Overview
- Developing Windows Client Control Add-ins
- Exposing Events and Calling the Respective C/AL Triggers from a Windows Client Control Add-in
- Exposing Methods and Properties in a Windows Client Control Add-in
- Extending the Windows Client Using Control Add-ins
- How to: Create a Window Client Control Add-in
- How to: Determine the Public Key Token of the Windows Client Control Add-in
- How to: Install a Windows Client Control Add-in Assembly
- How to: Register a Windows Client Control Add-in
- Installing and Configuring Windows Client Control Add-ins on Pages
- Walkthrough: Creating and Using a Window Client Control Add-in
- Windows Client Control Add-in Overview
Let's create a Client Add-in for WDTU. We want to add an MP3 player to the Playlist page to allow the user to preview songs on the Playlist. The following screenshot shows what it will look like when we're done (our MP3 player FactBox is circled):

To accomplish this, we will create a Visual Studio 2012 or higher .NET assembly (.dll) utilizing the Windows Media Player.
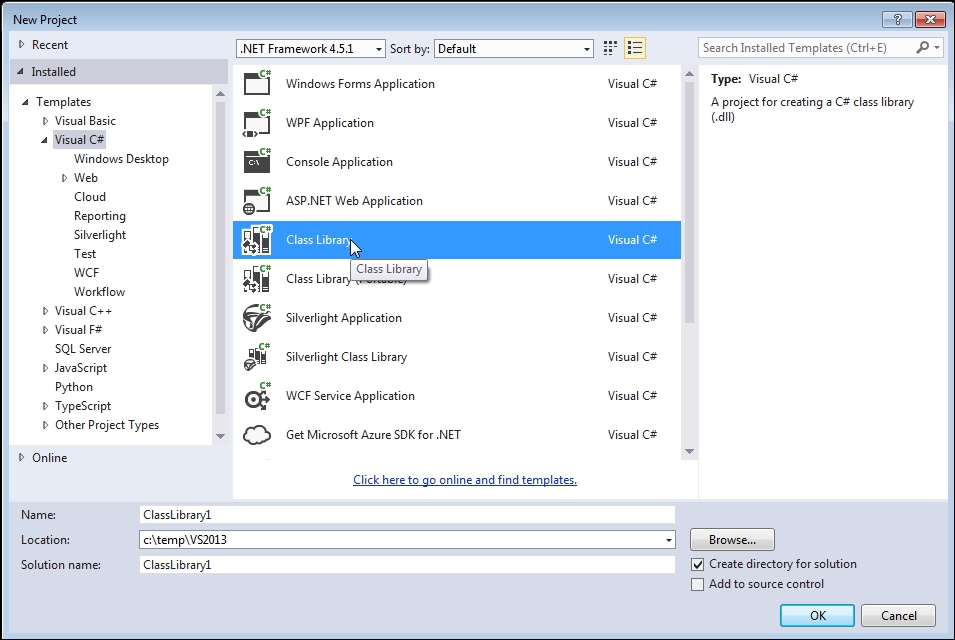
To start, we are going to open Visual Studio 2013 and create a New Project. For a template, select Visual C# - Windows Class Library. Make sure the .NET Framework selected is 4.5 or higher. Name the solution WDTUplayer, and place in a directory we can access later (we'll use C:Temp). Check the Create directory for solution option.
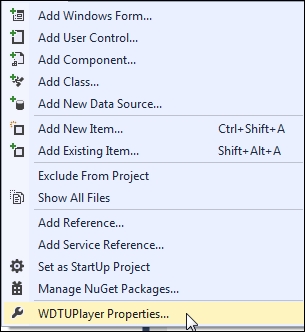
In order to access the .dll in NAV, we need to create a Strong Key Name (SNK). To do this in Visual Studio, go to the menu for Project and select WDTUPlayer Properties.
Select the Signing option on the left:

Then Checkmark the Sign the Assembly option:
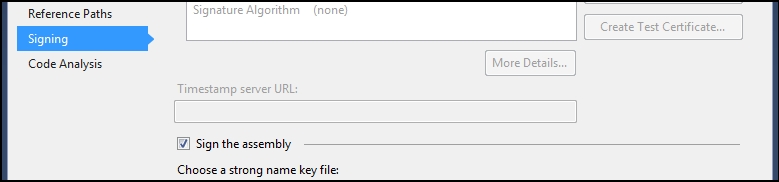
Select <New…> from the dropdown for the box Choose a strong name key file, and fill in a file name such as WDTUplayer.snk. Creating the SNK before adding any controls or other objects to the project allows the additional elements to inherit the SNK.

Go to the Project menu option and select Add New Item (Ctrl + Shift + A) and select Windows Form. The new Windows Form object will be added to our Form design layout screen. Right-click on the form and select Properties (or View | Properties). Review the form properties and set the ones defined in the following table:
|
Property |
Value |
|---|---|
|
AutoScaleMode |
None |
|
AutoSize |
True |
|
FormBorderStyle |
None |
|
Locked |
True |
|
Padding |
0,0,0,0 |
|
MaximizeBox |
False |
|
MaximumSize |
0,0 |
|
MinimizeBox |
False |
|
MinimumSize |
0,0 |
|
Size |
276,47 |
|
Text |
WDTU MP3 Player |
Next, we need to make the Windows Media Player (a COM object) available in the Toolbox. Windows Media Player must be installed on our machine (it typically already is). Click on View | Toolbox (or Ctrl + W, X) and scroll to the General group:

Right-click on General and select the Choose Items option. In the Choose Toolbox Items form, select the COM Components tab and scroll down to Windows Media Player. Check the box and click OK:

The Windows Media Player control will now be available in the Toolbox | General tab.
Select the Windows Media Player control and drop it into the form that we added earlier. Right-click on the Windows Media Player control and then click on Properties. Uncheck Auto Start and check Stretch to Fit:

Close the Windows Media Player Properties window, click on View | Properties Window (or Ctrl + W, P), and set properties as shown in the following table:
|
PROPERTY |
VALUE |
|---|---|
|
Name |
WDTU_MP3_Player |
|
Anchor |
Top, Bottom, Left, Right |
|
fullScreen |
False |
|
Location |
0,0 |
|
Margin |
0,0,0,0 |
|
Locked |
True |
|
Size |
275, 45 |
|
stretchToFit |
False |
|
windowlessVideo |
False |
In the Quick Launch box at the top right of the screen, type in Add Reference to search for that function (in the following image, only "add ref" was typed before the Project – Add Reference link was displayed):
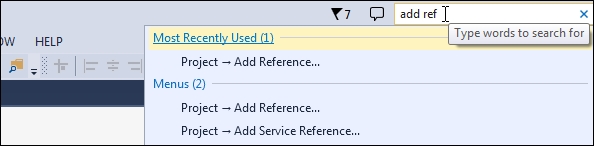
Click on Project – Add Reference to display the following screen:
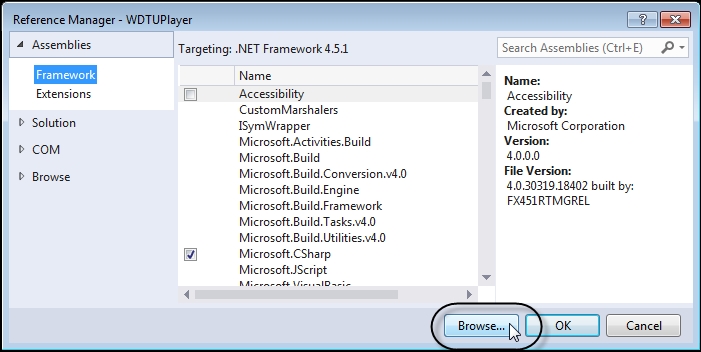
Click on the Browse button. Find Microsoft.Dynamics.Framework.UI.Extensiblity, usually found in C:Program Files (x86)Microsoft Dynamics NAV70RoleTailored Client, as shown in the following image:

Then add it as a Reference, and click OK:

To get to the code behind the Form1.cs, in the Solution Designer window, right-click to select View Code or double-click on the form image in the main window. Once we are viewing the code, we should make it look like the following:
using System;
using System.Collections.Generic;
using System.ComponentModel;
using System.Data;
using System.Drawing;
using System.Linq;
using System.Threading.Tasks;
using System.Text;
using System.Windows.Forms;

namespace WDTUplayer
{
    public partial class Form1 : Form
    {
        //string to put value from NAV into string MoviePath;

        public Form1()
        {
            //Make sure not a null string –
            //will error if not initalized
            MoviePath = "";
            InitializeComponent();
        }

        //Function called from Class to set URL path string
        public void SetMoviePath(string pMoviePath)
        {
            MoviePath = pMoviePath;
        }

        //Default function for NAVMediaPlayer control on form
        //where the URL can be dynamically set from NAV
        private void WDTU_MP3_Player_Enter(object sender, EventArgs e)
        {
            WDTU_MP3_Player.settings.autoStart = false;
            WDTU_MP3_Player.URL = MoviePath;
        }

    }
}
In the Class1.cs object, the code needs to be created as follows:
using System;
using System.Collections.Generic;
using System.ComponentModel;
using System.Linq;
using System.Text;
using System.Threading.Tasks;
using Microsoft.Dynamics.Framework.UI.Extensibility;
using Microsoft.Dynamics.Framework.UI.Extensibility.WinForms;
using System.Windows.Forms;
using System.Drawing;

namespace WDTUplayer
{
    [ControlAddInExport("Cronus.DynamicsNAV.WDTU_MP3")]
    [Description("WDTU MP3 Player")]

    public class WDTU : StringControlAddInBase
    {
        //Create form instance to pass value from NAV
        WDTUPlayer.Form1 WMPForm = new WDTUPlayer.Form1();

        //Initialize the form
        protected override Control CreateControl()
        {
            WMPForm.TopLevel = false;
            WMPForm.Visible = true;
            return WMPForm;
        }

        // This is the function that receives from NAV (set) // and sends back to NAV (get) the string value from // the SourceExp property on the NAV page field with // the ControlAddIn assigned to it
        public override string Value
        {
            get
            {
                return base.Value;
            }
            set
            {
                base.Value = value;
                WMPForm.SetMoviePath(base.Value);
                //Function in form
            }

        }
    }
}
Note the statement defining public override string Value. This is the override of the Value property in the Class1.cs object that retrieves the value passed from NAV (set) and passes the value from the .NET assembly back to NAV (get). Because we defined the WMPForm variable as the Form object, we can pass the value retrieved from NAV (the field value linked in the CardPart page we will create to hold our Client Add-in).
Save all the objects and go to the Build menu and select Build WDTUPlayer. Locate and copy the following files from our Visual Studio Project folder:
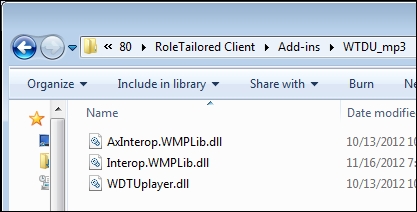
WDTUplayer.dllInterop.WMPLib.dllAxInterop.WMPLib.dll
Client Add-ins are each placed in their own directory within the directory C:Program Files (x86)Microsoft Dynamics NAV80RoleTailored ClientAdd-ins (this is the default location).
We'll create directory WDTU_mp3 in that location and place our three files there. Depending on the development computer's setup, additional files may also have to be copied to the WDTU_mp3 directory.
From Start Menu | All Programs | Visual Studio 2013 | Visual Studio Tools, run Developer Command Prompt for VS2013. When the Visual Studio Command Prompt screen displays, enter the following:
sn -T "C:TempWDTUplayerWDTUplayerinDebugWDTUplayer.dll"
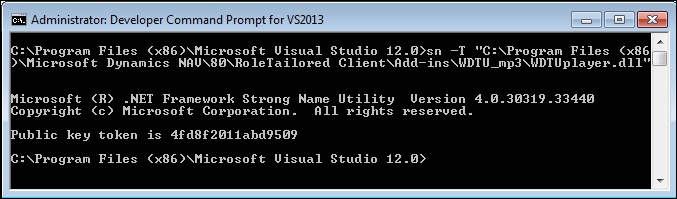
Public key token in this image is 4fd8f2011abd9509 (yours is likely to be different).
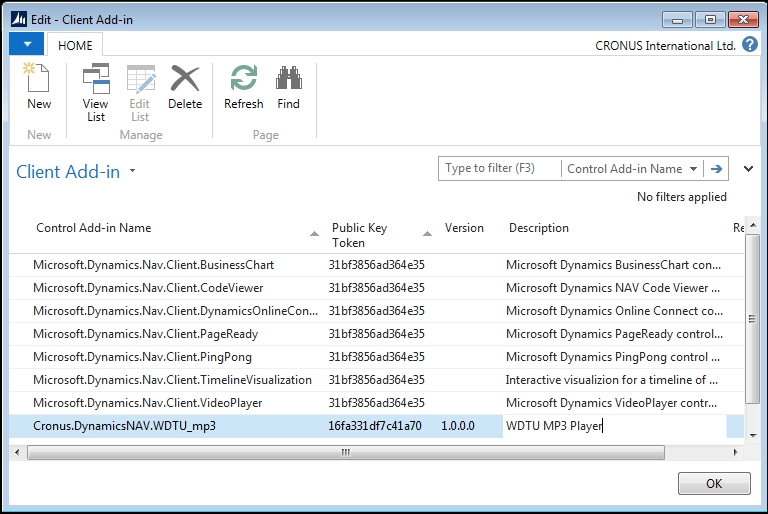
Exit the Visual Studio Command screen and open the NAV 2015 Development Environment. Click on the Object Designer button Tables, find Table 2000000069 - Client Add-in, then Run the table. Enter the control add-in name, public key token, a version (you decide which version), and a description.
Now that our client add-in is registered in NAV, we will create a CardPart to display a control containing our new Media Player Add-in control (which links the .NET .dll element to a field in NAV).
Click on Page | New in the Development Environment, enter Item for the table, Create a page using a wizard: and CardPart for the page type:

On the next tab, only select a single field, MP3 Location. This is the value we wish to pass to the .NET assembly:

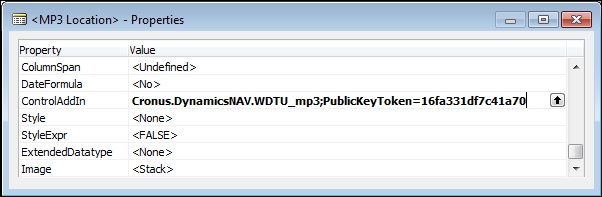
Click Finish and save the Page as 50011 - WDTU MP3 Player. Click on the field MP3 Location and view the properties. Scroll down to ControlAddIn and perform a lookup to select Cronus.DynamicsNAV.WDTU_MP3. The public key token will also be populated. Set the ShowCaption property to No.
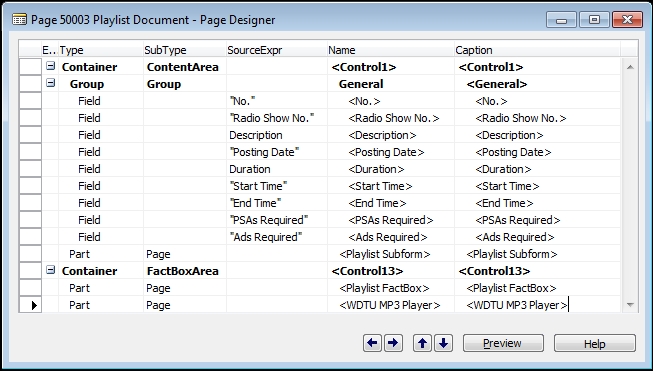
Save and close the page. Design Page 50003 - Playlist. Open the properties of the subform control for the Playlist Subform and copy the control ID.

We need to assign this to the WDTU MP3 Player CardPart to link the CardPart to the SubForm lines. In the Page Designer for Playlist page, add the CardPart as a FactBox under the PlaylistFactbox.
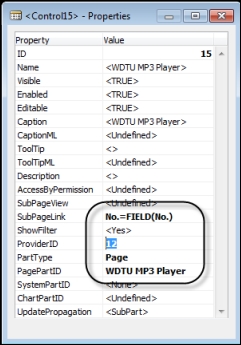
Display the properties for this new Page Part control and fill in the properties as shown in the following screenshot:
Now we will test our work. Of course, in order to test, we have to have test data set up to match what we've designed in our software. We must have Items that represent MP3 files and which contain the location of those MP3 files. Plus, the MP3 files must exist in the defined location. We should set up at least a couple of test items and associated MP3 files so we can enjoy the results of our work.
Once we have a minimal amount of test data set up, Run the Playlist page (50003). If all is well, the WDTU MP3 player should play the MP3 from the defined file location for each item in the playlist subpage. If it doesn't work, then this will be an opportunity to experiment some more with the NAV 2015 Debugger.
In order to take advantage of the Client Add-in capabilities, we need to develop some minimal Visual Studio development skills and probably some .NET programming skills. Care will have to be taken when designing add-ins that their User Interface style complements, rather than clashes with, the UI standards of the NAV RTC.
Client Add-ins are a major extension of the Dynamics NAV system. This feature allows ISVs to create and sell libraries of new controls and new control-based micro-applications. It allows vertically focused Partners to create versions of NAV that are much more tailored to their specific industries. This feature allows the integration of third-party products, software, and hardware, at an entirely new level.
The Client Add-in feature is very powerful. If we learn to use it, we will have another flexible tool in our kit and our users will benefit.