
13. Color Management in Macromedia FreeHand 10 and 11: Capable but Quirky
Macromedia must have a whole bunch of customers with an interesting variety of legacy needs, because Macromedia FreeHand doesn’t have just one color management system. Exactly how many it has depends on your point of view, but we’ll concentrate on the ones that use ICC profiles, with a brief overview of the others—if only so that you can wonder, as we do, why they’re even there.
FreeHand has many strengths, but we can’t count color management as being among them. With most OSs, FreeHand works (or fails to work) as described in this chapter. But at the time of publication, FreeHand 10.0 and 11.02 both exhibit bizarre behavior that defies detailed explanation when running under Mac OS X Panther (10.3.x). RGB to CMYK conversions at output time, and the onscreen previews of such conversions, are intermittently unreliable and more often unreliable than not.
We can report that an early binding workflow—placing CMYK images and using an assumed profile set in the Separations printer pop-up menu—provides decent soft proofing of placed and native content, but if you want FreeHand to perform conversions at output time, don’t trust them without a lot of testing. FreeHand honors embedded profiles only in imported RGB TIFF images, and lets you assign profiles to imported RGB TIFF and JPEG images, and all CMYK elements are invariably assumed to be output CMYK. If your workflow is to design in RGB and convert to CMYK at output time, FreeHand’s color management can serve you well. Likewise, if you do all your work in final CMYK, FreeHand can provide you with good on-screen previews, and will pass the CMYK values unchanged to output.
For any other workflow, all bets are off. And even in these two simple workflows, FreeHand offers plenty of opportunities for mistakes—so in this chapter, we’ll try to steer you clear of the shoals of confusion and guide you to the safe harbor of smoothly functioning color management.
FreeHand’s Color Preferences
The Preferences dialog box has a series of categories on the left-hand side. When you select Colors, the dialog box shown in Figure 13-1 appears.
Figure 13-1 FreeHand Color Preferences dialog box

Color Management Types
On Windows systems, the dialog box offers four possibilities: None, Adjust Display Colors, Color Tables, and Kodak Digital Science. Mac OS offers the same four and adds a fifth option, Apple ColorSync (see Figure 13-2). We strongly recommend that you ignore the first three options and choose either Kodak Digital Science or Apple ColorSync, which offer identical options and functionality in FreeHand But for those who must know, here are the ramifications of the first three options.
Figure 13-2 Color management types

None
This option offers no user control for either output conversions or on-screen previews. The conversion from CMYK to RGB for either display or for RGB output devices is controlled by a built-in and nonmodifiable table, as is the conversion from RGB to CMYK output triggered by the “Convert RGB Colors to Process” option in FreeHand’s print dialog (discussed later). Needless to say, we don’t recommend this type of color management.
Adjust Display Colors
We have two problems with this option—one philosophical, one practical. It lets you change the behavior of your monitor, for FreeHand only, in an attempt to match printed output—the approach that Bruce calls “messing up your monitor to match the print” (though he usually uses a stronger term than “messing”).
The philosophical objection is that it negates one of the major strengths of color management. Back in Chapter 3 we pointed out that color management reduces the number of device-to-device links from n×m to n+m. This approach goes back to the n×m method, because you need to mess up your monitor in a different way each time you change output processes.
The practical objection is that it simply doesn’t work very well. Even when we adjust the display to match printed versions of the swatches, we find that the swatch colors are just about the only things that match between display and print—everything else is off, sometimes a long way off. And to add insult to injury, this method only compensates for native FreeHand elements—imported images preview inaccurately.
Color Tables
This type of color management is pointless. It depends on Kodak Digital Science or Apple ColorSync, and builds Color Tables based on existing ICC profiles. Since you have to base the tables on ICC profiles anyway, you might as well just learn to use ICC color management. We see no advantage to this method, and would be glad to see it removed from FreeHand.
Kodak Digital Science and Apple ColorSync
Referring back to Figure 13-1, we need to cover two checkboxes before getting to the Setup dialog, the meat and potatoes of this course.
• Color manage spot colors lets you color manage just their on-screen preview. You don’t manage their CMYK values for output, because they’re hardwired based on FreeHand’s built-in Pantone tables. (In FreeHand 10, these are the older pre-May 2000 tables, while FreeHand 11 uses the newer post-May 2000 ones.) See “Named-Color Systems” in Chapter 18, Building Color-Managed Workflows.
• Rebuild Color Tables uses the settings in Setup to build color tables for use with the Color Tables type of color management previously mentioned, but since we told you not to use this feature, let’s move on to the contents of the Setup button.
The Color Management Setup dialog box offers seven options (see Figure 13-3). FreeHand 10 isn’t particularly assiduous in looking for profiles—on Mac OS X, it only looks in the /Library/ColorSync/Profiles folder. On other platforms, it ignores both subdirectories and aliases in the usual directories for profiles—so it doesn’t, for example, find display profiles stored in the Displays subfolder in the Mac OS 9 ColorSync Profiles folder. FreeHand 11 successfully finds profiles in all legitimate locations.
Figure 13-3 Color Management Setup dialog box

Monitor
This is where you select your current display profile—FreeHand doesn’t get this information automatically from ICM or ColorSync.
Monitor simulates
The options offered are None, Composite printer, and Separations printer. “None” literally means do no display compensation. If you use this option, neither embedded profiles nor assumed profiles get used for on-screen display, though they may be used for output.
If you use either of the other options, RGB images are displayed by converting from their embedded profile or the “Default RGB image source” profile to the Composite or Separations printer profile (depending on which one you choose in the Monitor simulates pop-up), then to the display profile.
CMYK images, however, are always converted for display using the Separations printer profile as source, even if Monitor simulates is set to “Composite printer.” If you set Monitor simulates to “None,” FreeHand uses its built-in unmodifiable table as the source for display conversion of CMYK instead.
Separations printer
This setting lets you choose a CMYK profile, which becomes the assumed source profile for all CMYK content, including imported images, even if they have an embedded profile—FreeHand simply ignores embedded profiles in imported CMYK. As the CMYK source profile, it affects on-screen preview of CMYK native elements and placed objects. If you print from FreeHand to an RGB device, the profile you select here is used as the source profile for all CMYK content. The only CMYK-to-CMYK conversion FreeHand performs is to a composite CMYK printer when “Composite simulates separations” is turned on—again, the Separations printer profile is used as the source.
Intent
This pop-up lets you specify a rendering intent for all conversions. It affects RGB-to-CMYK conversions at print time, and also affects RGB-to-RGB and CMYK-to-RGB conversions when the Composite printer is an RGB printer (and the output device is non-PostScript). This is the only rendering intent control FreeHand offers.
Composite simulates separations
This checkbox only affects the output, not the on-screen preview. It makes the composite device simulate the separation printer by converting all non-CMYK content to Separations printer CMYK, assigning the Separations printer CMYK profile to all CMYK content, then converting the resulting Separations printer CMYK to the composite printer space.
All the conversions use the rendering intent you specify under Intent, so it’s impossible to use perceptual or relative colorimetric rendering to go from the source profiles to Separation printer CMYK, then absolute colorimetric rendering to go from Separation printer CMYK to the Composite printer space. If you want the composite printer to produce a reasonable simulation of the final separations, we recommend that you set the Intent to Relative Colorimetric.
Composite printer
Here you may select an RGB or CMYK profile for a composite printer. If you select an RGB profile, the “Convert RGB to process” checkbox in the FreeHand print dialog is ignored, though it isn’t grayed out. But selecting an RGB profile here is quite dicey when it comes to printing—see “Printing,” later in this chapter, for more information.
To select a profile here, you must check the “Composite simulates separations” checkbox previously described. There’s no logical reason for this; that’s just the way it is. You can temporarily check the box to change the profile, and then uncheck it to ensure separation simulation does not occur. Even though the selected profile is grayed out when this box is unchecked, it’s still set as the Composite printer profile.
Default RGB image source
The profile selected here is automatically assigned to untagged imported RGB images rather than simply acting as the assumed profile. We make this distinction because images imported while profile “A” is selected will retain profile “A” as their source if you subsequently change the default RGB image source to profile “B.” Only subsequently placed images will use profile “B.” If you choose “None,” the display profile, set in the Monitor pop-up menu, is assigned as the source.
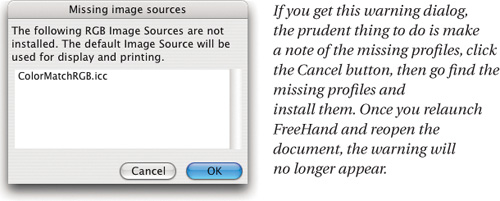
The profiles automatically assigned to imported RGB images are referenced in the saved FreeHand document, but not embedded. If you open the file on another workstation that doesn’t have the profiles installed, you’ll get a cryptic warning dialog listing the missing profiles when you open the document (see Figure 13-4). The dialog says that the default RGB image source will be used instead—that means whichever default RGB image source profile is selected in Preferences at the time the document is opened.
Figure 13-4 Missing Image Sources
Note that this setting applies only to imported graphics. Native RGB elements are always treated as untagged in FreeHand, assuming the display profile as their source profile. This is annoying because the same native elements on two different workstations have different RGB source profiles assumed, and will print differently. To avoid major differences when printing native elements, you need to calibrate all monitors to the same standard. Even then, there’s typically enough variation from display to display that you’ll still get minor differences.
Imported images will display and print the same from multiple workstations, but native elements probably won’t. It’s a major gotcha and oversight by Macromedia.
Manual Assignments
FreeHand offers only one manual control, for assigning profiles to imported images, and it applies exclusively to imported RGB images.
Object Palette
The Object palette—which you open by choosing Object from the Inspectors submenu of the Windows menu—shows you the file type and color space, as well as a pop-up menu showing the source profile, of a currently selected imported RGB graphic (see Figure 13-5).
Figure 13-5 Object palette for RGB TIFF and for CMYK TIFF

Notice that the Object palette example for RGB indicates the Image source is “-SMPTE-C.” The “-” in front of the profile name indicates that this profile was embedded in the imported image. FreeHand always uses the embedded profile in supported RGB image formats unless you change it in this pop-up menu (which we don’t recommend).
If you do change the profile associated with an object, FreeHand immediately forgets the embedded profile. If you later decide to use the embedded profile instead, you’ll need to re-import that object.
Note that the Image source pop-up menu is grayed out for the CMYK example. Embedded profiles for CMYK images are ignored, and it’s impossible to assign profiles manually. As previously discussed, the Separations printer profile specified in Color Management Setup is the assumed source profile for all CMYK elements, including imported images.
Exporting
The undocumented rules that govern how document content is converted by FreeHand’s Export command to various file formats cause Bruce to muse, “Where am I going, and why am I in this handbasket?” As far as we’ve been able to determine, they spell disaster. The export commands have few options pertaining to color conversions; everything else is controlled by the color management settings in Preferences. There are so many permutations that we confined our testing to just Apple ColorSync behavior as it pertains to EPS, PDF, and TIFF exporting. We expect the behavior when using Kodak Digital Science to be the same.
Tip: Create Output-Ready CMYK PDF Files
To create a CMYK print-ready PDF file, print a PostScript file from FreeHand to disk—which will make FreeHand color manage the output following the rules for printing (see “Printing,” later in this chapter)—then process the PostScript file in Acrobat Distiller and make a PDF. Voilà, output-ready PDF that you can place in your page-layout application.
But for the brave or foolish, we’ll document what we’ve learned thus far in the hopes of shaming Macromedia into making FreeHand’s Export features more rational in a future version of the application.
TIFF
TIFF export is always to untagged RGB. It doesn’t matter if the entire content of your document is CMYK—it will end up as an RGB TIFF. The controls in the Export dialog box for TIFF are limited, and don’t include options for CMYK export or profile embedding.
All CMYK elements and images get converted from the Separations printer profile to the display profile, using the rendering intent set in the Intent pop-up in FreeHand’s Color Management Setup.
RGB behavior is controlled by the Monitor simulates setting. If it’s set to “None,” RGB objects aren’t color managed on export—the raw RGB values are simply written to the TIFF. If it’s set to “Separations” or to “Composite,” RGB objects get converted to the Separations or Composite printer profile, respectively, then to something we’ve been unable to determine—perhaps a hardwired internal space—and finally, to monitor RGB.
EPS and PDF
Both EPS and PDF exporting have a Setup button to access their options, and both offer a “Convert colors to” pop-up menu containing three choices: CMYK, RGB, or CMYK and RGB. The similarities end there.
EPS
The three options produce EPS files on Export as follows:
• CMYK. This option produces an all-CMYK EPS. All CMYK objects, whether native or imported, simply have their raw values written into the EPS file. RGB native elements use the Monitor profile as the assumed source, and RGB imported images use their assigned profile. Both are then converted to an unknown CMYK destination. We haven’t been able to figure out what it is, or get an answer from Macromedia, but it definitely isn’t the Separations printer profile.
• RGB. This option produces an all-RGB EPS. Native and imported CMYK elements use the Separations profile as the assumed source, and are converted to an unknown RGB destination. Imported RGB images use their assigned profile as source, and are also converted to an unknown RGB destination. RGB native elements are left unconverted, and the raw RGB values are exported to the file.
• CMYK and RGB. This option produces a mixed-mode EPS. Imported CMYK images, as well as RGB and CMYK native elements, are left unmodified. Imported RGB images are converted to CMYK using their embedded or assigned profile as source, and an unknown CMYK destination profile.
The three options produce PDF files on Export as follows:
• CMYK. You get a mixed-mode PDF. Imported CMYK images and CMYK native elements are unmodified, so their raw values are exported. Imported RGB images are exported unmodified with raw RGB values intact. RGB native elements use an unknown source and unknown destination, and are converted to CMYK.
• RGB. You also get a mixed-mode PDF. Nothing is converted—raw values are exported for all images and elements.
• CMYK and RGB. Same as for RGB.
If anyone can provide a rational explanation for this set of Export behaviors, we’d love to hear it!
Printing
Printing from FreeHand using color management is relatively straightforward. The main thing you need to do at print time is to tell FreeHand whether you’re printing to the Composite printer or to the Separations printer (see Figure 13-6).
Figure 13-6 FreeHand Print dialog box

In the FreeHand portion of the print dialog is a Separations checkbox. If you check it, the Separations printer profile you selected in Color Management Setup is used as the destination profile. When it’s unchecked, the Composite printer profile you selected in Color Management Setup is used as the destination profile. To use the “Composite simulates separations” feature, you must uncheck the Separations checkbox, and have previously checked the “Composite simulates separations” checkbox in Color Management Setup.
Gotchas
Didn’t think it was going to be that simple, did you? Certainly not after the hell called Export.
• “Convert RGB to process” must be checked (it is by default), or else RGB content isn’t converted to CMYK at output time. This checkbox has two locations—you can check either one. One is reached through Output Options on the File menu. The other is in the Output Options section of the Imaging panel in the Print Setup dialog box, which is reached by clicking the Setup button in the Print dialog (see Figure 13-7).
Figure 13-7 Output Options and Print Setup: Imaging tab

• When you print to a PostScript device, FreeHand wants almost everything to be CMYK. Even if you uncheck the “Convert RGB to process” option and select an RGB profile for the Composite printer, only imported RGB images get converted to the destination Composite printer profile. Everything else is CMYK, and there appears to be no way around this, so you may have significant problems printing to an RGB PostScript RIP.
• On Mac OS X, the default printer, set in the Print Center utility, must be a PostScript printer. Otherwise, FreeHand assumes that you’re printing to an RGB raster device and produces exclusively RGB PostScript, so you’ll most likely end up with a mess.
Be Careful
If you’re careful, you can produce good results using FreeHand’s color management. You can either work entirely in final CMYK, or work in RGB and separate to final CMYK on output. If you work in mixed RGB and CMYK, make sure that any imported CMYK is already in the final print space. If you need to export CMYK from FreeHand, the only way that works is to use the rather laborious process we describe in the Tip, “Create Output-Ready CMYK PDF Files,” earlier in this chapter. FreeHand’s Export features are currently unsafe at any speed!