

Figure 15.9 Printer Definition Window to Select Previewer
If the previewer selection box appears, select the previewer for this printer. If you do
not need a previewer, choose None or leave the field blank.
Note: You can add a previewer to any printer through the DMPRTCREATE
PREVIEWER command. For more information, see “Define a New Previewer”
on page 268.
Note: It is not required that printers and print previewers share a common language.
9. Click Next to proceed to Step 5 of the wizard.
The following window appears:
Figure 15.10 Printer Definition Window to Complete Process
10. Click Previous to change any information. Click Finish when you have completed
your printer definition.
You have now finished setting your default printer.
262 Chapter 15 • Printing with SAS
After you have returned to the Print Setup window, you can test your default printer by
clicking Print Test Page.
Note: You can also use the PRTDEF procedure to define a printer programmatically. For
more information, see “Managing Universal Printers Using the PRTDEF Procedure”
on page 276.
Set Printer Properties for Your Default Printer
Printer properties that you can change include the following:
• the printer name and description
• the printer destination device and its properties
• the default font for the printer
• advanced features such as translation tables, printer resolution, and the print
previewer associated with the printer
To change printer properties for your default printer, follow these steps:
1. Select File ð Print Setup and choose Properties.
The Printer Properties window appears.
Alternatively, you can issue the DMPRTPROPS command.
2. From the Printer Properties window, select the tab that contains the information that
you need to modify.
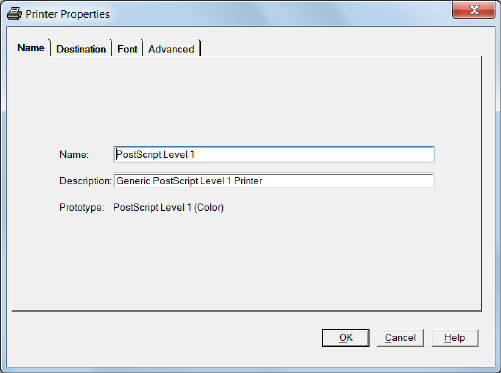
• In the Name tab, you can modify the printer name and the printer description.
Note: The printer name is not case sensitive. If you change only the casing, the
printer name change fails. To change the case of the printer name, you can
delete the printer and re-create it with the new casing. You can also modify
the name of the printer, save the modifications, and then change the name
again to the name and casing that you want.
Figure 15.11 Printer Properties Window Displaying Name Tab
• The Destination tab enables you to designate the device type, destination, and
host options for the printer. See “Sample Values for the Device Type,
Destination, and Host Options Fields” on page 281 for examples.
Configuring Universal Printing Using the Windowing Environment 263

Figure 15.12 Printer Properties Window Displaying Destination Tab
• The Font tab controls the available font options. The selections available in the
drop-down boxes are printer specific. The font size is in points.
Note: This window enables you to set attributes for the default fonts. Typically,
procedure output is controlled by the fonts specified by the ODS style or by
program statements that specify font attributes.
Figure 15.13 Printer Properties Window Displaying Font Tab
• The Advanced tab lists the Resolution, Protocol, Translate table, Buffer size,
Previewer, and Preview command options for the printer. The information in the
drop-down fields is printer specific.
264 Chapter 15 • Printing with SAS

Figure 15.14 Printer Properties Window Displaying Advanced Tab
Resolution
specifies the resolution for the printed output in dots per inch (dpi).
Protocol
provides the mechanism for converting the output to a format that can be
processed by a protocol converter that connects the EBCDIC host mainframe
to an ASCII device. Protocol is required in the z/OS operating environment,
and if you must use one, select one of the protocol converters that are listed.
Translate table
manages the transfer of data between an EBCDIC host and an ASCII device.
Normally, the driver selects the correct table for your locale; the translate
table needs to be specified only when you require nonstandard translation.
Buffer size
controls the size of the output buffer or record length. If the buffer size is left
blank, a default size is used.
Previewer
specifies the Previewer definition to use when Print Preview is requested.
The Previewer box contains the previewer application that you have defined.
See “Define a New Previewer” on page 268.
Preview command
is the command that is used to open an external printer language viewer. For
example, if you want Ghostview as your previewer, type ghostview %s.
When a Preview Command is entered into a Printer definition, the printer
definition becomes a previewer definition. The Preview Command must a
valid command. When the command is executed as part of the preview
process the %s are replaced with the name of a temporary file that contains
the input for the preview command.
Note: The Previewer and Preview Command fields are mutually exclusive. When
you enter a command path into the Preview Command field, the Previewer box
is dimmed.
How to Specify a Printer for Your Session
The PRINTERPATH= system option enables you to specify a Universal Printer to use
for the current SAS session. This printer specification is not retained across SAS
sessions. The PRINTERPATH= system option is primarily used in batch mode, when
Configuring Universal Printing Using the Windowing Environment 265
there is no windowing environment in which to set the default printer. This option
accepts a character string as its value. For example:
options printerpath=myprinter;
options printerpath="Print PostScript to disk";
Note: If the printer name contains blanks, you must enclose it in quotation marks.
You can get a list of printers that are currently defined from two places:
• The list of printers in the Printer field of the Print Setup window.
• Submit this code:
proc qdevice out=printers;
printer _all_;
run;
proc print data=printers;
var name desc;
where nametype contains "Printer";
run;
You can also override the printer destination by specifying a fileref with the
PRINTERPATH= system option:
options printerpath= (myprinter printout);
filename printout path;
Printing with Universal Printing
Print a Test Page
To print a test page, follow these steps:
1. Select File ð Print Setup and choose Print Test Page to open the Print Setup
window.
2. Select the printer for which you would like a test page from Printer list view.
3. Click Print Test Page.
Alternatively, you can issue the DMPRINTSETUP command.
Print the Contents of an Active SAS Window
To print the contents of a window in SAS, follow these steps:
1. Click inside the window to make it active.
2. Select File ð Print.
A print window appears. Your print window might differ from the window that
follows.
Alternatively, you can issue the DMPRINT command.
266 Chapter 15 • Printing with SAS
..................Content has been hidden....................
You can't read the all page of ebook, please click here login for view all page.