
L3. LAB 3: ANDROID AUDIO SIGNAL SAMPLING 63
3. Loading native libraries into memory when the program runs. e following code should
be placed in the class file responsible for defining the Android activity. In the example app,
this can be found in the GUI class:
static {
System.loadLibrary("yourlibrary");
}
System.loadLibrary links the native method declaration in the Java class with the processing
code declared in the C file. ere are alternative methods of declaring native functions and
performing the linking which will be covered in a later chapter.
Depending on the input data types in the methods and the expected return data types,
the JNI method signature will change. If any of these steps are not correctly done, Java will not
be able to find the native methods and an exception will be thrown when the app attempts to
call the native method.
L3.6 SUPERPOWERED SDK
For real-time low-latency througputs on Android devices, the Superpowered utility can be used.
is utility is an audio API which is developed for mobile devices. On Android devices, Su-
perpowered uses OpenSL to allow processing of audio data in a low-latency manner. More
information on these APIs are available at the following links:
• Superpowered: http://superpowered.com
• OpenSL ES: https://www.khronos.org/opensles/
In what follows, a simple audio I/O path is implemented via Superpowered and it is shown
how to implement a low-latency Android app.
• Go to http://superpowered.com and download the SuperpoweredSDK. Store it in
C:Android.
• Open Android Studio. In the splash screen, select Open an existing Android Studio Project.
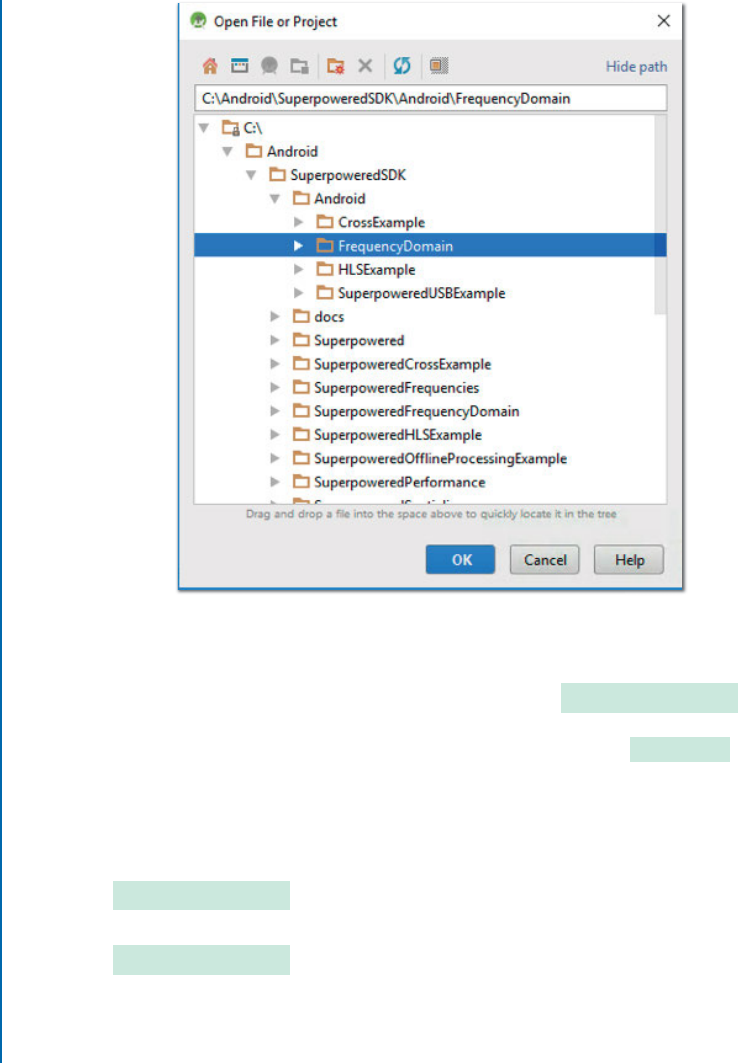
• Navigate to the SuperpoweredSDK folder. In the Android subfolder, open the Frequency-
Domain example in Android Studio, as shown in Figure L3.2.
• If the project shows errors on opening, it may be due to an incorrect path
to the Superpowered directory. Go to local.properties of the project in the
project navigator window and change the path of the Superpowered directory to
C:AndroidSuperpoweredSDKSuperpowered and sync the gradle again.
64 4. ANALOG-TO-DIGITAL SIGNAL CONVERSION
Figure L3.2: FrequencyDomain example.
• Open MainActivity.java. In that, the JNI native function FrequencyDomain can be seen,
which is the C++ function that calls the function to start audio I/O with the supplied
sampling rate and input buffer size. As it gets called inside the onCreate method, the
audio path is created as soon as the app is loaded.
• Next, go to the FrequencyDomain.cpp file inside cpp > jni in the project navigator. In this
file, two methods can be seen.
– FrequencyDomain : is is the JNI method which is called from MainActivity.java.
is function is used to create a Superpowered Audio I/O session.
– audioProcessing : is is the callback linked with the Audio I/O session which is
repeatedly called when the input data are available for processing.
• To build a simple unprocessed audio i/o path, let us add a simple C code to process the
incoming audio. Right-Click on the JNI folder and go to New > C/C++ Source File. Enter

L3. LAB 3: ANDROID AUDIO SIGNAL SAMPLING 65
the name of the file as File, set the type as .c and click on create an associated header. e files
may not appear in the Project Navigator. Add the following codes to the CMakeLists.txt
file.
– Add the following line of code:
file(GLOB C_FILES "*.c")
– In the add_library section, add the following line of code:
${C_FILES}
After this is done, upon syncing the gradle, the two files should appear in the jni
folder.
• In the FIR.c file, add the following code:
void FIR(float* input, float* output, int nSamples) {
int i = 0;
static float endSamples[2] = {0,0};
for (i = nSamples - 1; i > 1; i--) {
output[i] = (input[i] + input[i - 1] + input[i - 2])/3;
}
output[1] = (input[1] + input[0] + endSamples[1])/3;
output[0] = (input[0] + endSamples[1] + endSamples[0])/3;
endSamples[1] = input[nSamples - 1];
endSamples[0] = input[nSamples - 2];
}
In the FIR.h file, add the following code:
void FIR(float* input, float* output, int nSamples);
• After the algorithm is coded in C, it can be called in the main file. In FrequencyDomain.cpp,
replace the existing code with the following code:

66 4. ANALOG-TO-DIGITAL SIGNAL CONVERSION
#include <jni.h>
#include <stdlib.h>
#include <SuperpoweredFrequencyDomain.h>
#include <AndroidIO/SuperpoweredAndroidAudioIO.h>
#include <SuperpoweredSimple.h>
#include <SuperpoweredCPU.h>
#include <SLES/OpenSLES.h>
#include <SLES/OpenSLES_AndroidConfiguration.h>
// To Call C functions
extern "C" {
#include "FIR.h"
}
// Globally declared audio buffers
static float *inputBufferFloat, *leftInputBuffer,
*rightInputBuffer, *leftOutputBuffer, *rightOutputBuffer;
// This is called periodically by the media server.
static bool audioProcessing(void * __unused clientdata, short int
*audioInputOutput, int numberOfSamples, int __unused samplerate) {
SuperpoweredShortIntToFloat(audioInputOutput, inputBufferFloat,
numberOfSamples, 2);
SuperpoweredDeInterleave(inputBufferFloat, leftInputBuffer,
rightInputBuffer, numberOfSamples);
FIR(leftInputBuffer, leftOutputBuffer, numberOfSamples);
FIR(rightInputBuffer, rightOutputBuffer, numberOfSamples);
SuperpoweredFloatToShortIntInterleave(leftOutputBuffer,
rightOutputBuffer, audioInputOutput, numberOfSamples);
return true;
}
extern "C" JNIEXPORT void
Java_com_superpowered_frequencydomain_MainActivity_FrequencyDomain(
JNIEnv* __unused javaEnvironment, jobject __unused obj,
jint samplerate, jint buffersize) {
..................Content has been hidden....................
You can't read the all page of ebook, please click here login for view all page.