
MEDIA MANAGEMENT
You have high-end, professional, ‘broadcast and beyond’ capable tools in an easy to use package that anybody can learn.
JIM KANTER
ATLANTA FINAL CUT PRO USER GROUP
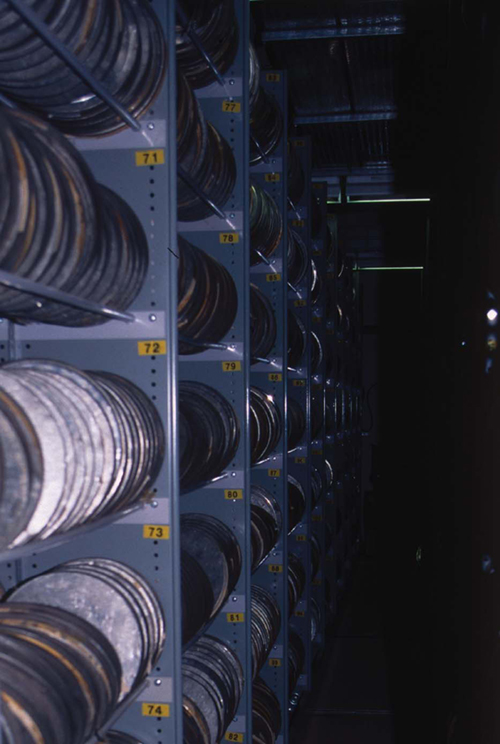
In an ideal world when one completes a project it should be as simple as deleting the files from the scratch disks which were chosen during initial setup. In reality, editors will often end up with files scattered across several hard disks with everything from clips to render files in the most obscure and hidden areas of one’s computer. This situation is particularly common when one works with several projects at a time and when one fails to pay attention to the setup of scratch disks when moving from project to project. Fortunately there are a few very easy techniques which one can use without having to search through every folder on each hard drive to track down all of the files that have been used in a particular project.
Making Clips Offline

An invaluable command is Make Offline found under the Modify menu. Make Offline, as the name suggests, will break the link between the project you are working with and the clips you choose to make offline. This is done in one of three ways:
![]() the link is broken and the clips are left stored on the hard drive
the link is broken and the clips are left stored on the hard drive
![]() the selected clips are moved to the trash
the selected clips are moved to the trash
![]() the selected clips are deleted from the disk.
the selected clips are deleted from the disk.
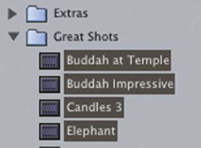
![]() Highlight the Items In the Browser which you wish to Make Offline. Clips, bins or Sequences can be chosen.
Highlight the Items In the Browser which you wish to Make Offline. Clips, bins or Sequences can be chosen.
![]() Seflect the Modify menu and scroll to Make Offline. A box will open giving you three options.
Seflect the Modify menu and scroll to Make Offline. A box will open giving you three options.
![]() Choose the option you wish to perform.
Choose the option you wish to perform.
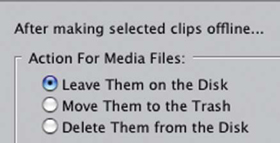
You can choose to make the clips offline and leave them stored on the hard drive where they already exist, or move them to the trash, or delete them from disk If you choose either of the last two options be careful as the results cannot be undone.
I often use Make Offline and select Delete Them from the Disk at the end of a project. This ensures a quick easy way to clear the captured media files from the hard drives in your computer with the minimum of effort on your part.
It can also be useful to move a bunch of files, or all the files of a project, to the trash, to copy elsewhere. This is the simplest way of tracking down all the files in a project without having to manually search for them.
The Render Manager
Whenever you render material in the Timeline the files created during the render process are stored in the Render folder/s created when you set your scratch disks. Due to the nature of building effects material will often be rendered several times over until you get the effect exactly as you want it. It can therefore be advantageous to get rid of old render files which are not being used anymore and reclaim the hard drive space. This is exactly what the Render Manager does for you — it clears out the render files you no longer need in a simple and efficient way.
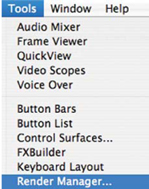
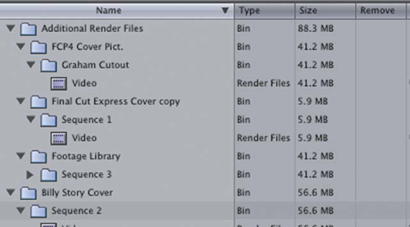
![]() Choose the Tools menu, scroll to Render Manager and release your mouse button. A window will open displaying folders which reference to the render files on your hard drives.
Choose the Tools menu, scroll to Render Manager and release your mouse button. A window will open displaying folders which reference to the render files on your hard drives.
![]() Click the downward arrows to reveal the render files. Information to the right will tell you the amount of hard drive space these files take up.
Click the downward arrows to reveal the render files. Information to the right will tell you the amount of hard drive space these files take up.
![]() Highlight the files you wish to remove. Apple click to highlight multiple files, one at a time, or Shift click to highlight everything from top to bottom.
Highlight the files you wish to remove. Apple click to highlight multiple files, one at a time, or Shift click to highlight everything from top to bottom.
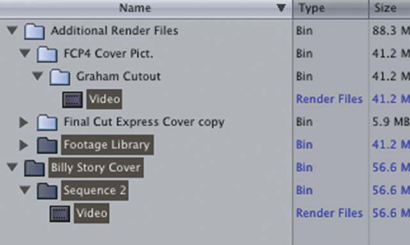
![]() Click OK and these files will be deleted from the disk.
Click OK and these files will be deleted from the disk.
Note: the results cannot be undone as the files have now been removed from disk, however, you can simply re-render the material if you find you have made a mistake. Nothing will be lost but the time it takes to render.