
EFFECTS
There are no special tools anymore.
Everybody has access to the same stuff.
JOE MALLER
JOE’S FILTERS
When it comes to building effects in Final Cut Pro there are several things that need to be considered. First, there are the type of effects that are applied to individual clips or to a series of clips in the Timeline — these are single layer video effects. Then there are the types of effects that are termed multi-layered effects.
Look to the video track symbols at the front of the Timeline — the break-off tabs are labelled V1, A1, A2.… These are the video and audio tracks. Final Cut Pro allows for up to 99 video tracks or layers to be created.
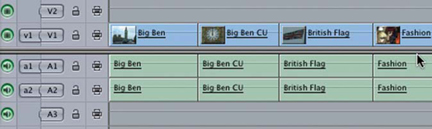
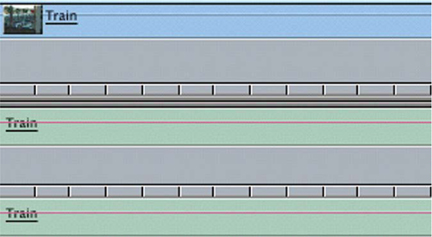
A Single Layer of Video in the Timeline
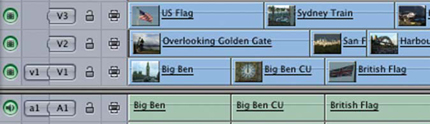
Multi-Layers of Video in the Timeline
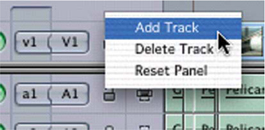
Creating a video track — which means adding a layer — is as simple as Control clicking in the gray area next to any of the tracks which already exist.
A menu will open giving you the choice to either add or delete a track. You can Control click above, below or to the left of the tracks in the Timeline to open up the contextual menu which allows you add or delete tracks.

Control Click in this Area
When working with a single layer of video, effects can be applied in the form of Transitions, Filters and Generators.
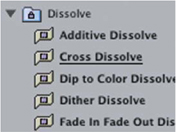
Transitions refer to an effect that is applied between two clips. Examples include dissolves, wipes and slides.
Filters can be applied to a clip or part of any clip. They are used to change the look of images by manipulating each of the video frames which make up the image. Examples include blurs, mattes, borders and changes to brightness, contrast and color.
Generators are neither Transitions nor Filters. These are used to create additional material which you need to work with. These include devices such as slug (black), text and matte colors. Think of Generators as being the electronic equivalent of spacer, head and tail leaders and countdowns of the film world.
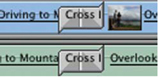 A Transition is Added Between Two Clips
 A Filter is Added to a Clip
 A Generator is Created Inside of Final Cut Pro
When working with Transitions and Filters these are applied to a single layer of video and can be integrated into a Sequence which is made up of no more than a single video track. This does not mean that Sequences made up of multiple layers do not use Transitions and Filters. The point is a Sequence made up of no more than one layer can include Transitions, Filters and Generators. Multi-layered Sequences will also make use of Transitions, Filters and Generators and these can and likely will be applied to any of the layers in the Sequence.
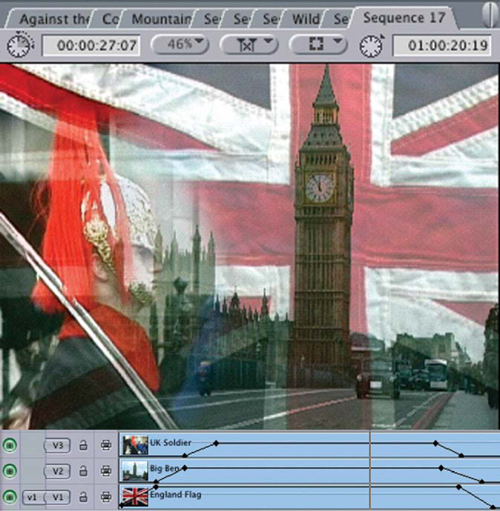
The instant you have more than one layer of video you are working in the realms of compositing. Layers are video components which are stacked on top of each other— examples include: picture in picture, titles, and animated components.
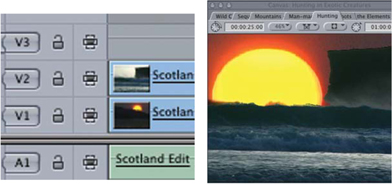
An Example of Compositing Made Up of Two Video Layers

An Example of Compositing Made Up of Three Video Layers
Before we move onto Compositing it is important to know how to work with Transitions, Filters and Generators. You need to understand the difference between these. Just to refresh your memory: Transitions work between clips; Filters are applied to clips; and Generators work in a similar way to clips but are generated within Final Cut Pro itself.
The Concept of Media Limit (Handles)
It is vital to understand when using Transitions that there must be available media for the Transition to work. This available media is referred to as ‘handles’. The maximum length that a Transition can be is equal to the available media or ‘handles’ which exist on the original clips as they were captured to your computer’s hard drive.
Thus, should you wish to apply a one second dissolve between two shots then there must be at least 12 frames (PAL) or 15 frames (NTSC) of available media. The available media applies to the end (tail) of the outgoing clip, on one side of the transition, and the beginning or ‘head’ of the incoming clip. The idea is the same as checkerboarding two pieces of film in an optical printer or A/B rolling shots on separate machines in a linear tape suite.
If you do not have the available media then the length of a transition will be restricted to the media that is available. It is impossible to exceed these limits.
Applying Transitions
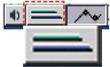
![]() Click once on the Effects tab In the Browser and this will reveal a list of Transitions, Filters and Generators. I suggest working in list mode for this part of the operation.
Click once on the Effects tab In the Browser and this will reveal a list of Transitions, Filters and Generators. I suggest working in list mode for this part of the operation.

![]() Click once on the triangle to the left of the Video Transitions folder — this will reveal a list of the available Transitions. Choose the type of transition you require and click the triangle to the left. Now choose a transition you want to work with.
Click once on the triangle to the left of the Video Transitions folder — this will reveal a list of the available Transitions. Choose the type of transition you require and click the triangle to the left. Now choose a transition you want to work with.
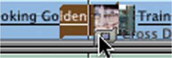
![]() Drag the Transition onto the edit point in the Timeline where you want the effect to be applied.
Drag the Transition onto the edit point in the Timeline where you want the effect to be applied.
![]() A render bar will appear indicating the state of the material in the Timeline. If it is red, it needs to be rendered for playback, if it is green the effect will play in real time through RT Extreme. If it is yellow or orange the effect will play, however, the reliability of playback cannot be guaranteed.
A render bar will appear indicating the state of the material in the Timeline. If it is red, it needs to be rendered for playback, if it is green the effect will play in real time through RT Extreme. If it is yellow or orange the effect will play, however, the reliability of playback cannot be guaranteed.
Note: when choosing Transitions, Filters or Generators if the effect is bold under the Effects tab in the Browser, this means the effect will play in real time through RT Extreme. If the effect is not in bold then it will have to be rendered for playback.
Changing Transition Durations
![]() Double click on the Transition in the Timeline — this will open a set of controls in the Viewer.
Double click on the Transition in the Timeline — this will open a set of controls in the Viewer.

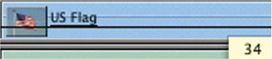
![]() At the top of the Viewer Is the name of the Transition. Immediately below this is a numerical value representing the Transition duration . Click once with the mouse in this box and this will highlight the numeric value. You can now overtype this value. If you want a 2 second dissolve type 200 and press the return button; if you want a half second dissolve type 12 (PAL) or 15 (NTSC) and press return; for a 10 second dissolve type 1000 and press the return button.
At the top of the Viewer Is the name of the Transition. Immediately below this is a numerical value representing the Transition duration . Click once with the mouse in this box and this will highlight the numeric value. You can now overtype this value. If you want a 2 second dissolve type 200 and press the return button; if you want a half second dissolve type 12 (PAL) or 15 (NTSC) and press return; for a 10 second dissolve type 1000 and press the return button.

The Change in Transition Duration is Reflected in the Timeline
![]() The dissolve duration is now changed. The above set of instructions applies regardless of which transition is chosen.
The dissolve duration is now changed. The above set of instructions applies regardless of which transition is chosen.
Applying Filters
Filters are extremely powerful and creative tools to work with, it can take a good deal of experimentation to master them. It is definitely worth the effort, however. What can be produced on a desktop editing system such as Final Cut Pro would have cost a fortune at a facilities house only a few years ago. The price paid now is the amount of time the individual is prepared to spend building and rendering these effects.
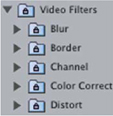
![]() Click on the triangle to the left of Video Filters in the effects area of the Browser. This will reveal a list of Filters stored in bins. Open a bin and choose a Filter you wish to experiment with.
Click on the triangle to the left of Video Filters in the effects area of the Browser. This will reveal a list of Filters stored in bins. Open a bin and choose a Filter you wish to experiment with.
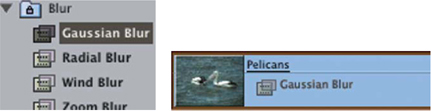
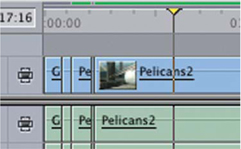
![]() Drag the Filter onto the clip where you want the Filter to be applied. Remember, if the Filter is bold this indicates it will play in real time through RT Extreme. If it is not bold it will need to be rendered. The level of real-time playback will be determined by the color of the render bar which appears above the clip in the Timeline.
Drag the Filter onto the clip where you want the Filter to be applied. Remember, if the Filter is bold this indicates it will play in real time through RT Extreme. If it is not bold it will need to be rendered. The level of real-time playback will be determined by the color of the render bar which appears above the clip in the Timeline.
![]() To alter the parameters of the Filter double click the clip in the Timeline. Click on the Filters tab located at the top of the Viewer.
To alter the parameters of the Filter double click the clip in the Timeline. Click on the Filters tab located at the top of the Viewer.
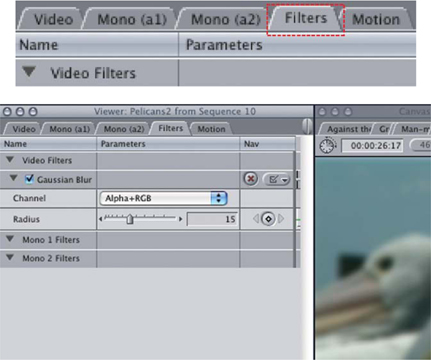
This will open a selection of controls that are used to alter the parameters of the filter.
![]() Make sure the Scrubber Bar in the Timeline is positioned on the clip to which the Filter has been applied. This is important as it ensures adjustments will be displayed visually in the Canvas.
Make sure the Scrubber Bar in the Timeline is positioned on the clip to which the Filter has been applied. This is important as it ensures adjustments will be displayed visually in the Canvas.
![]() Experiment with the controls under the Filters tab in the Viewer and observe the result in the Canvas and on your television screen (if you are set up with this configuration). Play the clip back through RT Extreme, if possible, or render the clip if necessary.
Experiment with the controls under the Filters tab in the Viewer and observe the result in the Canvas and on your television screen (if you are set up with this configuration). Play the clip back through RT Extreme, if possible, or render the clip if necessary.
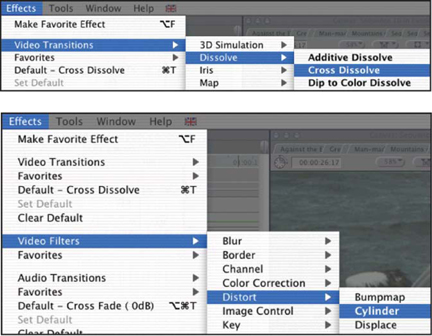
All Transitions and Filters can also be accessed from the Effects menu at the top of the screen. Simply scroll down to Video Transitions or Video Filters and select the effect you want. If you wish to use a Transition make sure the Scrubber Bar in the Timeline is positioned where the Transition is to be applied. If you choose a Filter, first highlight the clip in the Timeline and then choose the Filter from the Effects menu. Whether you choose to access the effects from the Effects menu or from the Effects tab in the Browser comes down to personal preference. The result will be the same.
Compositing
Compositing is where all the fancy stuff happens: flying titles, moving boxes, multi-layered dissolve sequences, transparent backgrounds — all the elements that ‘dress up’ a video production and make it more than cuts, dissolves, basic transitions and filters. As mentioned earlier, compositing encompasses everything that involves more than one layer of video.
Video filters, transitions and generators can all be applied to any video track, or several individual video tracks at a time, however, it is the ‘stacking’ or ‘layering’ of tracks of video that builds a composited sequence.
In on-line linear suites layering of video was done on a vision mixer in combination with a DVE (digital video effects). In the film world an optical printer was used. Pieces of film were sandwiched together (called bi-packing) and this was then exposed to several passes of light to achieve complex effects. Inside of Final Cut Pro the tracks are layered in hierarchical order with the tracks closest to the top having priority over those below.
For those who have no idea what a DVE is — this refers to a stand-alone box used in television production for creating special effects. DVEs became popular in the late 1970s and 1980s and have been used all the way through to the present. DVEs have been seen as providing the video equivalent to the optical printer of the film world. They have traditionally been regarded as horrendously expensive, powerful devices. They are still used in live television production and on-line edit suites, however, as a result of programs such as Final Cut Pro mere mortals can now achieve sophisticated effects with modest budgets. Previously a simple squeeze or flip (or flop as it is called in Final Cut Pro) required one to step into an expensive post-production suite and often pay far more than the cost of Final Cut Pro for a single effect!
Methods of Creating Multiple Tracks
By default Final Cut Pro opens with a single track of video in the Timeline. There are three possible ways to add more tracks:
![]() Control click next to the V1,V2 symbols (to the left of the locks). This will give you the option to either Add or Delete a track. If you click in the gray area above the last existing video track there will be a single option which is to add a track.
Control click next to the V1,V2 symbols (to the left of the locks). This will give you the option to either Add or Delete a track. If you click in the gray area above the last existing video track there will be a single option which is to add a track.
![]() Drag a clip from the Browser or Viewer directly into the Timeline, into the gray area, above the top-most existing video track. Release your mouse button. This will then create a new video track where you drop the clip and audio tracks below the last existing audio tracks.
Drag a clip from the Browser or Viewer directly into the Timeline, into the gray area, above the top-most existing video track. Release your mouse button. This will then create a new video track where you drop the clip and audio tracks below the last existing audio tracks.
![]() Open the Sequence menu at the top of screen and choose the Insert Tracks command from the menu.
Open the Sequence menu at the top of screen and choose the Insert Tracks command from the menu.
Once you have created the additional video tracks, items can then be edited to these tracks by dragging clips from the Browser or Viewer directly into the Timeline, or you can direct the flow of video/audio using the break-off tab patching facility in combination with Insert and Overwrite Editing.
The Motion Tab
The Motion tab is home to a great many of the tools used in the compositing process. In this window you will find the facility to resize images, rotate, reposition, crop, distort and adjust the opacity of clips. Effectively the Motion tab provides you, the editor, with a fully fledged DVE facility.
To access the Motion tab, click the last tab to the right in the Viewer. Click the arrows to the left of each of the headings to access the controls.
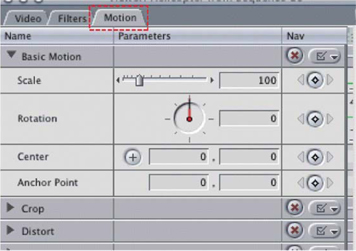
Using the Motion Tab
To scale an image means to reduce or increase its size. The default size is 100%, therefore numbers greater than 100 mean the image has been made larger or ‘blown’ up whereas numbers less than 100 mean the image has been reduced in size.
To alter the size of a clip using the Motion tab:
![]() Double click a clip in the Timeline. This will open the clip into the Viewer. Make sure the yellow Scrubber Bar is positioned on the clip in the Timeline. This ensures you will see the result in the Canvas as you alter the parameters of the clip in the Motion tab.
Double click a clip in the Timeline. This will open the clip into the Viewer. Make sure the yellow Scrubber Bar is positioned on the clip in the Timeline. This ensures you will see the result in the Canvas as you alter the parameters of the clip in the Motion tab.
![]() Click the Motion tab in the Viewer.
Click the Motion tab in the Viewer.
![]() Move the slider bar next to the word Scale either backwards or forwards. Alternatively type in a number. If you wish to reduce the clip in size by half type 50%. If you want to double its size type 200%.
Move the slider bar next to the word Scale either backwards or forwards. Alternatively type in a number. If you wish to reduce the clip in size by half type 50%. If you want to double its size type 200%.

Providing the clip is positioned on video 1 in the Timeline the result will be the image, reduced in size, over black. If you do not see this result you need to position the yellow Scrubber Bar over the clip in the Timeline prior to reducing the image in size.

Now repeat the process, however, this time we want to work with two tracks of video.
![]() Create a second track of video by Control clicking in the gray area above V1.
Create a second track of video by Control clicking in the gray area above V1.
![]() Slide the V1 break-off tab to V2 and edit a clip onto V2. Alternatively, you can drag a clip direct from the Browser or Viewer to V2.
Slide the V1 break-off tab to V2 and edit a clip onto V2. Alternatively, you can drag a clip direct from the Browser or Viewer to V2.
![]() Reduce the size of an image on the V2 track to 50%. This will create What is called a ‘picture in picture’. The image on the V2 track will be reduced in size while that on V1 remains at 100%.
Reduce the size of an image on the V2 track to 50%. This will create What is called a ‘picture in picture’. The image on the V2 track will be reduced in size while that on V1 remains at 100%.
Providing your computer is capable of RT Extreme, and External Video is set to All Frames and the Firewire cable is connected to a deck/camera, then you will be able to see the result play in real time onto a television monitor. If you are working exclusively on the computer monitor and not connected to a deck/camera then you can observe the result in the Canvas.
To rotate the image on the V2 track simply select the rotate command underneath Scale.
Turn the wheel or type in a numeric value.
Remember— a circle is made up of 360 degrees.
Again, to ensure the clip is active in the Viewer, first double click it in the Timeline. Then click the Motion tab to see the controls, making sure the yellow Scrubber Bar is positioned on the clip in the Timeline/ Canvas. This will ensure the result is displayed in the Canvas.

To move a clip about within the Canvas click on the plus ‘ + ’ symbol to the right of the word Center in the motion controls. A small ‘ + ’ will then appear in the Canvas (you might have to look hard to see it — but it is there!) Click the ‘ + ’ with your mouse and reposition the image within the Canvas window. Alternatively, type co-ordinates into the boxes.
As you work, you may choose to rotate the image again or resize it. Other parameters can be altered. For example, check the Drop Shadow box towards the bottom of the Motion window.
Experimentation is the key. By adjusting parameters, typing numbers, adjusting opacity, altering angles — many different results can be achieved. No instruction manual can ever teach you everything that is possible. It is up to you to teach yourself by altering the controls and trying out the possibilities.
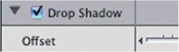
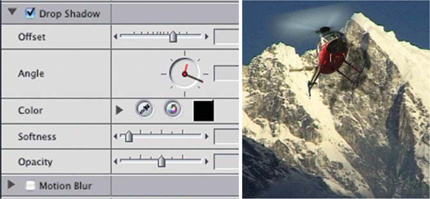
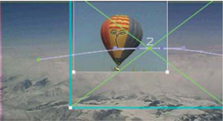
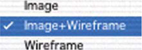
Image + Wireframe
An important and useful mode is what is called Image + Wireframe. Click the arrow in the box located towards the center of the Canvas. Select Image + Wireframe from the drop-down menu.
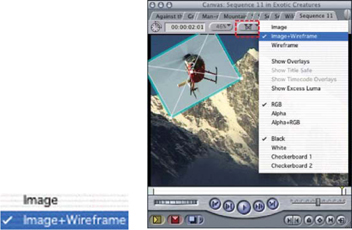
Once you have selected Image + Wireframe you will notice a large cross will appear from end to end across the active image. When working in this mode it is possible to slide the

Click on Center of the Image and Reposition by Dragging
image around the frame by simply clicking on the center of the image with your cursor and then repositioning by dragging. This is a lot simpler than typing in center co-ordinates into the boxes or using the little ‘ + ’ symbol as described earlier.
Below: The image can be rotated by positioning your cursor on either edge and moving your mouse in opposite directions.
Your Cursor Becomes a Circular Arrow. You can then Rotate the Image
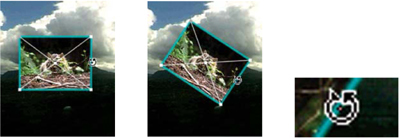
Below: By dragging any of the corners of the image it can quickly be resized.
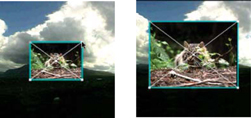
Position Your Cursor on the Edge of the Image and Drag to Resize
Using Image + Wireframe provides a quick and effective way to reposition, resize and rotate images. The downside is you do not get the same control which you do by entering numerical values directly into the Motion Control window. Choose whichever option suits the task you need to perform.
Titlesafe
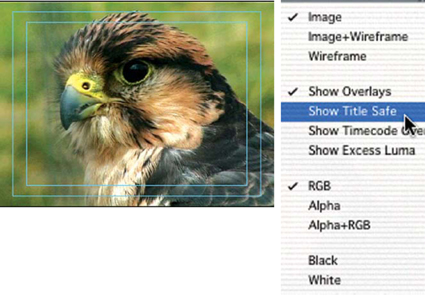
Under the same menu as Image + Wireframe is another setting called Titlesafe. Both settings, Image + Wireframe and Titlesafe, can be switched on or off in either the Viewer or Canvas.
If you find it impossible to switch on Titlesafe you need to first ensure that Show Overlays is checked. With Show Overlays selected it is then possible to toggle Titlesafe on and off.
The Titlesafe setting is particularly important to have switched on when positioning images or working with titles. Domestic monitors do not display the full video image as it is recorded to tape. What is displayed on your computer monitor known as ‘underscan’ while what you see on your television set is known as ‘overscan’. Broadcast monitors offer both options.
When Titlesafe is switched on it will be obvious — two sets of blue lines will be noticeable around the inside perimeter of the Viewer or Canvas. The Title Safe area is known as the Essential Message Area (EMA). In simple terms, to ensure that the images you are working with will be seen correctly on a television set you need to make sure they are positioned within the lines of the Title Safe area. The outer lines are regarded as safe on most televisions, whereas the inner lines are regarded as safe on virtually all television sets. When working with text it is best to position the text inside the inner lines. When positioning images do not go outside of the outer lines unless you are comfortable that these images will likely spill outside the frame, or cutoff, on playback. Of course, allowing images to spill outside of cut-off can be used for effect, however, one needs to know that this will take place. In other words, if this effect takes place it should be deliberate, rather than accidental.
It is important to remember that not all television sets are the same. Some will crop the final images on playback more than others.
Working with Multi-Layers
It is relatively easy to create a picture in picture as already described. Using the same principles one can position several images on-screen at a time. The effect we will produce is to have a single image positioned as a background with three other images layered over it. Prior to the availability of systems such as Final Cut Pro this type of effect could only be produced at facility companies and television stations using powerful DVEs and other expensive equipment. Now you can do it on your desktop quickly and easily.
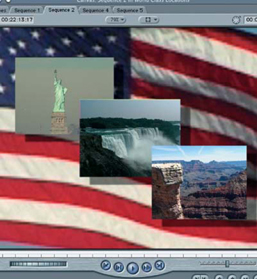
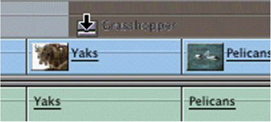
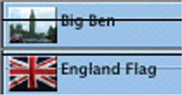
![]() Layer the images you want to work with over each other in the Timeline. Be aware that the order in which they are stacked will determine the priority of the layers.
Layer the images you want to work with over each other in the Timeline. Be aware that the order in which they are stacked will determine the priority of the layers.
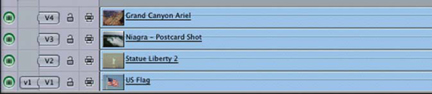
Thus the image on layer 4 will be at the front of the layers, while the image in layer 1 will serve as the background. Those on V2 and V3 will make up the middle layers.
![]() Reduce each of the Images In size to 35% — except for the background Image, this stays at 100%. To achieve this you will need to individually click on each of the Images to bring them into the Viewer, and then resize accordingly. To achieve the same size for each image make sure the number in the Scale setting is the same.
Reduce each of the Images In size to 35% — except for the background Image, this stays at 100%. To achieve this you will need to individually click on each of the Images to bring them into the Viewer, and then resize accordingly. To achieve the same size for each image make sure the number in the Scale setting is the same.
![]() Make sure that Image + Wireframe is switched on and use your mouse to position each of the images. You will need to double click each clip in the Timeline to make it active in the Viewer, then position accordingly. Repeat this procedure for each image you wish to position. This can be done manually or, if you prefer, use the ‘ + ’ symbol to set X and Y co-ordinates in the Motion Control window.
Make sure that Image + Wireframe is switched on and use your mouse to position each of the images. You will need to double click each clip in the Timeline to make it active in the Viewer, then position accordingly. Repeat this procedure for each image you wish to position. This can be done manually or, if you prefer, use the ‘ + ’ symbol to set X and Y co-ordinates in the Motion Control window.
![]() If you find there is a black border on any of the edges as you place the images, you need to use the Crop facility to remove this. Often a black edge is seen on the extreme outer perimeter of the video frame. This is never seen when the image is played to a television set, however, when an image Is squeezed back this can become apparent. It needs to be cropped to get rid of it.
If you find there is a black border on any of the edges as you place the images, you need to use the Crop facility to remove this. Often a black edge is seen on the extreme outer perimeter of the video frame. This is never seen when the image is played to a television set, however, when an image Is squeezed back this can become apparent. It needs to be cropped to get rid of it.
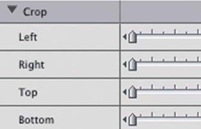
Use the slider bars to crop the image or enter a numeric value to achieve the same result.
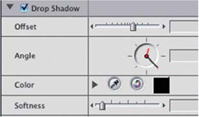
![]() Switch on the Drop Shadow In the Motion Control window. Controls for this setting are used to indicate the direction, distance, color, softness and opacity of the drop shadow.
Switch on the Drop Shadow In the Motion Control window. Controls for this setting are used to indicate the direction, distance, color, softness and opacity of the drop shadow.
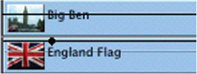
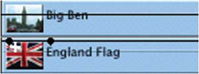
If necessary, reduce the opacity of the bottom layer to make the images on the upper layers stand out. This is achieved by using the opacity slider in the Motion window or by switching on Clip Overlays at the base of the Timeline and then moving the bar which appears within the clip to the desired level. A counter will indicate shifts in the level of opacity as you move the bar up and down.

The Slider Bar Affects the Opacity of Clips
Clip Overlays
Move the Black Bar Up and Down to Adjust Opacity
It is best to plan your effects before you begin to create them. By having a clear picture of what you are trying to achieve you have a much better chance of achieving something that works. By all means experiment. It is better, however, to experiment with vision and purpose rather than stumbling around in the dark hoping something acceptable will emerge.
Keyframing Images
Keyframing allows you to set points which define a path which an effect will follow. It provides the ability to move things around, animate objects in real time and perform subtle or fast moves. An example of keyframing would be to move a box from one side of the screen to another. Effects are built through layering and adjustments to the attributes in the Motion Control tab such as size, rotation and position.
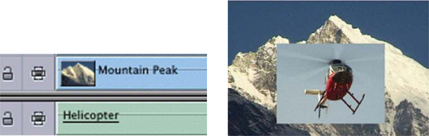
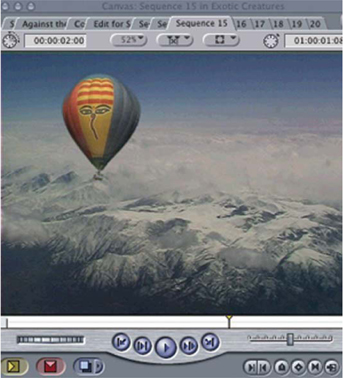
To keyframe an image you must first decide what you are trying to achieve. Let us work through the following example where we will have an image start on one side of the screen, rotate gently and increase in size until it comes to rest on the other side of the screen.
Two layers of video are involved with this example.
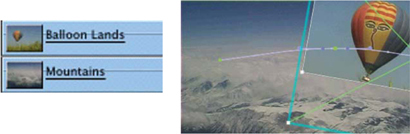
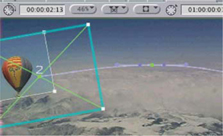
Layer 1 — Mountains
Layer 2 — Balloon
When keyframing images 1 change the layout of the interface. You may wish to learn this as a custom setup so that you can quickly move back and forth between the standard setup and the setup used for compositing and motion control.
The Motion tab is positioned on top of the Browser and extended to reveal its full width. Until now we have only been viewing half of the Motion tab, which is the controls section, it is now time to explore the other half of the facility which is where individual keyframes are plotted on horizontal lines. The plotted points — keyframes — represent moves which are animated over time.

![]() Set up the interface as illustrated.
Set up the interface as illustrated.
![]() Make sure you have two layers of video in the Timeline — one shot on top of another.
Make sure you have two layers of video in the Timeline — one shot on top of another.
![]() Position the Scrubber Bar on the first frame of the Sequence and turn your attention to the Canvas. The video of layer 2 will be all you see for the moment. Using the pointer double click the second video track in the Timeline to make it active in the Viewer.
Position the Scrubber Bar on the first frame of the Sequence and turn your attention to the Canvas. The video of layer 2 will be all you see for the moment. Using the pointer double click the second video track in the Timeline to make it active in the Viewer.
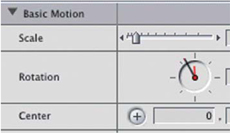
![]() Click on the Motion tab in the Viewer.
Click on the Motion tab in the Viewer.
![]() Use the Scale control to reduce the image in size.
Use the Scale control to reduce the image in size.
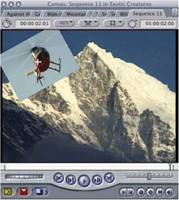
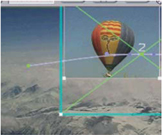
![]() Select Image 1 Wireframe mode from the pull-down menu in the Canvas. Click in the center of the image and drag the image to the left where you want the effect to begin.
Select Image 1 Wireframe mode from the pull-down menu in the Canvas. Click in the center of the image and drag the image to the left where you want the effect to begin.
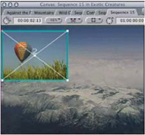
Resize and Reposition the Image
![]() Click with the yellow Scrubber Bar in the Timeline/Canvas and position it where you want the effect to begin.
Click with the yellow Scrubber Bar in the Timeline/Canvas and position it where you want the effect to begin.

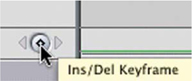
![]() Press the Insert/Delete Keyframe button in the Motion Control tab of the Viewer next to the word Scale. This will set the first keyframe.
Press the Insert/Delete Keyframe button in the Motion Control tab of the Viewer next to the word Scale. This will set the first keyframe.
![]() Use the controls in the Motion tab to rotate the image counterclockwise. You can type in a numeric value if you prefer.
Use the controls in the Motion tab to rotate the image counterclockwise. You can type in a numeric value if you prefer.
![]() Press the Insert/Delete Keyframe button again — to the right of the word Rotate. This will add a rotation value to the effect.
Press the Insert/Delete Keyframe button again — to the right of the word Rotate. This will add a rotation value to the effect.
![]() Press the Insert/Delete Keyframe button once more — this time next to Center. This is a positioning or location reference point.
Press the Insert/Delete Keyframe button once more — this time next to Center. This is a positioning or location reference point.
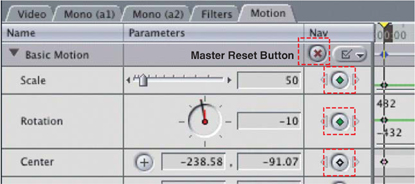
All these points add up to one keyframe — a combination of size, rotation and positioning. The first keyframe is now marked.
![]() Reposition the yellow Scrubber Bar where you want the next keyframe point to be marked. You will notice that the yellow Scrubber Bar moves in three places at once — in the Timeline, Canvas and Motion tab window.
Reposition the yellow Scrubber Bar where you want the next keyframe point to be marked. You will notice that the yellow Scrubber Bar moves in three places at once — in the Timeline, Canvas and Motion tab window.
![]() Click in the center of the image and drag it to the right. A line indicating the path the image will follow will be displayed.
Click in the center of the image and drag it to the right. A line indicating the path the image will follow will be displayed.
![]() Resize the image by using the Scale controls in the Motion Control tab. The second keyframe points are automatically added as Scale, Rotation and the Center are adjusted. This is represented visually in the Motionwindow by the line which gradually rises to indicate the move which has been plotted.
Resize the image by using the Scale controls in the Motion Control tab. The second keyframe points are automatically added as Scale, Rotation and the Center are adjusted. This is represented visually in the Motionwindow by the line which gradually rises to indicate the move which has been plotted.
Resize, Rotate and Reposition and Image
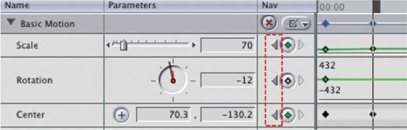
Use These Arrows to Jump between Keyframes
![]() Rotate the Image using the Rotation control in the Motion tab window. The second keyframe is added automatically for rotation.
Rotate the Image using the Rotation control in the Motion tab window. The second keyframe is added automatically for rotation.
You now have two keyframes plotted and this is represented visually by the dots marked on the right side of the Motion Control window. You can jump back and forth between the two keyframes by using the forward and backward arrows next to the Insert/Delete Keyframe buttons in the Motion Control window.
Playback the effect, providing the RT Extreme settings allow. Otherwise you will need to render to see the result.
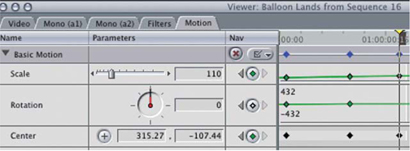
![]() We are just about there. Move the Scrubber Bar forward to the final keyframe point. Adjust the Scale, Rotation and Center controls. Keyframe points for each of these will be added automatically with each adjustment.
We are just about there. Move the Scrubber Bar forward to the final keyframe point. Adjust the Scale, Rotation and Center controls. Keyframe points for each of these will be added automatically with each adjustment.
It should be clear that a distinct set of processes is being followed each time a keyframe is added. The image needs to be sized using the controls in the Motion tab; rotated and positioned. The first keyframe must be added manually, by pressing the Insert/Delete Keyframe button, while each keyframe thereafter is added automatically each time an adjustment is made to any of the parameters.
The duration of the effect is determined by the distance or separation between the first and last keyframe. The process is logical and straightforward. It is crucial not to miss out any of the steps as this will interrupt the effect you are trying to create.
By dragging the Scrubber Bar through the effect in either the Canvas or the Timeline you can see the path the effect will follow. Playback the result through RT Extreme or render the effect, if need be. Check to see if you are happy with it. If not, repeat the process and try again.
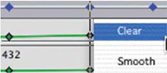
Keyframe points can be smoothed by Control clicking on the keyframe point itself.
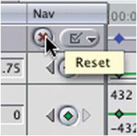
Note: Keyframes can easily be reset by clicking the Reset button at the top of the Motion Control tab. Keyframes can be deleted by pressing the Insert/Delete Keyframe button. If a keyframe already exists it will be deleted. If there is no keyframe present one will be added. Another way to delete keyframes is to select the Pen tool from the Toolbar, position it over a keyframe point and hold down the Alt/Option key (which gives you a minus symbol). By clicking on any of the keyframe points they will be deleted.
Keyframes can also be repositioned by dragging. Simply position your cursor over a keyframe point and your cursor will turn into a small cross. Drag the keyframe to a new position and release it.
You may notice that when you drag the yellow Scrubber Bar, it moves in the Timeline, the Canvas and the Motion Control area all at the same time. Each of these areas is linked, thus adjustments to one area affect the other areas.
Should you wish for the box to start outside of frame you need to reduce the size of the Canvas using the drop down % menu at the top of the Canvas.
This will resize the overall size of the frame inside the Canvas giving you the flexibility of adding keyframes outside of the television viewing area.
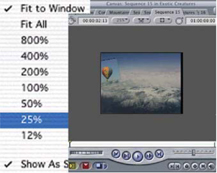
By reducing the overall display to either 12% or 25% it is possible to have animated objects fly in and out of frame from the top, bottom or either side of frame. By working with several layers of video one can animate several boxes at a time. The same can be achieved with text or imported Photoshop files.
When you really know what you are doing you can make the illusion complete.
Multi-Layered Dissolwes
Cuts and dissolves are the bread and butter of filmmaking. Effects have always been a luxury, however, with the availability of effects which don’t cost money there has been a huge increase in what clients and producers demand. It seems as if everyone wants to add extra shine to what might otherwise be a mediocre film. While overuse of effects will fail to make a bad production good — tasteful use of effects can be pleasing to the eye and if nothing else provides visual interest. The term ‘eye candy’ has been used to describe many of the effects offered in desktop editing systems.
A dissolve is nothing more than one shot fading into another. By placing a third layer over a dissolve it is possible to create what is known as the three-way dissolve. In the world of film production one had to plan dissolves, send the negative to the lab and hope the result was something close to what was envisaged. When using Final Cut Pro you can experiment to your heart’s content. You can even create four, five and six layer dissolves and beyond. The result can end up being a mash of unwatchable imagery — so be careful.
To create a three-way dissolve is not difficult:
![]() Make sure you have three empty video tracks in the Timeline.
Make sure you have three empty video tracks in the Timeline.
![]() Layer two clips on top of each other — the third layer will be added later.
Layer two clips on top of each other — the third layer will be added later.
![]() Make sure Clip Overlays is switched on.
Make sure Clip Overlays is switched on.
![]() Adjust the opacity of the video clips on V1 and V2 to achieve the result you are after. This is achieved by moving the black line inside the clip in the Timeline up and down. Providing the yellow Scrubber Bar is positioned within the bounds of the two clips the result will be displayed in the Canvas.
Adjust the opacity of the video clips on V1 and V2 to achieve the result you are after. This is achieved by moving the black line inside the clip in the Timeline up and down. Providing the yellow Scrubber Bar is positioned within the bounds of the two clips the result will be displayed in the Canvas.
![]() Once you are happy with the result add the third layer of video to V3.
Once you are happy with the result add the third layer of video to V3.
![]() Adjust the opacity, using Clip Overlays, until you can see all three images bleeding through. You may need to make further adjustments to ‘get it right’.
Adjust the opacity, using Clip Overlays, until you can see all three images bleeding through. You may need to make further adjustments to ‘get it right’.
![]() If necessary, render to check you are happy with the result.
If necessary, render to check you are happy with the result.
![]() Select the Pen tool from the very bottom of the Toolbar.
Select the Pen tool from the very bottom of the Toolbar.
![]() Point your cursor at the black line of the base video clip. Your cursor will turn into a pen.
Point your cursor at the black line of the base video clip. Your cursor will turn into a pen.
![]() Click on the black line and a point will be added. This will be your first keyframe.
Click on the black line and a point will be added. This will be your first keyframe.
![]() Add another keyframe to the left. By allowing your cursor to hover over either keyframes you will see it turns into a cross.
Add another keyframe to the left. By allowing your cursor to hover over either keyframes you will see it turns into a cross.
![]() Drag the keyframe on the left to the base of the clip.
Drag the keyframe on the left to the base of the clip.
![]() Perform the same function to the other clips, dragging keyframes to the base of the clip. What you are doing is plotting points so that the images will fade in and out at your discretion.
Perform the same function to the other clips, dragging keyframes to the base of the clip. What you are doing is plotting points so that the images will fade in and out at your discretion.

![]() Once you feel you have the points correctly plotted, render, if you need to, and then play back the result. You may need to make further adjustments if the result is not as you wish it to be.
Once you feel you have the points correctly plotted, render, if you need to, and then play back the result. You may need to make further adjustments if the result is not as you wish it to be.
If you follow points 1–7 you will achieve the result of a three-way superimposition. This may be fine for your purposes. If, however, you want the images to fade in and out at predefined points you need to use the Pen tool to plot keyframes. It is possible to have a single image play, have another image dissolve over it to be followed by a third image. I’m a big fan of three-way dissolves. They can look great and produce subtle or high impact results depending on how they are treated. The interface within Final Cut Pro is particularly suited to this type of work. The hassles required in a tape suite to achieve these effects were enough to persuade many editors never to try. As for the film world — now that would have been really difficult.
Keyframing Filters
Just as Motion can be keyframed, Filters can also be keyframed. By definition keyframing means to change over time. Therefore Filters can be animated over time in a similar way to keyframing Motion Effects.
![]() Add a Filter to a clip by dragging it from the Effects tab onto a clip in the Timeline. I suggest using a Gaussian Blur for the purpose of this exercise. Make sure the clip you are working with is no shorter than 10 seconds in duration.
Add a Filter to a clip by dragging it from the Effects tab onto a clip in the Timeline. I suggest using a Gaussian Blur for the purpose of this exercise. Make sure the clip you are working with is no shorter than 10 seconds in duration.
![]() Make sure the Pointer tool is selected. Double click the clip in the Timeline to which the Filter has been added. This will make the clip active in the Viewer.
Make sure the Pointer tool is selected. Double click the clip in the Timeline to which the Filter has been added. This will make the clip active in the Viewer.
![]() Position the yellow Scrubber Bar on the beginning of the clip in the Timeline.
Position the yellow Scrubber Bar on the beginning of the clip in the Timeline.
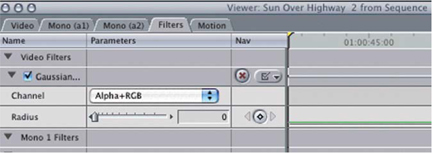
![]() Select the Filters tab in the Viewer. This will reveal the controls for changing the settings of the Filter you are working with.
Select the Filters tab in the Viewer. This will reveal the controls for changing the settings of the Filter you are working with.
![]() Make sure the setting for the filter effect is at 0. This will mean the Filter will have no effect on the clip at this stage.
Make sure the setting for the filter effect is at 0. This will mean the Filter will have no effect on the clip at this stage.
![]() Mark a keyframe by pressing the Insert/Delete Keyframe button.
Mark a keyframe by pressing the Insert/Delete Keyframe button.
![]() Move the Scrubber Bar several seconds into the clip (by holding down the Shift key + the horizontal forward arrow you can skip forward one second at a time). Do not adjust the Filter settings yet.
Move the Scrubber Bar several seconds into the clip (by holding down the Shift key + the horizontal forward arrow you can skip forward one second at a time). Do not adjust the Filter settings yet.
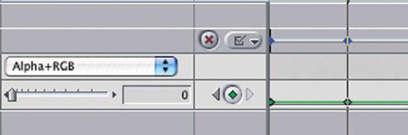
![]() Mark another keyframe. You will now have two keyframes marked.
Mark another keyframe. You will now have two keyframes marked.
![]() Move the Scrubber Bar forward several more seconds.
Move the Scrubber Bar forward several more seconds.
![]() Adjust the Filter settings to bring the clip completely out of focus.
Adjust the Filter settings to bring the clip completely out of focus.

What you have effectively done is place a filter on a clip in the Timeline and mark three keyframes to it. The first and second keyframes are marked with the filter set to zero, thus it has no effect on the clip - this ensures when the clip plays, initially there is no visual change to its appearance. The third keyframe is added where the filter settings are adjusted to bring the clip out of focus. Thus when the clip plays, initially it is in focus until the third keyframe where it moves out of focus. This is a simple and easy way to simulate a pull focus.
By using the above method you can keyframe many of the filters found under the Effects tab. For example, you could keyframe a clip so that the appearance changes from full color to black and white — or vice versa. You could keyframe a clip using the Fisheye filter so that it appears normal and over time changes as if it is being distorted by an extreme wide angle lens. The possibilities are endless. Through keyframing one has access to powerful tools to change the look, shape and feel of clips.
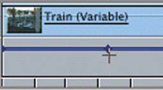
Time Remapping
Time Remapping is an easy and effective technique for performing what is called ‘ramping’ of speed. You can ‘ramp’ from slow to fast, fast to slow, slow to fast to slow, and into reverse or forwards motion at will.
In essence to work with the Time Remap feature is not difficult. It involves setting keyframes and moving these keyframes to create a shift in time, within the confines of the overall length of the clip. It is important to understand when using this function that the overall duration of a clip remains exactly the same. When slowing down or speeding up clips using the conventional speed modifier, found under the Modify menu, the duration of a clip is made longer for slow motion or shorter for fast motion. When using Time Remap the clip stays the same in length, it is the motion within the start and end points of the clip that are affected.
Before beginning work I suggested you set up your Viewer and Browser for compositing mode — that is spread out the Viewer so that you have access to the second half where keyframes can be plotted.
![]() Double click the clip in the Timeline you wish to work with. This will open the shot into the Viewer.
Double click the clip in the Timeline you wish to work with. This will open the shot into the Viewer.
![]() Click the Motion tab in the Viewer.
Click the Motion tab in the Viewer.
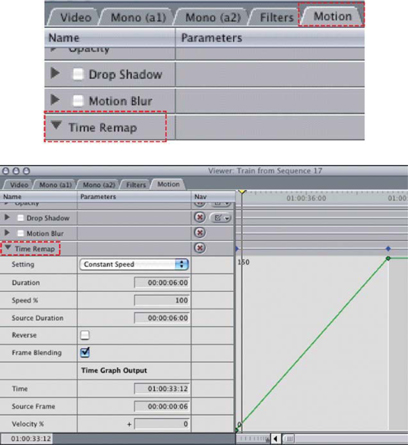
![]() Click the arrow next to Time Remap and scroll down to reveal the graph on the right-hand side.
Click the arrow next to Time Remap and scroll down to reveal the graph on the right-hand side.
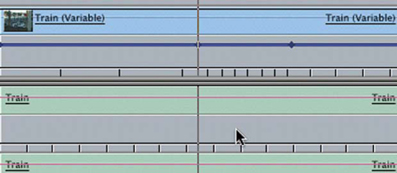
![]() Click the Toggle Keyframes button at the bottom left of the Timeline. This will alter the visual appearance of the Timeline vertically. You will see increment steps below each of the clips in the Timeline.
Click the Toggle Keyframes button at the bottom left of the Timeline. This will alter the visual appearance of the Timeline vertically. You will see increment steps below each of the clips in the Timeline.
![]() Choose the Time Remap tool from the Toolbar.
Choose the Time Remap tool from the Toolbar.
![]() Click with the Time Remap tool at two points within the clip you wish to alter. This will plot two keyframes in the line below the clip. There will now be a total of four keyframes marked — one at the beginning, two in the middle and one at the end of the clip.
Click with the Time Remap tool at two points within the clip you wish to alter. This will plot two keyframes in the line below the clip. There will now be a total of four keyframes marked — one at the beginning, two in the middle and one at the end of the clip.
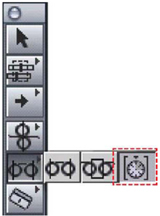
The Time Remap Tool
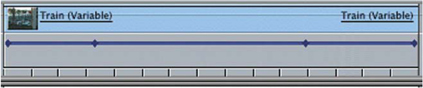
Notice that the line in the graph moves from bottom to top in a continuous angle. Look to the Timeline, below the clips, and you will see that there are equally spaced increments. Both the continuous angle and the equally spaced increments indicate that the speed within the clip is constant.
Let me repeat this. If the increments are evenly spaced then speed is constant. Now for the other part of the equation — if the increments are spread out then time will be in slow motion and if the increments are close together the result is fast motion.
Slow Motion Fast Motion
![]() Select the Time Remap tool and allow It hover within the clip, above one of the keyframe points in the center of the Timeline. The tool will turn into a + symbol.
Select the Time Remap tool and allow It hover within the clip, above one of the keyframe points in the center of the Timeline. The tool will turn into a + symbol.
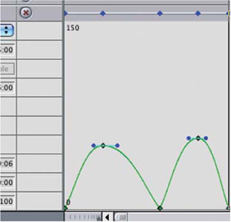
![]() Click on the keyframe and move It to either side. Watch what happens to the marked increments beneath the clip (It may be advisable to increase the spread within the Timeline to get a better look at the result). You will notice the increments contract and expand as you move the points. Thus, you can create an effect where a clip will begin in slow motion, speed up and then slow down again at the end of the clip. The plotting of keyframes is reflected in the graph in the Motion tab.
Click on the keyframe and move It to either side. Watch what happens to the marked increments beneath the clip (It may be advisable to increase the spread within the Timeline to get a better look at the result). You will notice the increments contract and expand as you move the points. Thus, you can create an effect where a clip will begin in slow motion, speed up and then slow down again at the end of the clip. The plotting of keyframes is reflected in the graph in the Motion tab.
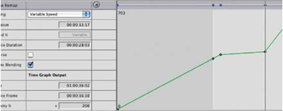
You can also move the keyframe points within the Motion window. Make sure you have selected the Time Remap tool and simply grab hold of the keyframes and move them. Keep an eye on the increments in the Timeline beneath the clip and observe whether they contract or expand. Remember, spread apart will create slow motion, whereas increments close together will create fast motion.
If you want a clip to play forward then into reverse you need to plot the keyframes so that the angle within the graphical display in the Motion tab is straight up and down.
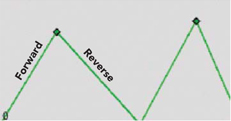
A line climbing at an angle vertically indicates forwards motion, while a line heading downhill is for reverse. You can therefore set a clip to move forwards, backwards and forwards with each move effectively ramping time into slow or fast motion.
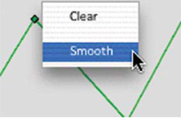
One final tip: if you control click on any of the keyframes in the Motion tab you will get an option to clear a keyframe or make it smooth. Select the smooth option and play back the result. You can perform Time Remapping functions at keyframe points which are smooth and fluid. This is a great way to make variations in motion flow in a subtle way.
Experiment with Time Remapping by using two, three, four and more keyframes. What I have described is a basic way to get this function to work. Now it is up to you to build on this.
Copy and Pasting Attributes
When you work hard at building a set of effects it can be a great timesaver to be able to copy the settings from one clip to another. For example, you may wish to run a series of clips in slow motion at 35%. Rather than setting the speed for each clip individually, it can be quicker to set this up for a single clip and to then copy the slow motion setting from one clip to all the others you wish to slow down. Details can be copied and pasted for many settings including: opacity, cropping, motion, drop shadows, filters and motion blur.
![]() Control click In the Timeline on a clip from which you wish to copy the attributes. This will open a menu with many options. Select Copy.
Control click In the Timeline on a clip from which you wish to copy the attributes. This will open a menu with many options. Select Copy.
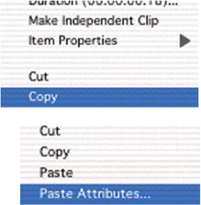
![]() Move your cursor to the clip you wish to paste the attributes to. Control click on this clip and select Paste Attributes from the menu.
Move your cursor to the clip you wish to paste the attributes to. Control click on this clip and select Paste Attributes from the menu.
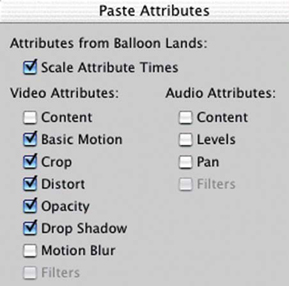
![]() Another menu will now open. Choose the options you wish to apply to the clip. Do this by checking the boxes with a tick. Obviously, the only attributes which you can apply are those which were already applied to the clip from which the attributes were copied.
Another menu will now open. Choose the options you wish to apply to the clip. Do this by checking the boxes with a tick. Obviously, the only attributes which you can apply are those which were already applied to the clip from which the attributes were copied.
Titling
As an all round editing package Final Cut Pro covers virtually every area a filmmaker will ever need to explore. No film would be complete without Titles. If nothing else a simple opening caption to identify a production is required. Final Cut Pro does much more than this including Moving Titles, Transparent Shadows and Animated Text.
Some of these operations can be quite complex, however, the basics are not difficult to master.
To access Titling in Final Cut Pro go to the Effects tab and locate Video Generators.
![]() Click the triangle to the left of Video Generators to reveal a list of options.
Click the triangle to the left of Video Generators to reveal a list of options.
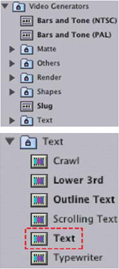
![]() Click the triangle next to Text — this will reveal a list of possible options to choose from.
Click the triangle next to Text — this will reveal a list of possible options to choose from.
Note: for really fancy titles look towards Livetype which is separate application bundled with Final Cut Studio. Livetype is specifically designed for complex text creation and is fully capable of making titles comparable to those seen on network television.
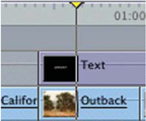
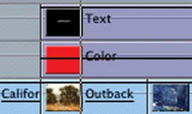
For the moment choose the fifth option — Text.
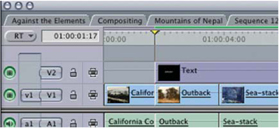
![]() Click on the Text Generator and drag it onto the V2 track in the Timeline where you want the Text to be positioned. Make sure you release it with a vertical arrow pointing downwards, thus performing an Overwrite Edit.
Click on the Text Generator and drag it onto the V2 track in the Timeline where you want the Text to be positioned. Make sure you release it with a vertical arrow pointing downwards, thus performing an Overwrite Edit.

![]() Double click the Text Generator on the second video track — this will load the Text into the Viewer. If your computer is capable of RT Extreme a green line will sit above the line of text in the Timeline indicating the result will play in real time. Otherwise, you will see a red line indicating that rendering is required.
Double click the Text Generator on the second video track — this will load the Text into the Viewer. If your computer is capable of RT Extreme a green line will sit above the line of text in the Timeline indicating the result will play in real time. Otherwise, you will see a red line indicating that rendering is required.
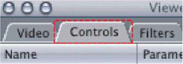
![]() In the Viewer click once on the second tab at the top — Controls.
In the Viewer click once on the second tab at the top — Controls.

![]() Make sure the Scrubber Bar in the Timeline is positioned on the shot which has the Text Generator positioned above it. This ensures the result will be displayed in the Canvas as you work.
Make sure the Scrubber Bar in the Timeline is positioned on the shot which has the Text Generator positioned above it. This ensures the result will be displayed in the Canvas as you work.
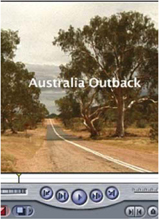
![]() You should now see the words ‘Sample Text’ in the Canvas.
You should now see the words ‘Sample Text’ in the Canvas.
![]() Return to the Viewer — make sure you have clicked the Controls tab — click in the box to highlight the words ‘Sample Text’. Overtype ‘Sample Text’ with whatever text you wish to enter.
Return to the Viewer — make sure you have clicked the Controls tab — click in the box to highlight the words ‘Sample Text’. Overtype ‘Sample Text’ with whatever text you wish to enter.
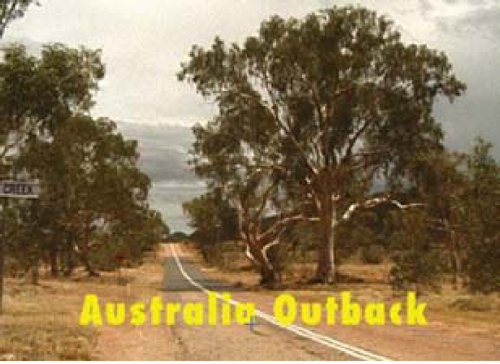
![]() Click in the Timeline again and nudge the Scrubber Bar a few frames along using the arrow keys — the text will appear in the Canvas, over the shot where the Scrubber Bar is positioned.
Click in the Timeline again and nudge the Scrubber Bar a few frames along using the arrow keys — the text will appear in the Canvas, over the shot where the Scrubber Bar is positioned.
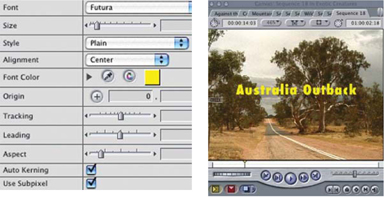
![]() You can modify the characteristics of the text by adjusting the details in the Controls area. You can change the font, the size, the color and tracking by altering each of the parameters.
You can modify the characteristics of the text by adjusting the details in the Controls area. You can change the font, the size, the color and tracking by altering each of the parameters.
![]() To reposition the text click on the ‘1’ symbol in the Controls area labelled Origin. Click once on the ‘1’ symbol and a small ‘ + ’ will appear in the Canvas.
To reposition the text click on the ‘1’ symbol in the Controls area labelled Origin. Click once on the ‘1’ symbol and a small ‘ + ’ will appear in the Canvas.
![]() Clicking in the Canvas window sets the ‘ + ’ wherever you click with the mouse button. Release your mouse button at the location where you want the text to be repositioned. Alternatively, you can enter X and Y co-ordinates in the Origin area in the Controls window.
Clicking in the Canvas window sets the ‘ + ’ wherever you click with the mouse button. Release your mouse button at the location where you want the text to be repositioned. Alternatively, you can enter X and Y co-ordinates in the Origin area in the Controls window.
Another way to move the text around is to switch on Image + Wireframe. Click with your mouse in the center of the active text window and you can then freely position the text with the mouse.
There are other Text Generators available. These include Outline Text, Crawl, Typewriter and Scrolling Text. All of these are variations on the basic Text Generator we have been working with. Experiment with these to see what they do and how they work. It is also possible to layer text, as with video tracks, so that several different layers of text can be built in different styles.

The easiest way to add a drop shadow is to go into the Motion window and switch Drop Shadow on. You need to make sure that the text generator is loaded into and active in the Viewer for this to work. You can then alter the direction, color, opacity and size of the drop shadow.
The quickest way to alter the overall opacity of the text is the same as with other clips in the Timeline. Simply switch on Clip Overlays and drop the black fine inside of the text generator in the Timeline to adjust the overall opacity.
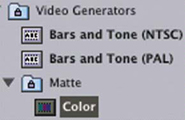
To position text over a colored background select Matte from within Generators (found under the Effects tab in the Browser). You then need to overlay the Matte Color on top of the video track and then position the Text Generator of your choice over this. The Matte Generator can be cropped in the Motion window and the transparency adjusted through either the opacity setting in the Motion window or by using Clip Overlays. Professional looking titles can then be achieved.
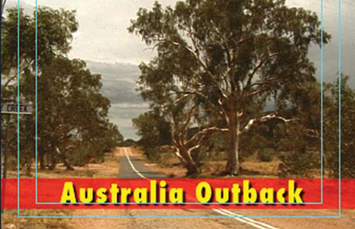
Switch on the Safe Title display to show what is termed ‘cutoff’. This is found under the same menu as Image + Wireframe.
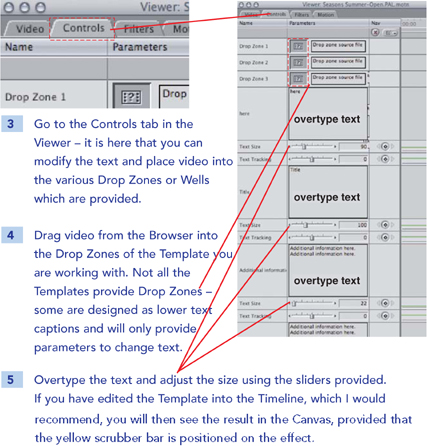
Master Templates
One can tap directly into the power of Motion from within Final Cut Pro 6 through the Master Templates. This is advantageous as the editor can access these effects without having to step outside of the Final Cut Pro environment — thus there is no need to learn another application. These templates work in a very similar way to the other effects in Final Cut Pro.
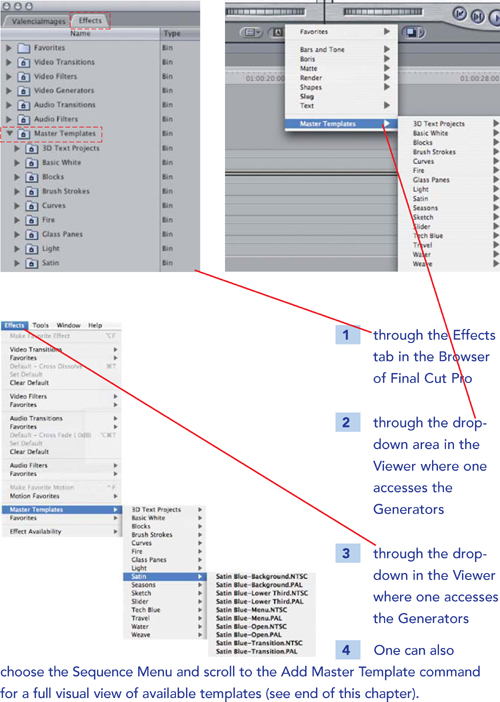
There are four ways to access the Master Templates:
Note that the Master Templates are format specific and it is therefore important that you choose the template which corresponds to the format you are working with. Templates are available for HD, NTSC or PAL. You will need the Motion content files installed to make use of these templates.
![]() Choose a Template by either double-clicking in the Effects tab of the Browser or by scrolling and releasing your mouse button in the Efffects menu or the area at the bottom of the Viewer. Wait a moment and the Master Template will then open in the Viewer.
Choose a Template by either double-clicking in the Effects tab of the Browser or by scrolling and releasing your mouse button in the Efffects menu or the area at the bottom of the Viewer. Wait a moment and the Master Template will then open in the Viewer.
![]() Press the Space Bar to preview the effect. You may wish to run through several effects until you find what you are looking for. You can then edit this effect into the Timeline using Insert or Overwrite — or continue working inside the Viewer and then edit the effect into the Timeline later.
Press the Space Bar to preview the effect. You may wish to run through several effects until you find what you are looking for. You can then edit this effect into the Timeline using Insert or Overwrite — or continue working inside the Viewer and then edit the effect into the Timeline later.
![]() Render the effect or play back through Dynamic RT if your computer is up to it.
Render the effect or play back through Dynamic RT if your computer is up to it.
Note: when working with lower ‘third’ templates these provide what is known as a key signal This means one can see through to the video on a layer below that to which the effect has been placed.
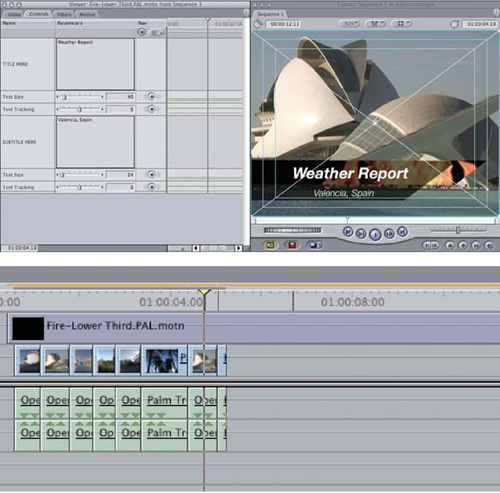
The Master Templates provide a quick and easy way to create great looking graphics without having to spend hours learning another application or fine tuning the result.
One can alter the size and tracking of text and also keyframe text attributes though the movement of text and video is restricted to the preset moves. While you are locked into the programmed movies do not dismiss these effects as gimmicks. Using the Master Templates enables one to produce visual animations which compare to network television graphics, and provide a means for anyone to access the power of Motion without having to learn the application.
If you want to take these effects further then step into Motion where full customization is possible.
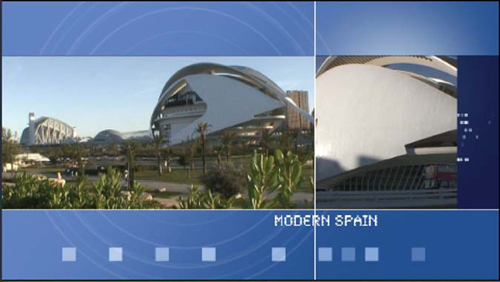
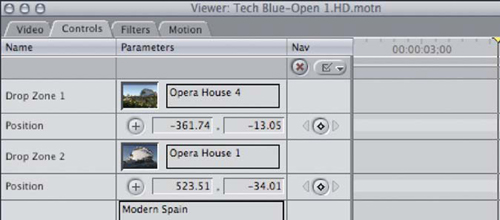
If one chooses the Sequence menu and scrolls down to the Add Master Template command, you will then be offered a visual view of the Master Templates which are categorised according to themes. One can easily get an overview of HD templates, widescreen, standard, PAL, NTSC, bumpers, lower thirds, transitions and openers. It is like having a one box solution to make up graphics for many different uses.

Click the folder All Master Templates and you can see as visual icons all the Master Templates which can be used.
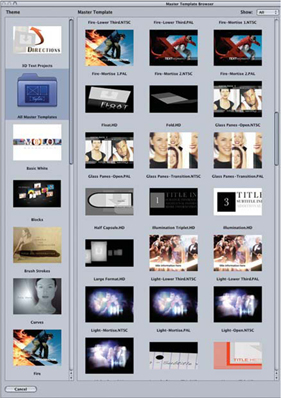
Double-click the template of choice and you can then integrate the moving graphics into your production.