2. Establishing Your App Design Studio
As we start getting into the technical and production-oriented aspects of iOS application design, I want this book to do you a favor—a really big favor: I want it to answer more questions than it raises.
This may be more of an aspiration than a truly achievable goal, but it is still a sincere goal and one born out of my own app design experience. For one thing, many of the processes require more steps (and thus, more decisions to make) along the way than I first anticipated. And as I encountered all of these steps, I rarely encountered enough documentation to get me through the entire process easily and safely.
So I hereby decree that the rest of this book might get a little tedious at times, but will do so in order to give you enough detail to master some very fundamental aspects of iOS app planning, design, and production. And while it may not teach you to design any app that you want, what it does teach you it will teach you very well.
In order to design iOS applications, you need to establish what I call your app design studio. This studio will be the place in which you design, test, and package your applications for submission to Apple.
The foundation of your studio will be an Intel-based Mac with the Snow Leopard version of Mac OS X (operating system). And atop that foundation will be Xcode, the integrated development environment (IDE) created by Apple so that you, in turn, can design software for Apple. But while Apple designs some of its software for both Mac and Windows computers (such as iTunes and Safari) and millions of iOS device owners sync their devices to Windows computers daily, Xcode doesn’t run on the Windows OS.
Once you have a Mac with the right processor and operating system, I could theoretically tell you to just download and install Xcode, and you would be ready to design iOS apps. But getting the free Xcode is not just a simple, one-step process, so let’s walk through how to do it in greater detail. We’ll be thorough, yet as quick as possible. After all, we’ve got apps to design!
Getting an Apple Developer ID
To install Xcode, you need to download the iOS SDK (formerly the iPhone SDK; the name changed in July 2010). But before you search for that, you need to get an Apple Developer ID.
The Apple Developer ID is your online identity for the entire app design, review, distribution, updating, and (if you’re selling your apps) compensation process. And, I suspect, because Apple would like you to eventually participate in this entire process, they require you to register for the Apple Developer ID before you can even download the iOS SDK. But fear not: The Apple Developer ID itself is free, as is downloading the SDK.
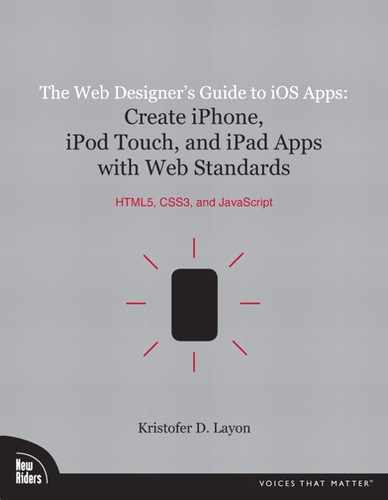
To start the ID process (Figure 2.1), visit http://developer.apple.com/programs/register.
2.1 The starting point for obtaining your Apple Developer ID.
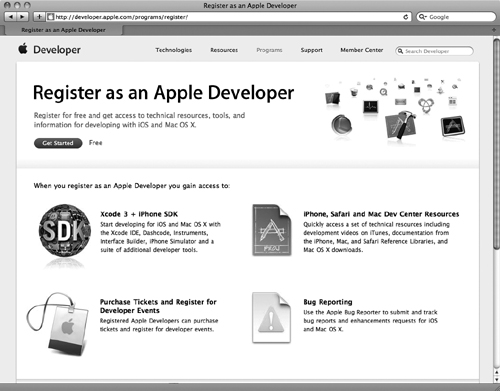
The second screen in the process (Figure 2.2) asks whether you have an existing Apple ID, and explains that you can, if you wish, use an Apple ID that you already have for iTunes or for purchasing goods online from the Apple Store. Yet Apple ominously notes under these choices that it is probably better to create a separate Developer ID to “avoid accounting and reporting issues.”
2.2 Unless you are already an Apple Developer, don’t use an existing Apple ID. It could make accounting and reporting problematic down the road.
One has to wonder: Why are we even given an option here?
If you’re like me, you probably dislike accounting or reporting problems, so I have a strong suggestion: Just create another ID. This keeps your Apple customer role completely separate from your Apple Developer role. It also allows your Apple Developer ID to be associated with a corporate entity with its own tax identification number, which may offer some tax advantages to you down the road.
After selecting the new Developer ID option, you’ll be forwarded to personal and professional profile pages. This is another area that appears to require careful answers, but don’t be particularly concerned. For example, there are questions about your primary app market, the categories of apps you plan to design, and whether you design for other mobile platforms. I have yet to hear any stories about Apple not approving an app because it doesn’t fit a category that was selected in this profile. Similarly, there are probably hundreds of Apple Developers who also design apps for other mobile platforms. So I don’t think you’ll be penalized for being honest if you’re also, say, an Android app designer. (On the other hand, why is Apple asking? Just chalk it up to one of the many unexplained mysteries that surround Apple.)
Apple Developer Agreement
After completing your personal and professional profiles, you are forwarded to another slightly intimidating screen: the Developer Agreement page. Again, don’t overthink this. On the other hand, this is more than just your standard EULA that you toss aside after buying new software. It outlines a legal agreement that you are making with Apple, as a developer of software for their devices. So what does that entail?
Now I’m not a lawyer, so don’t read on thinking that you’ll get a bunch of legal advice about the merits of Apple’s Developer Agreement, but here are some things to be aware of:
• Apple Developer ID and password: Keep these confidential and don’t share them with anyone. Unless you want to share them (and I’m not kidding here) with your child aged 13 to 17 who wants to design software for Apple under your ID. Isn’t it reassuring to know that you can start a family business with only one Developer ID?
• Developer benefits: No, you don’t get health insurance or paid vacation by registering to be an Apple Developer. But there is one particularly nifty benefit: being eligible to attend Apple’s annual Worldwide Developer Conference (WWDC) in San Francisco. This is the legendary event where Steve Jobs announces big news (like the first iPhone in June 2007, and the iPhone 4 in June 2010). The first day of announcements and updates is followed by four days of technical sessions and labs about all aspects of Apple’s iOS and Mac technologies. It is attended by Apple Developers from all over the world and is a great educational and networking opportunity. But don’t think that this is a free benefit—the 2010 registration fee was $1,600.
• Restrictions and confidentiality: Once you agree to become an Apple Developer, you’re also agreeing to not share the juicy details about how Apple’s devices and software work, or exciting things that you learn at the WWDC, or any advance notices about new Apple products. Essentially, you are signing a nondisclosure agreement. (This can be a fun thing to act coy about with your friends: “Well, I do have some accurate information about that Apple rumor, but unfortunately I’m not at liberty to tell you because I’m under NDA.”)
• Apple trademarks and logos: As an Apple Developer, you are granted limited use of Apple marks. For example, you can include the “Available on the App Store” badge on your website, as well as some very nice photos of iOS devices that Apple provides to you. You are also allowed to mention Apple product names in your site’s content. In either case, be sure to follow their usage guidelines (highlighted in chapter 11) and include any required disclaimers.
The agreement is relatively benign and has some benefits as well as constraints. I suggest reading it carefully and agreeing to it, but again, I am not a lawyer (I do not even play one on TV).
Verification and celebration
After you agree to the Developer Agreement, you’ll need to complete a quick verification process in which a code is emailed to you. Once you receive and enter this verification code in the proper field and submit it, you are presented with the congratulatory acceptance screen as Edward Elgar’s Pomp and Circumstance plays in the background (Figure 2.3).
2.3 Congratulations, you’re an Apple Developer! (Minus the applause and Pomp and Circumstance playing in the background.)

You’ve made it—you have a Developer ID, and are on your way to downloading what you’ve been patiently anticipating: the iOS SDK!
Downloading and installing the iOS SDK
Whew! Fortunately the rest of this process is quick and easy. Well, mostly easy. And, well, not so quick—that depends.
The fact of the matter is, the iOS SDK is one of the largest software downloads I have ever downloaded to my computer. Ever. At more than a whopping 2 gigabytes, I have run out of creative ways to warn attendees about downloading this in advance of coming to my app design workshops. I mean, you feel yourself growing old as it downloads. So if you try this at home and you’re on cable or slower, start the process and take your dog for a long walk while it downloads. But please don’t sit and watch it download. And if you do, don’t say I didn’t warn you.
The good news is, the download is really worth it. You get some dandy tools that do some incredible things, and they are all free.
Yes, this is the one free part of being an Apple Developer. You get their developer tools gratis. And it’s a nice set of tools that includes two essential programs: Xcode (for designing and packaging your app code) and Simulator (for testing your app along the way).
Note: Other things in the SDK
Another useful tool in the download is Dashcode, which has a more graphic and object-oriented approach to designing web apps that live on servers (rather than being downloaded and installed on devices). While this book does not cover web app design, many of the native app design skills you’ll learn here can be applied to designing web apps, which can then be viewed on any mobile device with a standards-based web browser. There are several other tools in the SDK, too, such as Interface Builder and a variety of diagnostic tools. These are not necessary for the apps and methods covered in this book, but might be of interest if you decide to try your hand at writing your own Objective-C.
To start your adventurous download (Figure 2.4), visit http://developer.apple.com/devcenter/ios/
2.4 The iOS Dev Center, your resource for iOS development.
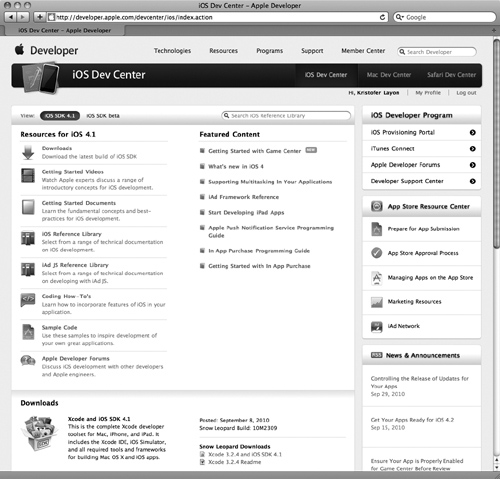
Under the page heading, there is a View menu where there are often (but not always) two tabs: one for the current released version of the SDK and one for the beta version of the next release. I encourage you to download the released version. The betas are really only useful for more advanced application designers who are staying ahead of the curve; the betas help them design apps that take advantage of new device or software features before they actually hit the marketplace.
Assuming you are just downloading the SDK to design for the current release, proceed with that process. Once the download is complete, you should have a large .dmg file in your Downloads directory. At the time of this writing, the iOS SDK 4.1 download was 2.17 gigabytes. Double-click it, follow the prompts and directions, and when you reach the end you’ll have the first part of your design studio in place!
Now it’s time to download and install NimbleKit, your Objective-C framework.
Note: Directory location of the SDK
Note that Xcode and its related iOS SDK apps are not installed in your regular Applications directory. If you went with the default location, these applications were installed on your drive’s Developer directory, just one folder in from the root.
Downloading and installing NimbleKit
Aren’t you glad to read that the last step is super-easy and requires no elaboration? I bet you are!
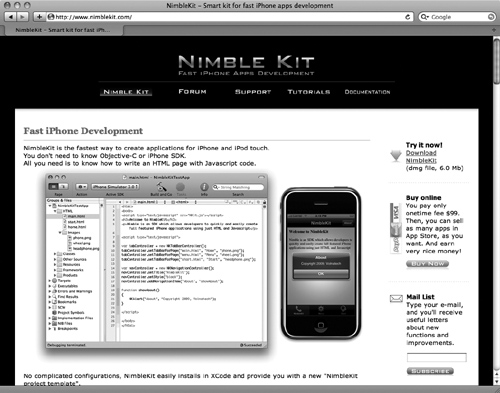
1. To download NimbleKit (Figure 2.5), visit http://www.nimblekit.com/.
2. Click the Download NimbleKit link. This time you’ll have a much smaller file, nimblekit.dmg, to save to your Downloads directory.
3. Open the file, follow the prompts and directions, and the NimbleKit framework will be installed.
Note: The NimbleKit license
You probably noticed the Buy online link in the right margin of NimbleKit’s home page. My advice: Ignore that for now. You can download NimbleKit for free, design apps with it, and test them in Simulator, all without paying the $99 fee. This is very nice, because it allows you to learn a lot before making a commitment. On the other hand, NimbleKit’s fee is one-time only (unlike Apple’s annual $99 Developer fee).
Summary
What you’ve learned in this chapter:
• Every step of a new design project, and process, has consequences, including obtaining and setting up your tools! So think it through.
• Get a unique Apple Developer ID so you keep your iTunes purchases separate from your interactions with iTunes and iTunes Connect as a developer.
• Read the Apple Developer Agreement carefully and make sure you are comfortable with what it says. Like any agreement, it creates opportunities as well as defines constraints.
• Downloading and installing the iOS SDK provides you with the foundational applications—Xcode and Simulator—you’ll need for the rest of this book.
• Downloading and installing the NimbleKit Objective-C framework enhances Xcode with a library of prewritten Objective-C resources, allowing you to focus on app planning, interface design, and content formatting instead of learning a new programming language.
Congratulations, your design studio for the upcoming exercises is now ready for action! Next we will explore Xcode and how to begin an app project.