7. Focus on App Content: Audio
In addition to text and images, social
content via feeds, and mapping, the
NimbleKit Objective-C framework supports
rich media content such as audio and video.
While not every web designer is an audio engineer, today’s Macs can make basic audio production pretty accessible. For example, after importing a song into GarageBand, you can make some fairly quick work out of trimming it and perhaps adding fades. Doing so can give you a brief song sample, like what you can listen to when shopping iTunes for music.
This process makes designing an iOS app with an audio introduction, song sample, or even spoken directions possible. A custom iOS app for education, a musical group, or a product can be greatly enriched with audio content.
NimbleKit supports playing audio content in iOS apps in multiple ways. Two of them are demonstrated in this chapter: HTML5 and NimbleKit’s NKAudioPlayer.
Playing audio with HTML5
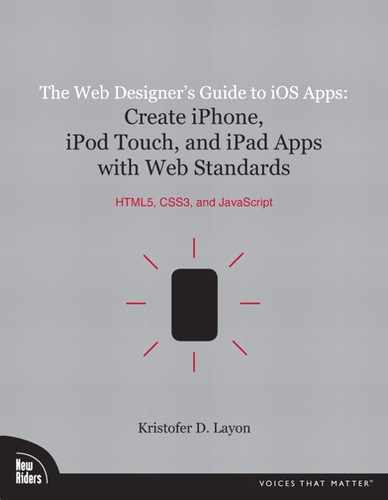
Playing an audio file with HTML5 could not be any easier. You need only use HTML5’s new audio tag and have an MP3 audio file handy. For example, to play a 30-second song sample called song.mp3, this is all that’s needed:
<audio src="song.mp3" controls></audio>
The addition of controls is necessary; without it, there’s no way to cue the track to play.
So at its most basic, playing this MP3 file in NimbleKit requires the following HTML:
The result in Simulator looks like what’s shown in Figure 7.1.
7.1 The native iOS audio player that is displayed using the HTML5 audio element.

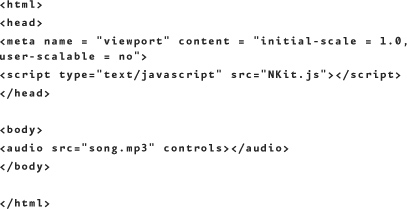
So how can we make this a bit more interesting, you might be wondering? Well, if I were checking out a song sample in an iOS app, I might want to see who the musician is, so let’s include an image (photo.jpg). Additionally, the positioning and sizing of the controls can be set by a stylesheet so it is centered low in the screen, overlaying the photo. Here are a few rules for this example’s style.css:
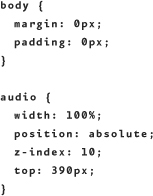
You can also add a title bar. In this example, the title bar background is coordinated with the photo. Here’s the revised HTML:
When you test it in Simulator, you’ll have something with both visual and musical interest (Figure 7.2).
7.2 The revised example with a title bar, photograph, and the audio controls sized and positioned with CSS.
Truly, that’s all there is when it comes to adding audio with HTML5!
Incorporating audio with NKAudioPlayer
Another method for incorporating audio into a NimbleKit-based iOS app is by using the NKAudioPlayer library item. Doing this shifts the coding work from HTML and CSS to JavaScript and results in a slightly different presentation.
To walk through this example, start with a new Xcode project file and add the song.mp3 and photo.jpg files to the project.
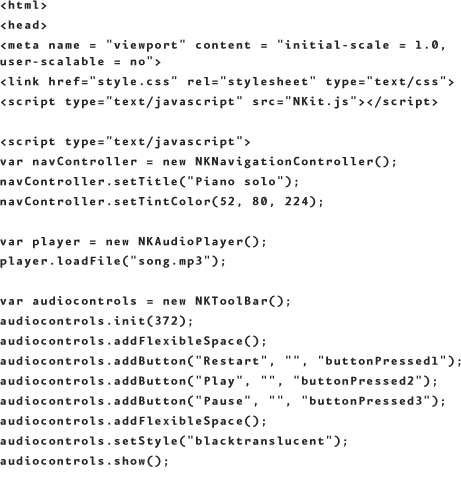
Next, create an instance of NKAudioPlayer in the main.html page. Give it the name player and have it load the song.mp3 file:
var player = new NKAudioPlayer();
player.loadFile("song.mp3");
Leaving this as is does not result in any music playing, however. You also need to create some controls. And strangely, there is no native Objective-C audio controller for NimbleKit to call on, so you need to build one yourself.
For this purpose, I suggest using the NKToolBar library item. It’s similar to the NKTabBarController that we explored in Chapter 4 except that it has no tabs and NKToolBar is 44 pixels instead of 49 pixels tall (or, the same height as the title bar in NKNavigationController). Instead of the tabs, NKToolBar inserts buttons onto the bar.
The next modification to main.html is to create a toolbar object and name it audiocontrols. In addition to naming the instance, it needs to be positioned on the screen on the y-axis. If the screen is going to have a title bar at the top, doing the math tells us that the top of the toolbar should be positioned 372 pixels from the origin (upper-left corner) in order for it to be flush to the bottom of the screen: 480 (full screen height) − 20 (status bar) − 44 (title bar) − 44 (tool bar) = 372. Here’s that position of the NKToolBar object being set through the first argument passed to the init() method:
var audiocontrols = new NKToolBar();
audiocontrols.init(372);
Next, add the buttons you’ll need to restart, play, and pause the audio file. To do this, use the method toolBar.addButton. Also note that by default, NKToolBar adds buttons starting from the left. Rather than do that, I encourage you to center the buttons so that it looks more like the iPod’s audio control. To make this happen, an odd little command is required:

Note that for every audiocontrols.addButton method, there are three parameters:
• button label
• button graphic
• callback (JavaScript action)
So, in this example, the three buttons will be labeled Restart, Play, and Pause; there are no graphics assigned to the buttons; and there are three JavaScript functions named buttonPressed1, buttonPressed2, and buttonPressed3.
Next, let’s define the three callback functions:
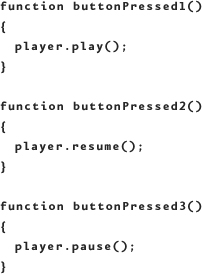
Note that for this implementation, I didn’t actually assign “play” to the play button. What I wanted to do instead is approximate a familiar audio player as closely as possible, so I made the first button the equivalent of restart (rewind to the beginning of the track and play); the second button is labeled “play” but assigned “resume” (so it will play from any point in the track, not just the beginning); and the third is both labeled and assigned “pause.”
So here is the final code for main.html:

There is only one CSS rule for the styles.css file in this example, to reset the screen’s margin and padding to zero:
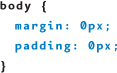
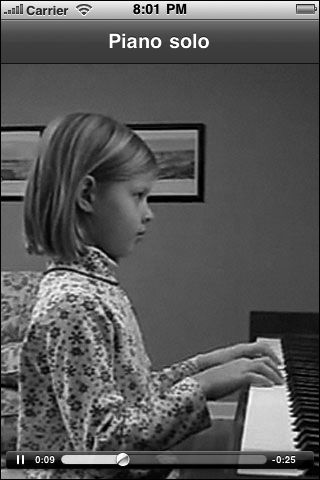
Figure 7.3 shows the result in Simulator.
7.3 An audio player created with NKAudioPlayer and NKToolBar with labeled buttons.

This isn’t bad. But there may be a better way.
The better way that I sought was to graphically look more like the iPod application on an iPhone. So I made restart, play, and pause buttons for the toolbar (Figure 7.4).
7.4 Restart, play, and pause buttons.
![]()
Now instead of the labels, the JavaScript that pulls in the buttons needs to pull in the PNG images I made: resume.png, play.png, and pause.png. This is how to make that modification:
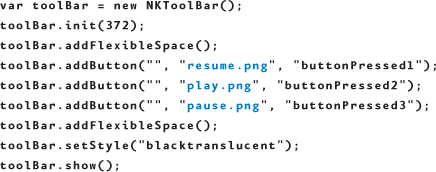
You could even leave the button labels in the code; the filled image parameters trump the labels, though, so the result would be the same. This is shown in Figure 7.5, with the standard labeled buttons replaced with the PNG images.
7.5 The revised NKAudioPlayer and NKToolBar audio screen, now with buttons similar to the iPod application.

So those are some fundamental building blocks for using audio in a NimbleKit-powered iOS application. Be creative, build on these ideas, and have fun with audio!
Summary
This chapter has demonstrated that adding audio to an iOS app is quite straightforward:
• You can use HTML5’s audio element, which gives you more flexibility with screen layout.
• Or you can use NimbleKit’s NKAudioPlayer library item, which works best when coupled with a toolbar and custom buttons.
Next, you’ll learn that working with video is comparable to working with audio: There are both HTML5 and NimbleKit library item options.